Tis the Season
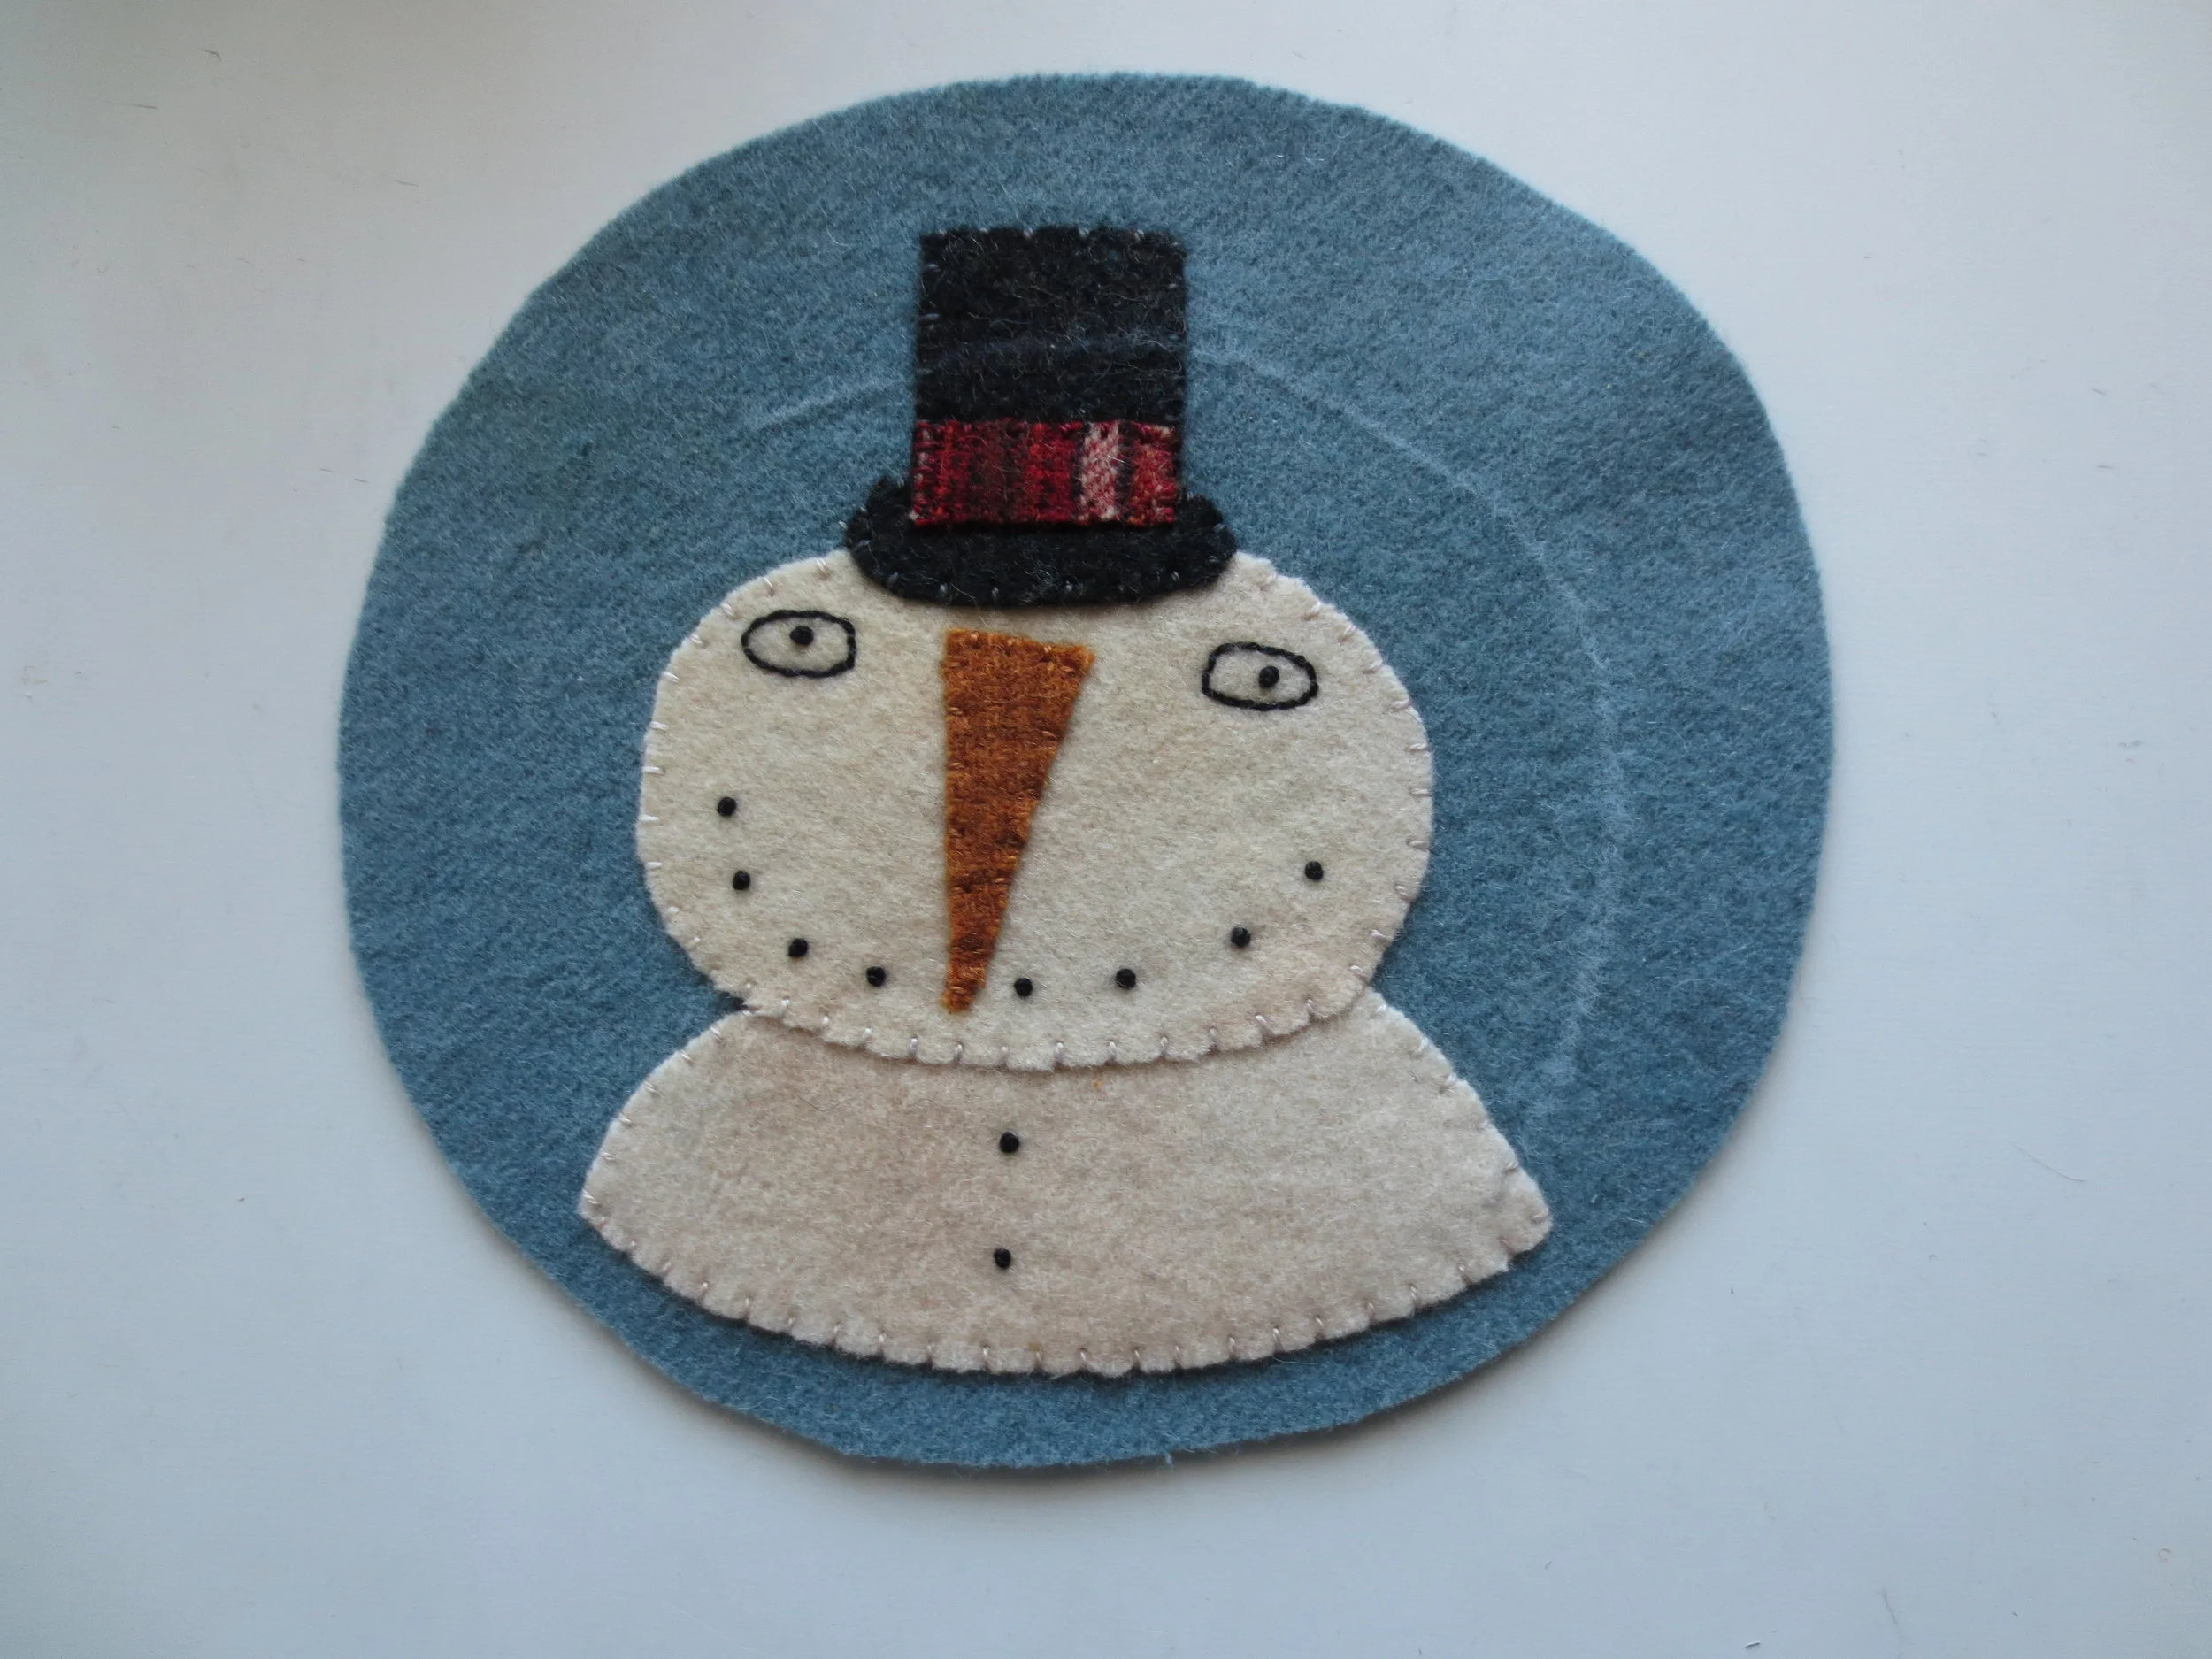
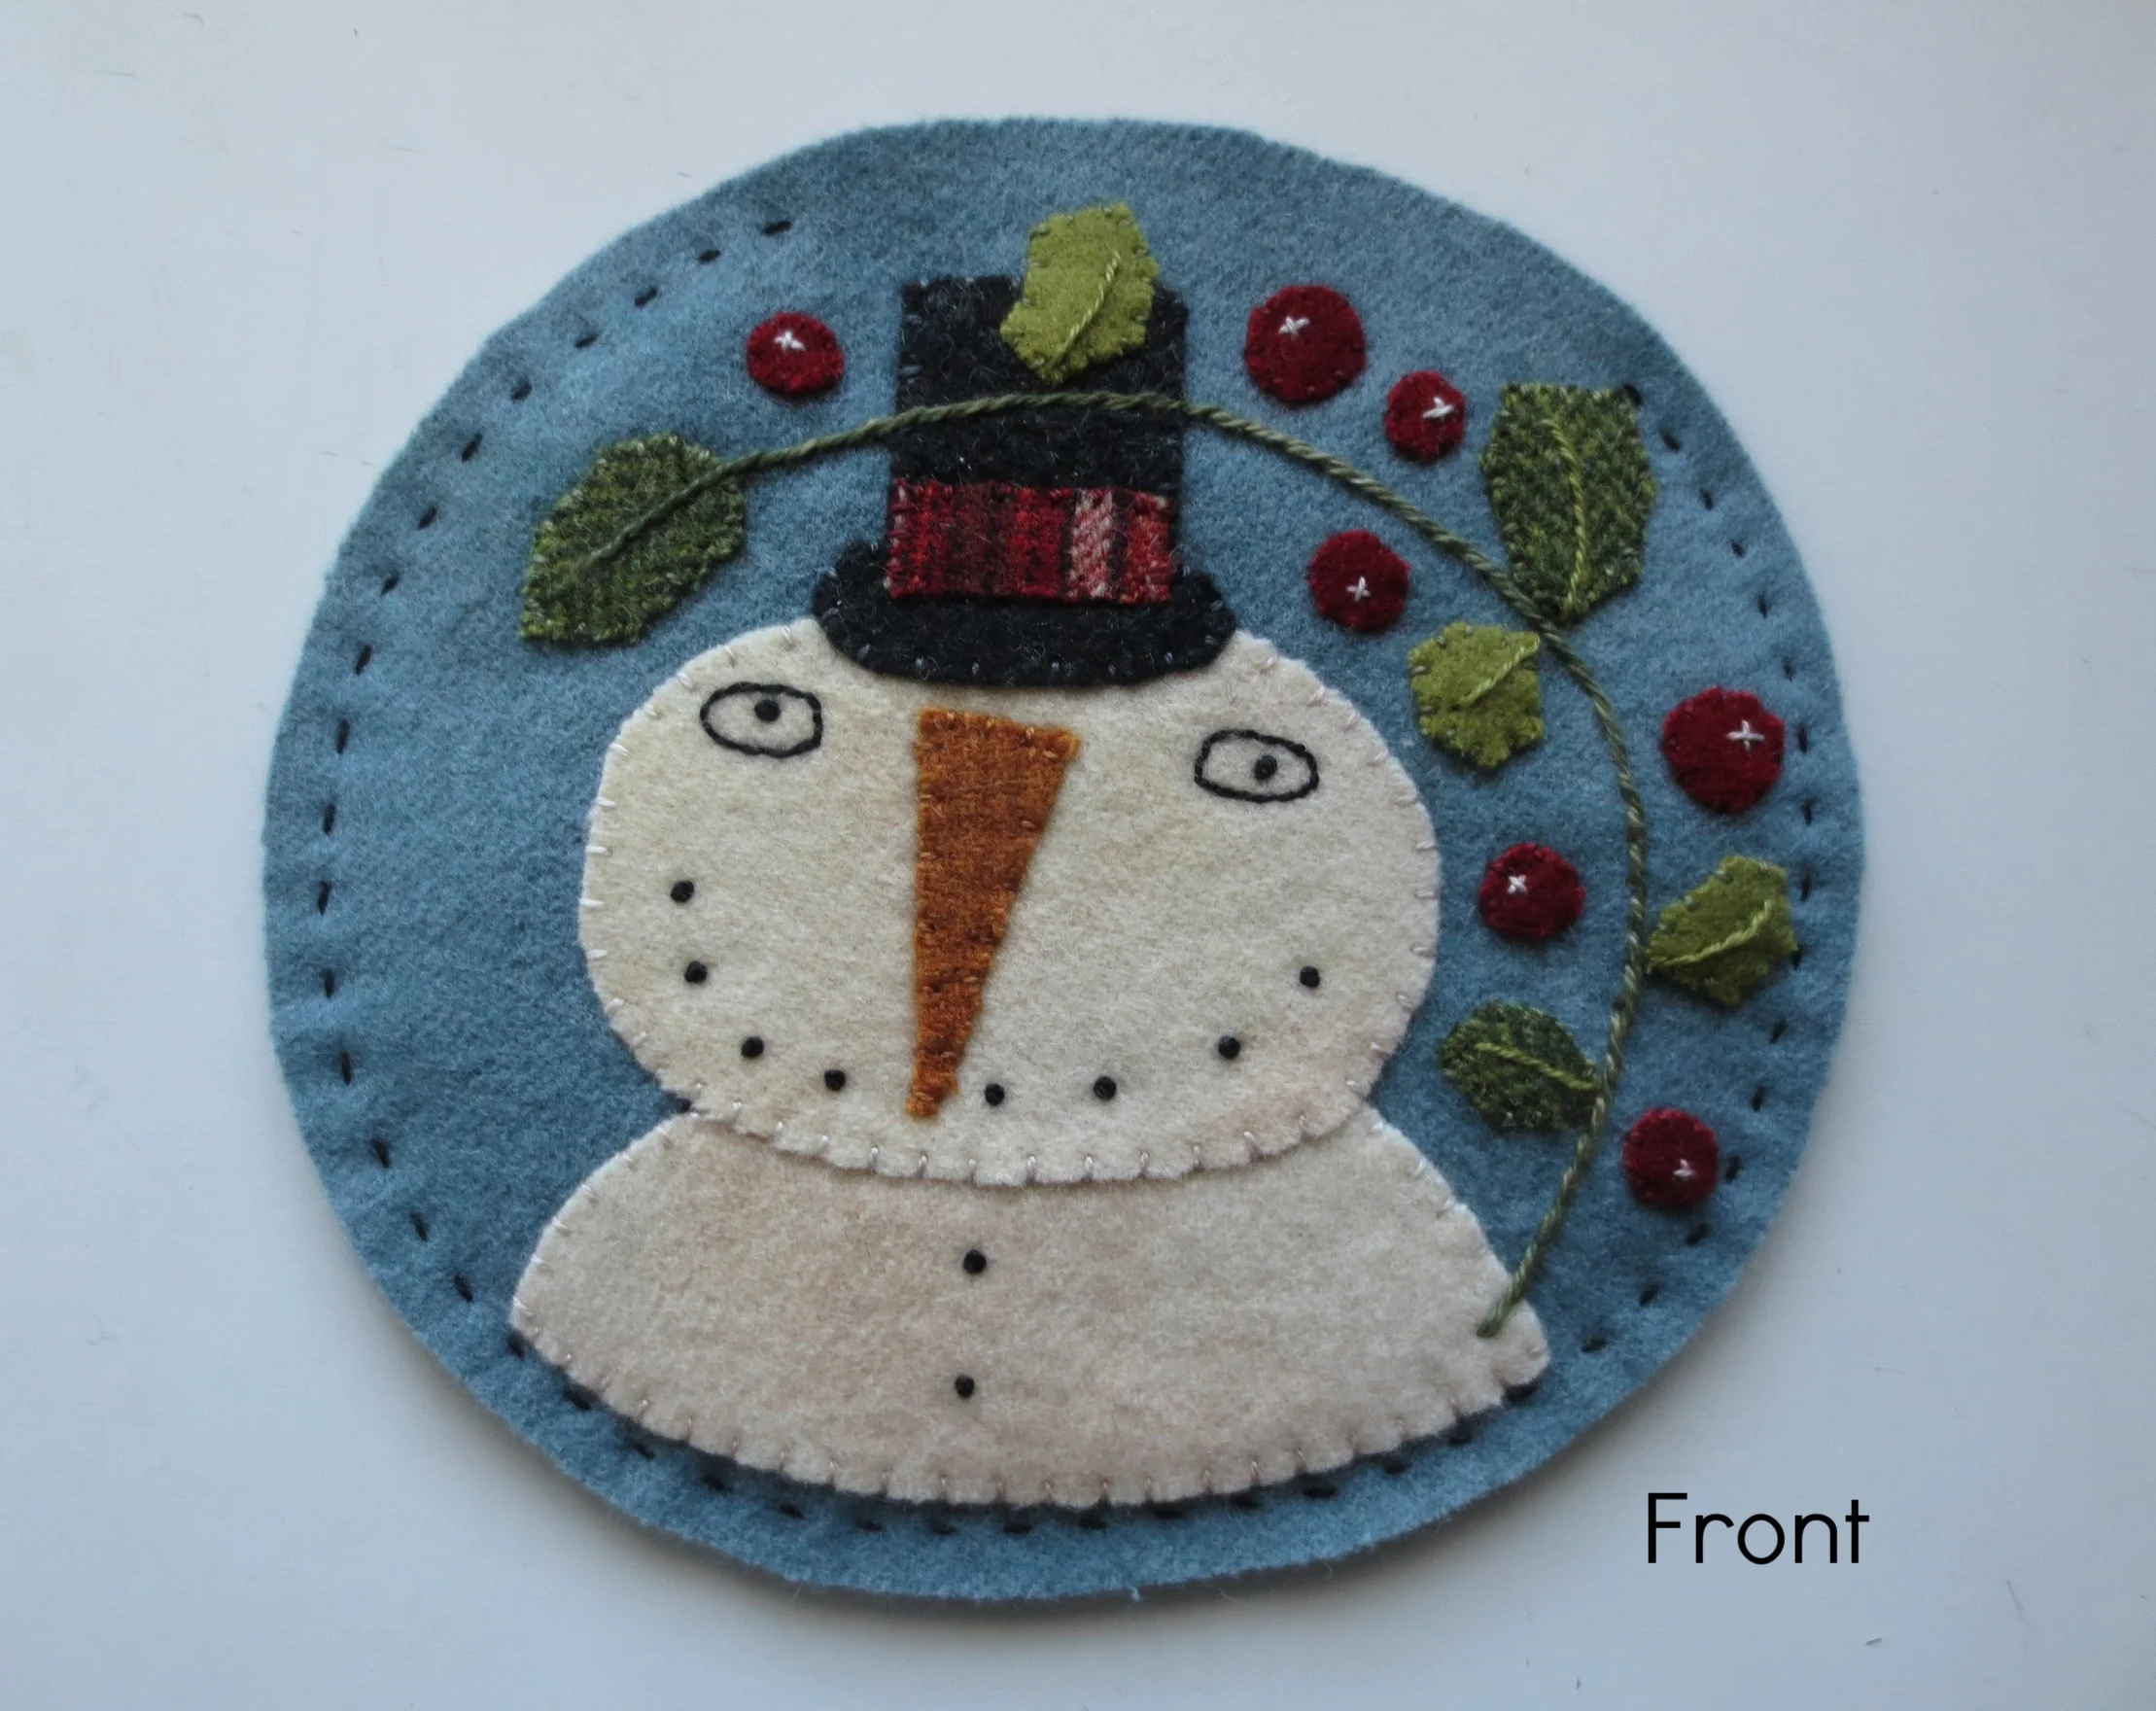
"Tis the Season" wool appliqued ornament (front)
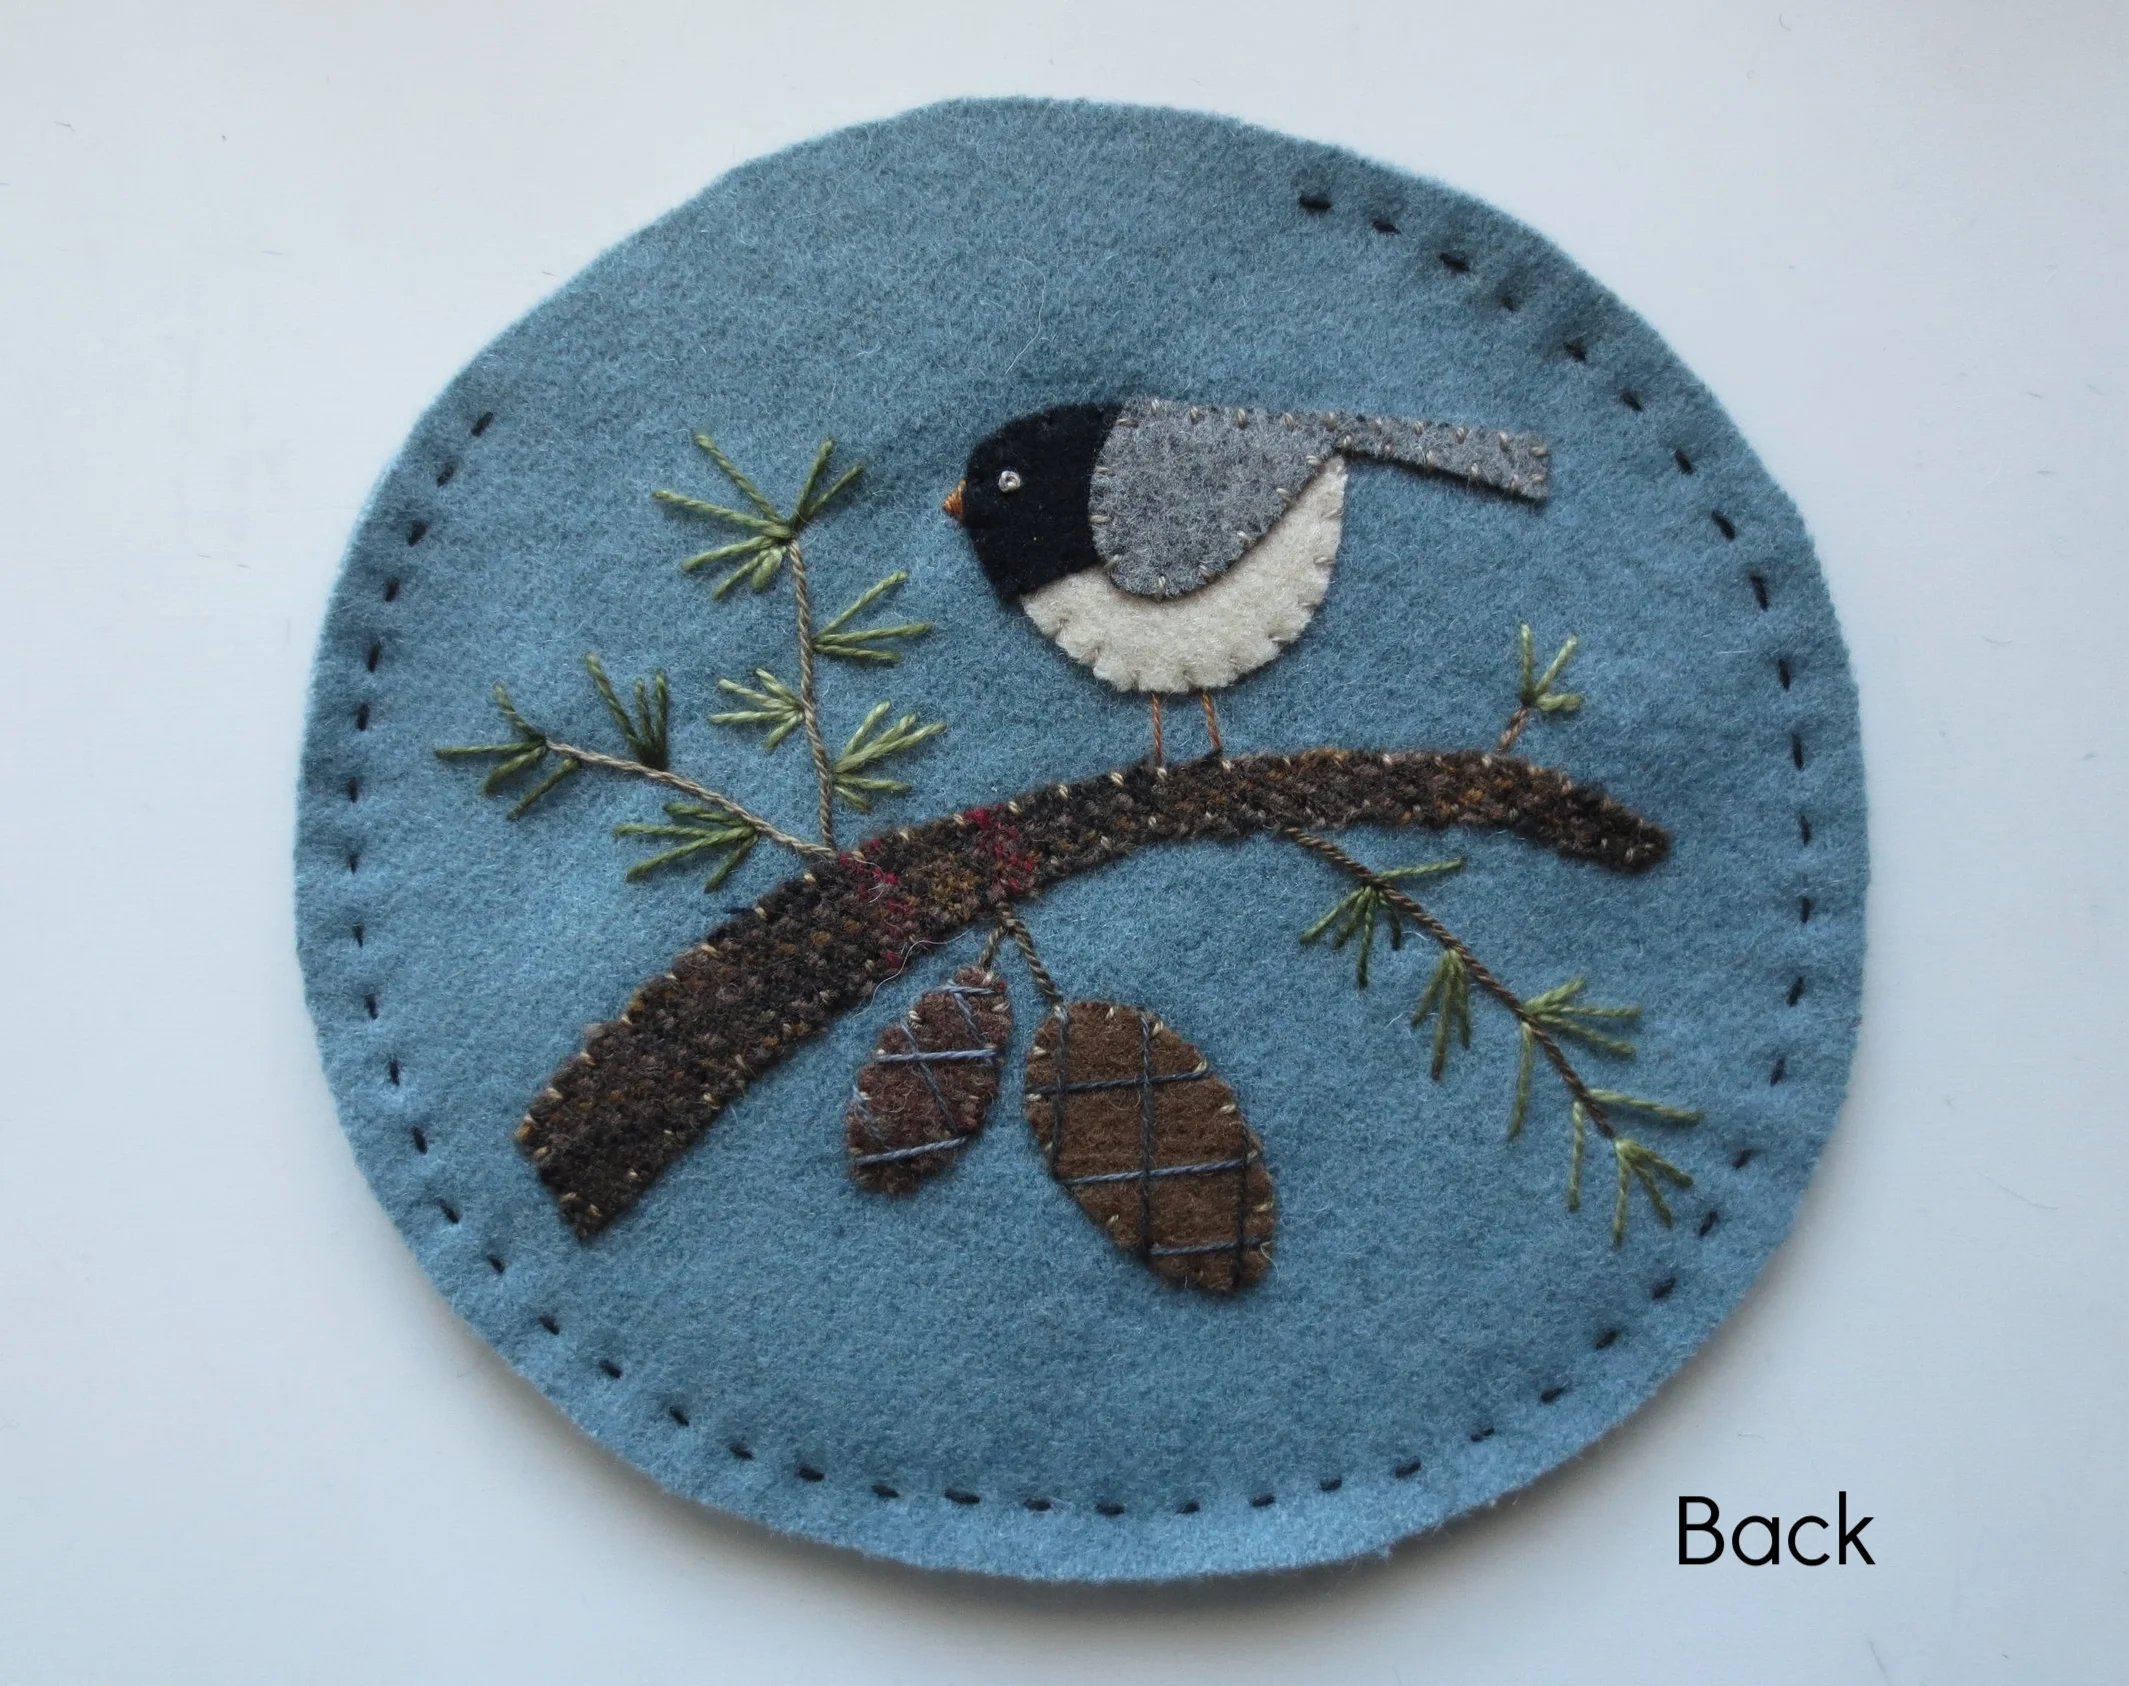
"Tis the Season" wool appliqued ornament (Back)
Tis the season for snowmen, figgy puddings, and festive gathering of good friends and family around a blazing hearth on a cold winter's night. It's my favorite time of year. Yes....It's hectic and exhausting, but also filled with twinkling lights, delicious food, and warm and wonderful memories.
This tutorial will show you how to make a double sided wool appliqued ornament that you can hang on a tree or on your front door. It's about 5" in diameter and is hung with a simple wire hanger you can make yourself. It could also be made as a framed and matted picture. The choice is yours.
You will need:
Felted wool
Felted wool for Tis the Season ornament
- Background - 7" x 14" blue
- Snowman and Chickadee body - 5" dirty white or cream
- Hat - 2 1/2" square black tweed
- Hat band - 1" x 1 1/2" red stripe
- Berries - 2" square dark red solid
- Leaves #1,4 & 5 - 2" square green herringbone or plaid
- Leaves #2,3 & 6 - 2" square green solid
- Nose - 1" x 2" orange plaid
- Chickadee wing - 1 1/2" x 2 1/2" gray
- Chickadee head - 1 1/2" square black
- Branch - 2" x 6" brown plaid
- Large pinecone - I 1/2" square medium brown solid
- Small pinecone - 1" square brown herribone
Thread - I used Valdani perle cotton, size 12 for all the appliqued pieces and size 8 for the holly branch, pine needles, and finishing blanket stitch. I used colors that matched my wool colors and black for the blanket stitch. Your colors may vary.
- Snowman and bird body - #P4
- Hat and bird head - #P11
- Hat band and berries - #O503
- Snowman's nose, chickadee's legs and beak - #O217
- Leaves - #O519
- Holly stem and pine needles (size 8) - #O519
- Snowman's eyes, mouth and buttons - black (size 12)
- Chickadee's wing and eye - #O178
- Branch, pinecones, and side branches - #P9
- Pinecone embellishment - #135
- Blanket stitch and running stitch - Black (size 8)
Miscellaneous
- Feather weight fusible web - My favorite brand is Vilene from pinwheels.com . A close second is Heat n Bond feather lite that you can get from here: https://www.missouriquiltco.com/ .
- Freezer paper - I buy this at my local grocery store. It's sold in a roll 18" x 33 1/3 yards and made by Reynolds. The patterns cut from freezer paper can be used multiple times. I have used the same pattern piece at least 6 times.
- Chalk pencil - light and dark colors
- Chenille needle - size 22 (size 8 thread) and size 24 (size 12 thread)
- Polyester fiberfill - I used Soft n Crafty from JoAnn Fabric and Craft.
- 20 gauge black wire - 10" length (I bought mine from JewelrySupply.com , but you may be able to purchase it from Michaels or JoAnn's.)
- Small wirecutters
- Needle nose pliers
- Steam iron
Instructions - Unless otherwise noted, use one strand of thread for all stitches.
- Download: Tis the Season Layout and Pattern #1 , Tis the Season Pattern #2 , Tis the Season Layout and Pattern #3, and Butternut Plaid Stitch Guide if needed.
- Trace the background pattern onto freezer paper. (You only need to cut one background pattern, but you will be using it twice) Cut out the pattern leaving a 1/4" border all around the outline.
- Iron the freezer paper, shiney side down, onto the blue background wool. Cut out along outline.
- Remove the freezer paper pattern and repeat to make the background for the back of the ornament. You should now have 2 pieces of blue background.
- Trace the remaining pattern pieces onto fusible web (The images are already reversed for use with fusible web).
- Cut out all the pattern pieces, leaving a small 1/8" border.
- Fuse to designated wools and cut out along traced outlines.
Wool pattern pieces ready for applique.
8. Let's start with the snowman side. Lay out the snowman head, body, hat, berries and leaves. DON'T FUSE YET! This is just to determine placement. Use the layout diagram for help on placement. You will be stitching a running stitch about 1/4" from the outer edge of the background wool after the applique is complete, so make sure your wool applique pieces are at least 1/4" from the outer edge.
Position all your wool pieces on the background.
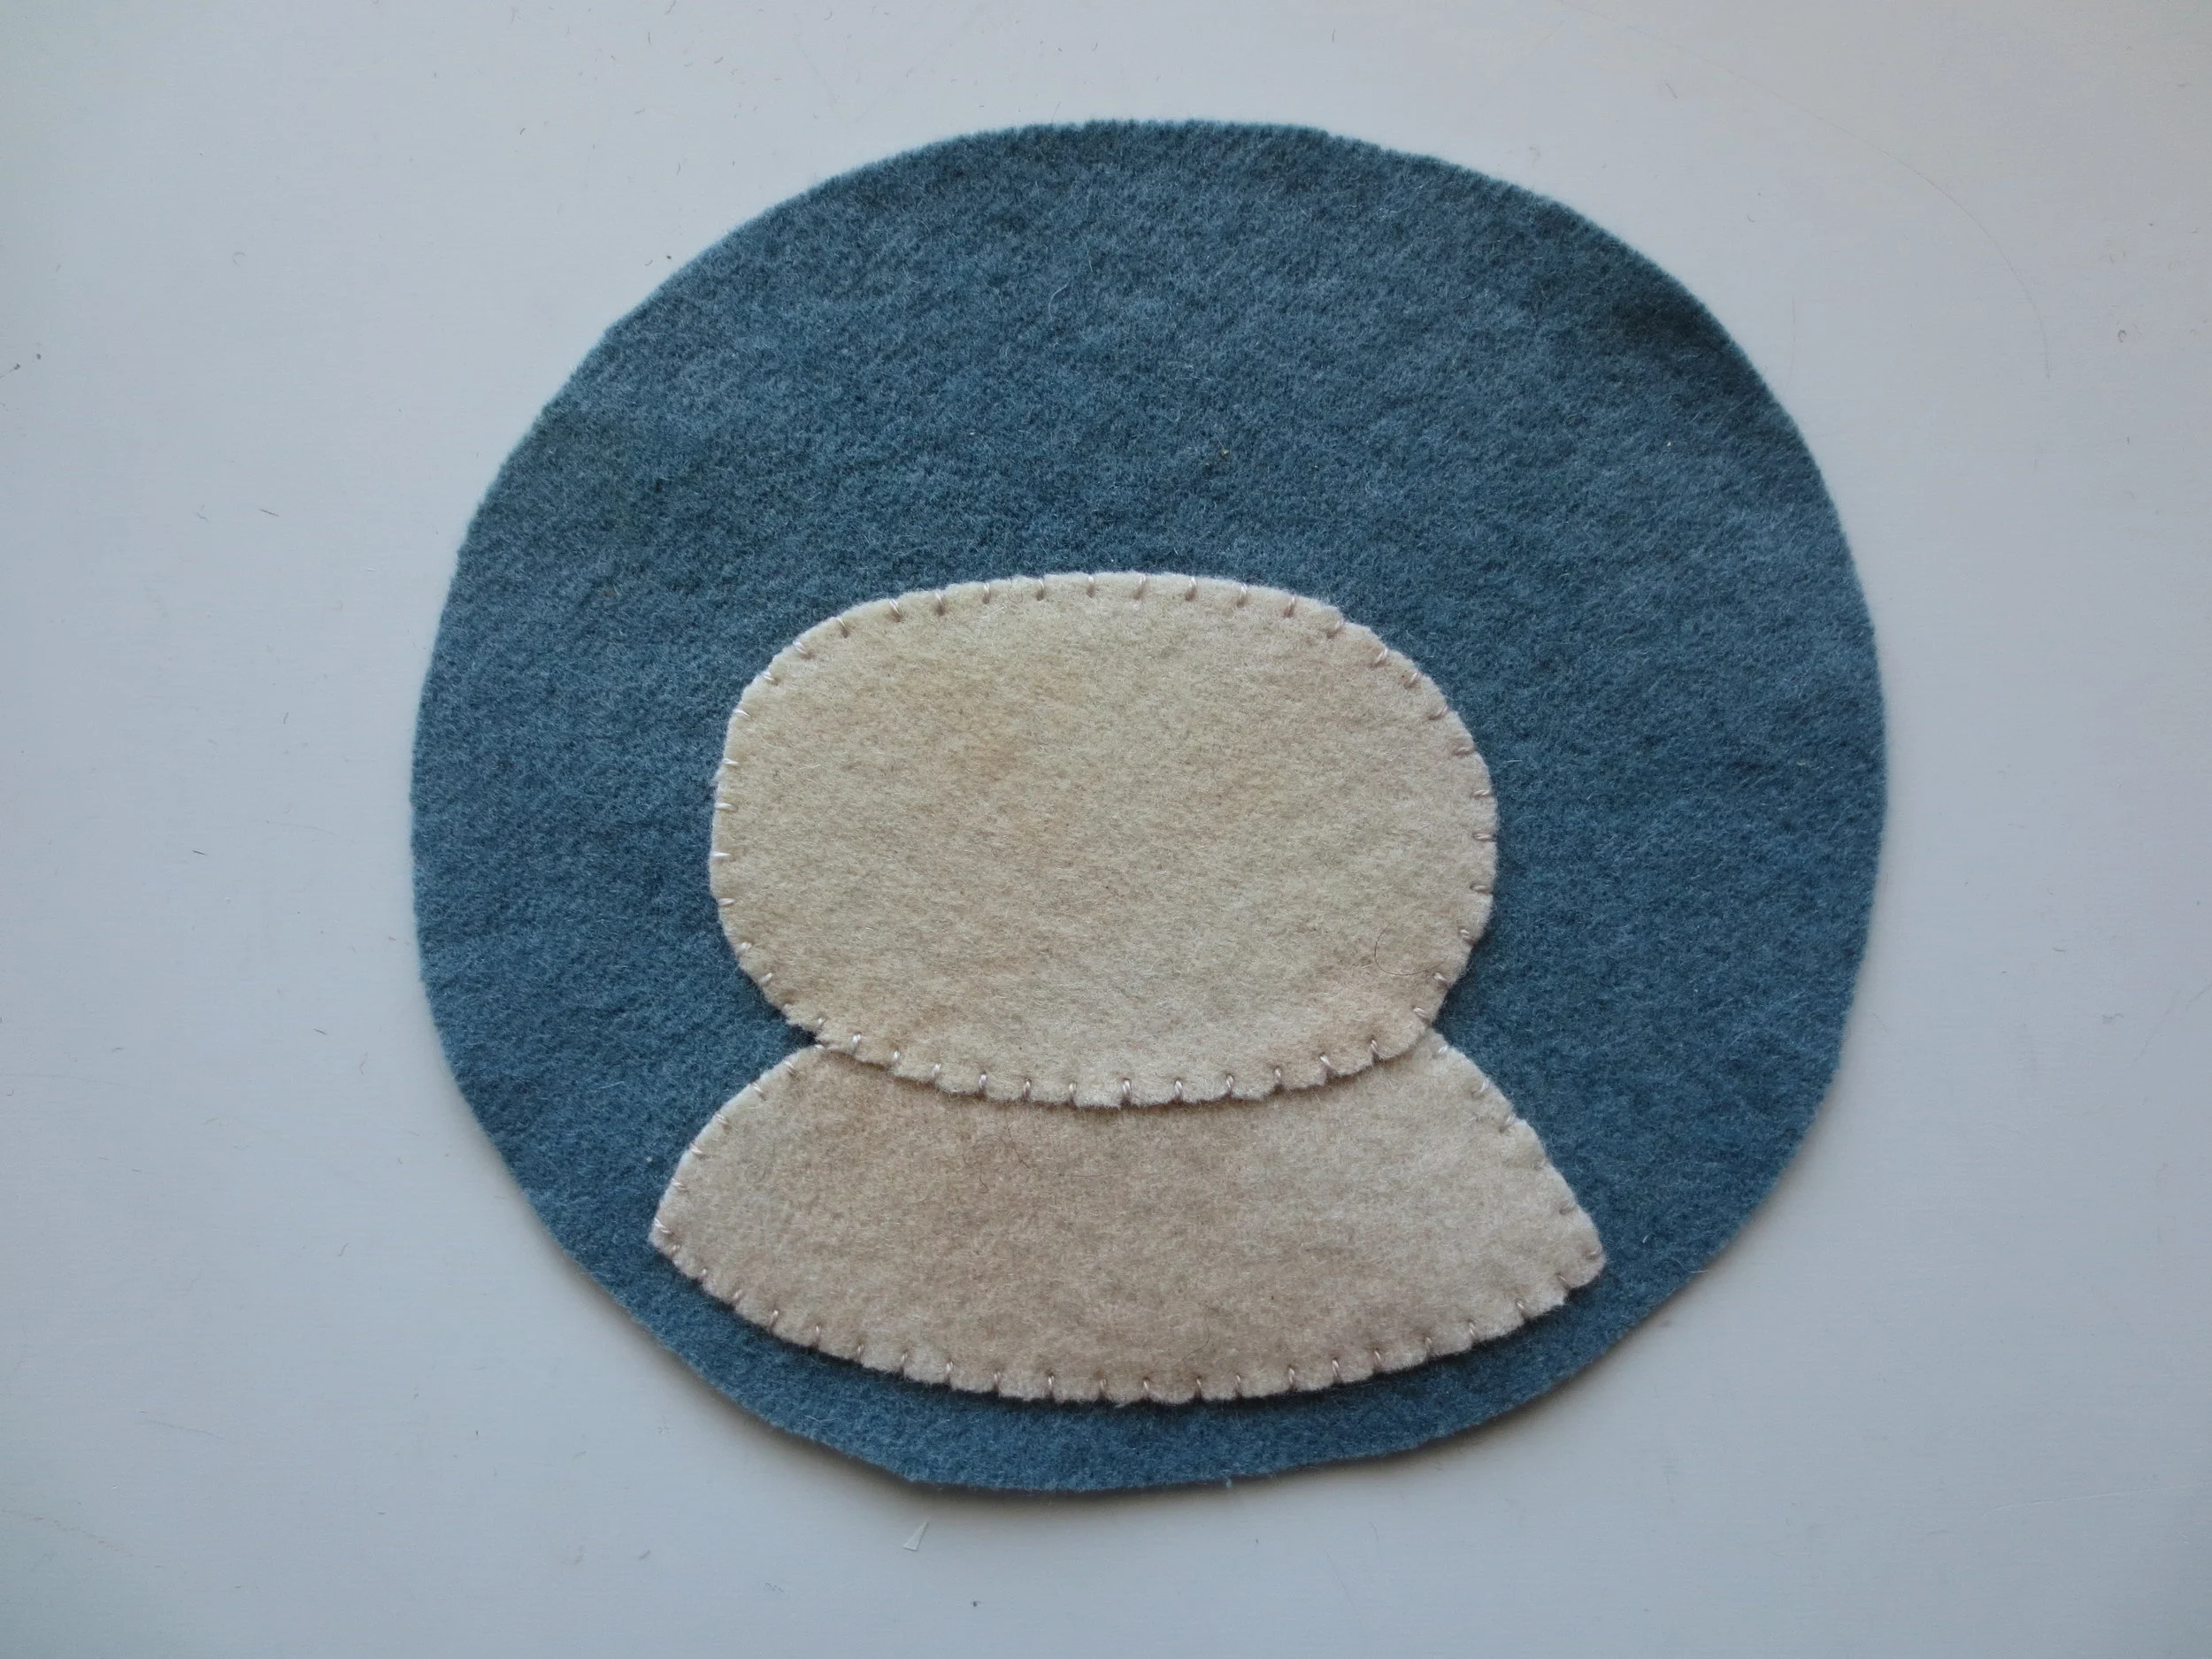
9. When you are happy with the layout, remove everything but the snowman head and shoulders. 10. Fuse the head and shoulders of the snowman onto the background using steam. Note: The head of the snowman slightly overlaps the shoulders (see layout).
Notice the overlap of the head on the shoulders?
11. Use matching colored thread to whip stitch the head and shoulders.
12. Reposition the hat with its band on the snowman's head. Position the nose on the face. Fuse in place using steam.
13. Whip stitch the hat, hatband, and nose with thread that matches wool colors.
14. With a dark chalk pencil, draw the eyes, mouth, and buttons on the snowman.
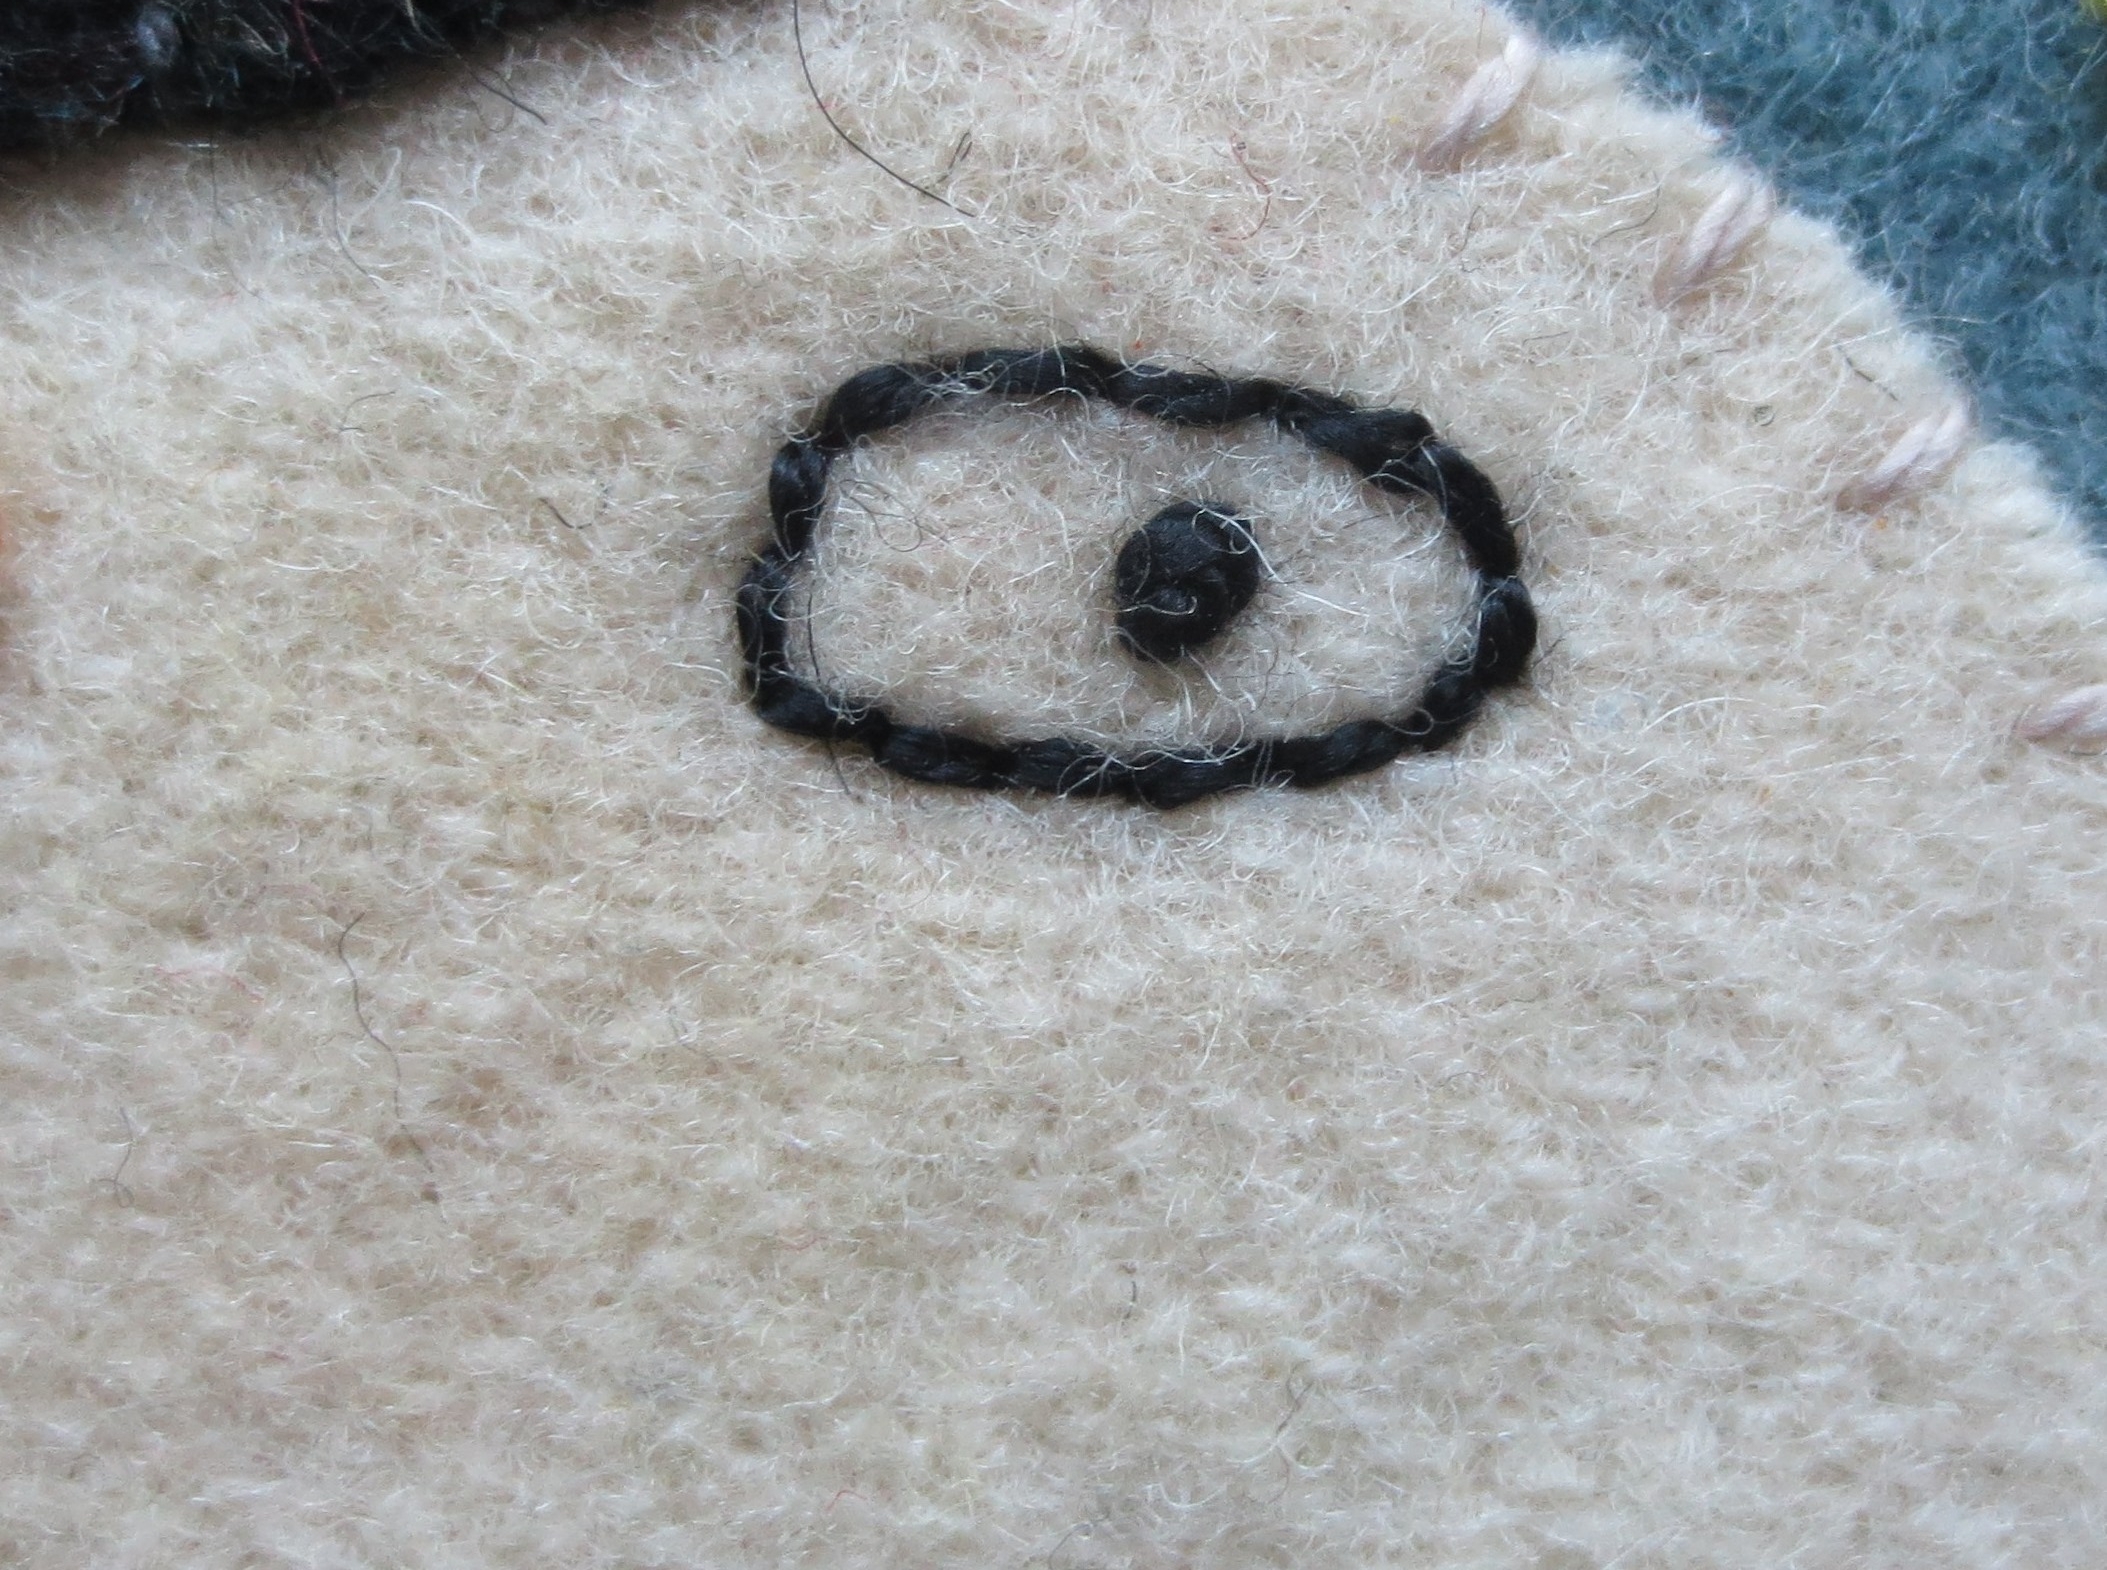
15. Back stitch the outlines of the eyes using one strand of black perle cotton, size 12. Then add a single french knot slightly off center within each outline. Use the layout for placement tips.
16. Stitch french knots for the mouth and buttons using the same thread.
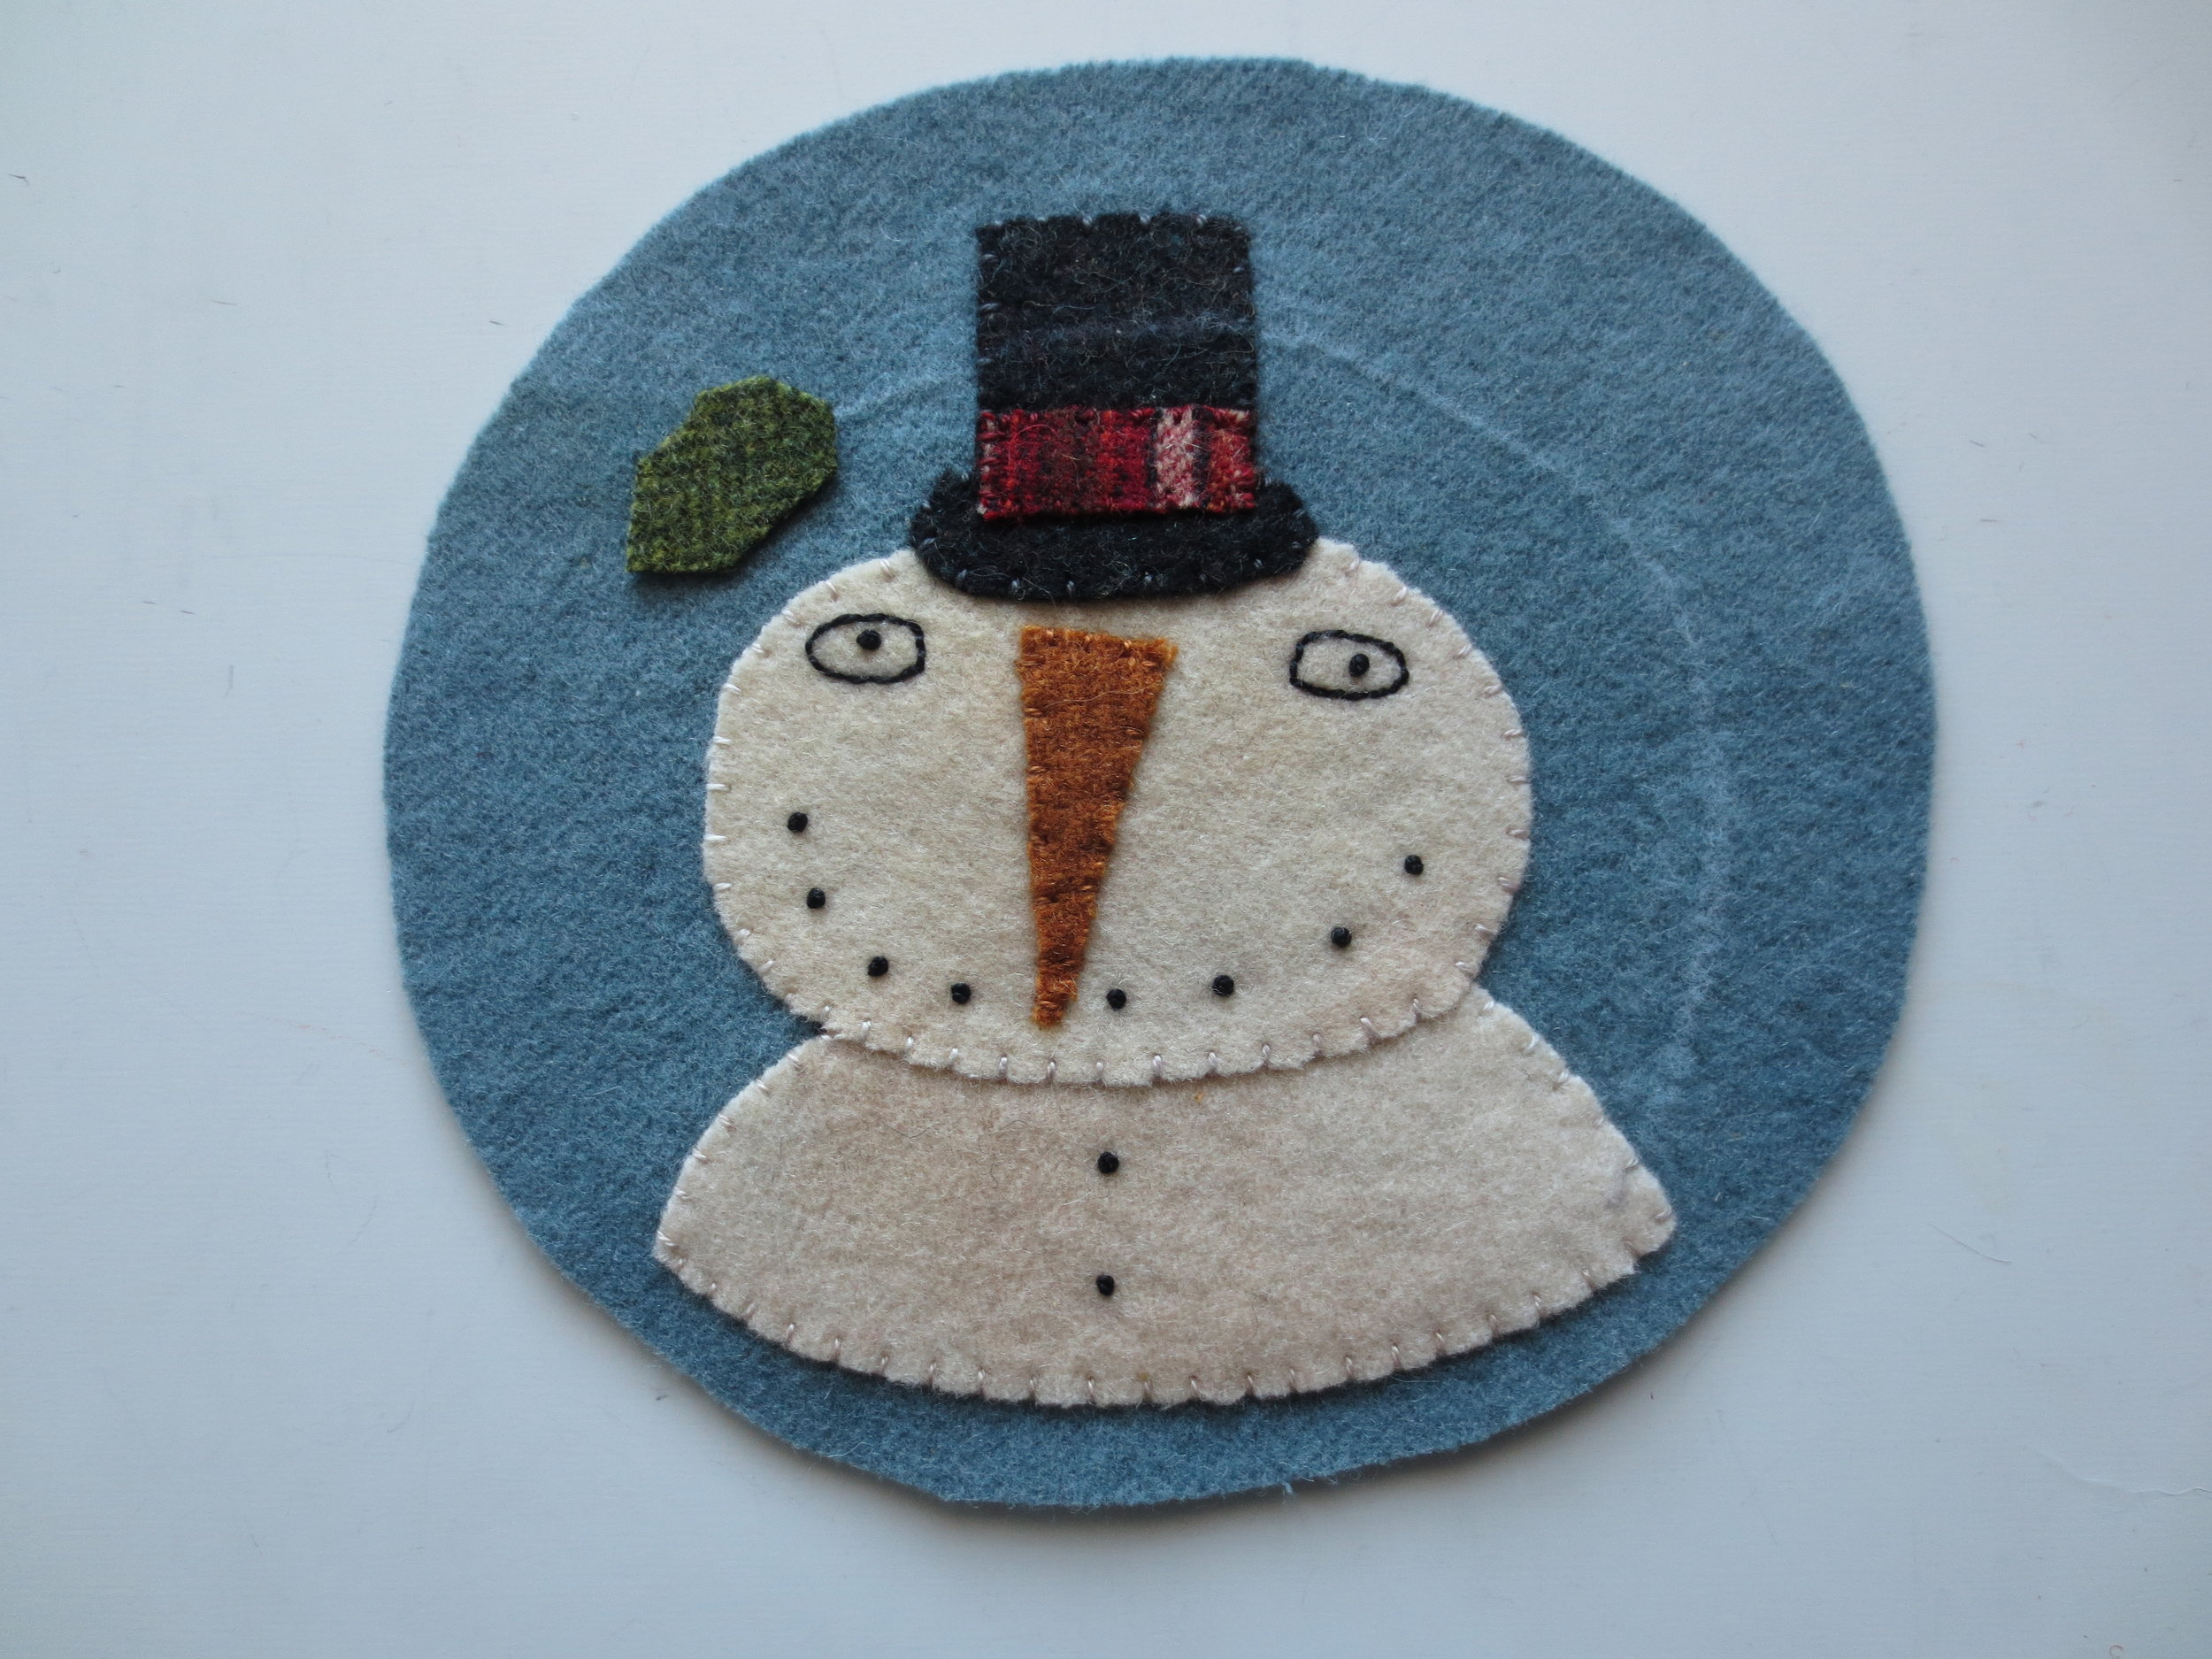
17. Draw the holly stem with a chalk pencil. You may want to lay out your leaves and berries to get a better idea about placement of the stem.
18. Fuse leaf #1 to the end of the chalk line. Draw the leaf vein with a chalk pencil (I took the photo before I drew the vein).
19. Starting from the top of the leaf vein, stem stitch the chalk line using #O519, size 8 (This is a variegated green).
20. Reposition the leaves and berries and fuse in place.
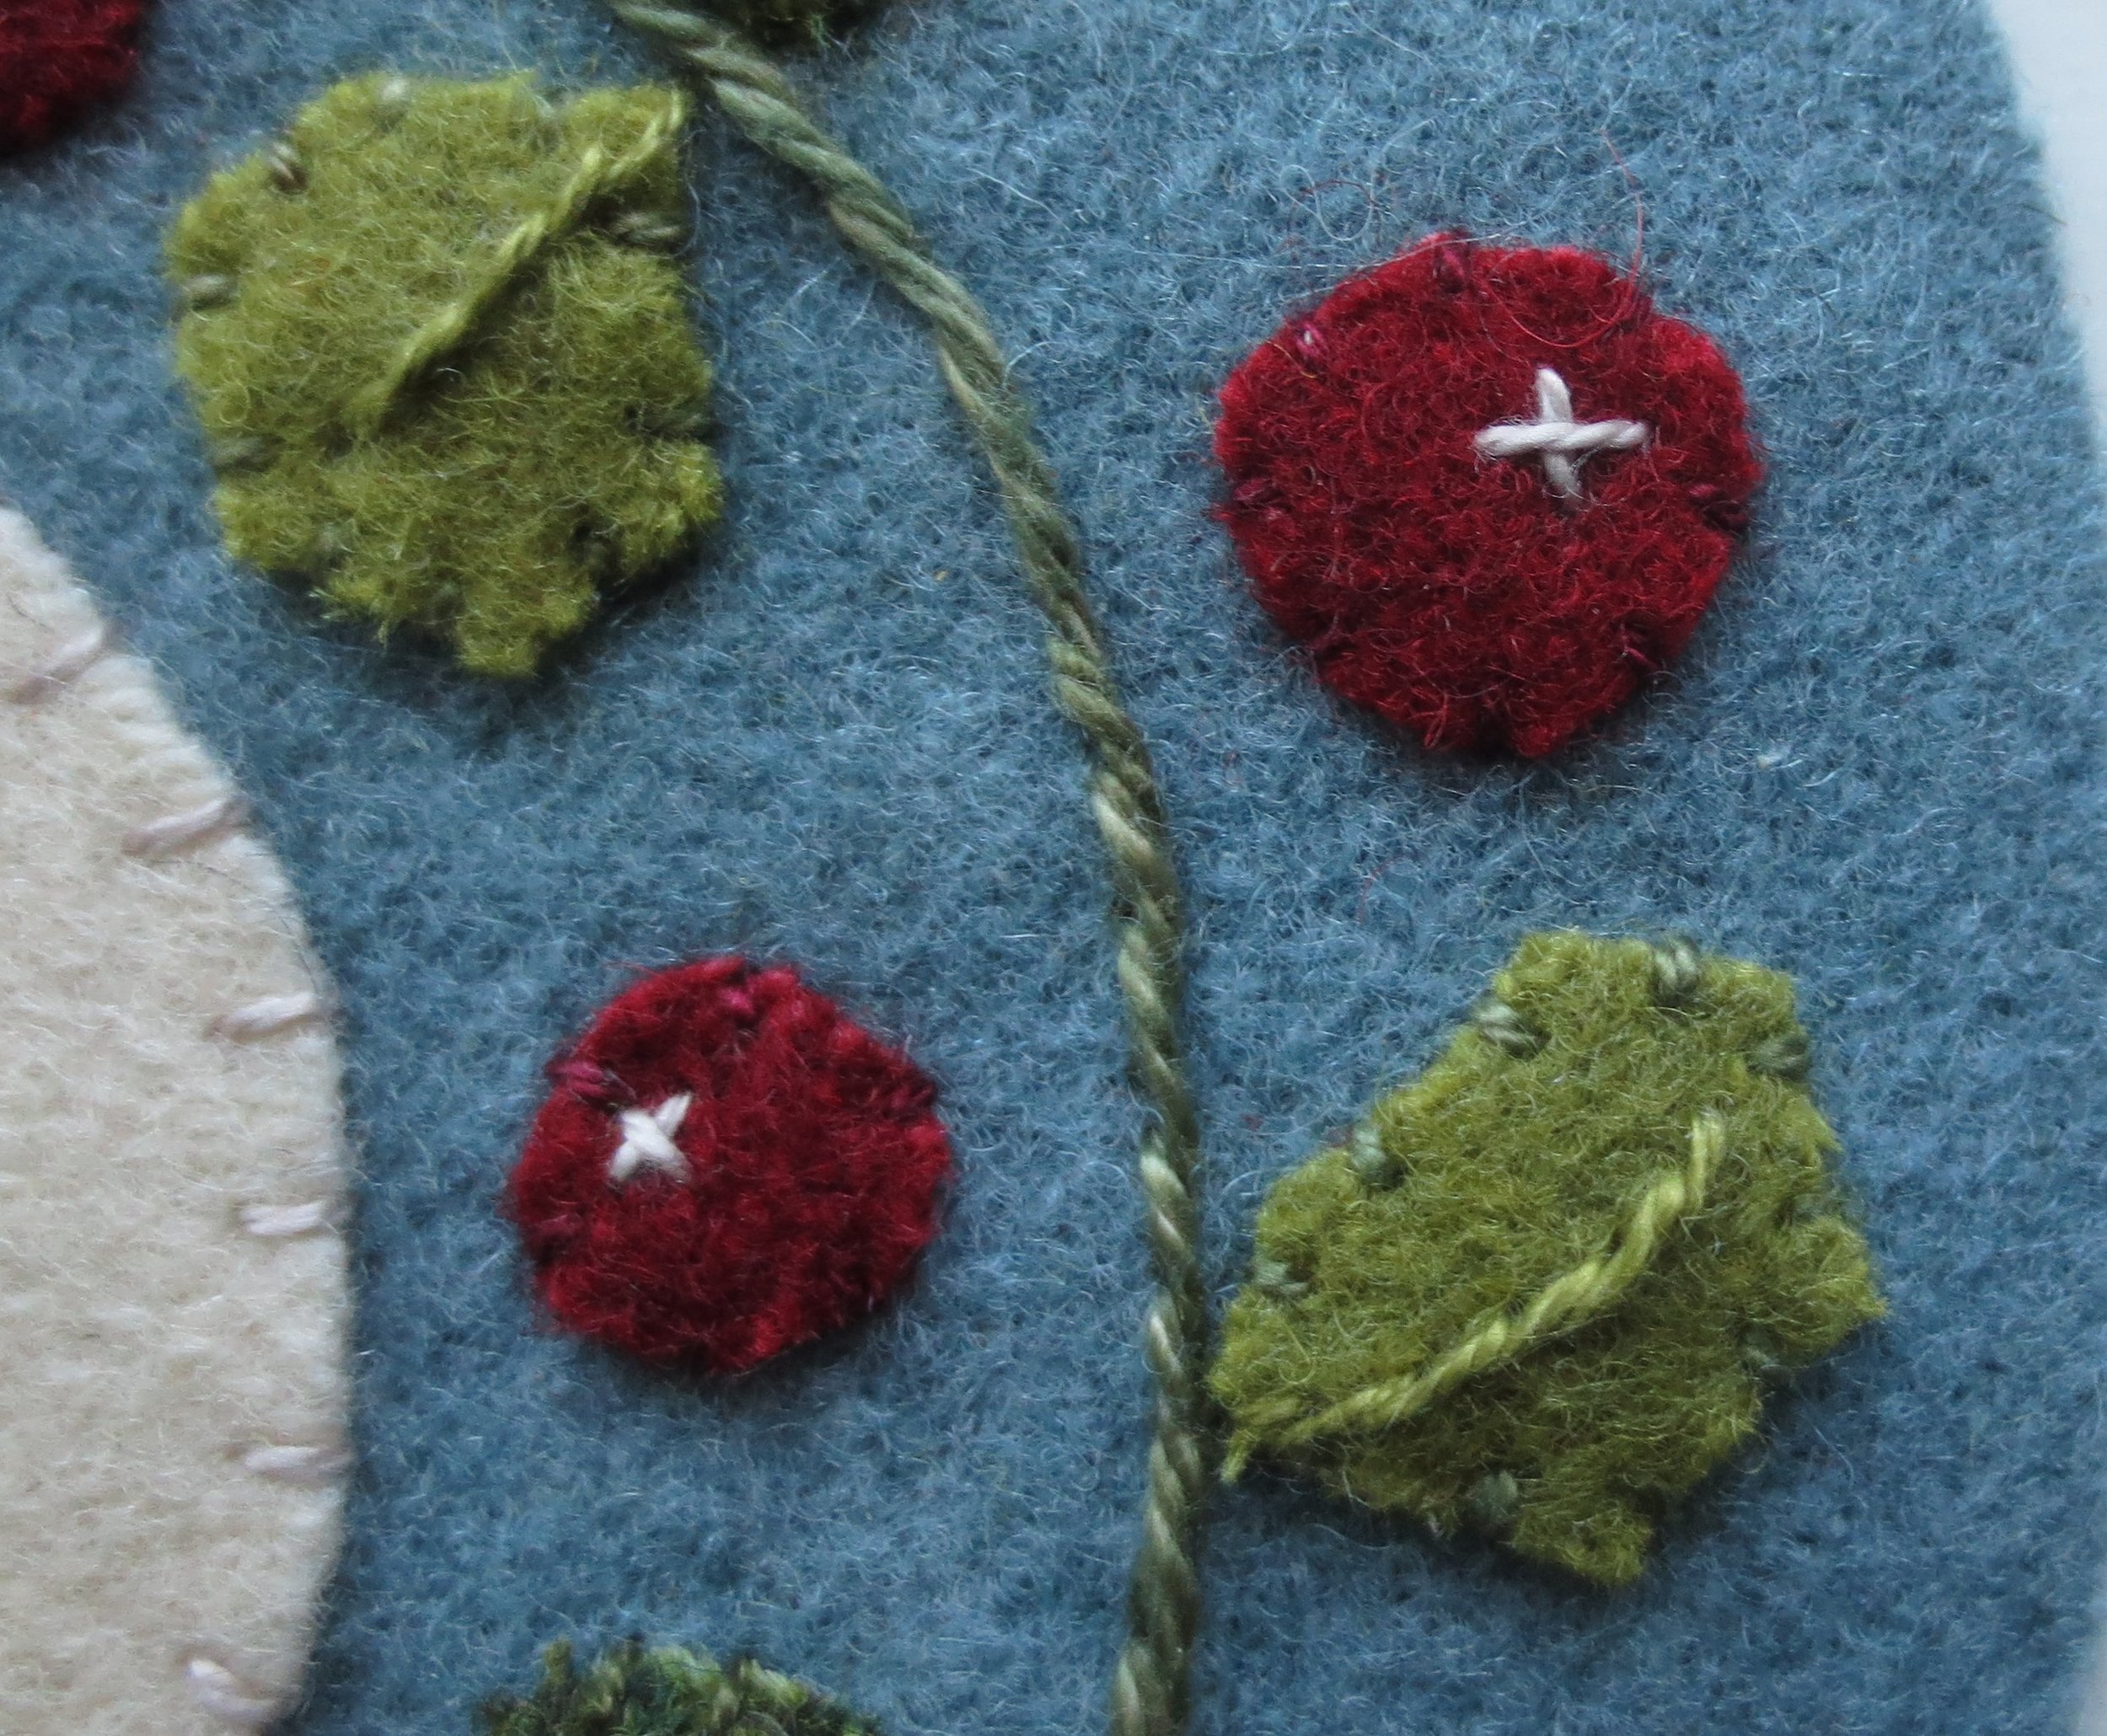
21. Whip stitch all the leaves and berries using thread to match wool colors.
21. Draw the veins of the leaves and berry spots with a chalk pencil.
22. Stem stitch the veins of the leaves with #O519, size 12.
23. Stitch a small cross (use the same thread that you used to whip stitch the snowman), on the dots you drew on the berries.
24. Now let's work on the chickadee side. Begin by positioning the pattern pieces onto the background wool and fuse in place using steam.
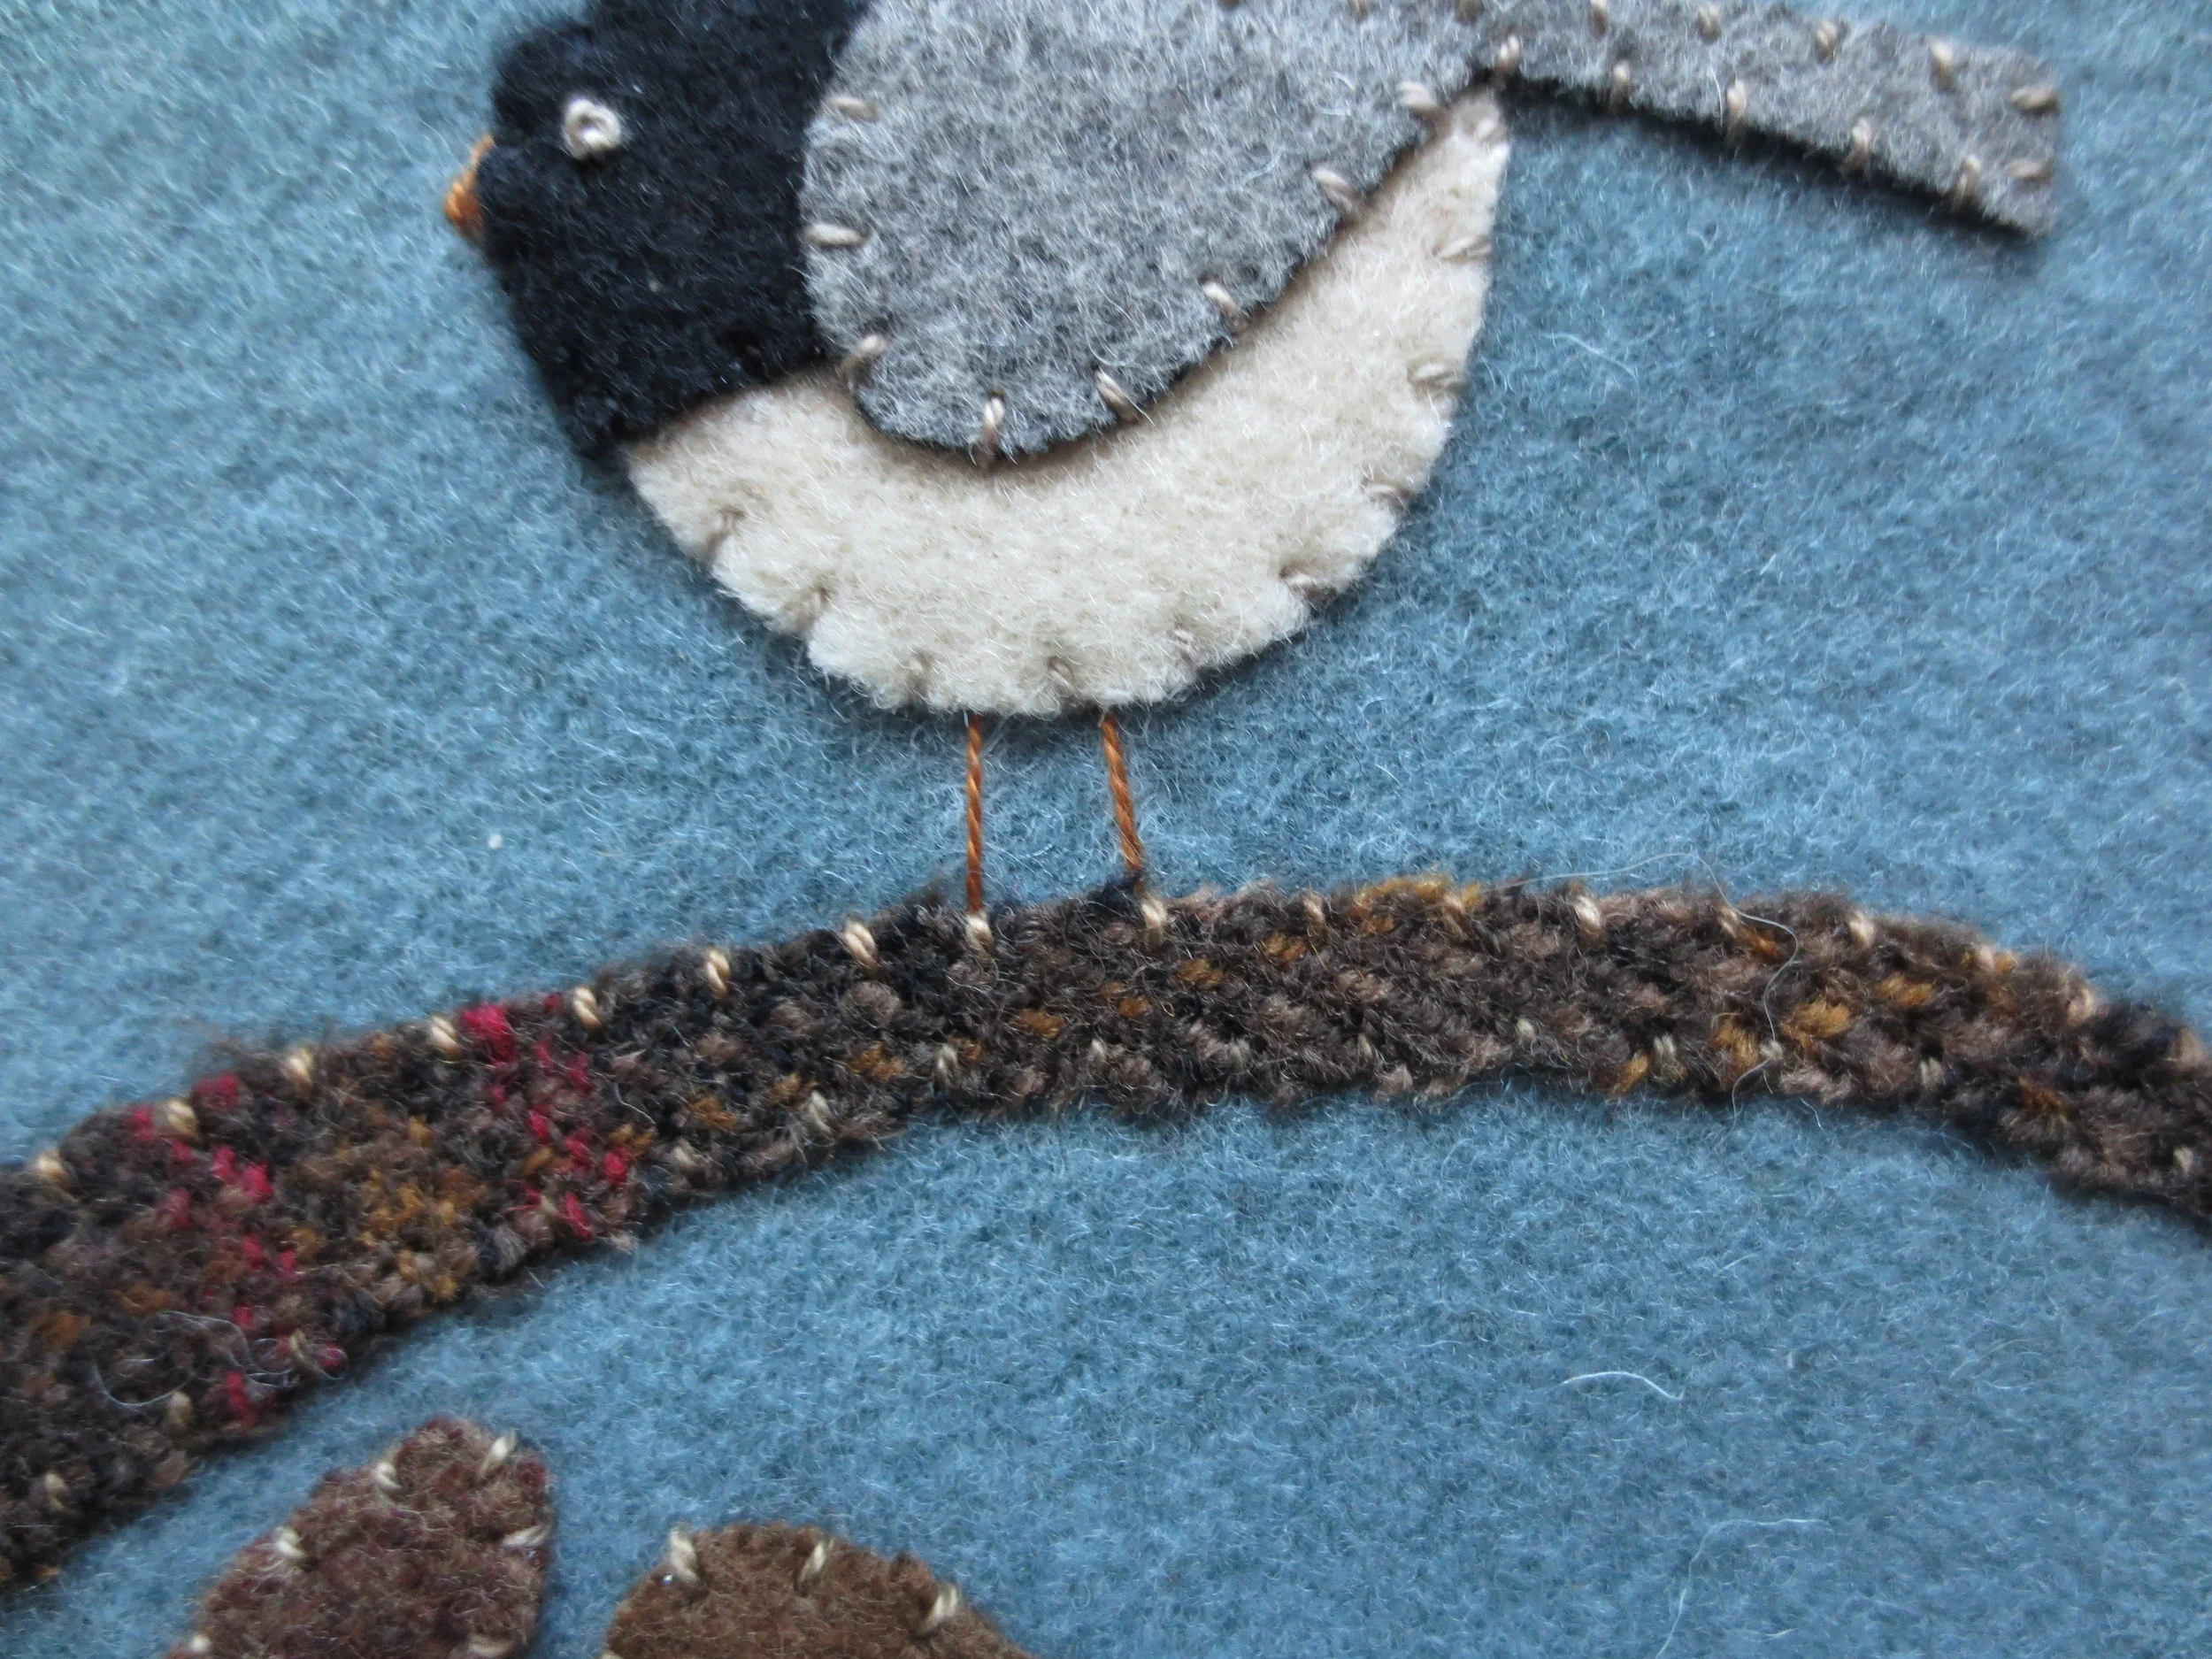
25. Whip stitch all the pieces using thread that matches the wool colors.
26. Use a light colored thread (#O178) to stitch a single french knot for the chickadee eye.
27. Use an orange thread (#O217) to satin stitch the chickadee beak. I used 4 stitches, beginning with the largest stitch at the head.
28. Use the same thread to make 2 straight stitched legs.
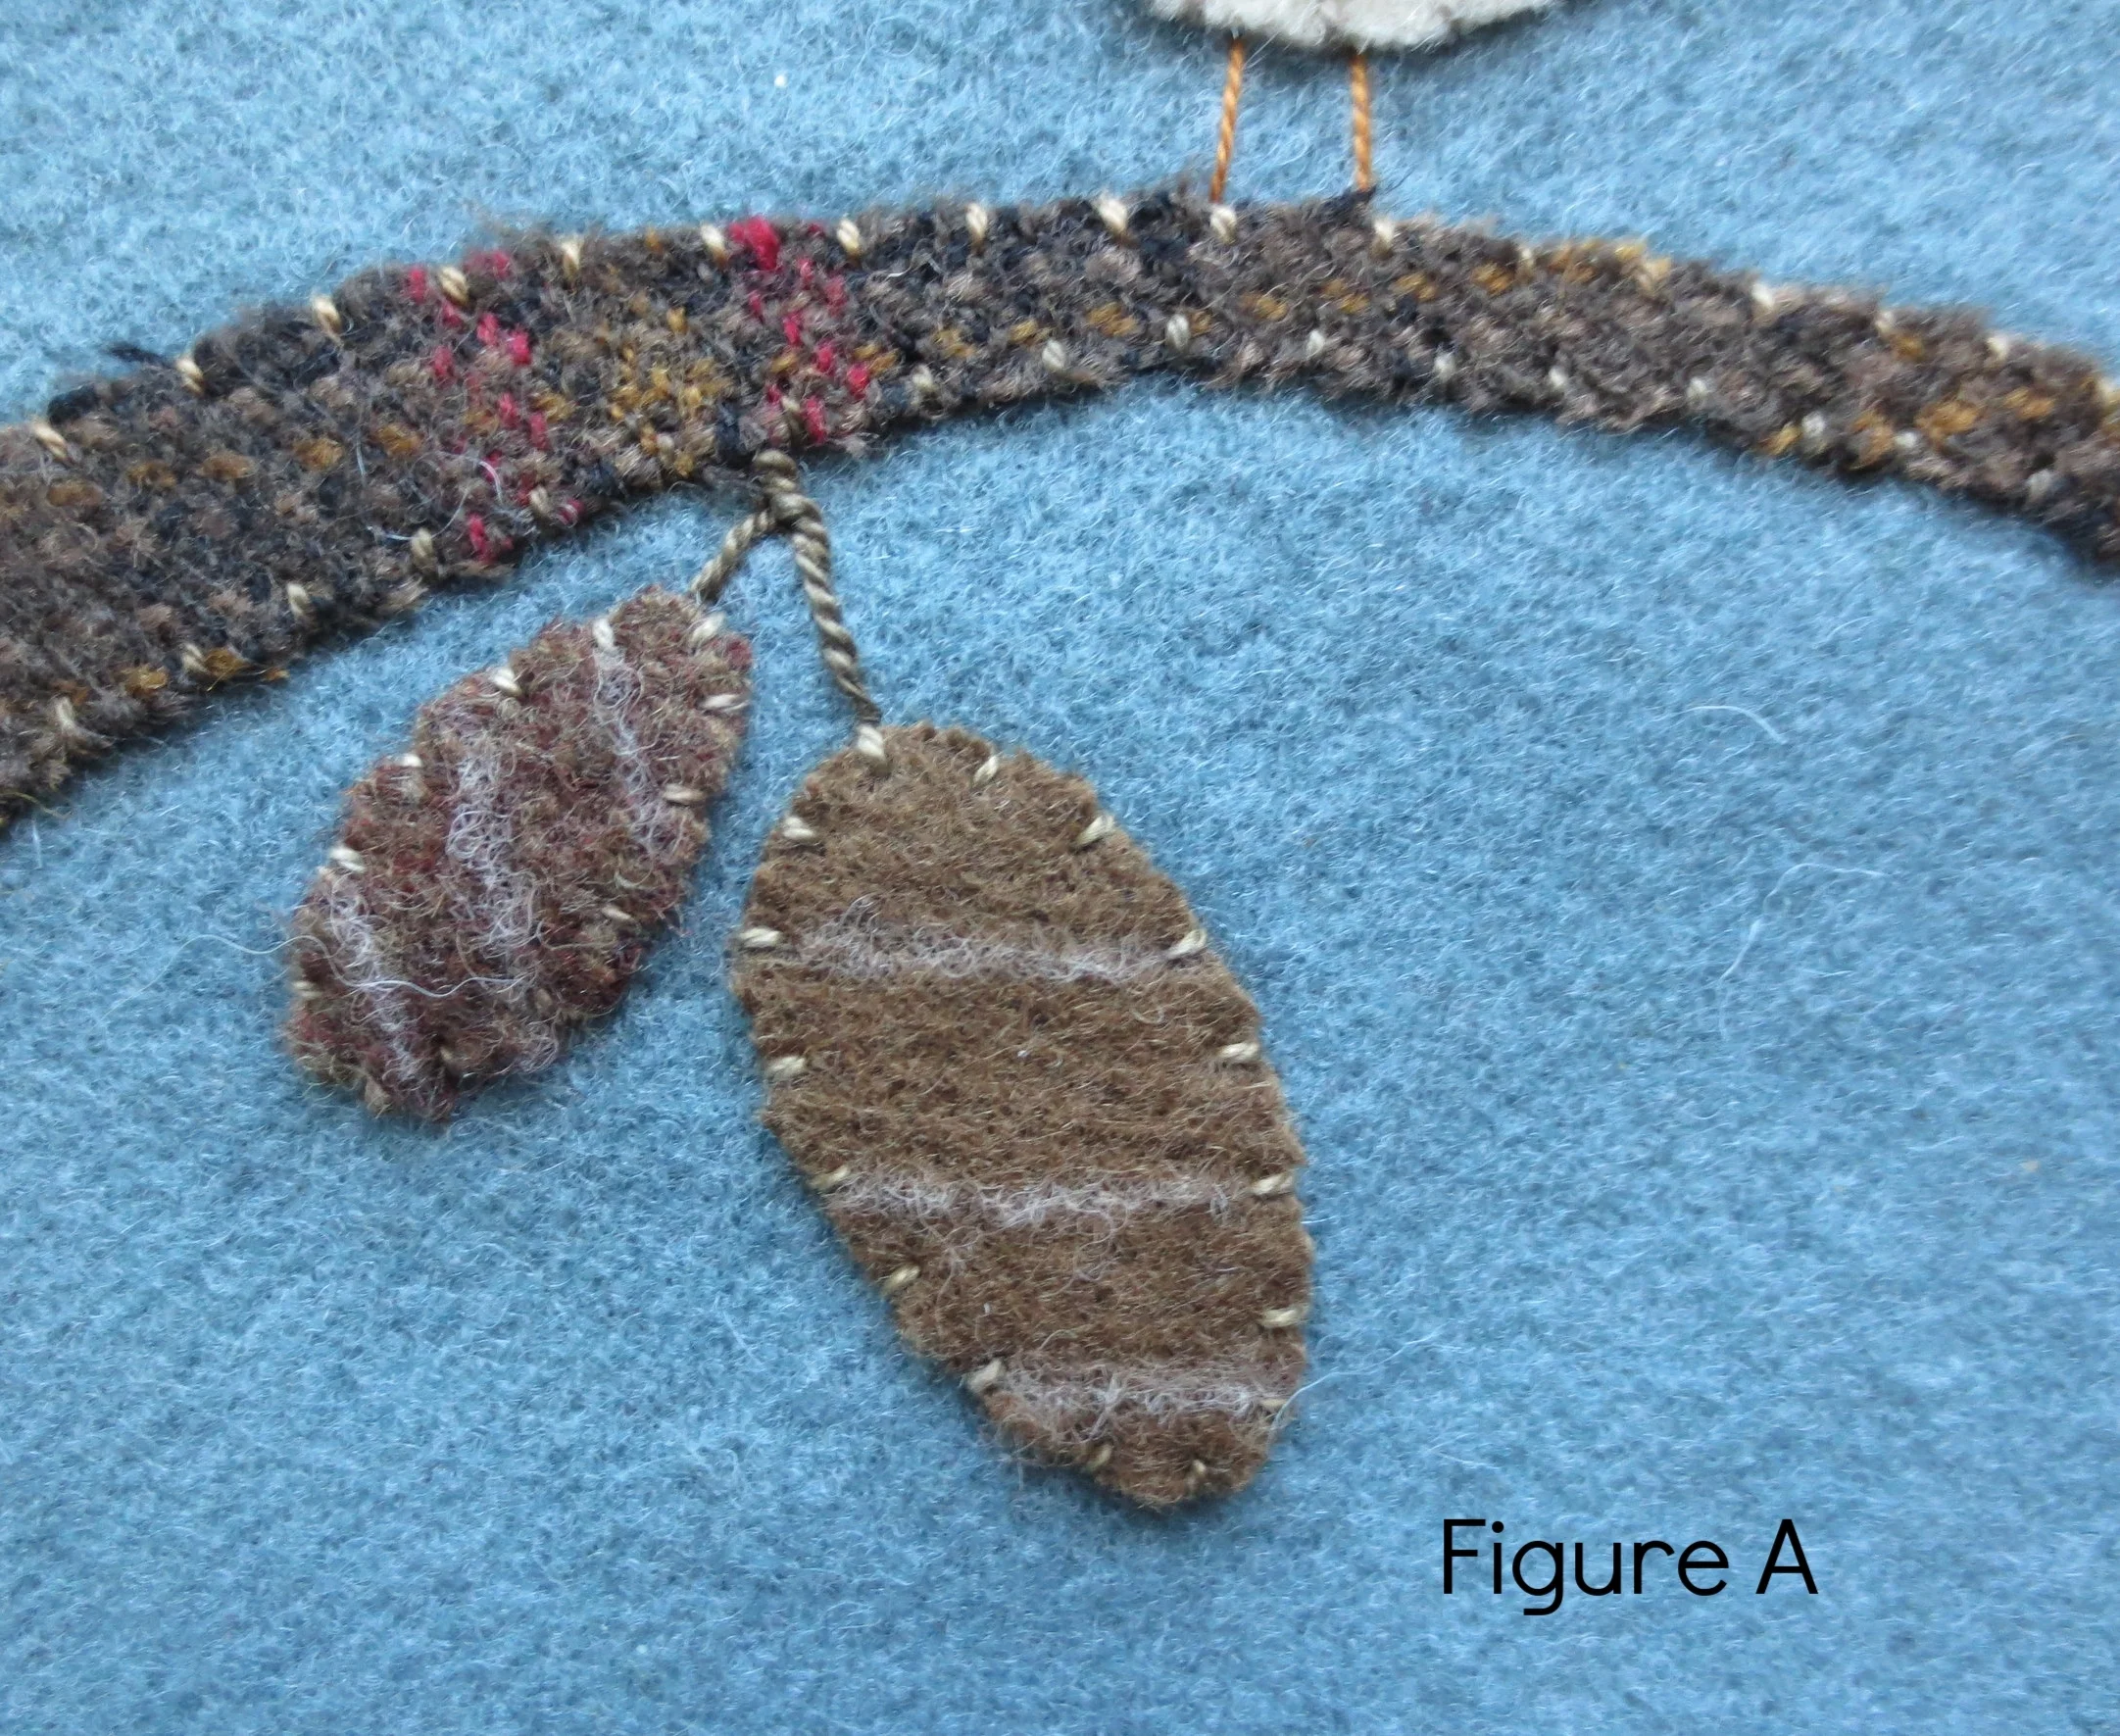
29. Draw the pinecone stems and stem stitch over the lines with #P9.
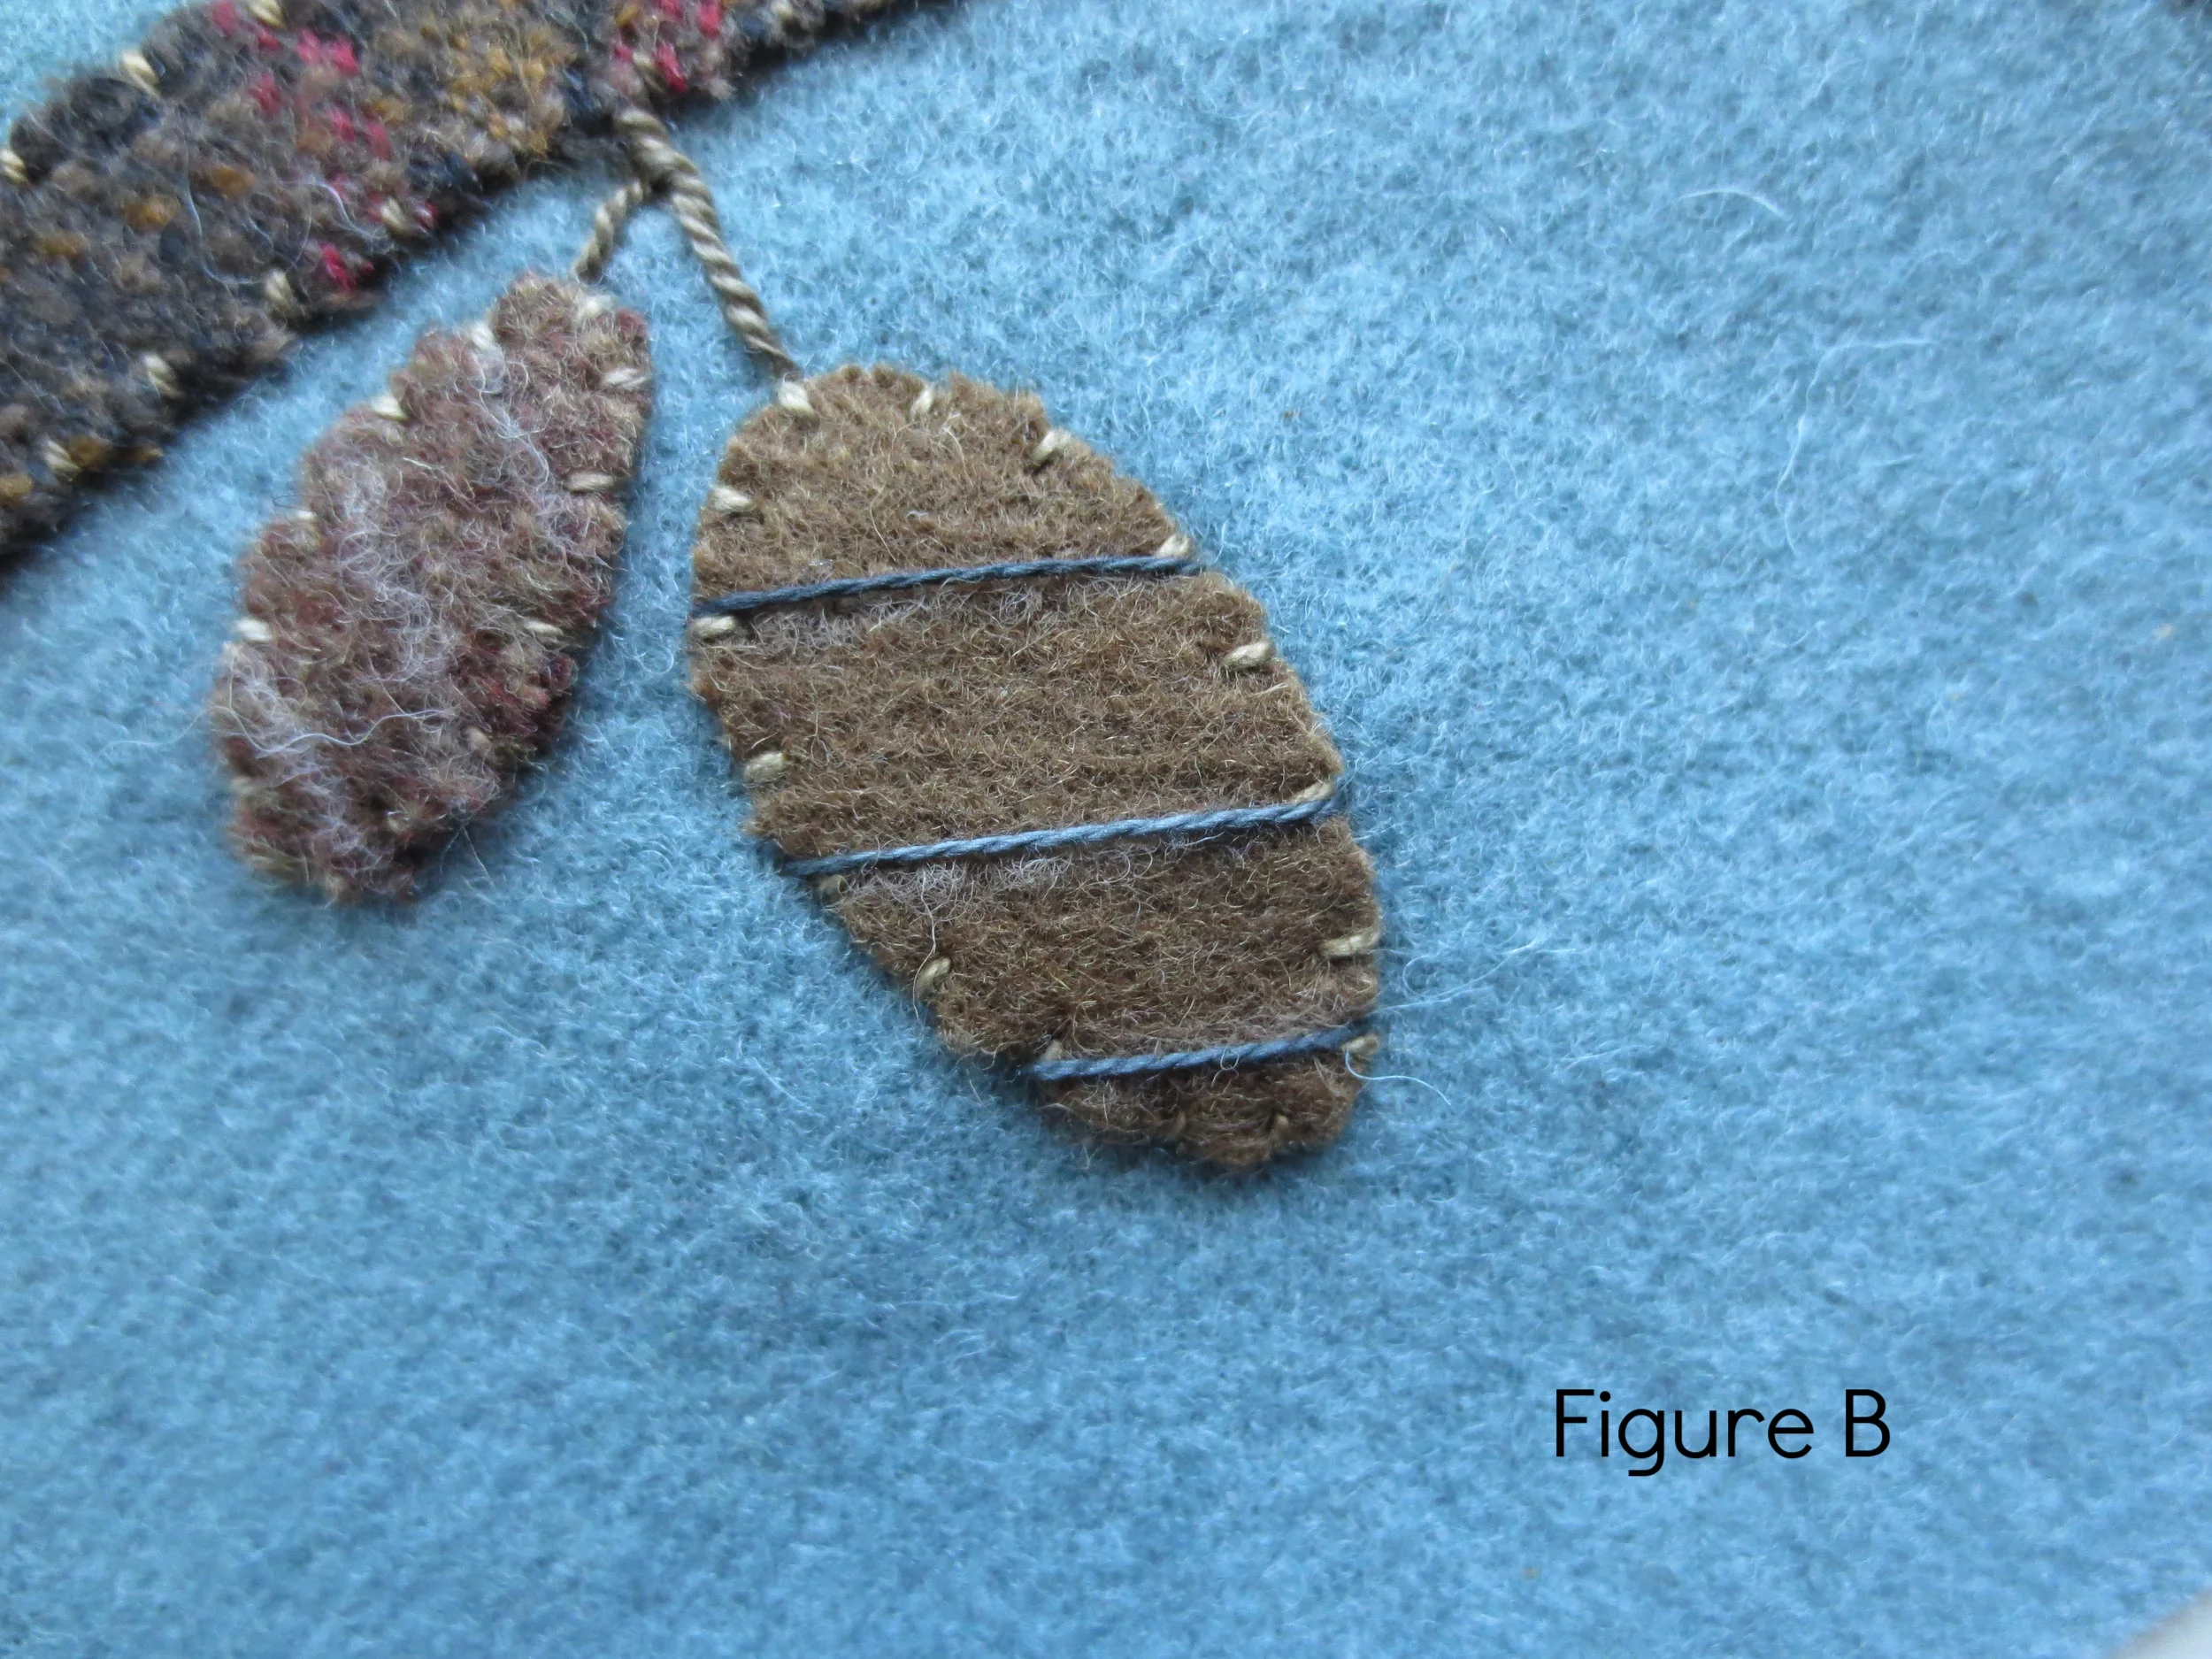
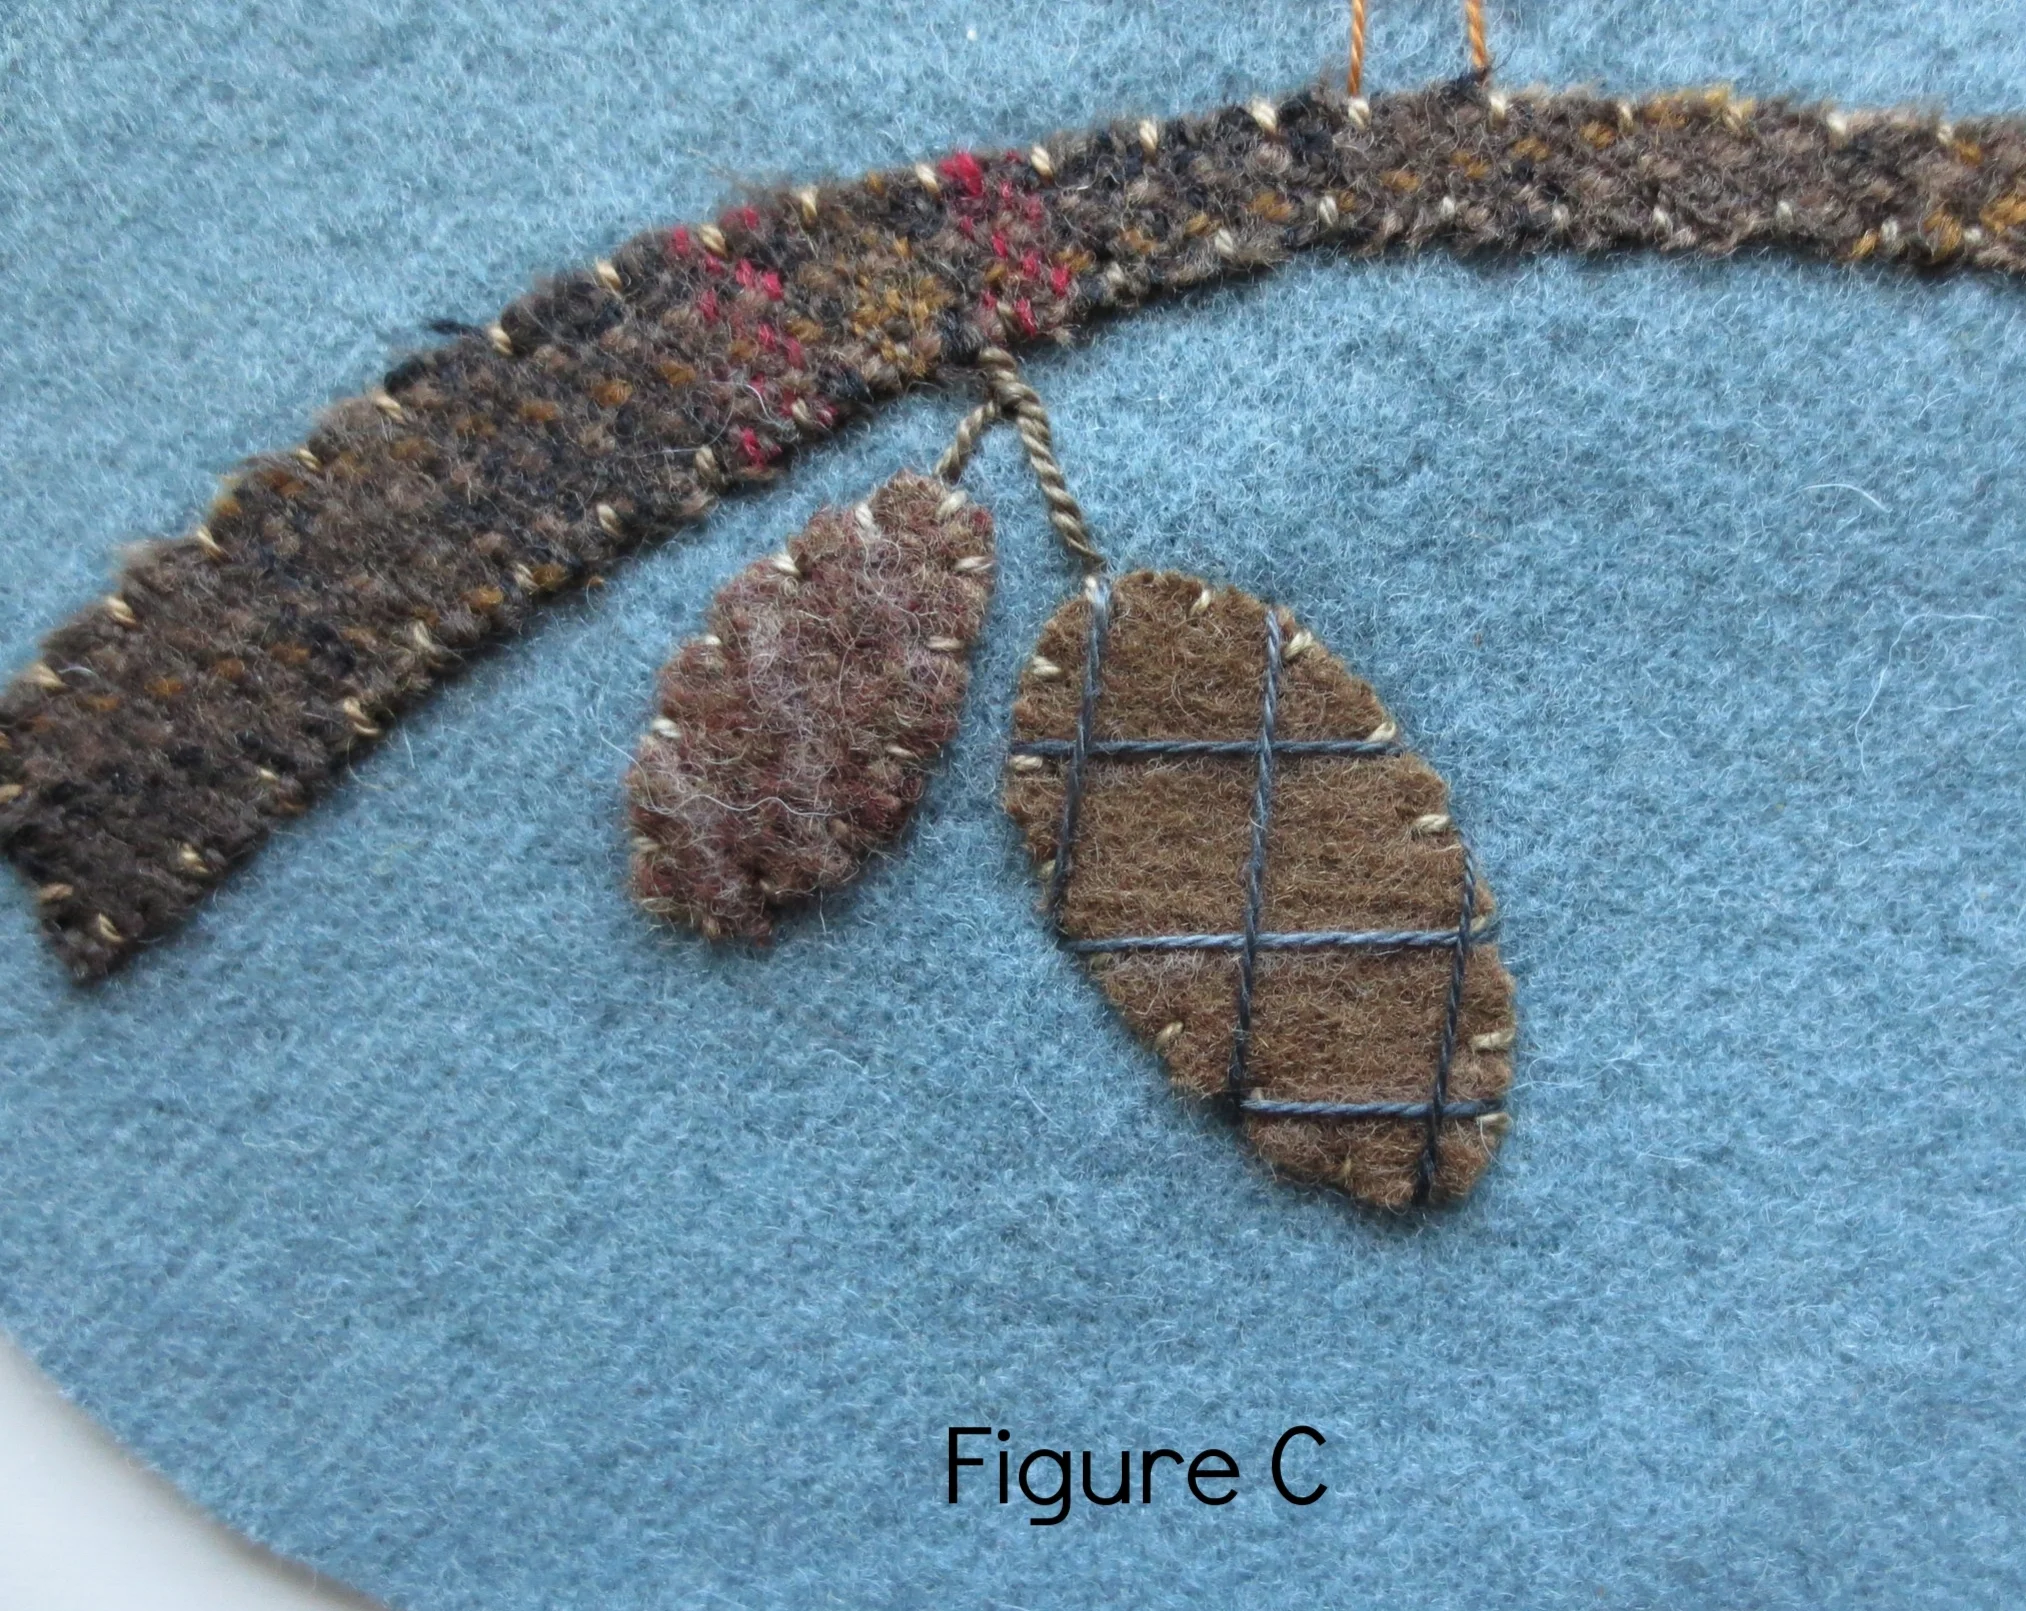
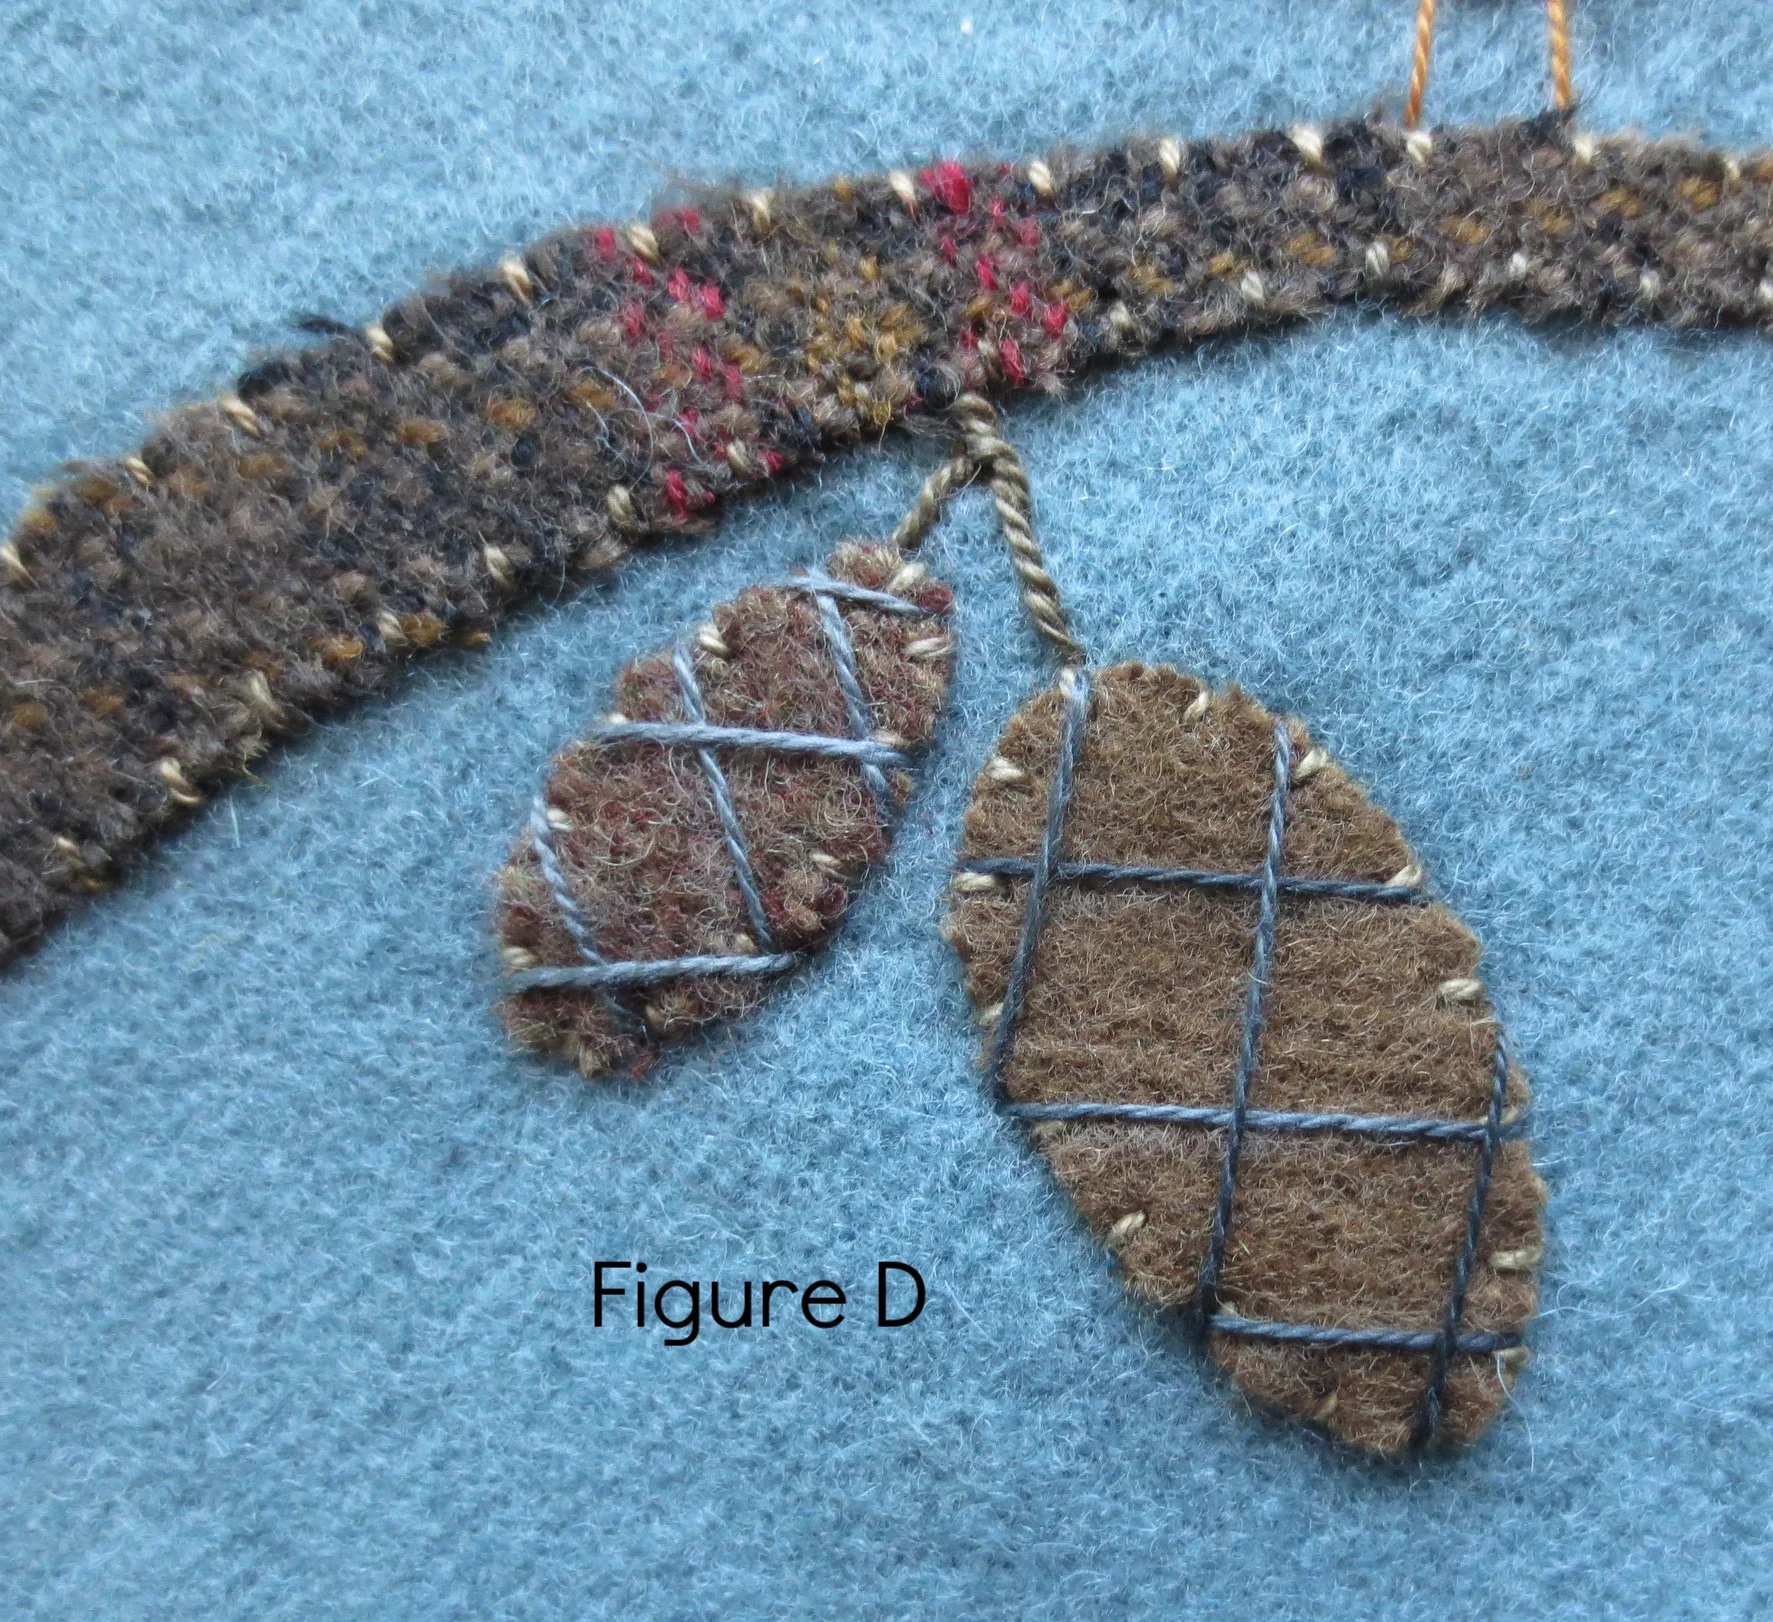
30. Using the layout as your guide, draw 3 diagonal lines across each pinecone (see Figure A below). 31. Straight stitch over the lines with contrasting thread (see Figure B below). 32. With the same thread stitch 3 equally spaced straight stitches perpendicular to the first 3 lines (see Figure C below). 33. Repeat on the small pinecone (see Figure D).
33. Side branches and pine needles
- Using the layout as your guide, draw the side side branches that extend from main branch.
- Use #P9 to stem stitch the side branches.
- Use #O519, size 8 to straight stitch the pine needles.
34. Ornament Assembly
- Place the chickadee side face down and lay the snowman side face directly on top.
- Pin to secure.
- Using black perle, size 8, stitch a running stitch 1/4" from outer edge leaving about a 3" opening on one side.
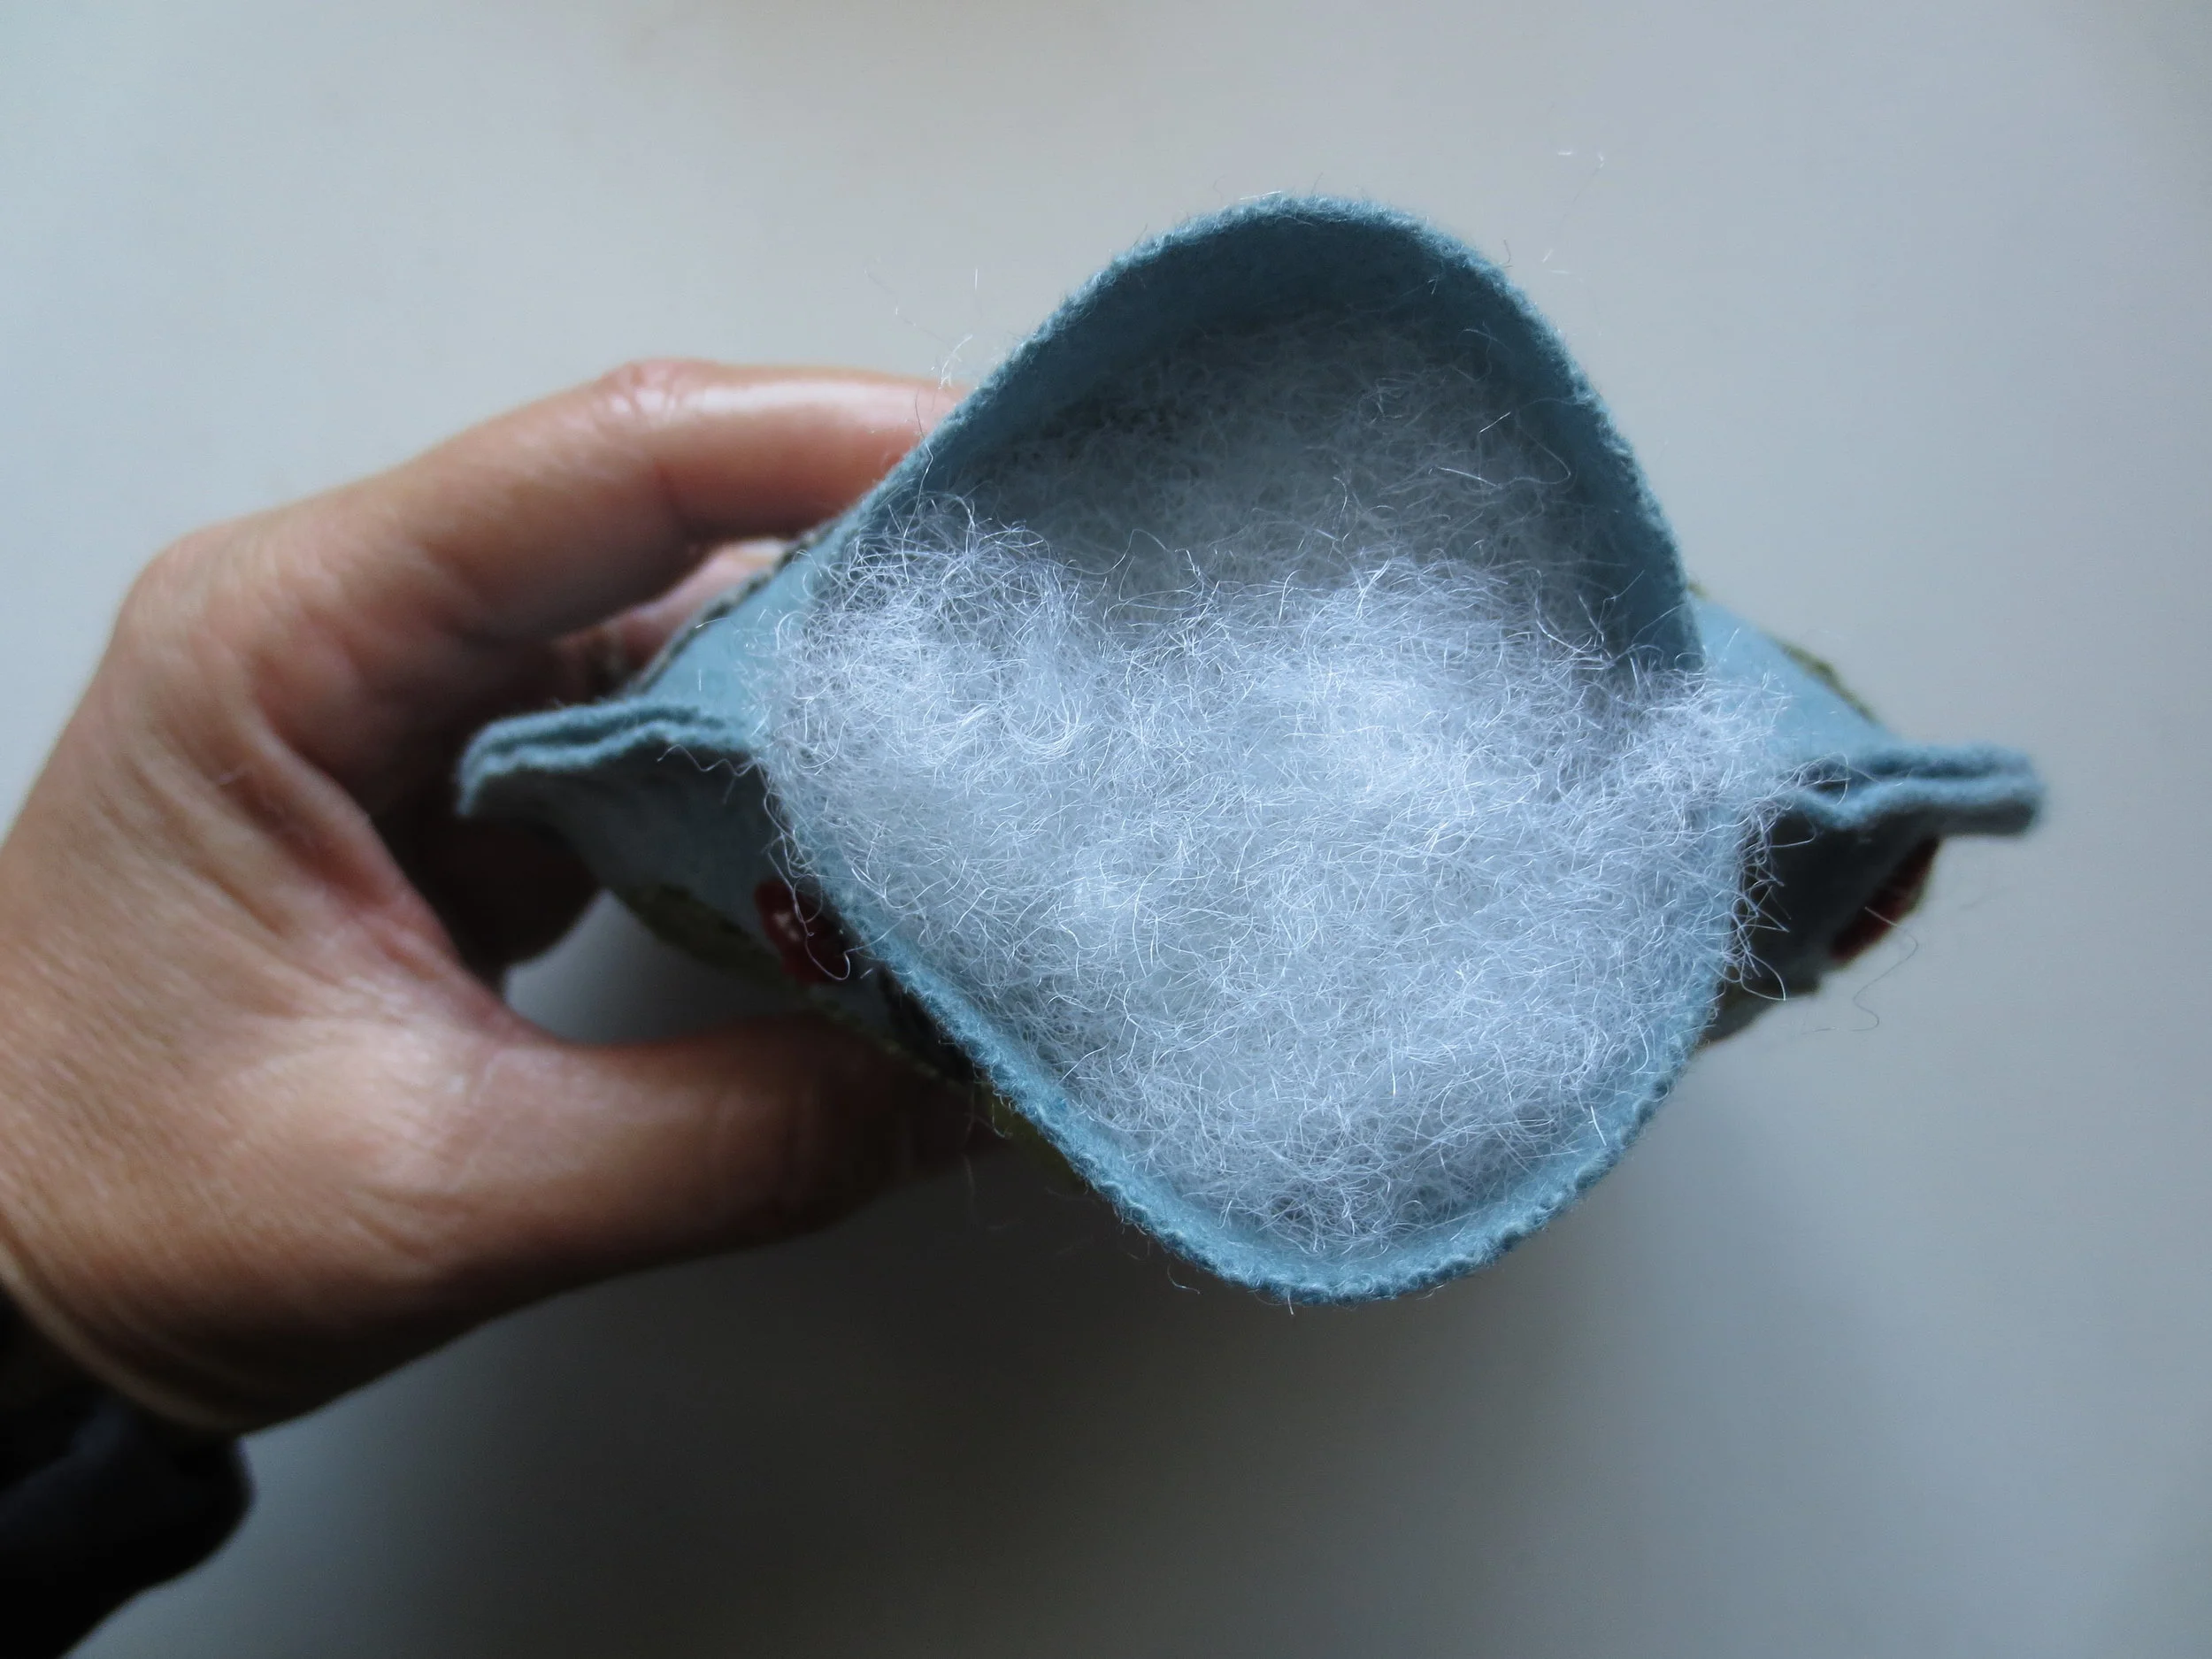
- Open the ornament and lightly stuff with fiberfill.
- Pin or clip the opening closed and continue with the black running stitch to secure. The edges will look a bit wavy, but it will be minimized with the blanket stitch.
- Using the same black thread, blanket stitch the outside edge.
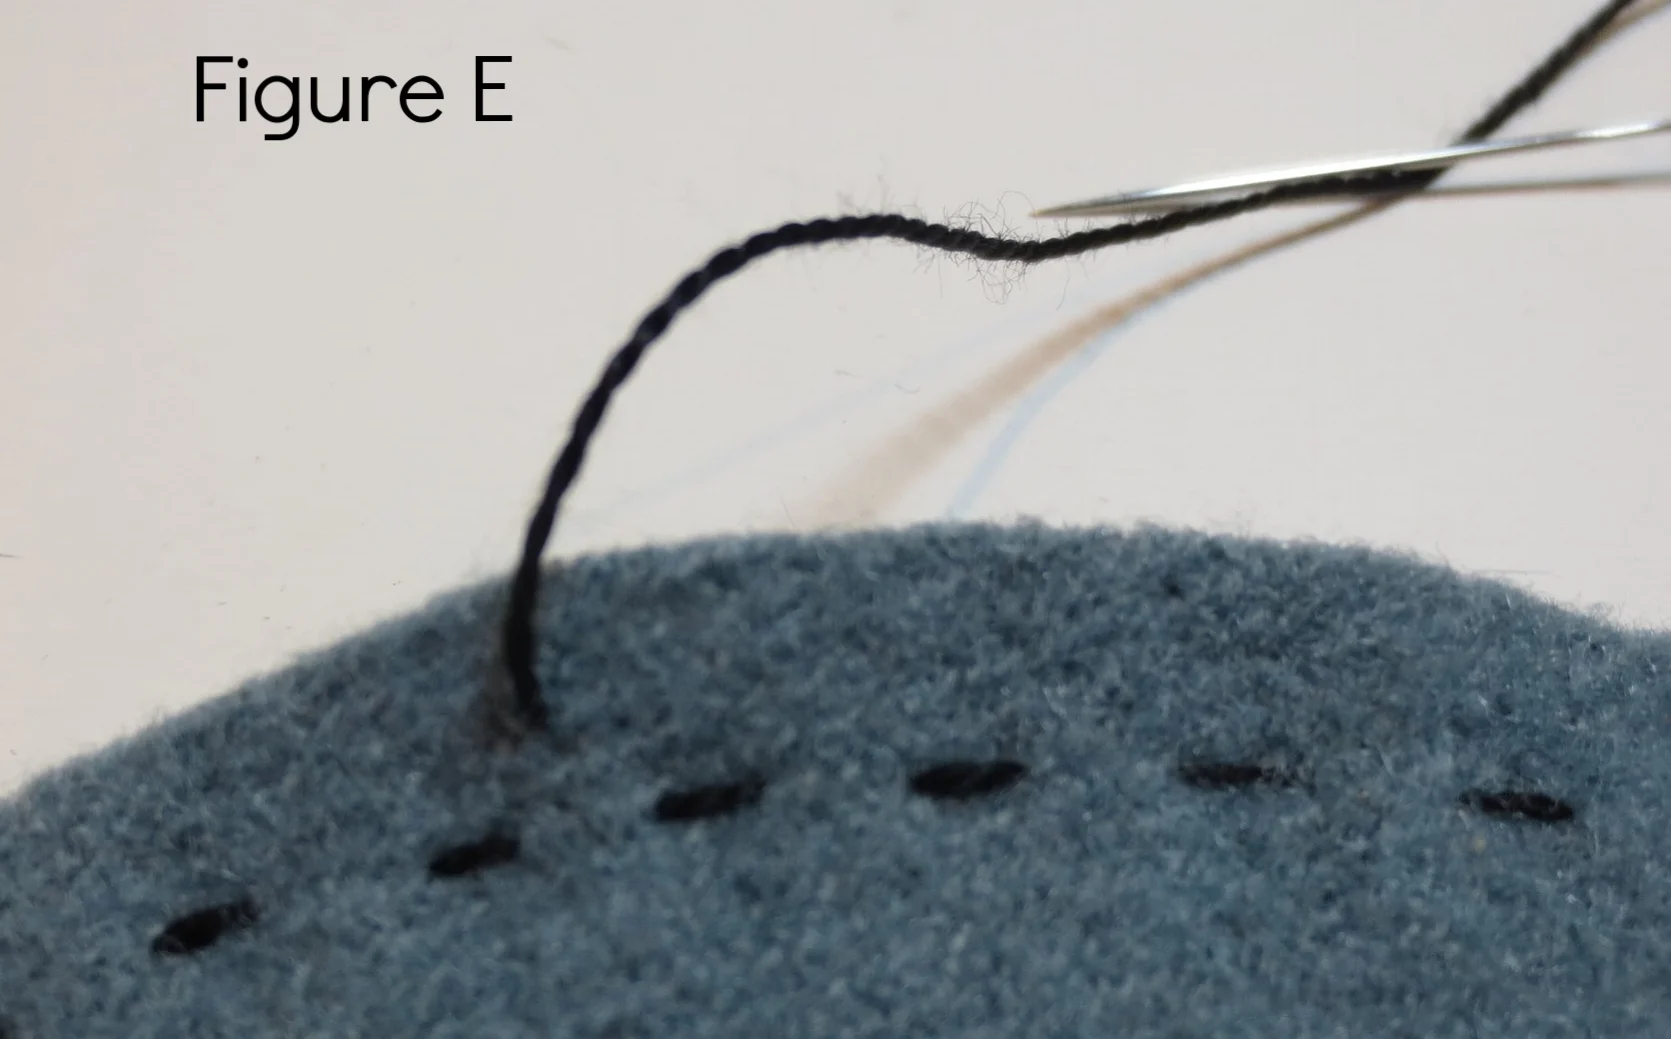
- Begin with the knotted end of your thread between the front and back layers. Come up through the front about 3/16" from the edge. Pull the thread through (Figure E).
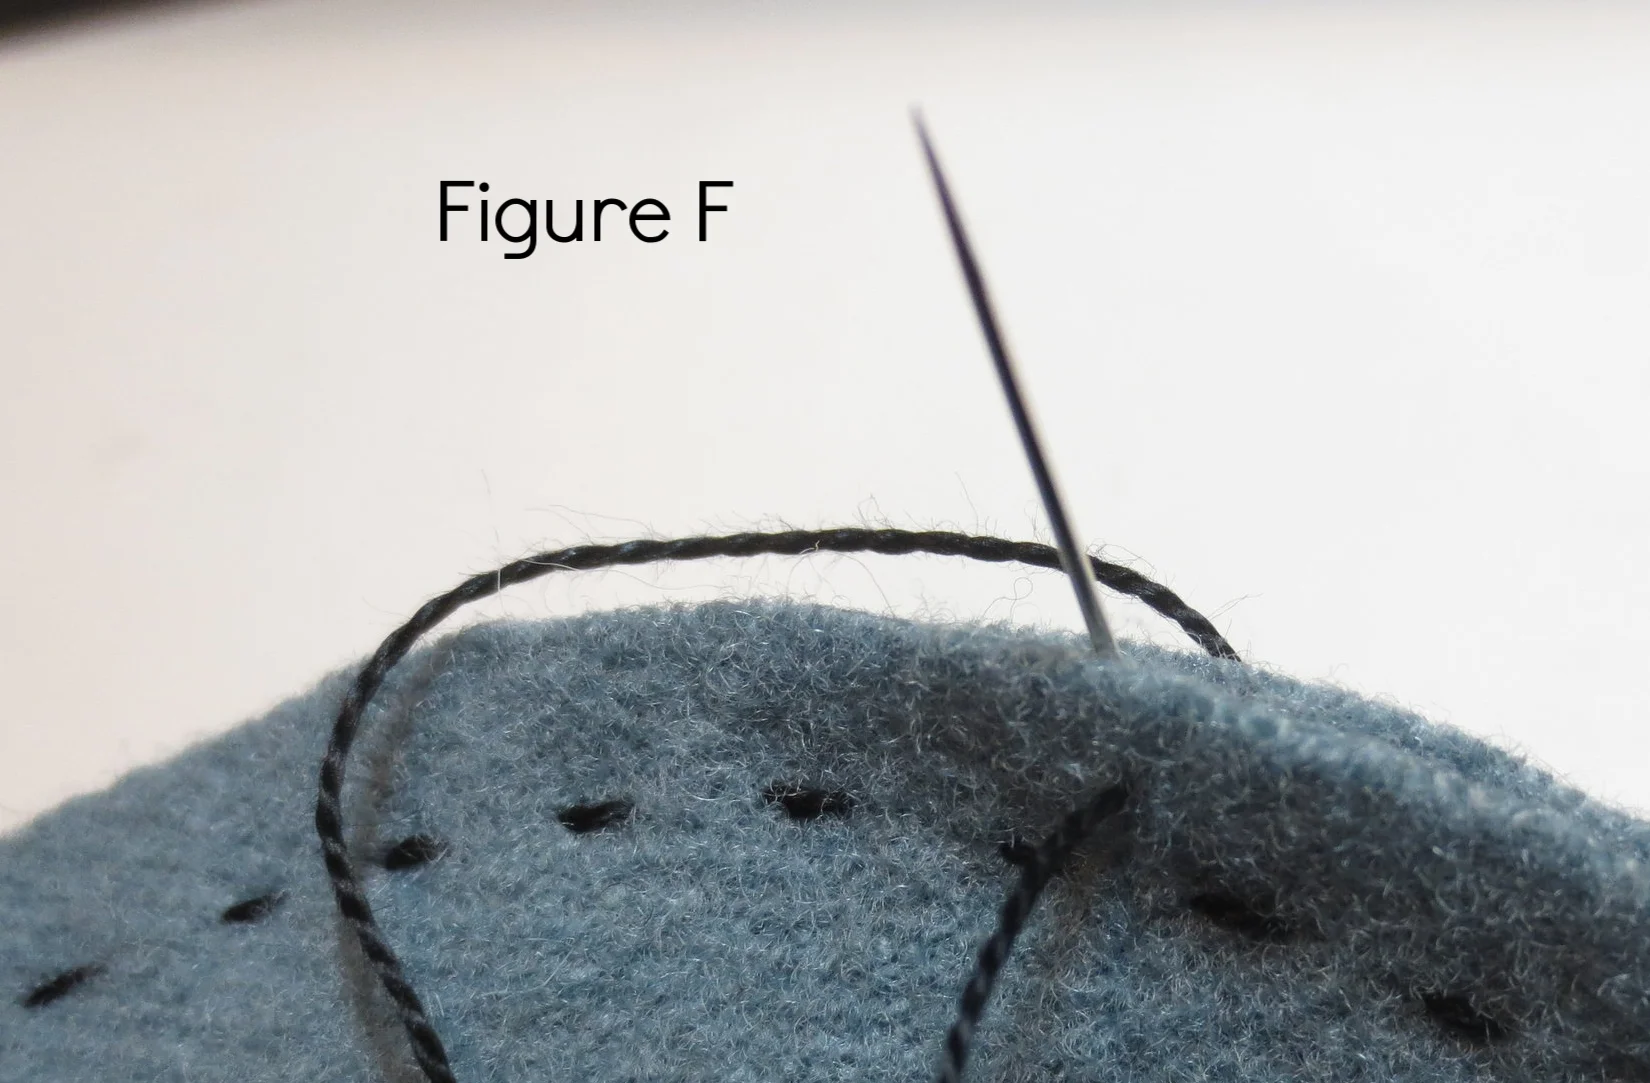
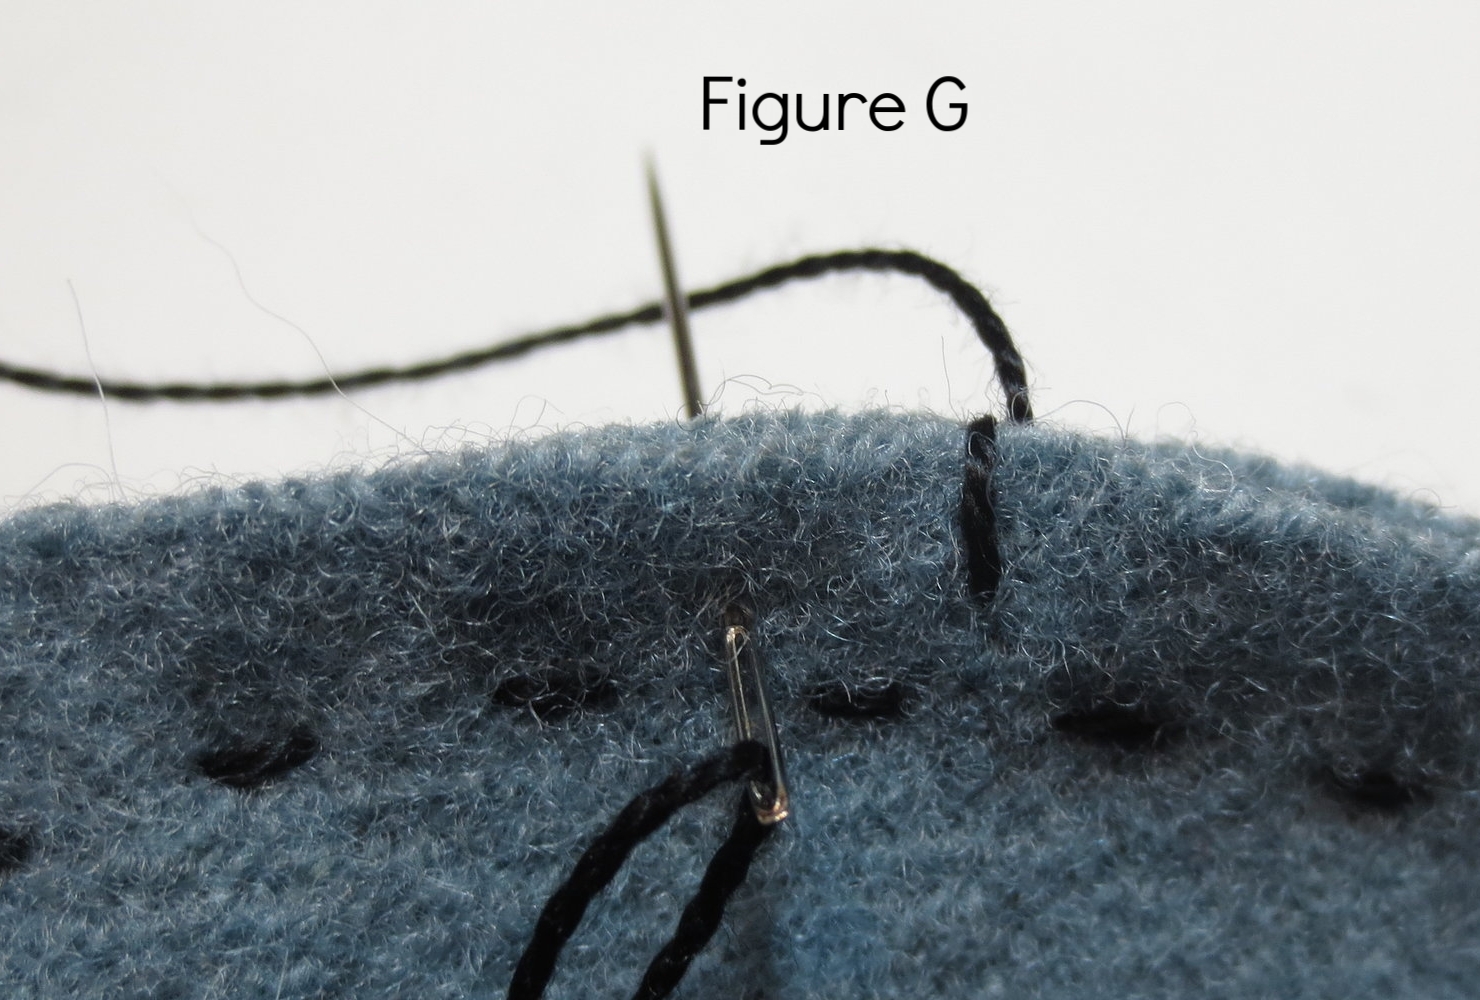
- Insert your needle through the back and come up between the front and back layers, making sure the thread winds around the back of the needle (Figure F). Pull the thread through (Figure G). This is way to make the first stitch only. All additional stitches should be made with the needle traveling through both layers. Refer to the stitch guide for further instructions.
- Continue making blanket stitches all the way around the outside edge. The stitches are about 1/4" apart.
35. Making the Wire Hanger
- Cut a piece of wire about 8" long.
- Place a pencil or pen in the center of the wire. Cross the wire ends and twist 2-3 times like a "twist tie."
- Remove the wire from the pencil and bend the ends so they look like the figure below.
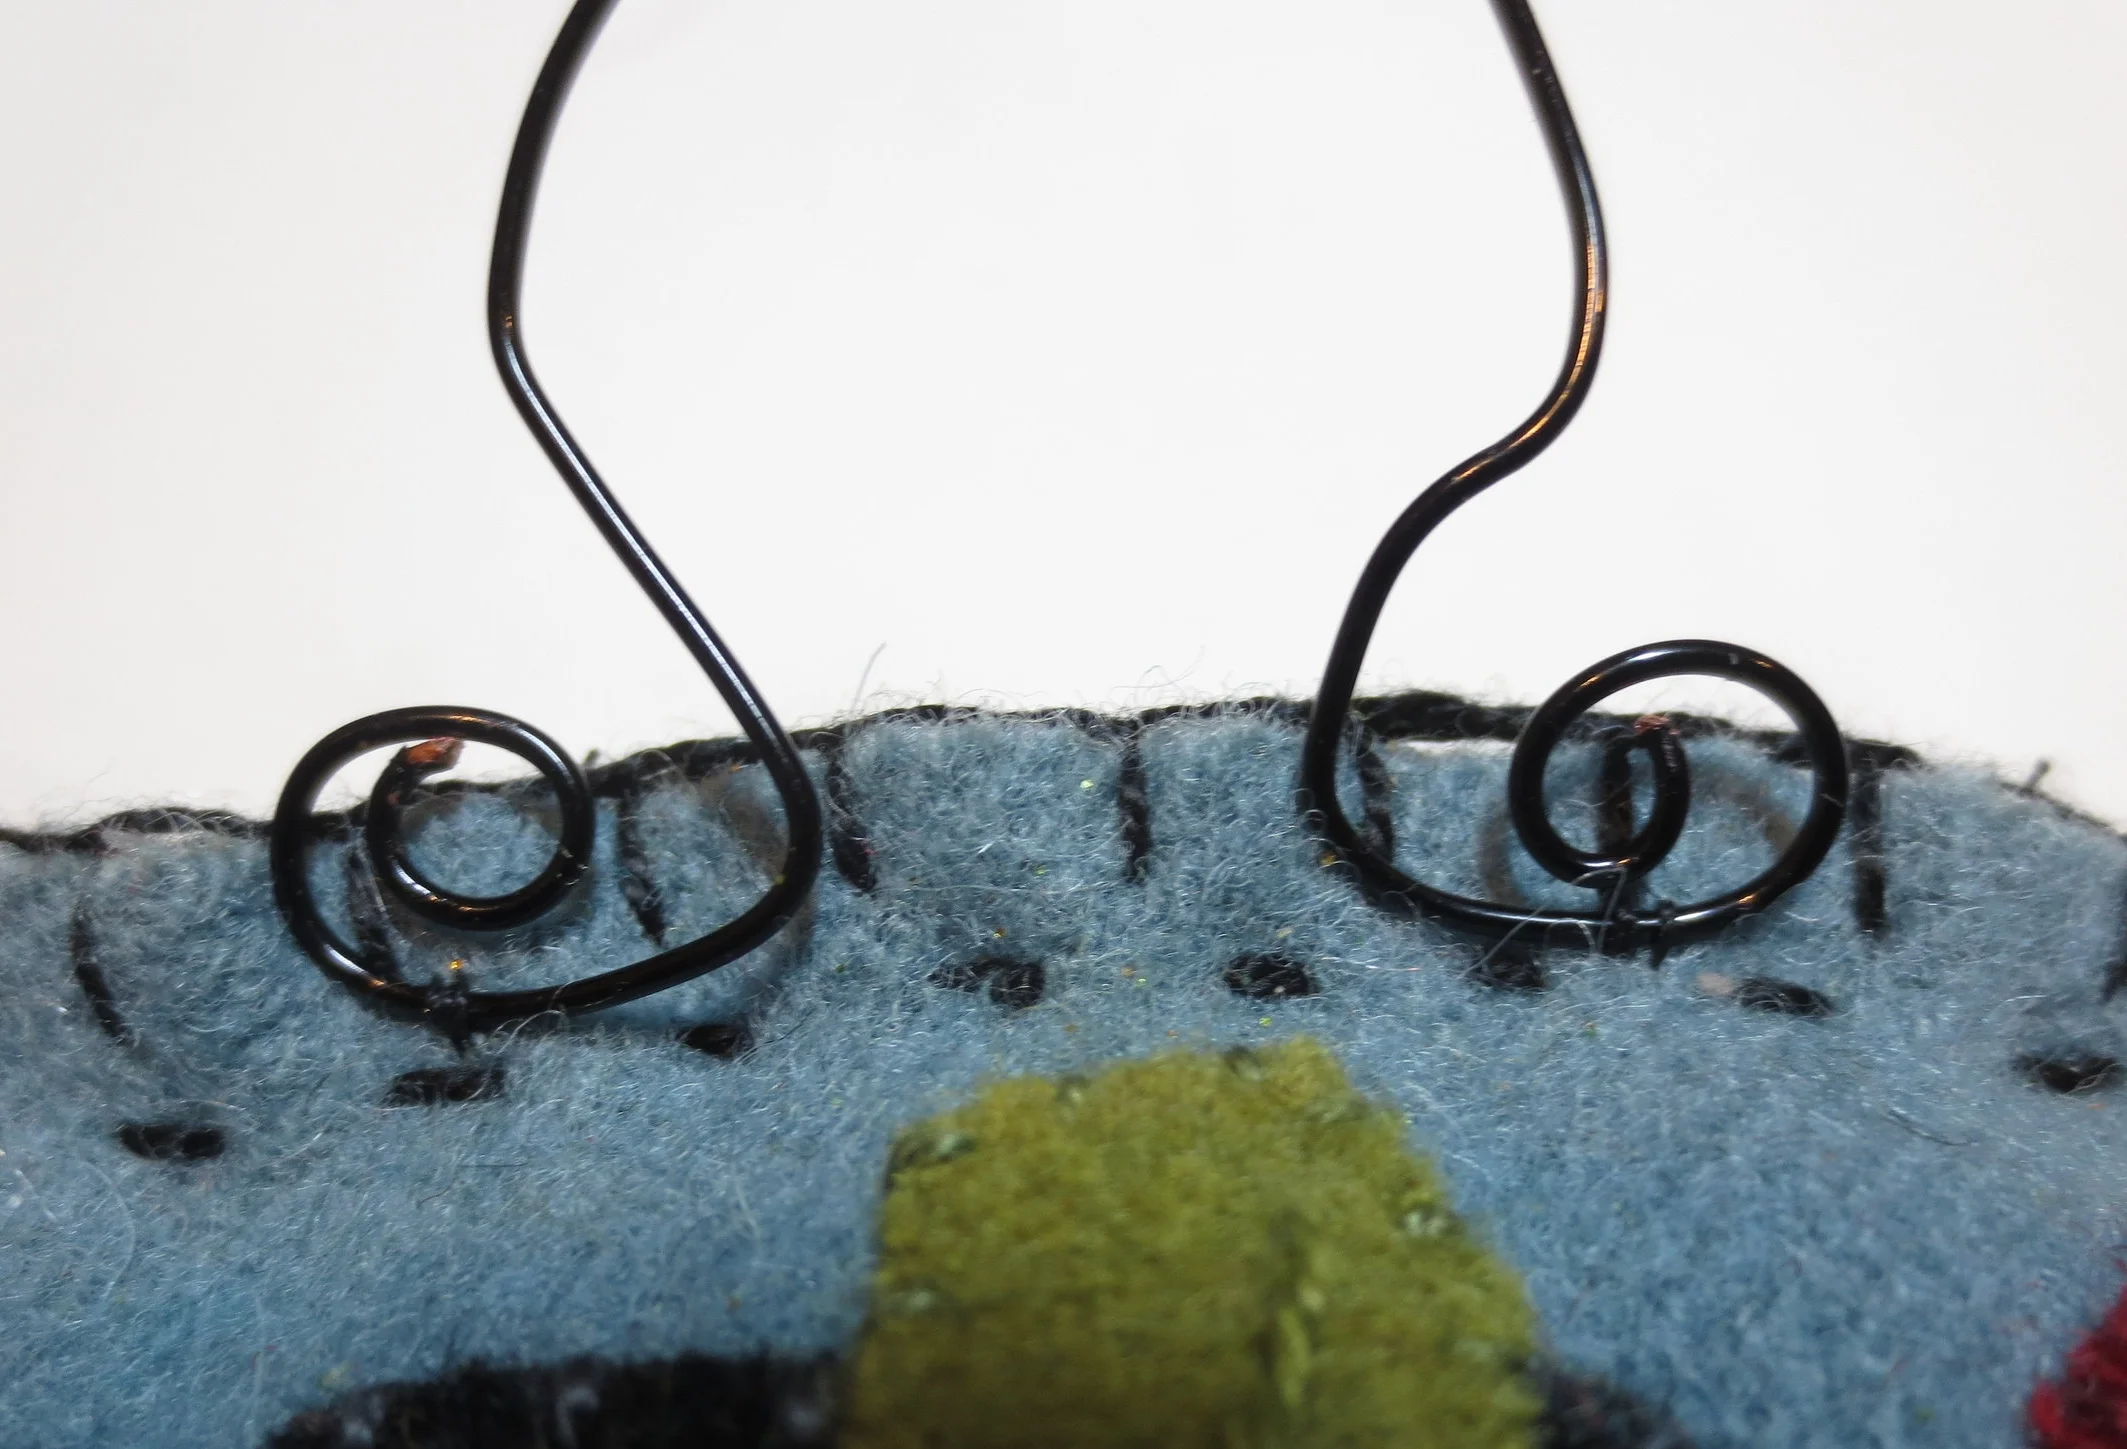
- Holding on to bottom curve of the wire with one hand and using the other hand to clamp the wire end with needle nose pliers, turn your wrist to make a curlicue like the figure below.
- Repeat with the remaining end.
- Pin the wire hanger to the top front of the ornament.
- Make 3 tacking stitches at the base of each curlicue using black, size 12 perle cotton. Make your knots between the front and back layers.
You are done! Your ornament is ready to be hung or wrapped up as a gift for a special someone.
Happy Stitching!


