Gingerbread Wishes and Peppermint Kisses
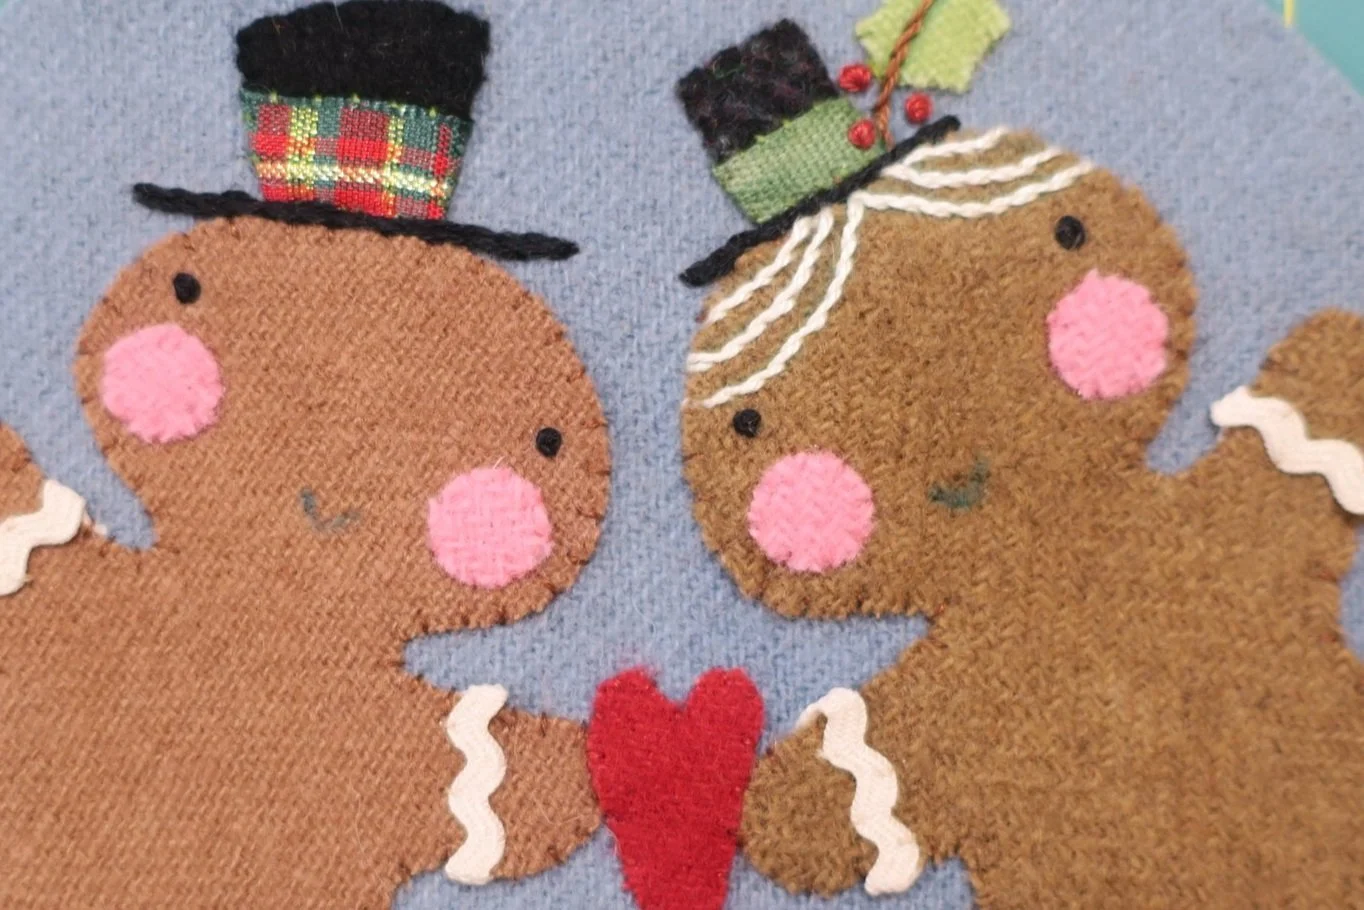
It’s ornament time! These gingerbread cuties, who are sporting top hats with festive hat bands, are the latest in my Christmas ornament design collection.
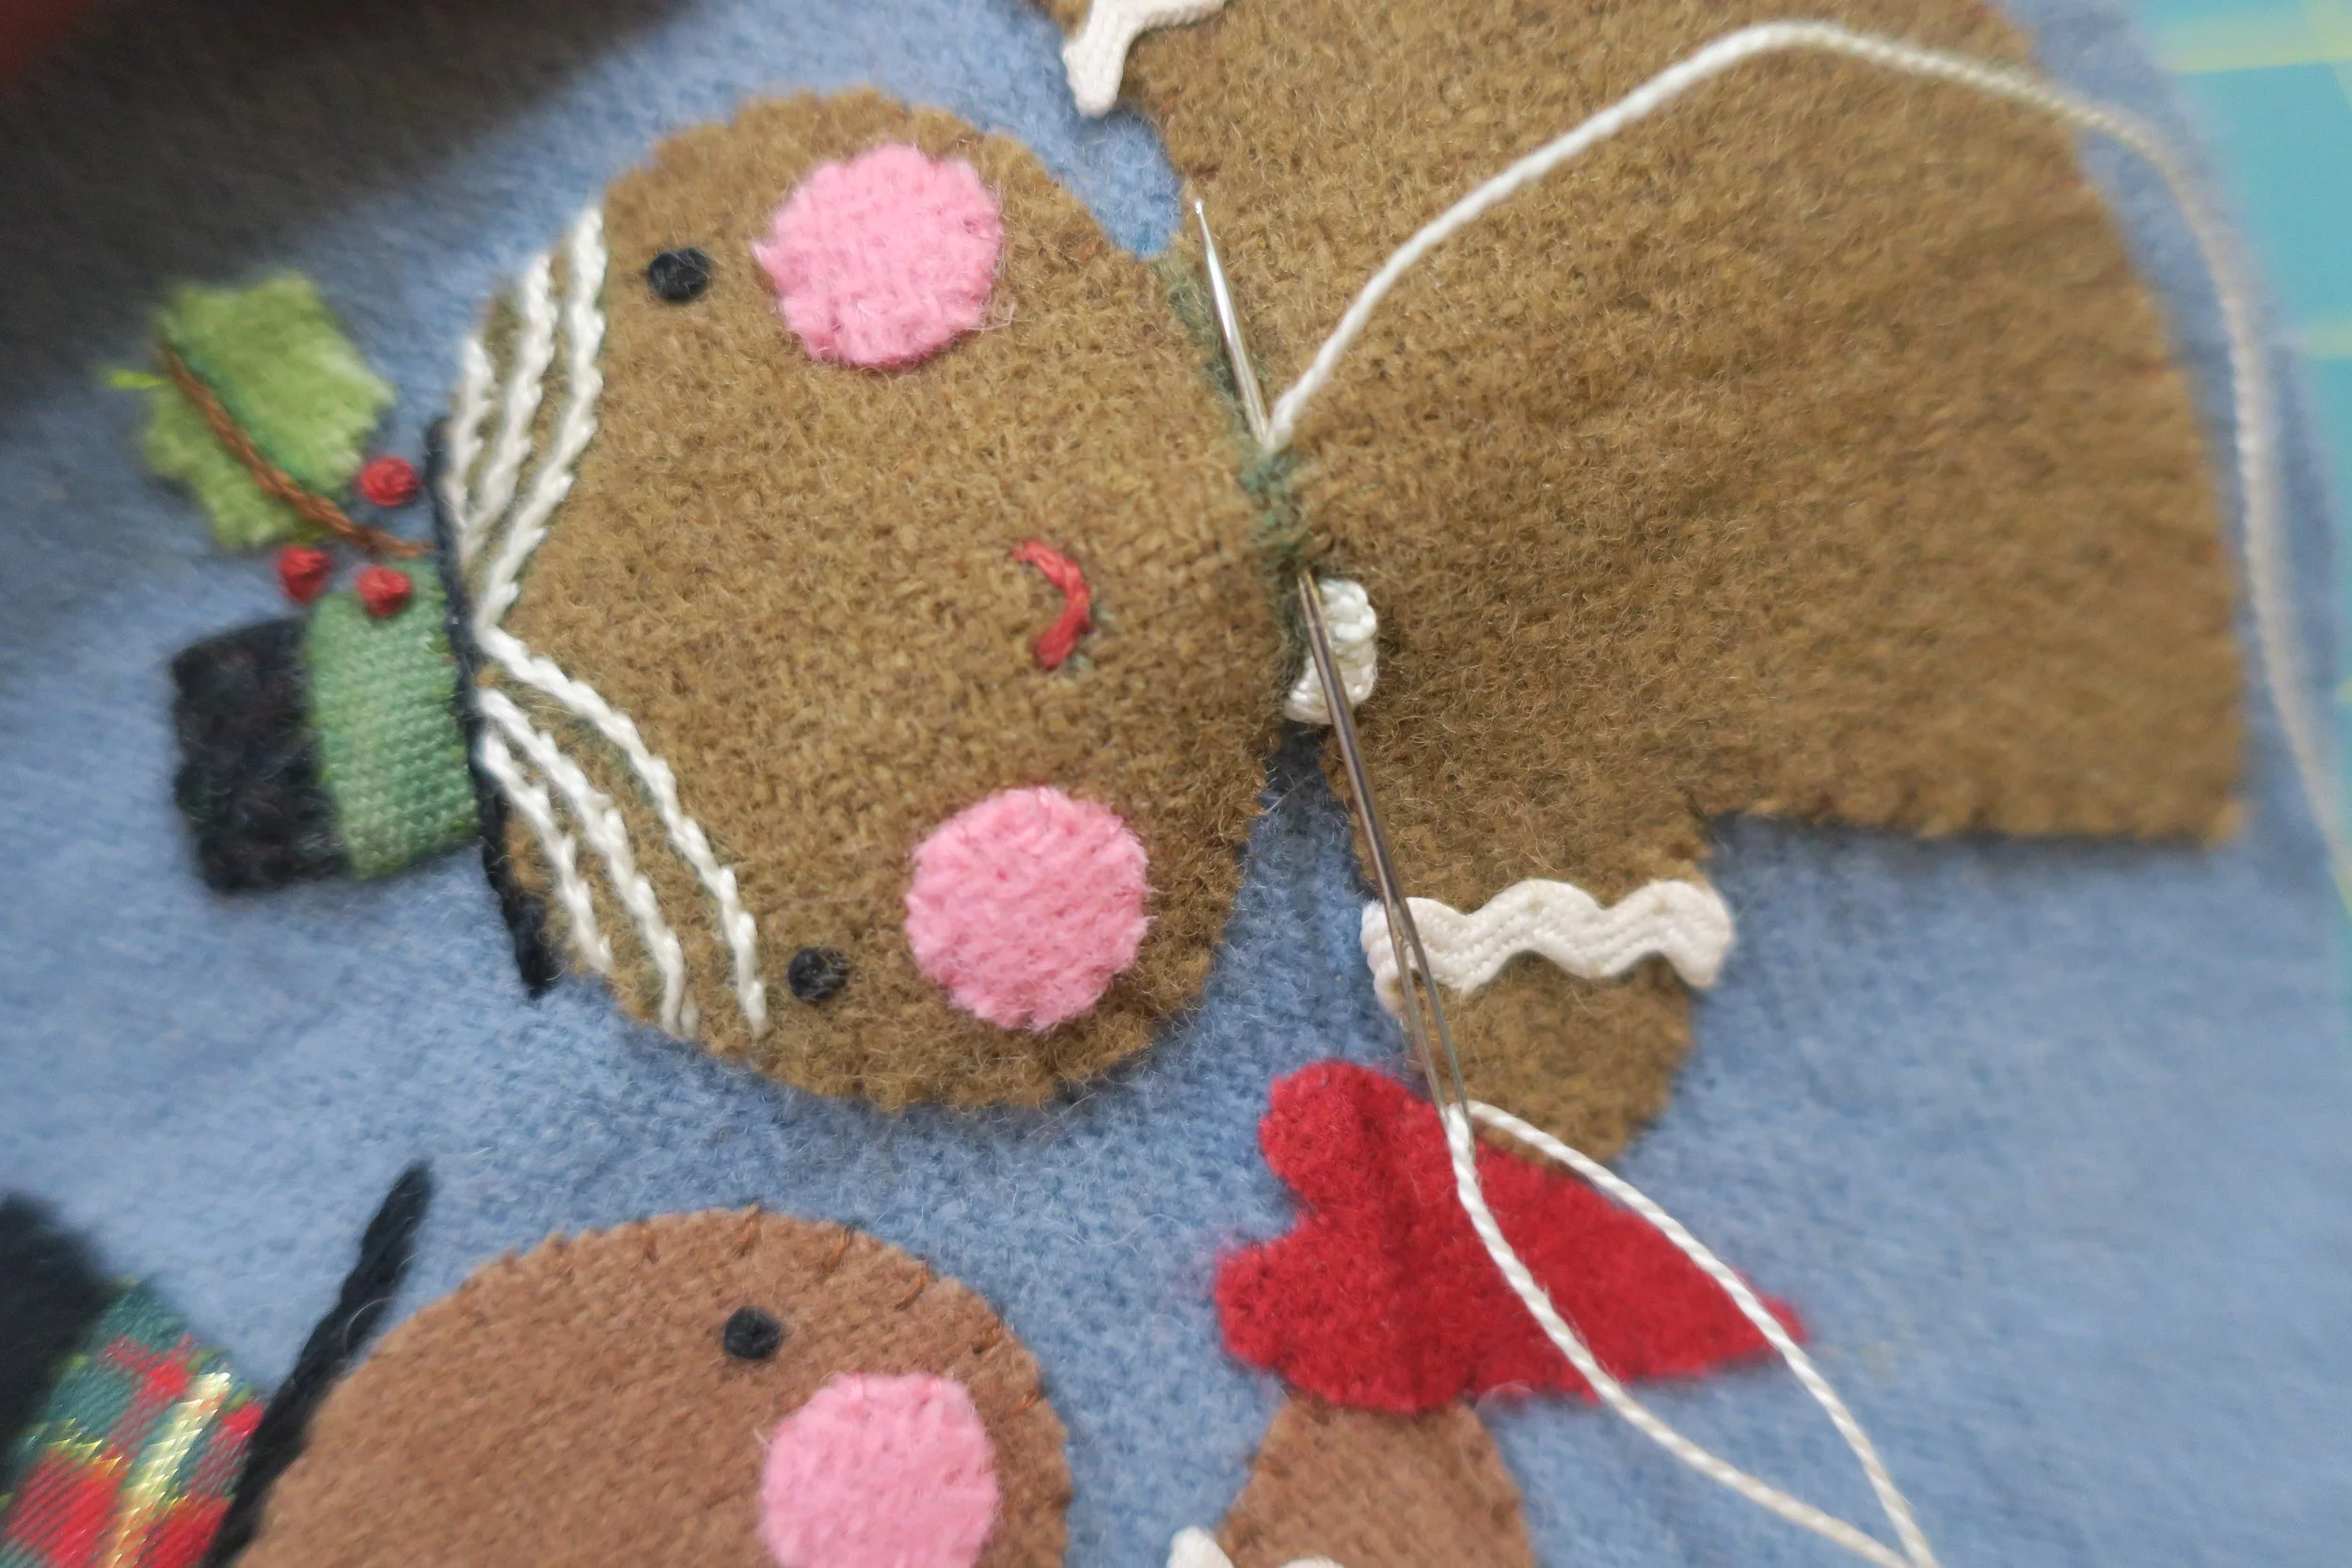
The gingerbread girl has a cast on stitch collar like the Christmas Angel ornament from last year, but I doubled the amount of stitches to give it a more ruffled look.
Also, I added a peppermint on the back of the ornament for a little kiss of holiday cheer.
Happy stitching!
You will need:
Gingerbread Wishes and Peppermint Kisses Layout and Pattern
Felted wool or wool felt - suggested colors
background - 6 1/2” x 12” blue
gingerbread boy - 3” x 3 1/2” cinnamon
gingerbread girl - 3” x 3 1/2” milk chocolate
hats - 1” x 2” black
cheeks - 1” x 1” rose pink ( a 3/8” leather punch makes these easy to cut out)
heart and peppermint swirl - 3” x 3” red
peppermint - 2 1/2” x 2 1/2” cream
holly leaf - 1” x 1” yellow green
Ribbon and ric rac
gingerbread boy hat band - 1 1/4” piece of 3/8” wide Christmas Tartan plaid ribbon
gingerbread girl hat band - 1” piece of 1/4” wide green ribbon
icing - 4” piece of 1/4” wide cream ric rac
5” piece of narrow (1/8” or 4mm) red ribbon
Thread
6 - strand embroidery floss in colors that match your wool and ric rac
Perle 8 - ecru
Miscellaneous
fusible web like Heat n Bond Lite or Vilene Meltfuse
freezer paper
Iron
chenille needle, size 24
milliners needle, size 1 (optional) This is used to create the collar of the gingerbread girl
Fabric chalk pencil or water soluble fabric pen for light and dark fabrics
light box or bright window
scissors
Instructions
1. Trace the patterns, except for the background, onto fusible web and then cut out leaving a small (1/8”) border around each pattern.
2. Trace the background pattern onto freezer paper and then cut out leaving a small border around the traced line.
3. Fuse the patterns onto designated wools and then cut out along the traced lines.
4. Cut the ric rac into four 1” pieces and then place on the arms of the gingerbread people using the layout as a placement guide.
5. Use 1 strand of floss to tack the ric rac in place (1 stitch on each of the ric rac hills).
6. Center the ribbon hat band on each of the hats. Use 1 strand of floss to whip stitch each of the bands in place, turning under the raw edges.
7. Position the gingerbread people, hats and heart onto the background wool. Pin bodies in place. Do not fuse.
8. Remove hats and heart.
9. Remove pins, tuck raw edges of ric rac under arms, and then fuse gingerbread people in place.
10. Reposition hats and heart. Add cheeks and holly leaf. Fuse in place.
12. Use 1 strand of floss to whip stitch all wool pieces in place.
13. Use a chalk pencil or fabric marker to mark the position of the eyes.
14. Use 2 strands of black embroidery floss to stitch a double wrapped French knot for each eye.
15. Draw the hat brims.
16. Use 3 strands of black floss to stem stitch over the line. Repeat with a additional stem stitched line directly under the first.
17. Draw the holly leaf stem.
18. Use 2 strands of brown floss to stem stitch over the drawn lines.
19. Use 2 strands of red floss to make 3 French knot berries. Use the layout for positioning guidance.
20. Draw the gingerbread girl’s hair.
21. Use 1 strand of ecru perle 8 to stem stitch over the drawn lines.
22. Draw the mouths.
23. Use 2 strands of red floss to back stitch over the drawn lines.
24. Let’s work on the ruffled collar. The ruffles are made with a cast on stitch like the one used on last years angel ornaments. A milliners needle, size 1 works well for this stitch, but the chenille needle will work in a pinch since you will only be casting on 10 stitches.
For more detailed instructions I suggest Mary Corbet’s Needlenthread video.
Draw a guide line across the neck of the gingerbread girl. Divide the line into 4 equal sections, marking each one with a dot.
Using 1 strand (at least 18” long) of ecru perle cotton, bring the needle up at the end of the first stitch (first dot). Pull the thread through.
Insert the needle back into the guide line at the edge of the neck, and then back up in the same hole where you first brought the thread up. Leave the needle in place, do not pull the needle through.
Bring the thread toward you, over your right forefinger that lies perpendicular to the needle. Loosely hold the thread with your right thumb against your middle finger, and then rotate your forefinger to the left while straightening your forefinger. This will create a loop that you can cast on to the end of your needle.
Cast on 10 loops, pulling each one snug against the needle.
Hold the cast on loops with your left thumb on top and forefinger under the wool, and then pull the needle through up and towards you. The cast on stitches will lay down against the wool. If you want a more looped look, add 2 - 3 more cast on stitches.
Repeat 3 more times for a total of 4 groups of cast on stitches.
25. Bow Tie
Center the red ribbon on the neck of the gingerbread boy, and then use 1 strand of red floss to stitch a single tacking stitch in the middle of ribbon.
Tie a bow, adjusting the size to fit the neck.
Trim the tails flush with the loops.
Use 1 strand of red floss to tack down the loops of the bow.
26. Use 2 strands of red floss to stitch French knots on the ruffles of the gingerbread girl’s collar.
27. Heart - The only embellishment on this will be a simple couched stitched outline. I used this stitch several times in the House on Flowerpot Hill design.
Use 1 strand of ecru perle 8 as your lay down thread, and 4 strands of red floss as your working thread.
28. Use 1 strand of ecru perle cotton to stitch 2 black buttons on each of the gingerbread people.
The front is complete!
29. Peppermint Applique
Position the peppermint on the center of the background wool, and the fuse in place.
Position the red swirl on the peppermint and then fuse in place.
Use 1 strand of matching color floss to whip stitch each of the wool pieces in place.
Draw guide lines for the swirls between the arms of the large red swirl.
Use 2 strands of red floss to stem stitch over the drawn lines.
Draw the cellophane outline around the peppermint, using the layout as your guide. This is a wonky outline, so don’t try to be exact — embrace imperfection.
Use 1 strand of ecru perle 8 to back stitch over the outline.
Draw the gather lines that radiate out from the sides of the peppermint. Remember…embrace imperfection.
Use the ecru thread to straight stitch over the drawn lines.
30. Refer to step 34 on the ornament assembly section of Tis The Season blog post for instructions on how to complete the ornament. Use ecru perle 8 instead of black. This includes information on making a cute wire hanger too.
Cheers Everyone!


