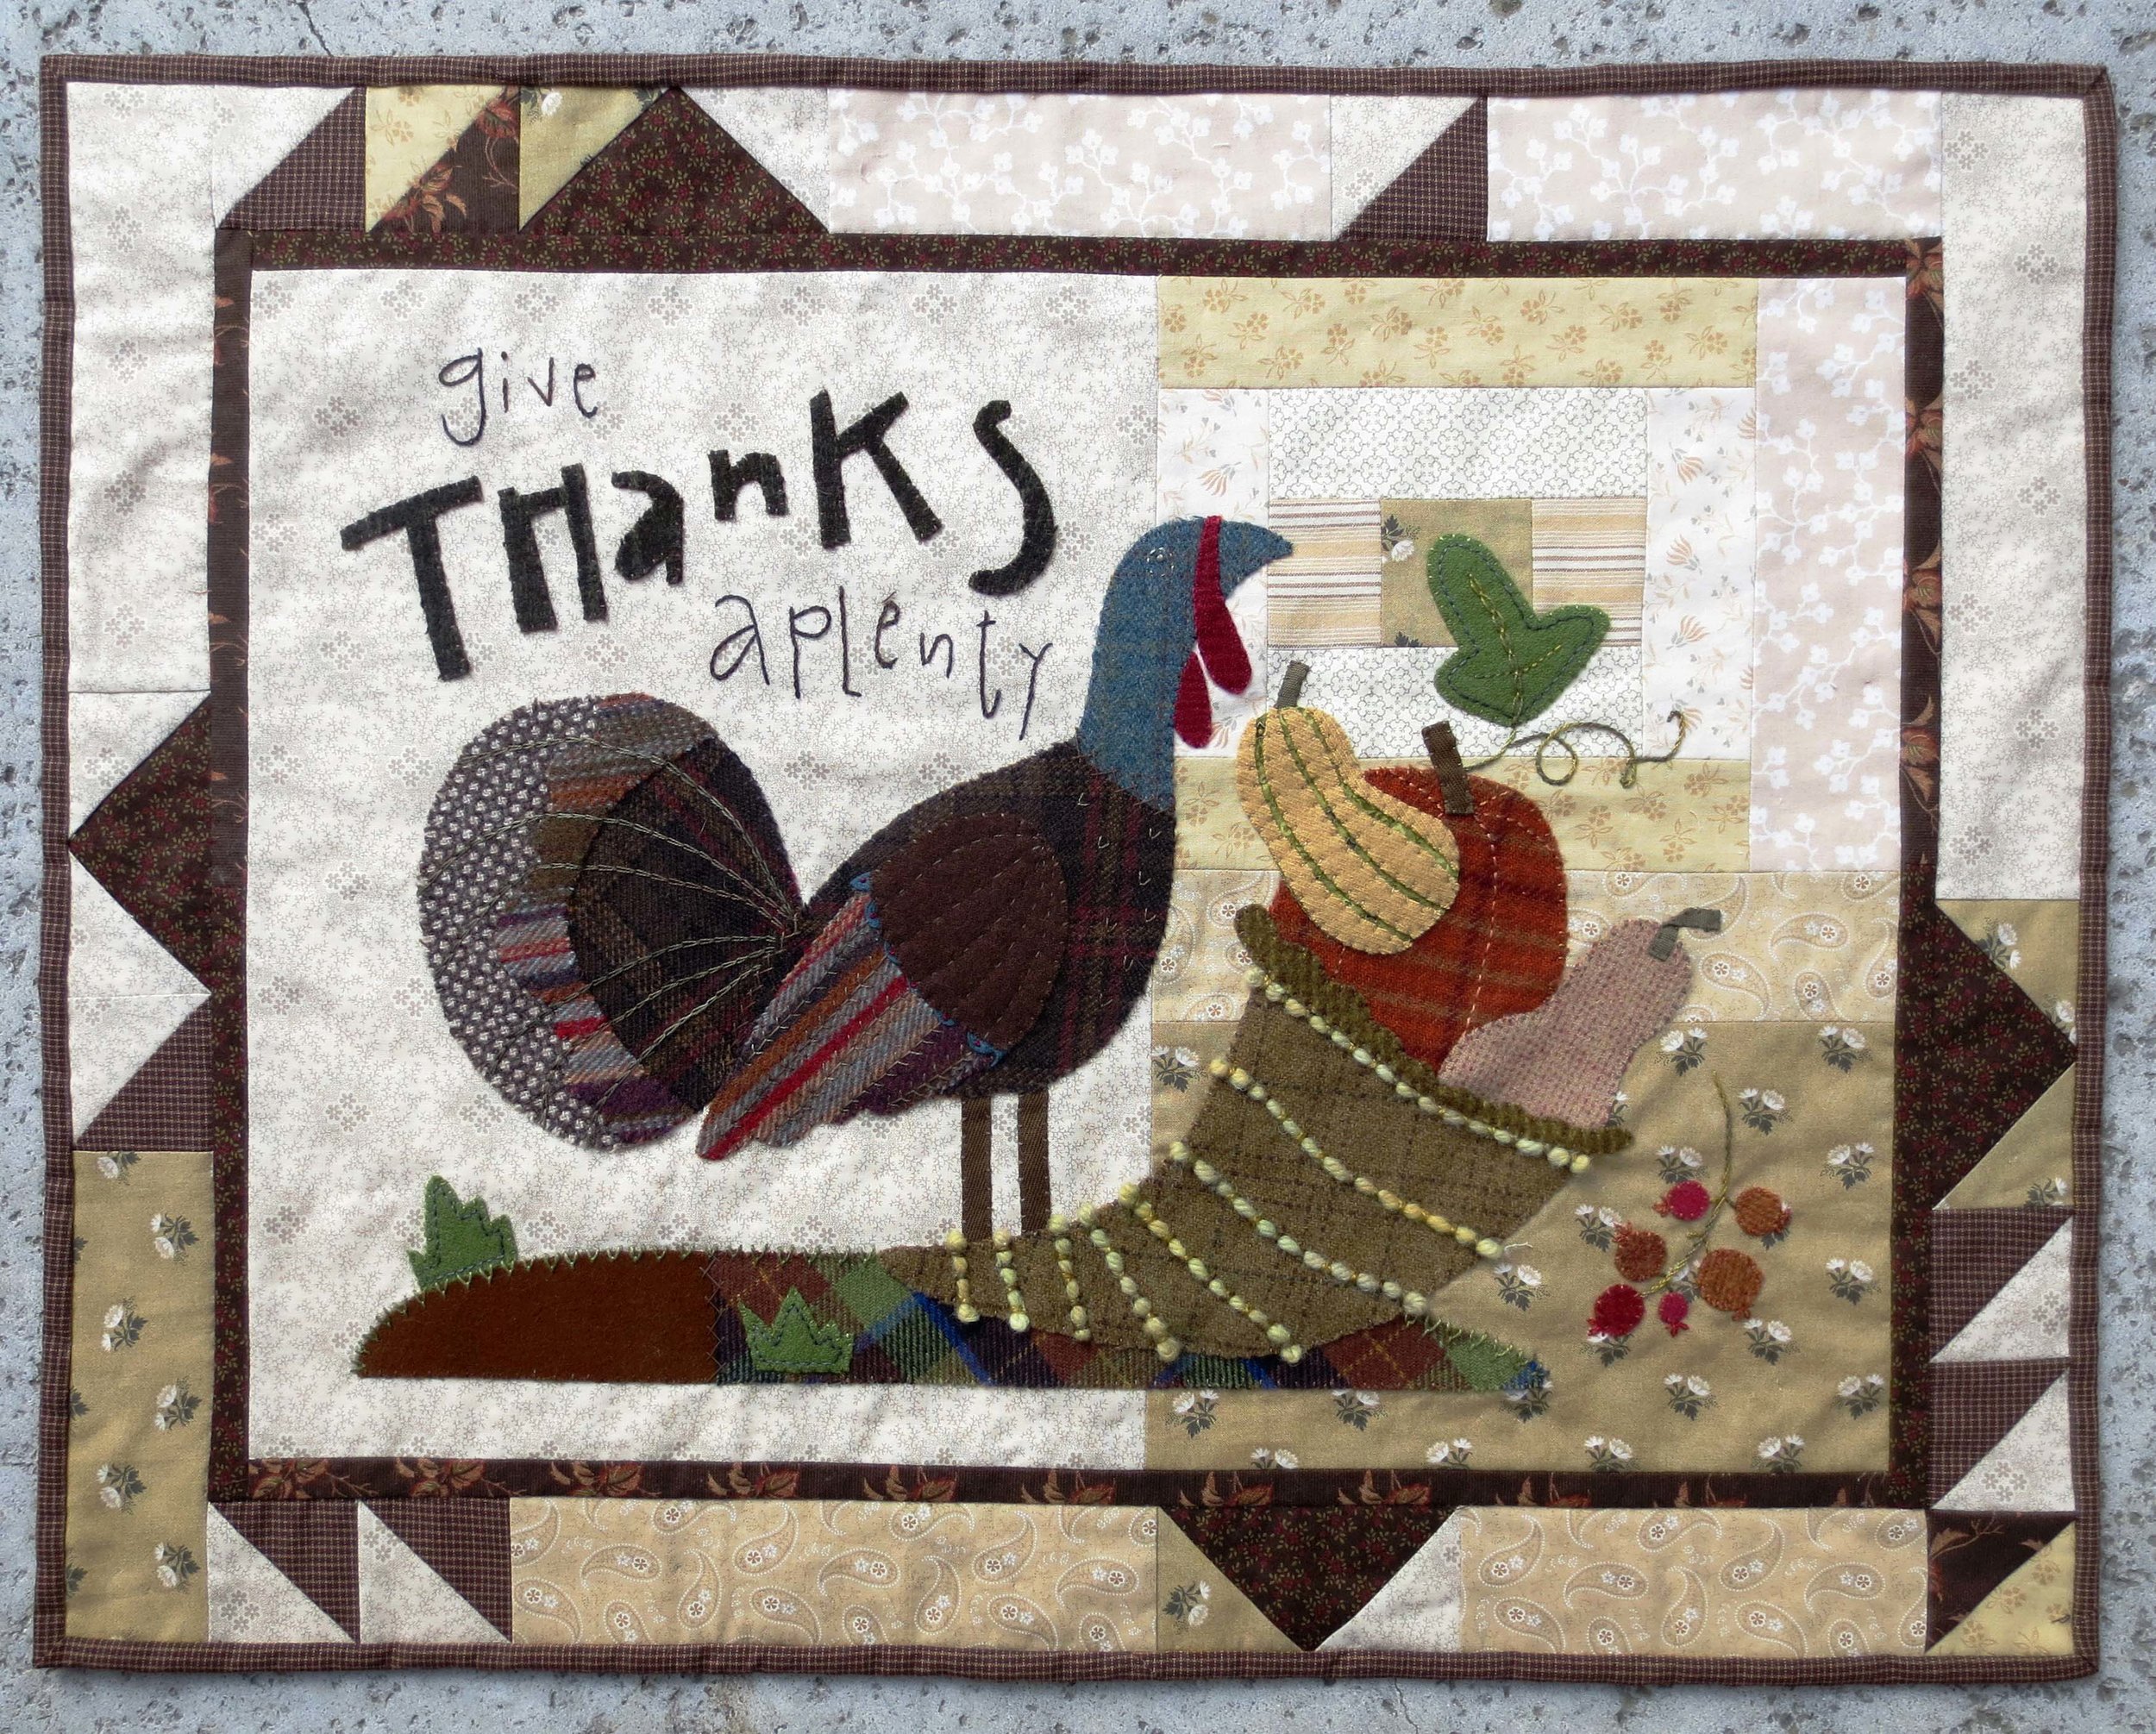
Give Thanks Aplenty
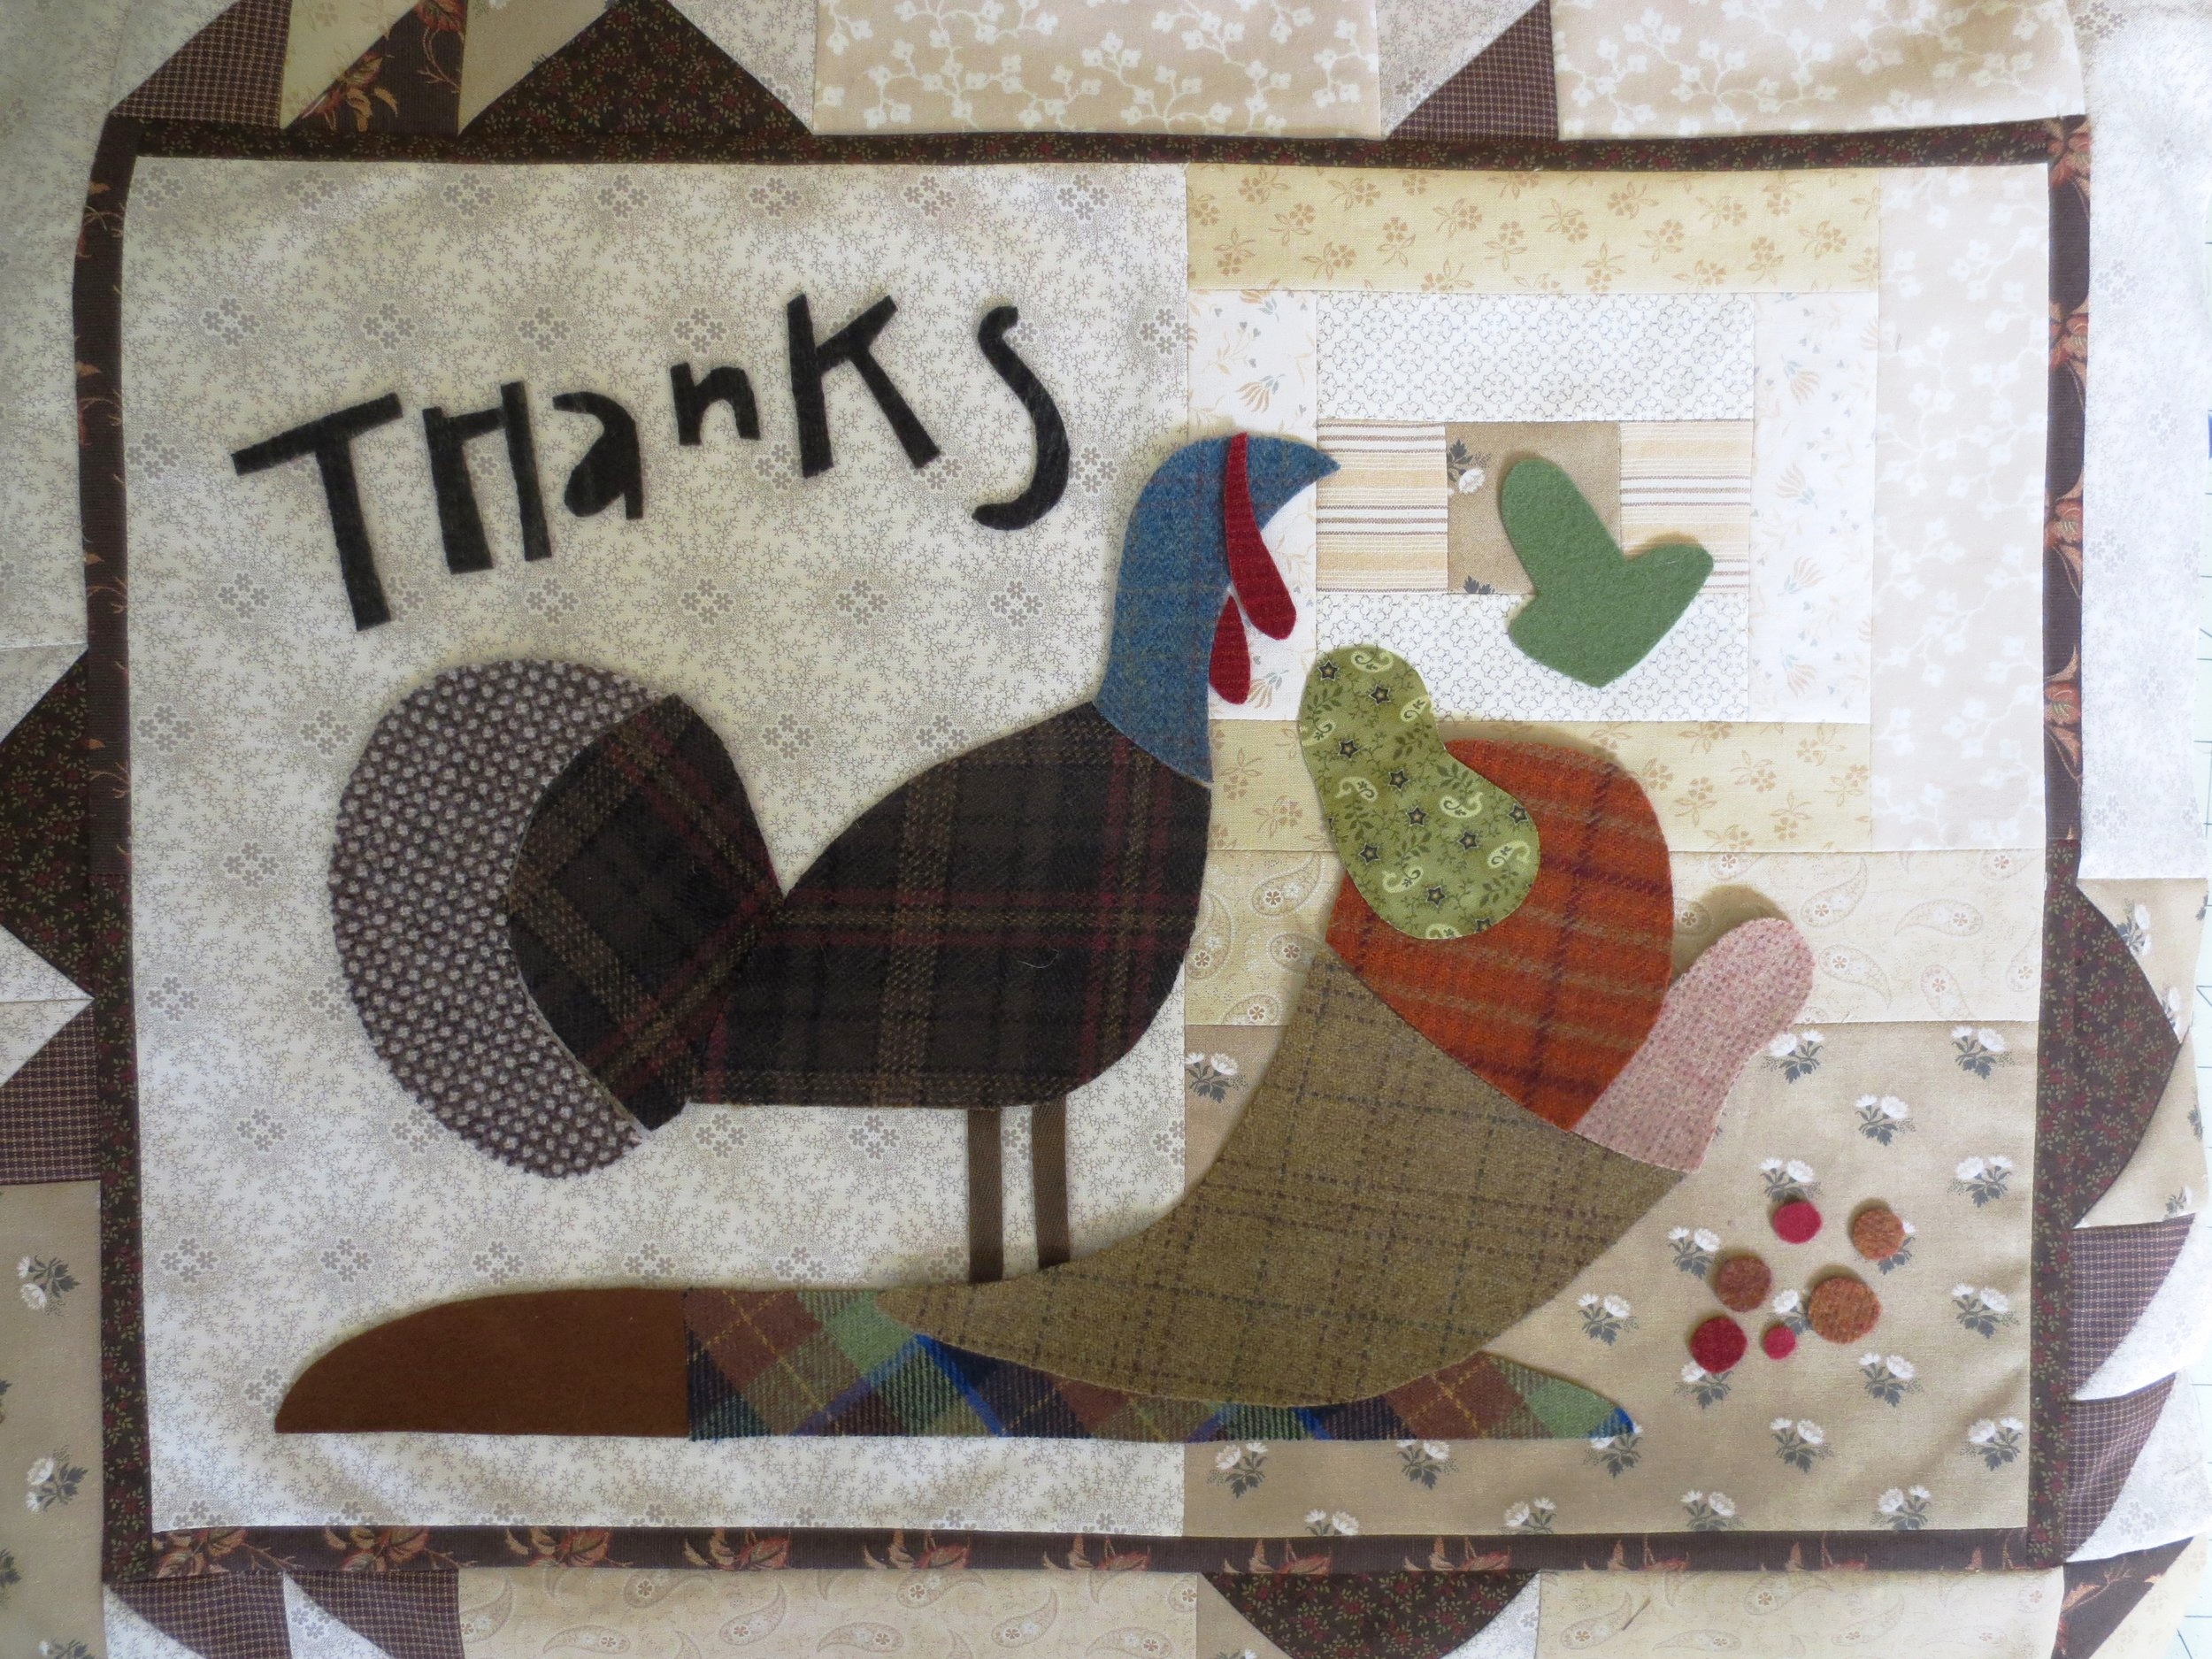
It’s finally fall and the heat of summer seems to have left us. Let’s celebrate the arrival of Autumn by making a harvest themed wall hanging/table mat.
The background for this design is constructed mainly of scraps. I used a variety of neutral creams and beiges. If you don’t want to make a pieced background you can cut a 16 1/4” x 22 3/4” solid piece of cotton or wool. These are the dimensions of the main part of the background minus the borders.
I didn’t include instruction on basting or binding. However, I did include some links on how to make and attach the binding at the end of the blog post.
I’ve also included some alternative design elements thoughout the post. The project tends to promote creativity, so go wild, add your own touches, and make it unique.
Happy Stitching!
You will need:
Fabric - Various quilting cottons.
Note: Label your fabrics as you cut them.
A – one 12 ½” x 16 ¼”
one 2 ½” x WOF (42”)
one 6” x 6”
two 3 3/8” x 3 3/8” squares
B – two 3 3/8” x 3 3/8” squares
one 2 ½” x 2 ½”
one 6 ½” x 10 ¼”
one 2 ½” x 7 1/2”
C – two 2 ½” x WOF (42”)
D – two 2” x 6”
one 3 1/4” x 3 1/4”
E – one 3 ¼” x 3 ¼”
two 2” x 9”
F – two 2” x 7”
G – one 2 ½” x 24”
H – two 2” x 2”
I – two 1” x WOF (42”)
J – one 6” x 6”
Three 1 1/2” x WOF (42”) - Binding
K – one 3 ¼” x 3 ¼”
one 1” x WOF (42”)
Backing Fabric – 1 yard
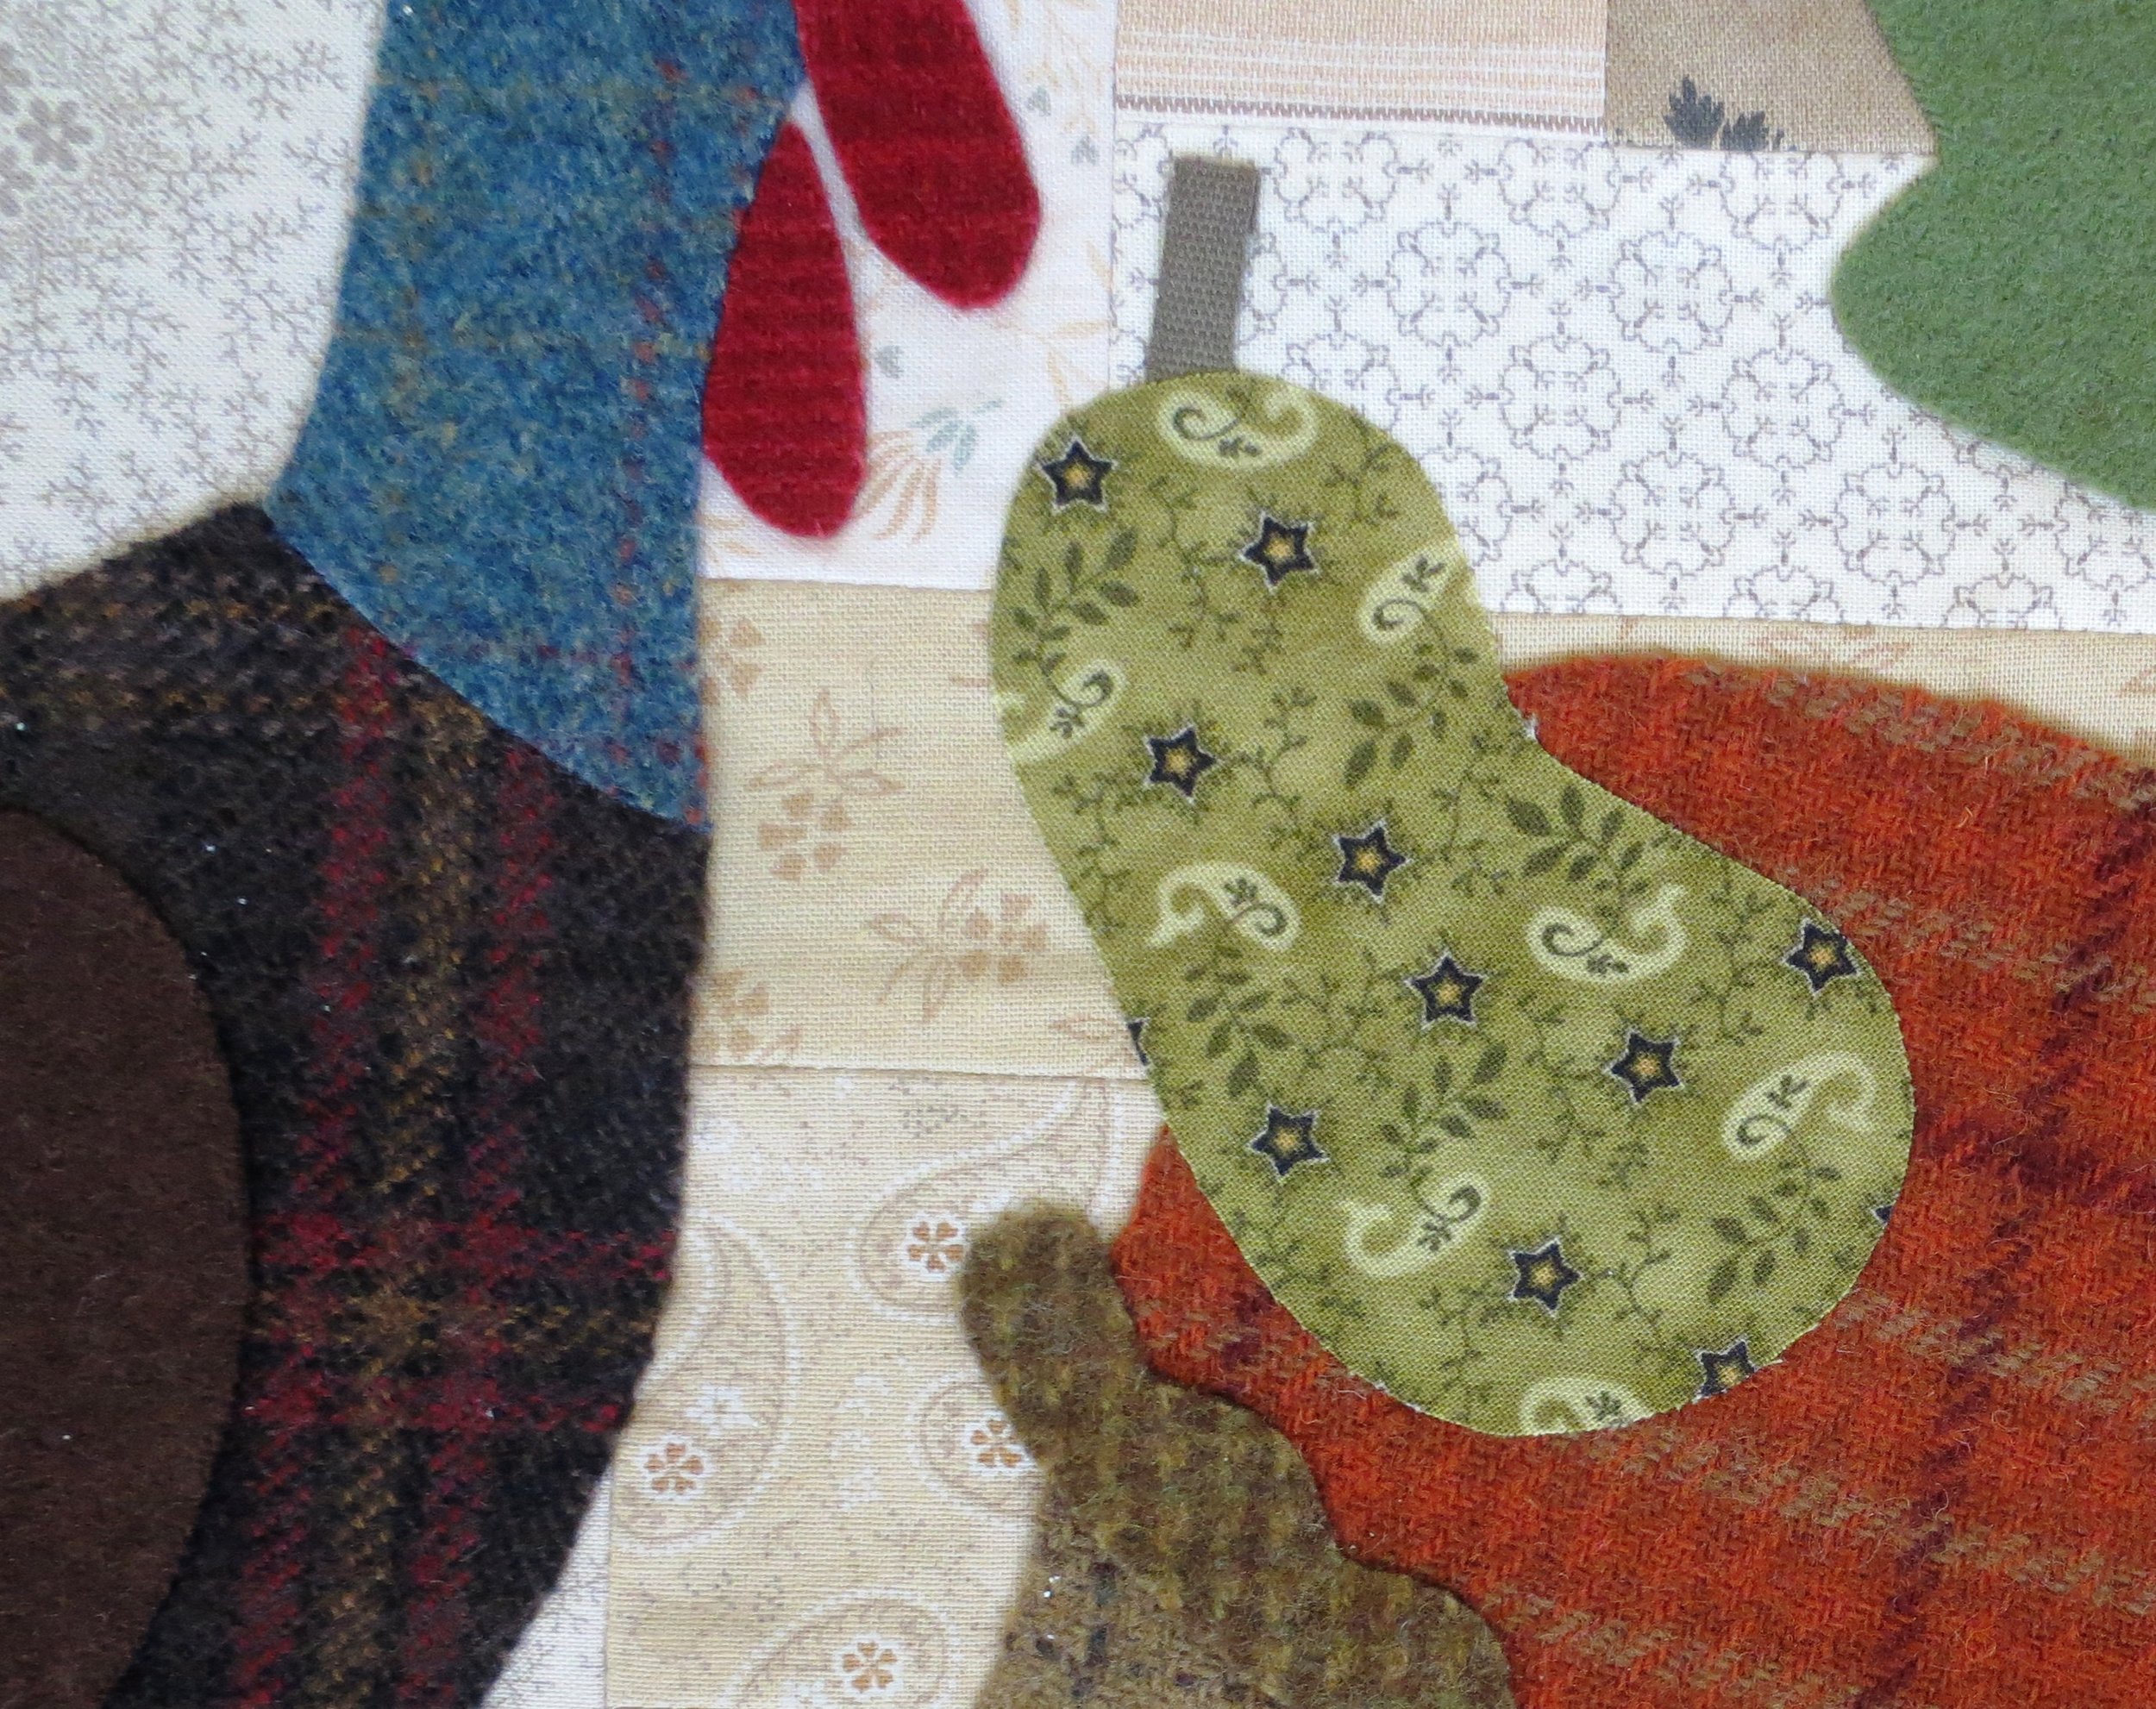
Delicata Squash – 3” x 4” (use fabric print that is darker in color than wool)
Batting – 25” x 31” thin batting like Warm & Natural
Wool – Only the dimensions are given. Color choices are up to you.
Note: If you wish to cut your wool on the diagonal you will need more than the amount stated below.
Cornucopia – 6” x 10”
Cornucopia ruffle – 1 ½” x 7”
Turkey body – 5 ½” x 8”
Turkey Head – 3” x 4”
Wing – 3 ½” x 5”
Wing cap 3” x 3 ½”
Tail Base – 3 ½” x 6”
Tail – 3” x 7”
Tail embellishment – 3” x 7”
Wattle – 2” x 3”
Pumpkin – 4 ½” x 4 ½”
Delicata squash – 3” x 4 ½”
Butternut Squash – 3” x 4 ½”
Pumpkin leaf, grass – 4 ½” x 4 ½”
Berries – 1” x 2” of three different orange wools
Ground (left) – 2 ½” x 6
Ground (right) – 2 ½” x 12”
THANKS – 3” x 10”
Thread
Most of the thread I used was perle cotton, size 12, in colors that matched my wool colors. The additional embroidery embellishments were created with size 12, 8, and 5 perle cottons. You may want to use colors that compliment, but not match your wool colors. The choice is yours. The following is a list of thread sizes that were used to make the model. I’m not including my color choices because your colors may vary.
Whip stitching on wool borders, and ribbon stems- size 12
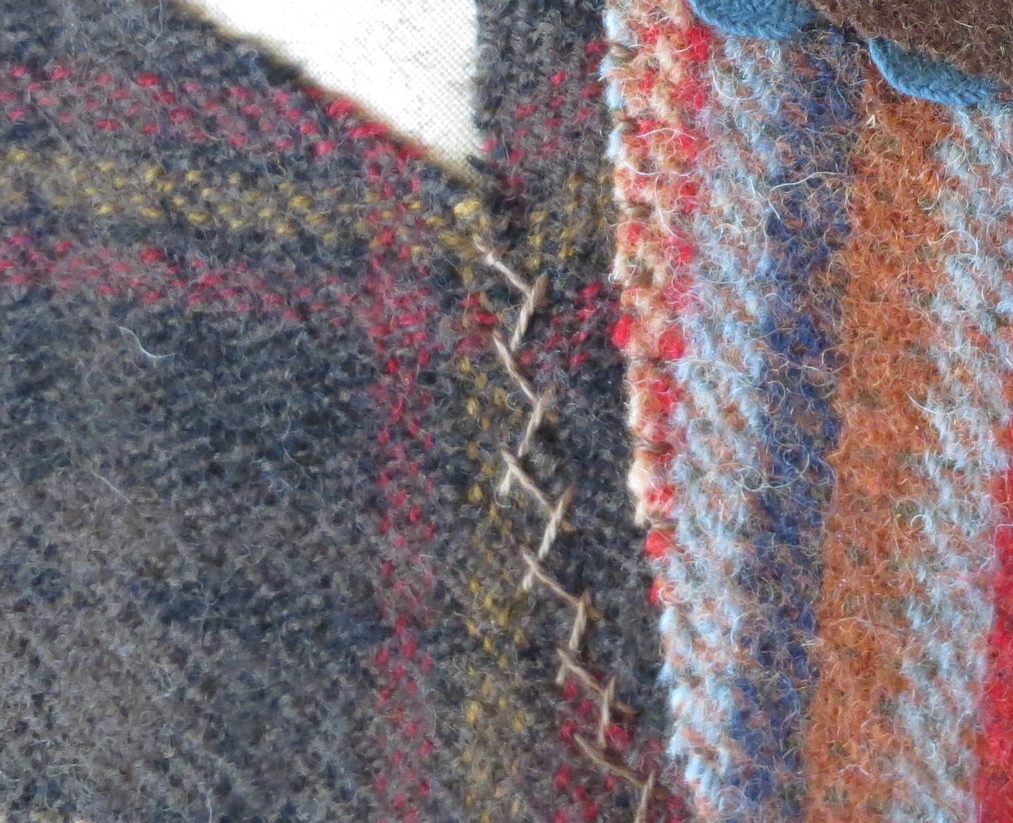
Herringbone stitching at wool joints - size 12
Chain stitch on tail - size 12
Closed fly or fern stitch on wing - size 12
Running stitch on wing cap, and eye outline - size 12
Colonial knot eye, and rick rack embellishment - size 12
Fly stitches on turkey body - size 12
Fly stitched grass on ground - size 8
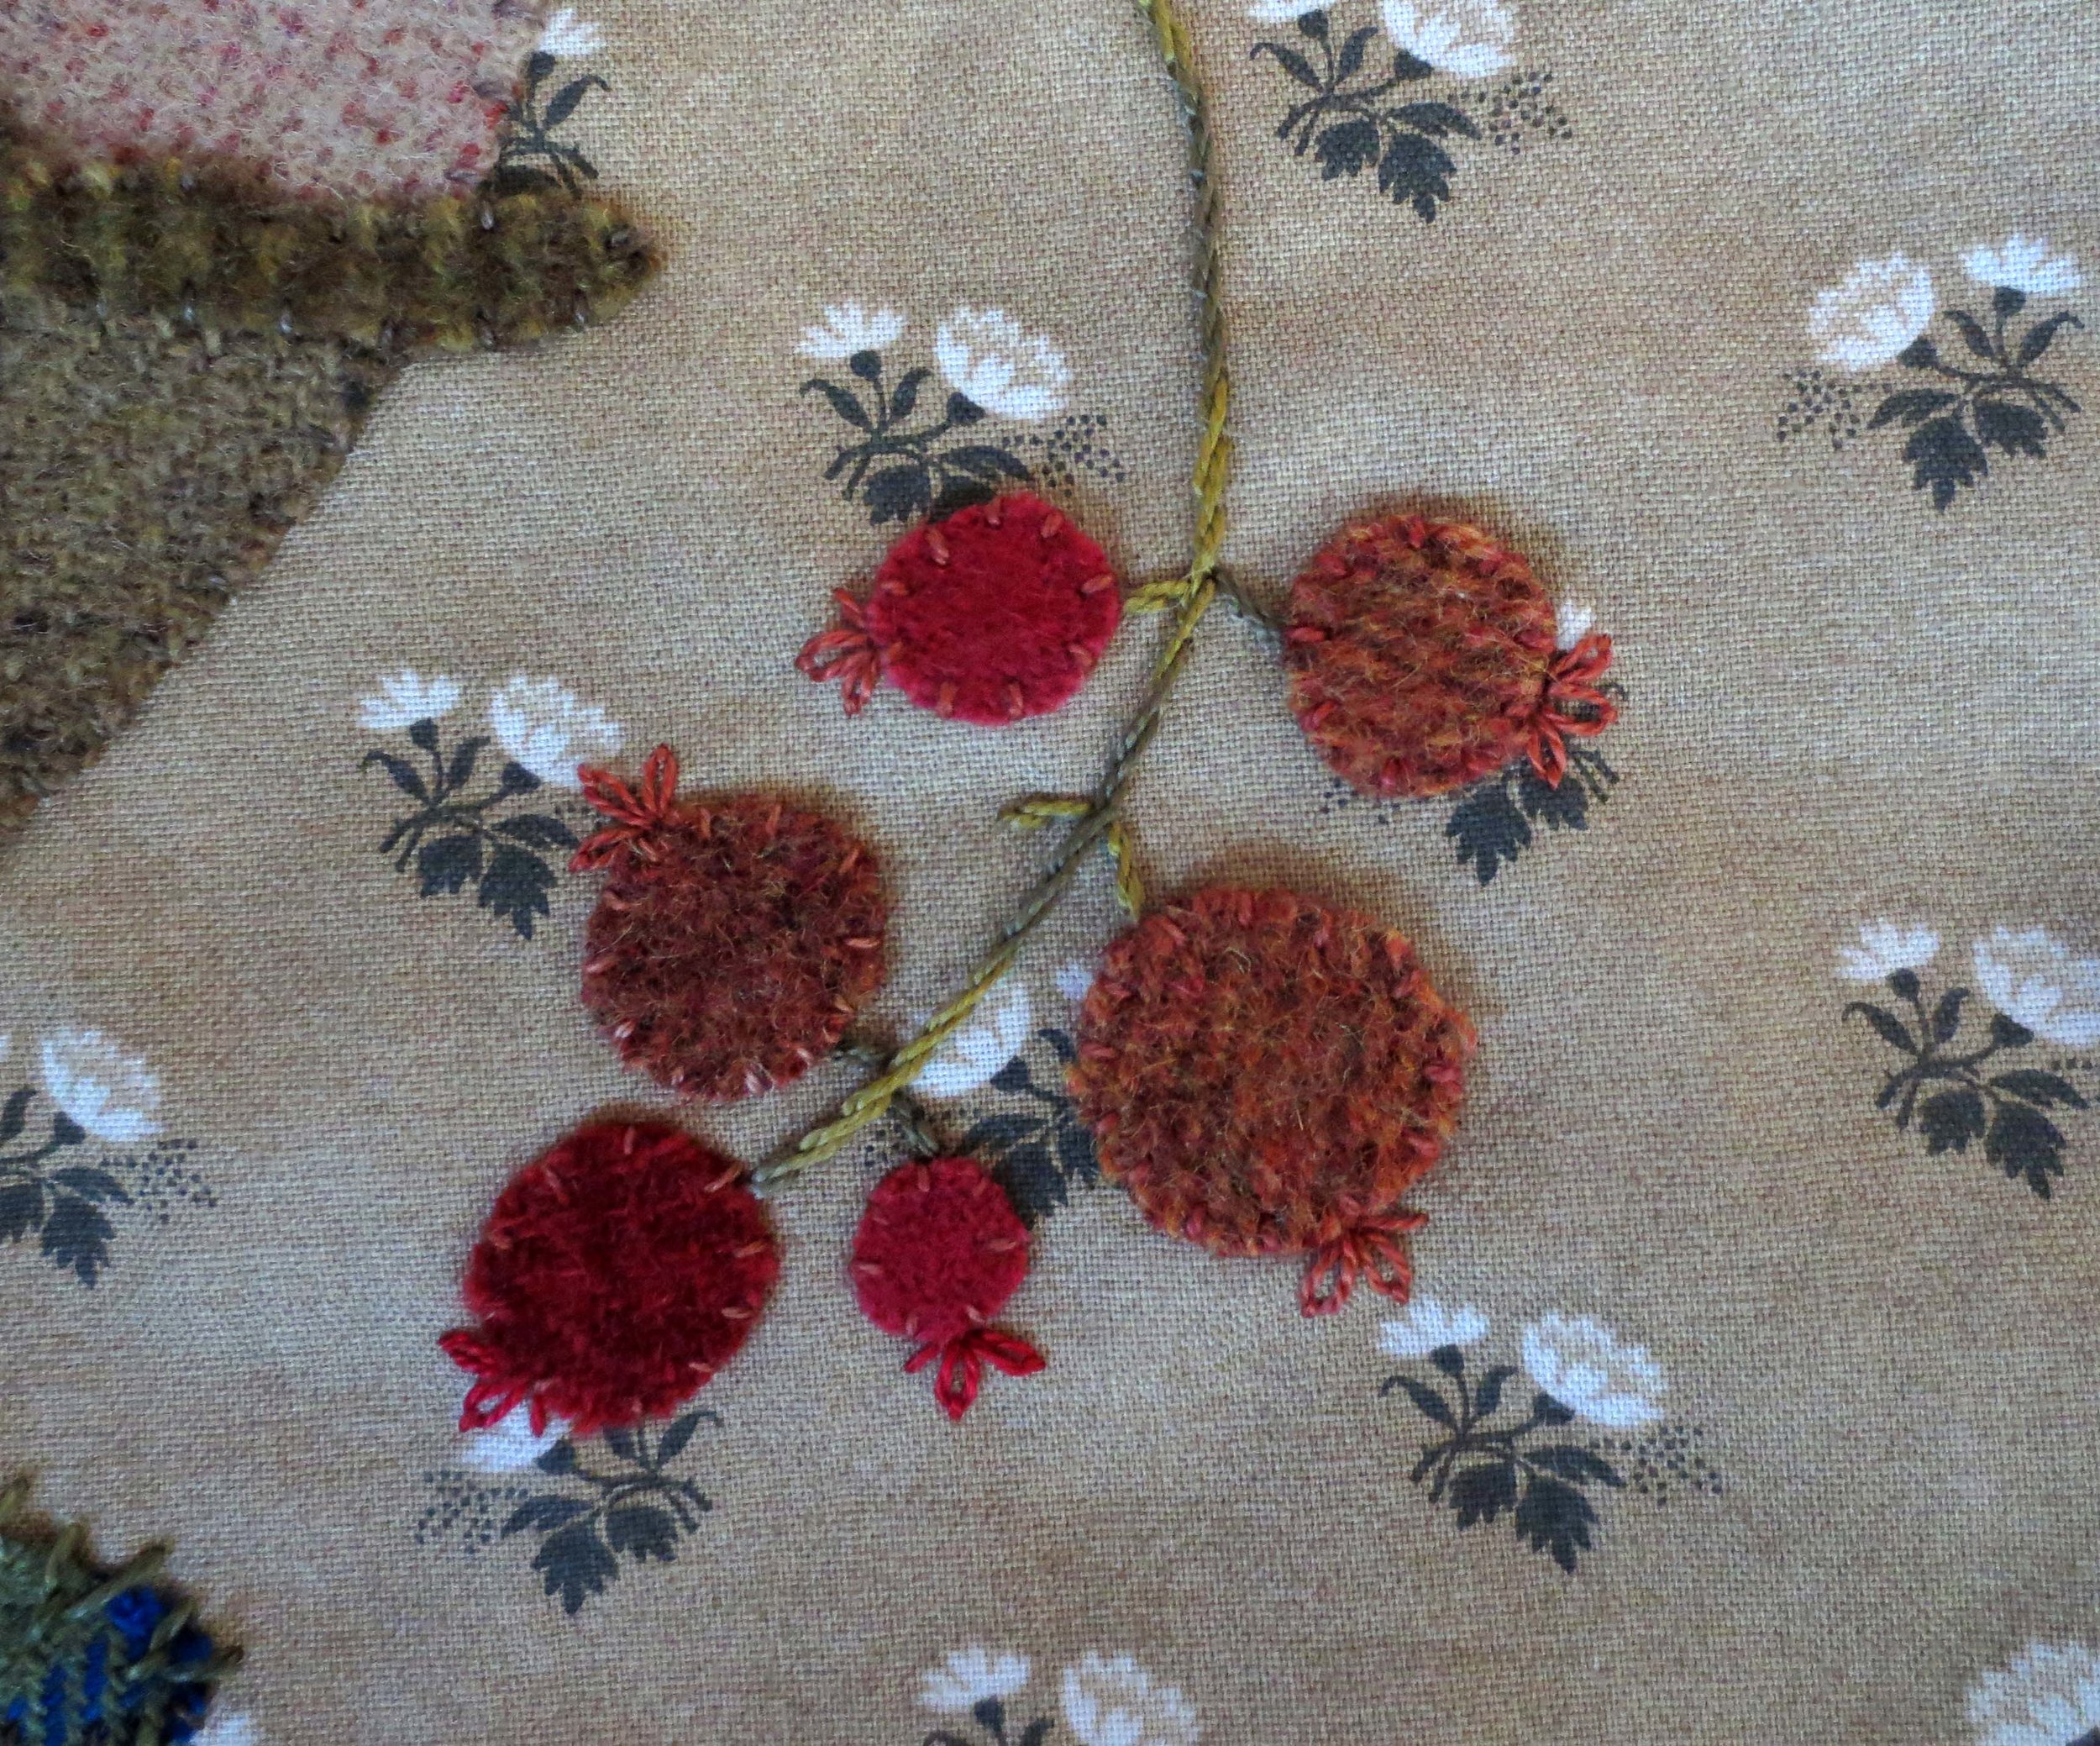
Lazy daisy stitches on berries - size 12
Stem stitched words, pumpkin tendril, and stem of berries - size 8
Double threaded running stitch on leaf stem - size 8
Back stitch on leaf and grass - size 8
Couching stitch on conucopia - size 5
Miscellaneous
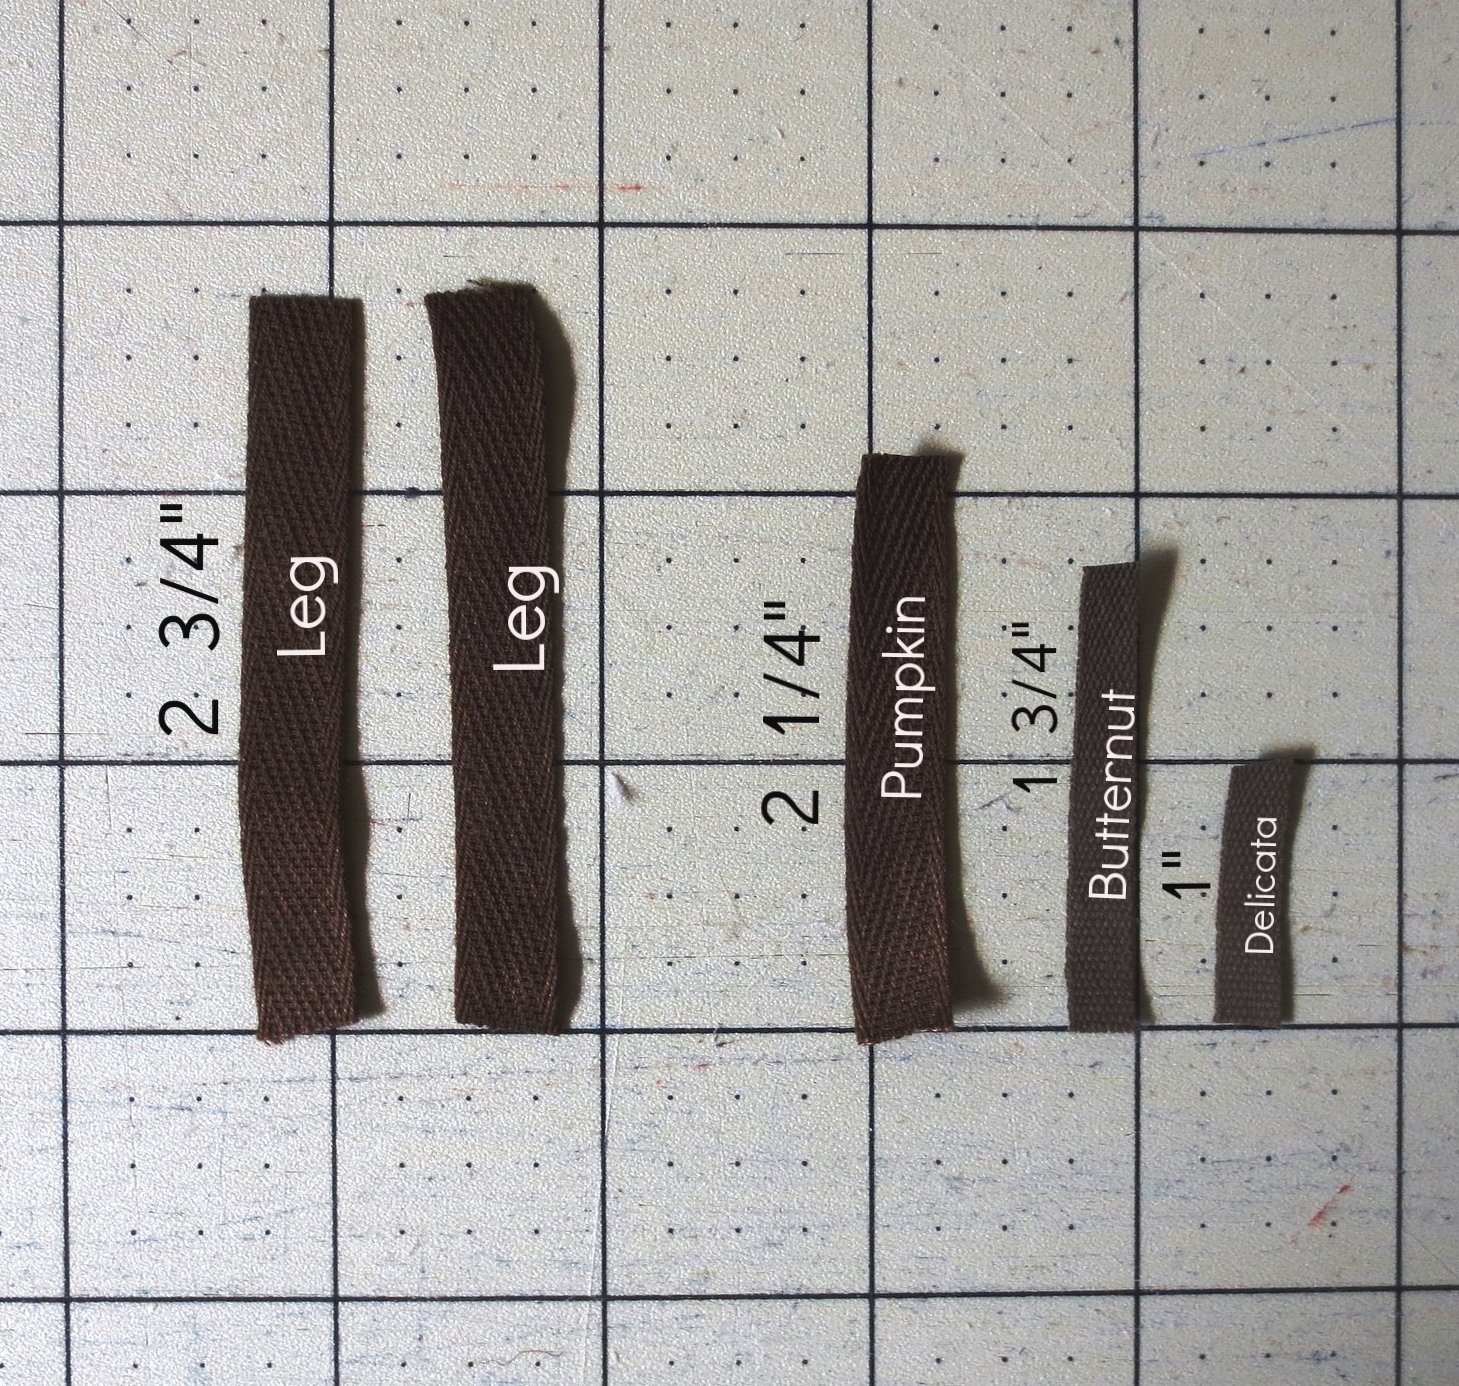
Turkey legs and pumpkin stem – 7 ½” length of 3/8” wide ribbon (I used cotton twill)
Butternut and delicata squash stems – 3” length of ¼” wide ribbon (I used cotton twill)
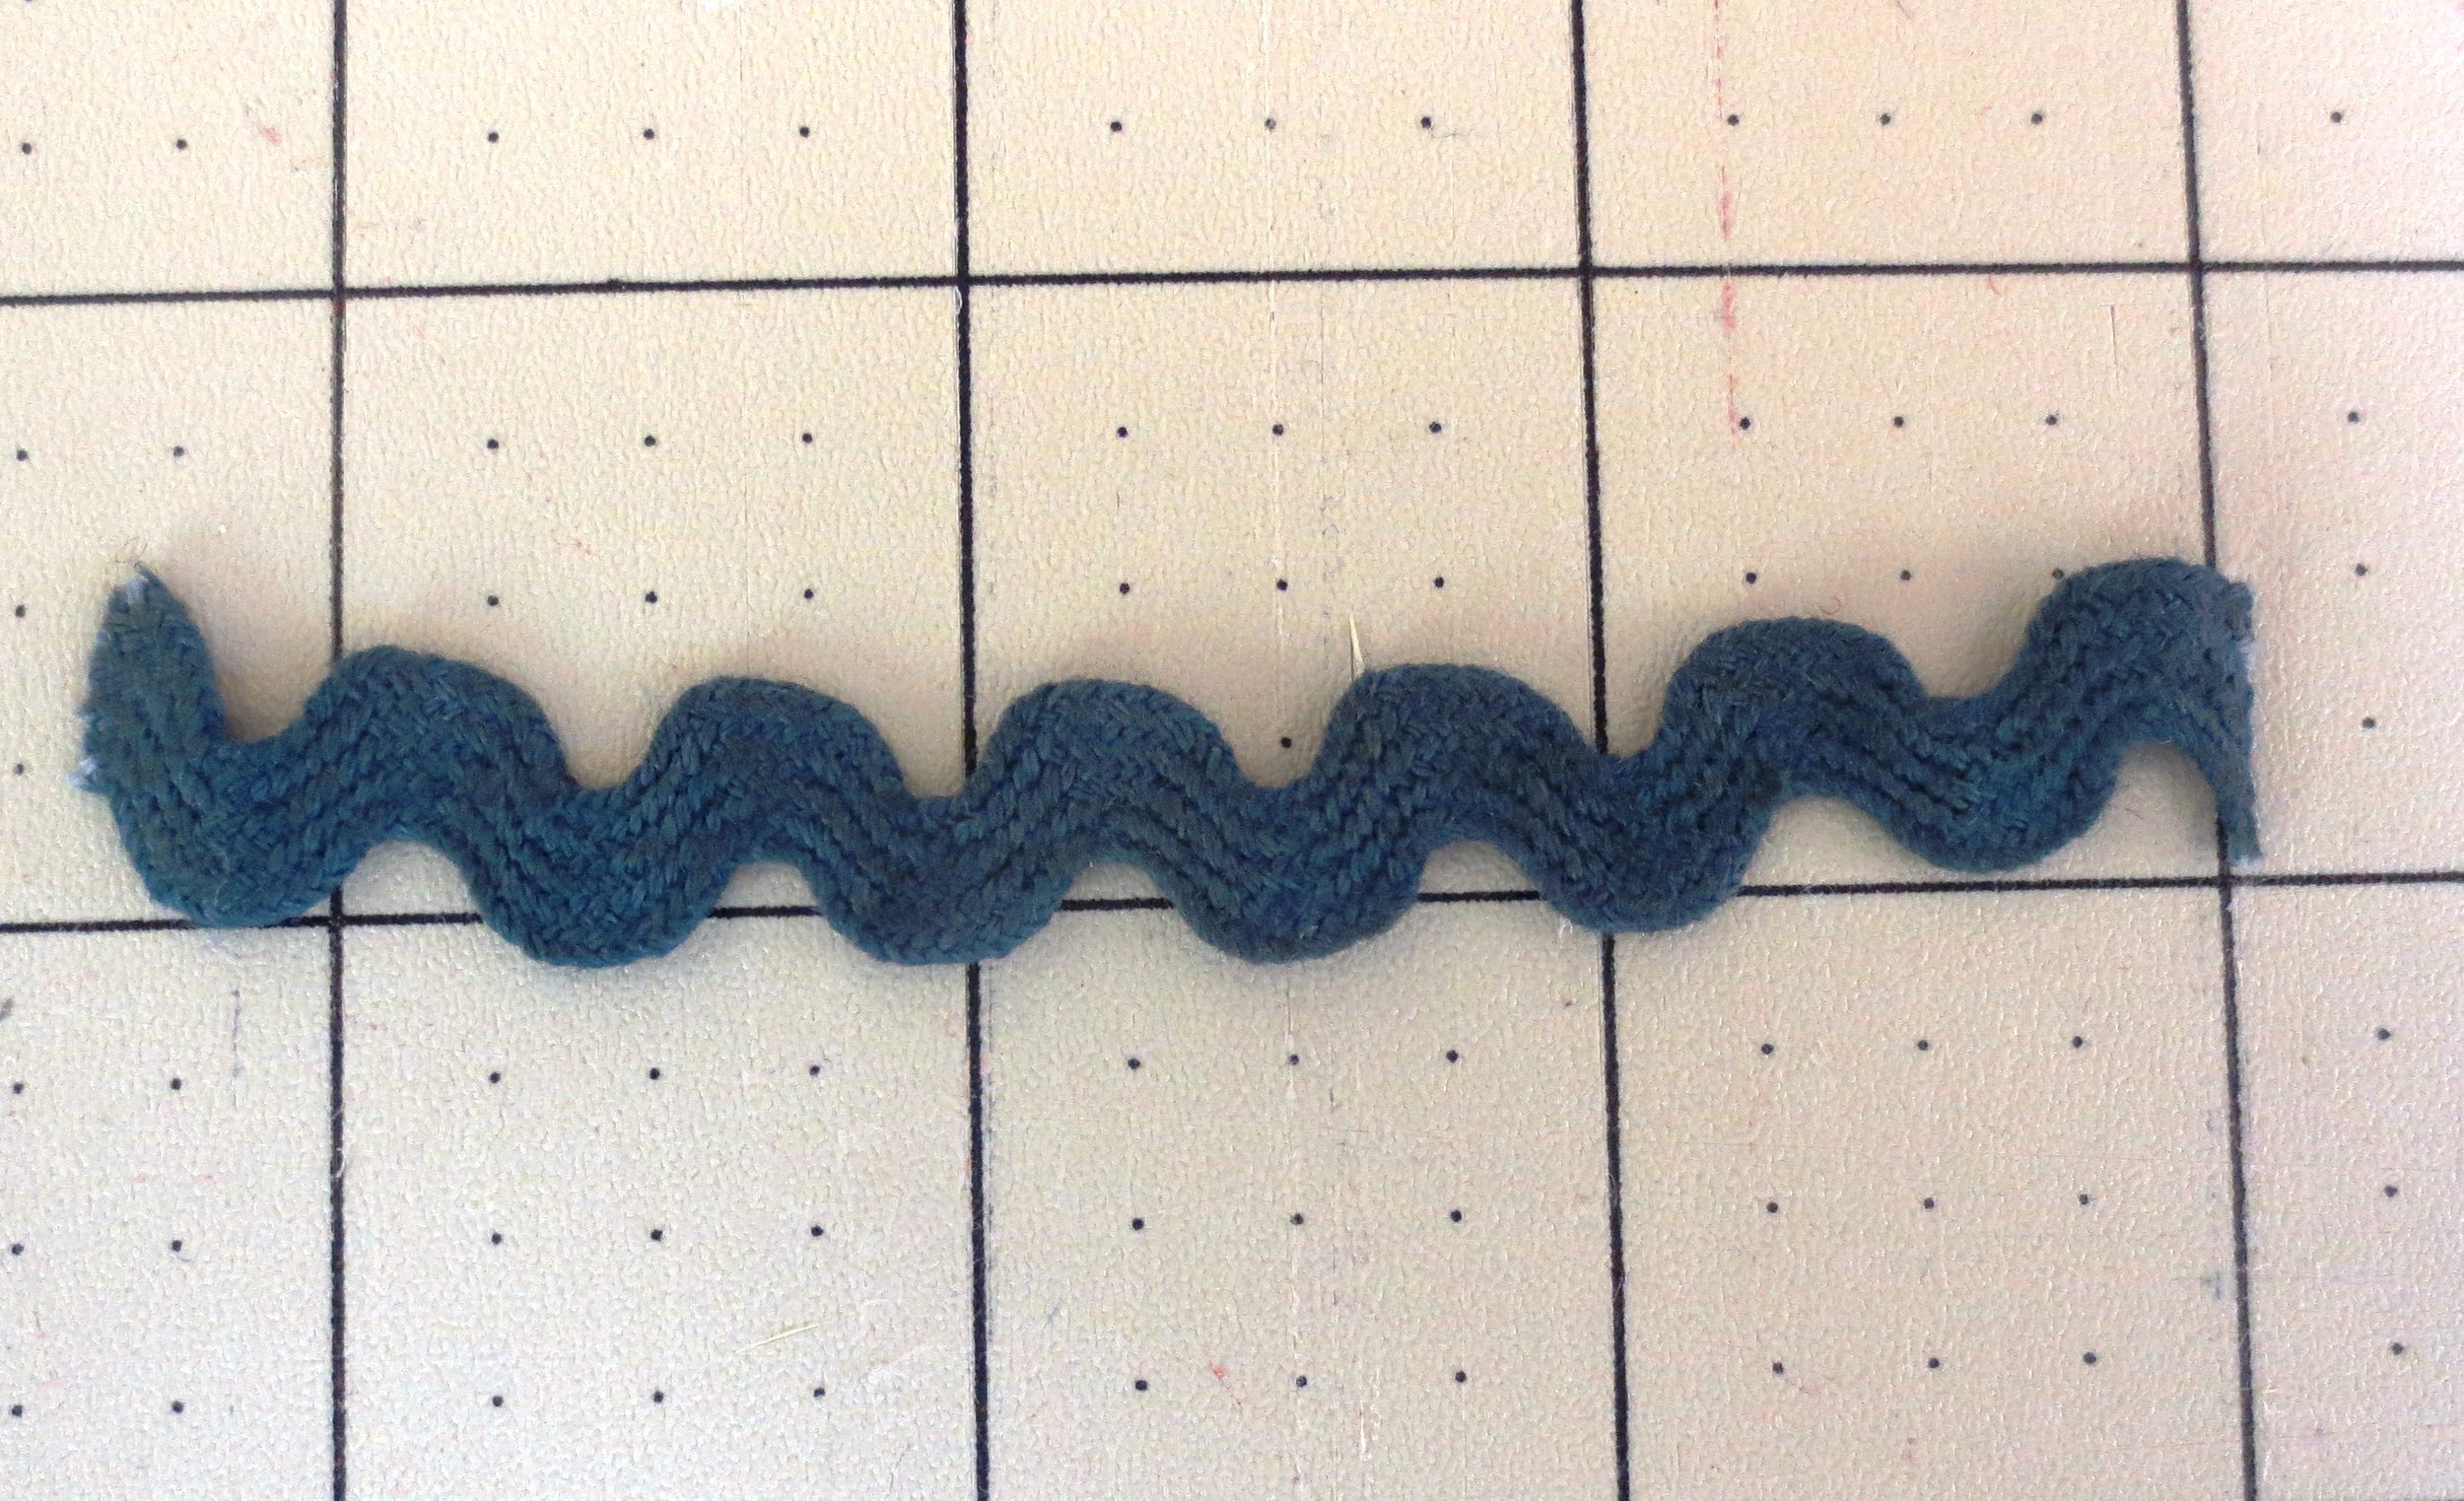
Wing cap embellishment – 4” length of ½” wide rick rack
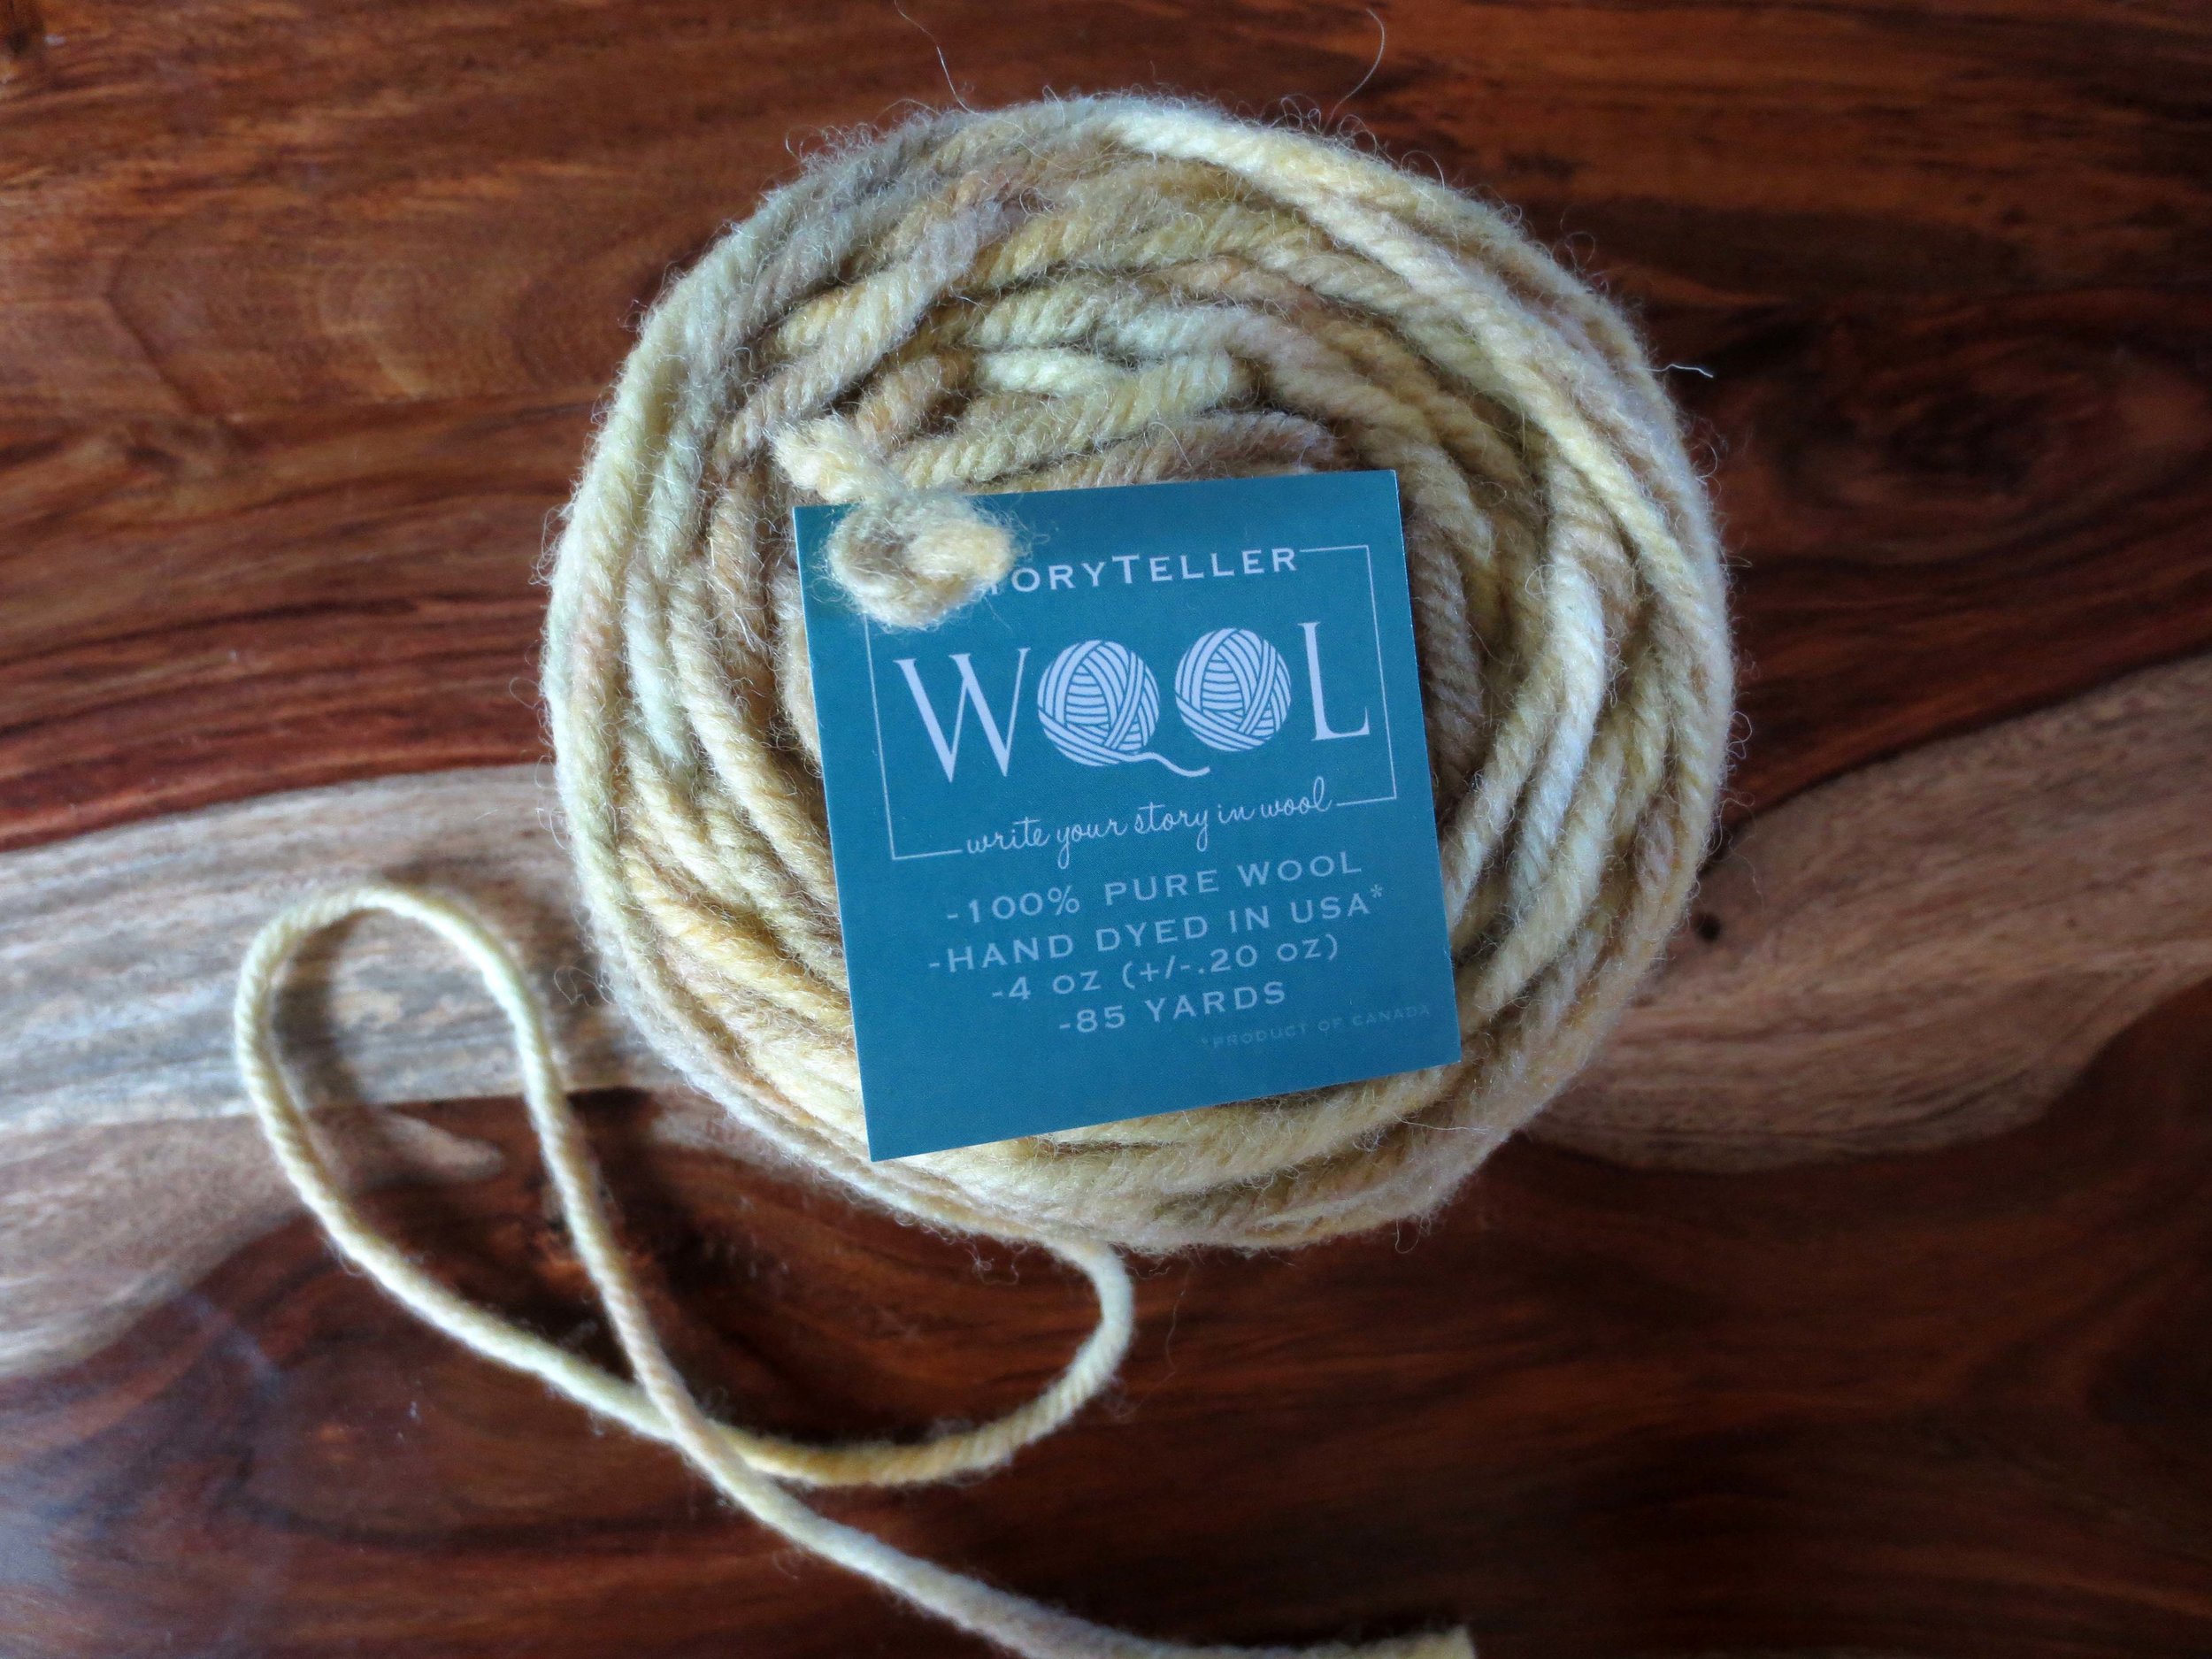
Cornucopia embellishment - 1 yard of chunky yarn in a complementary color (I used “Treasure Island” by StoryTeller Wool)
Feather-weight fusible webbing
Fine-line chalk pencil in light and dark colors
Chenille needles - size 24 and 22
Steam iron
Light box
Instructions (All seams are 1/4” wide and pressed open unless otherwise noted)
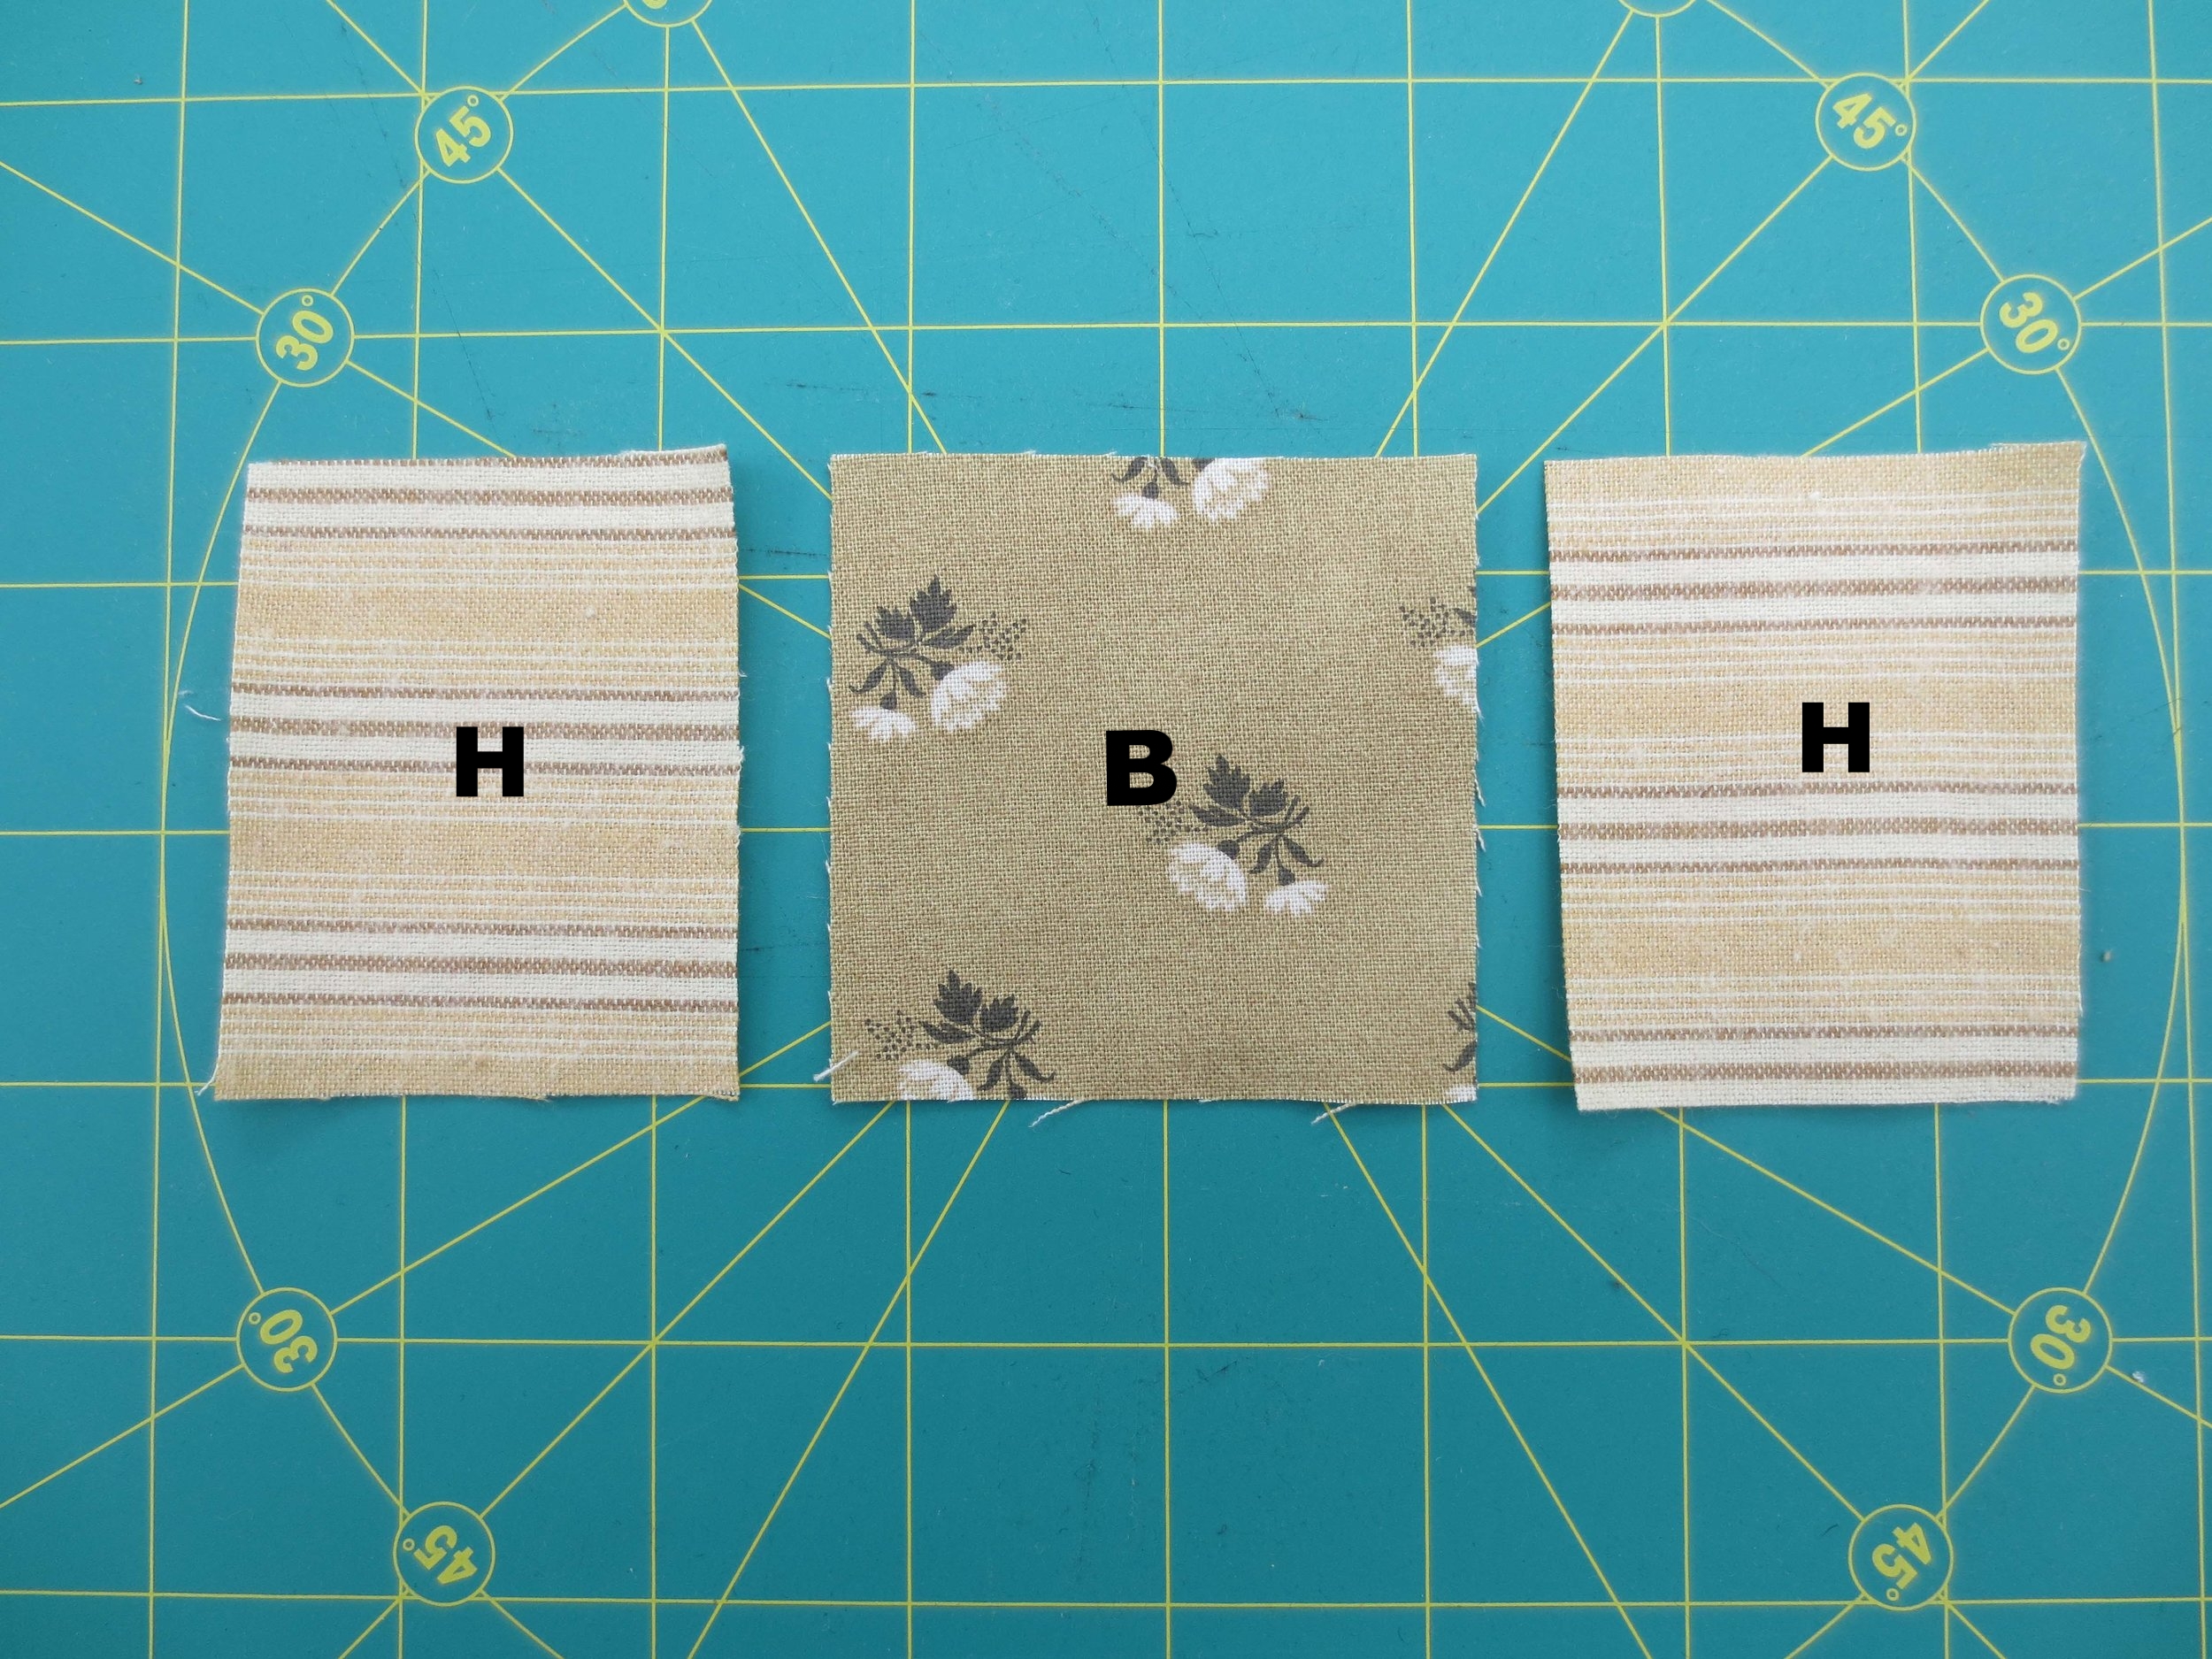
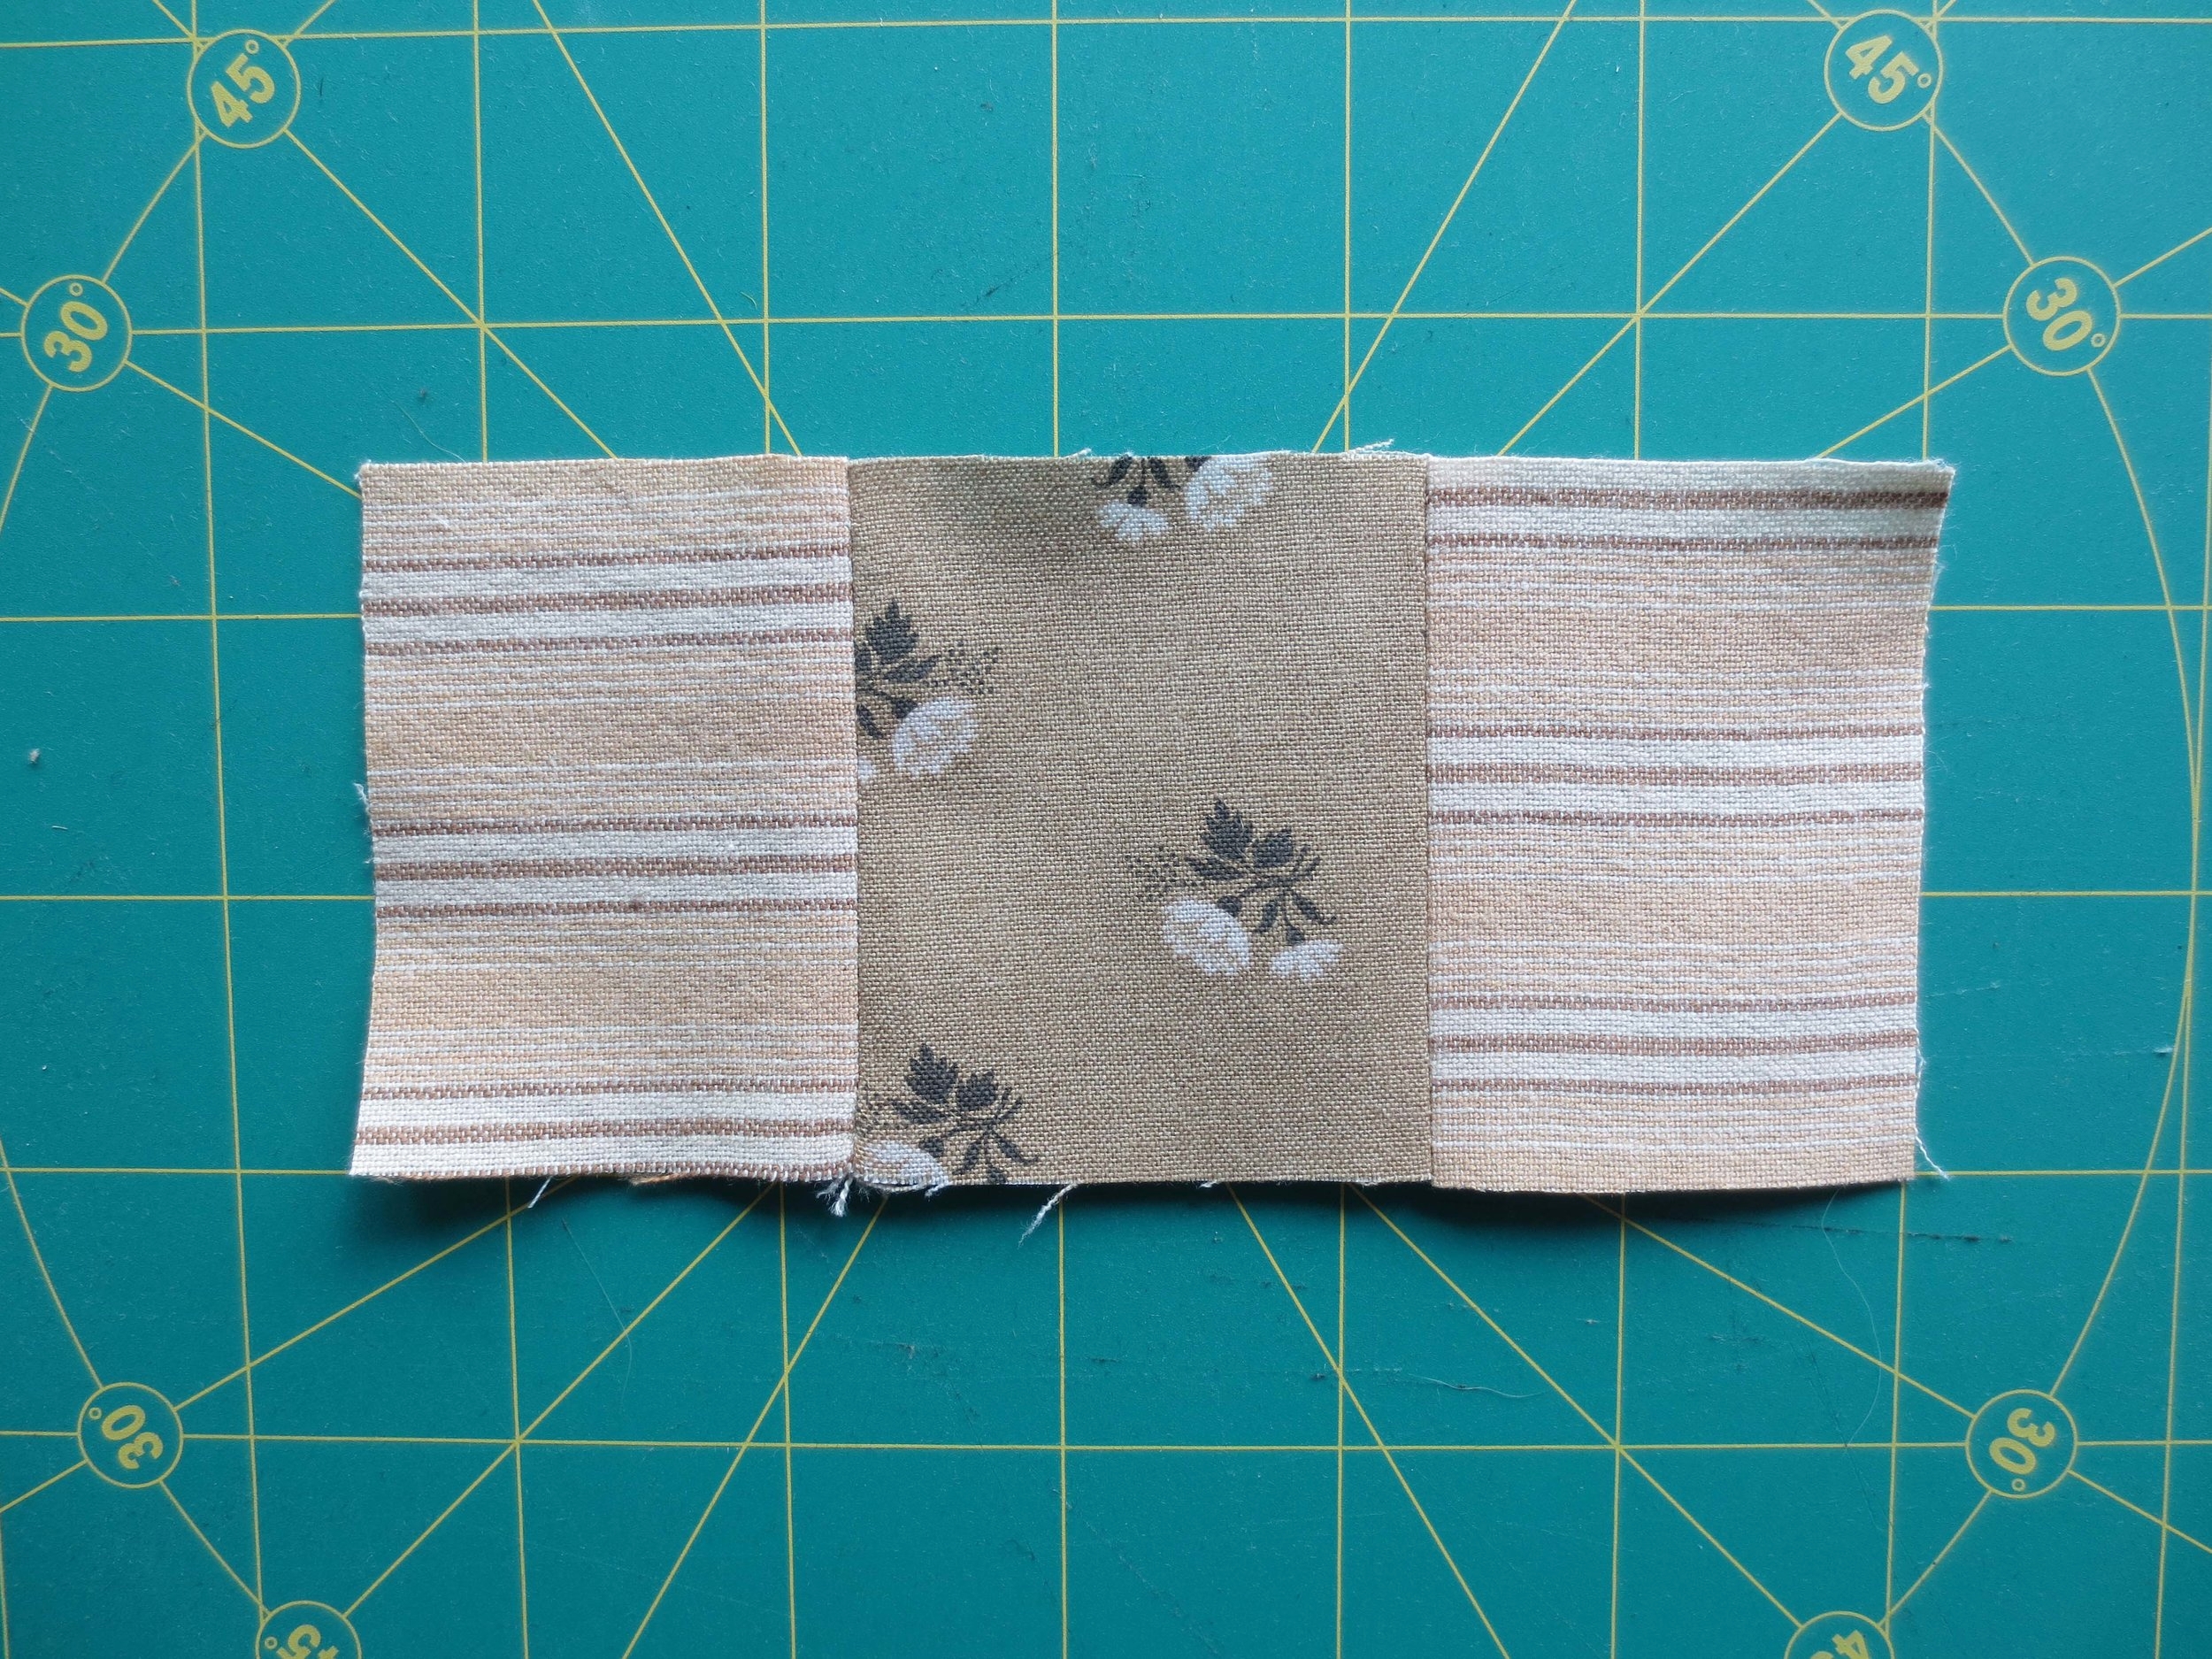
Sew one 2” square of fabric H to each side of the 2 1/2” square of fabric B. Press.
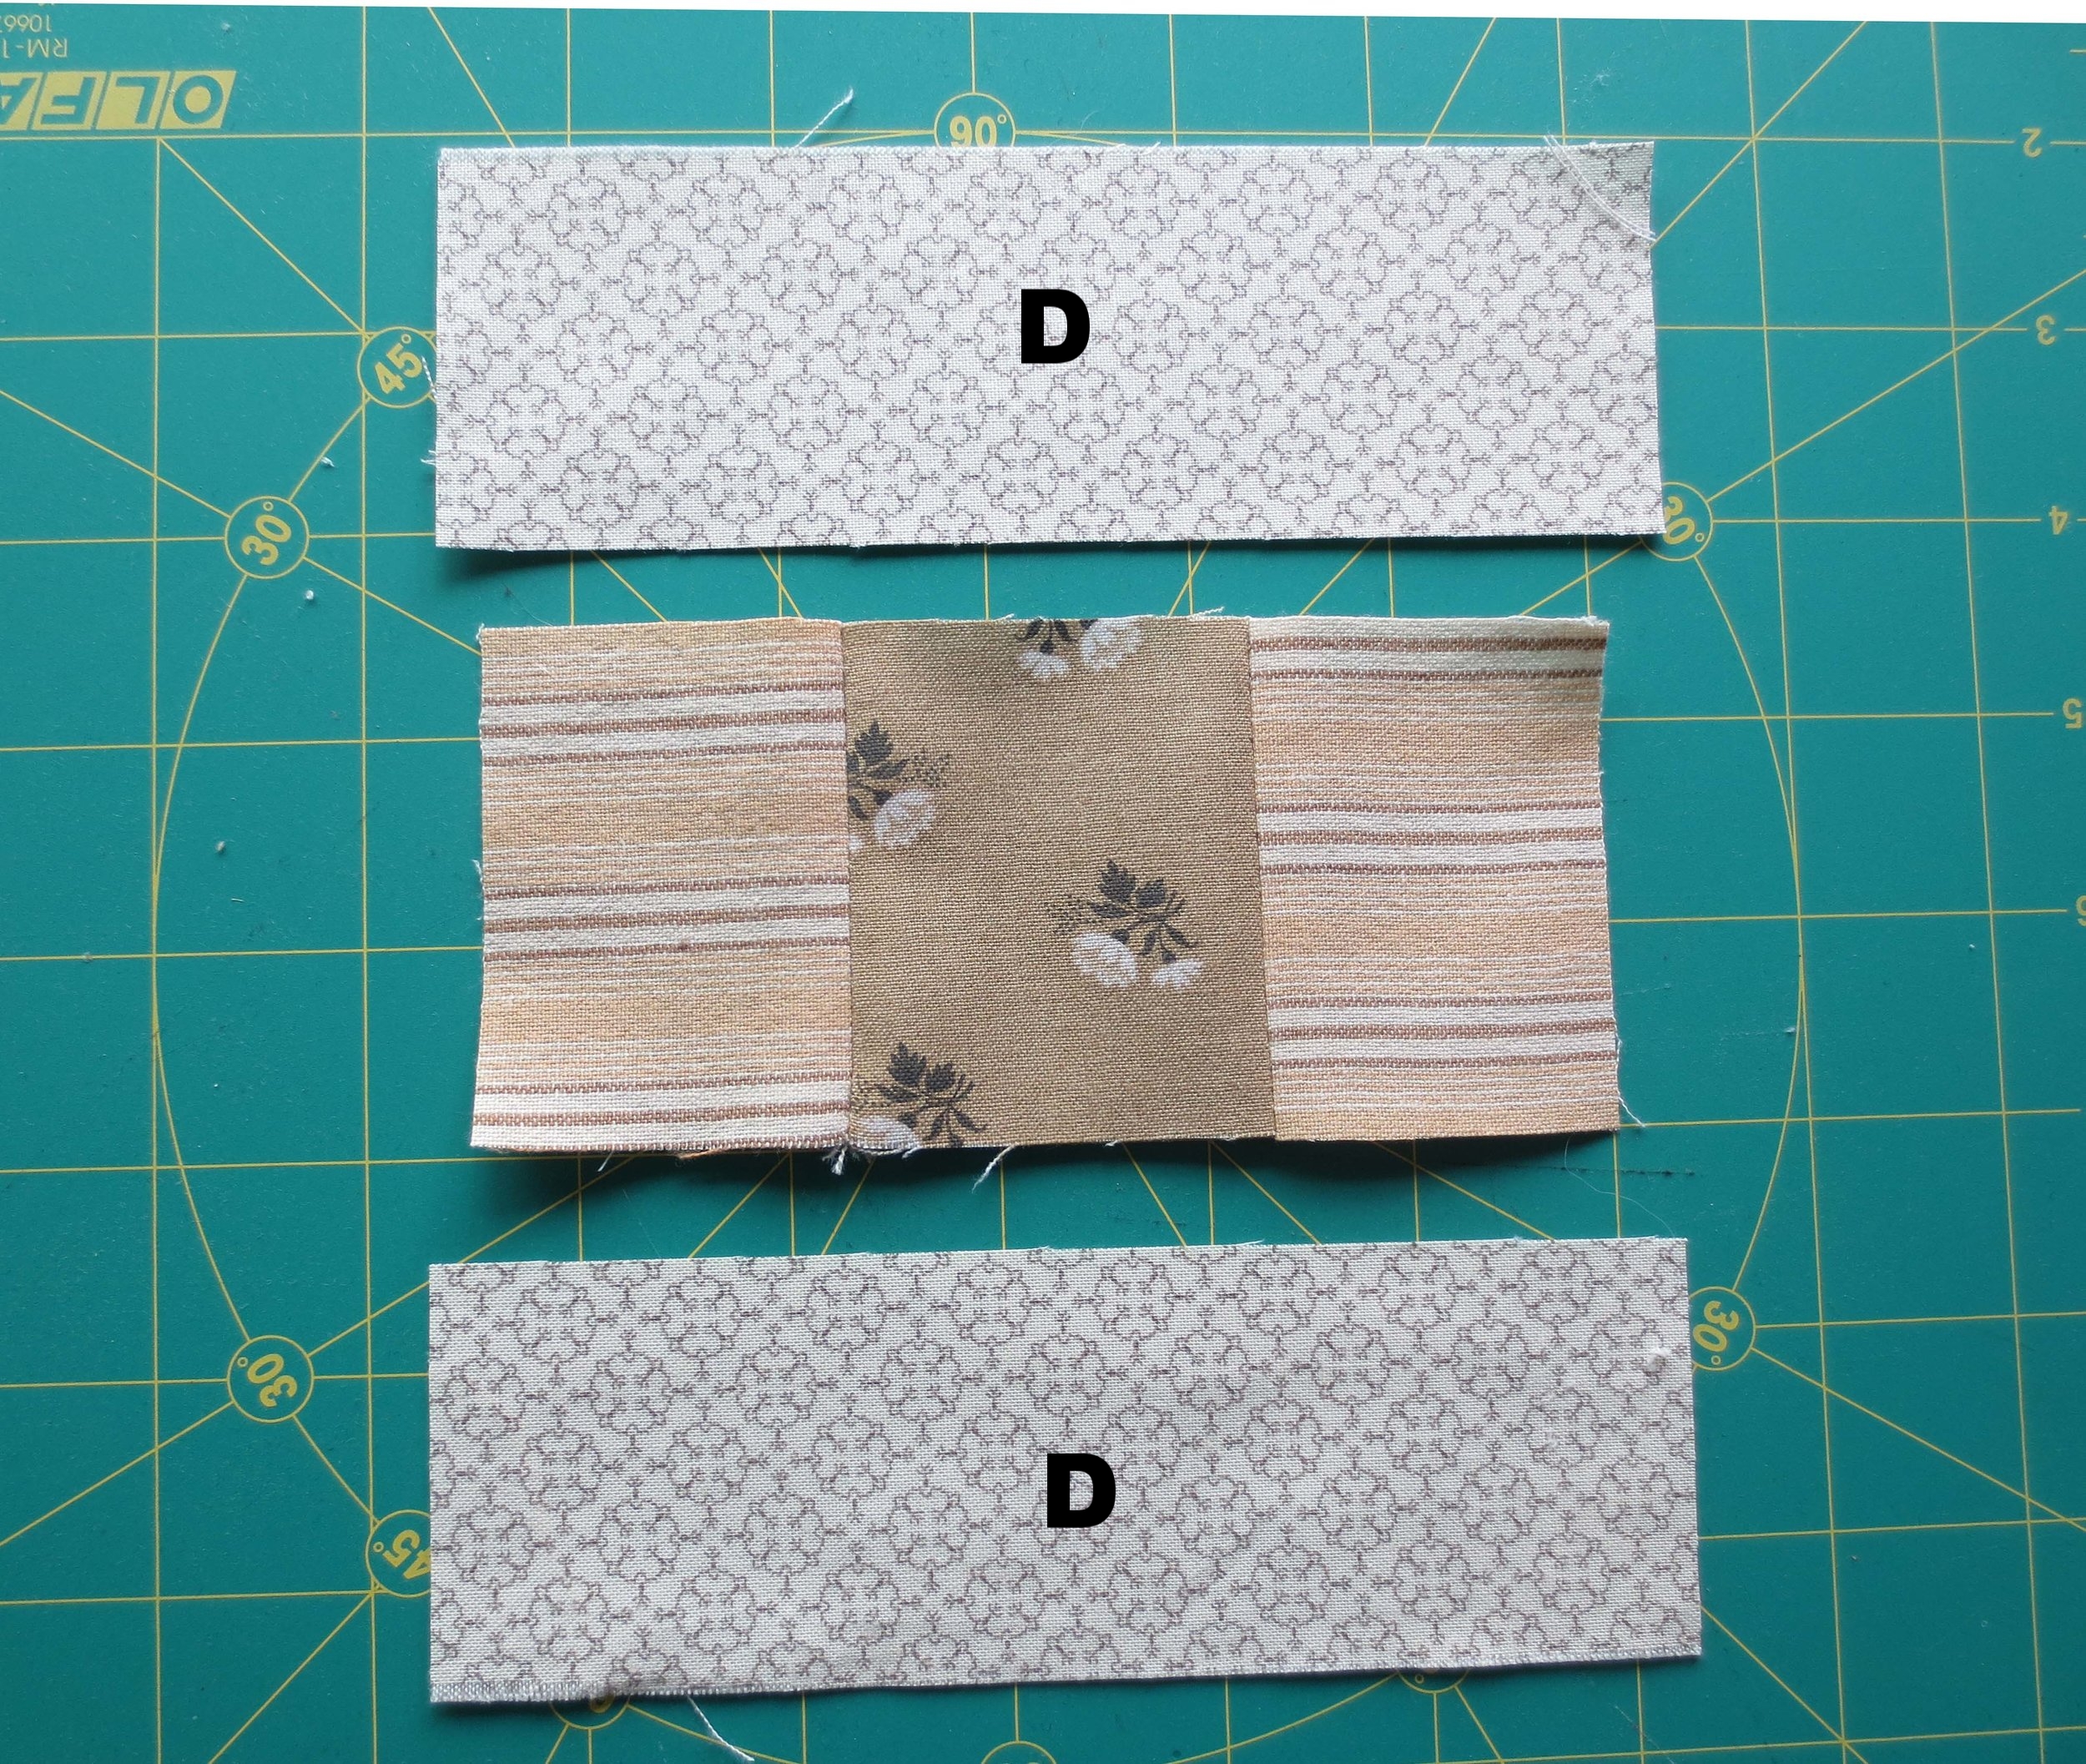
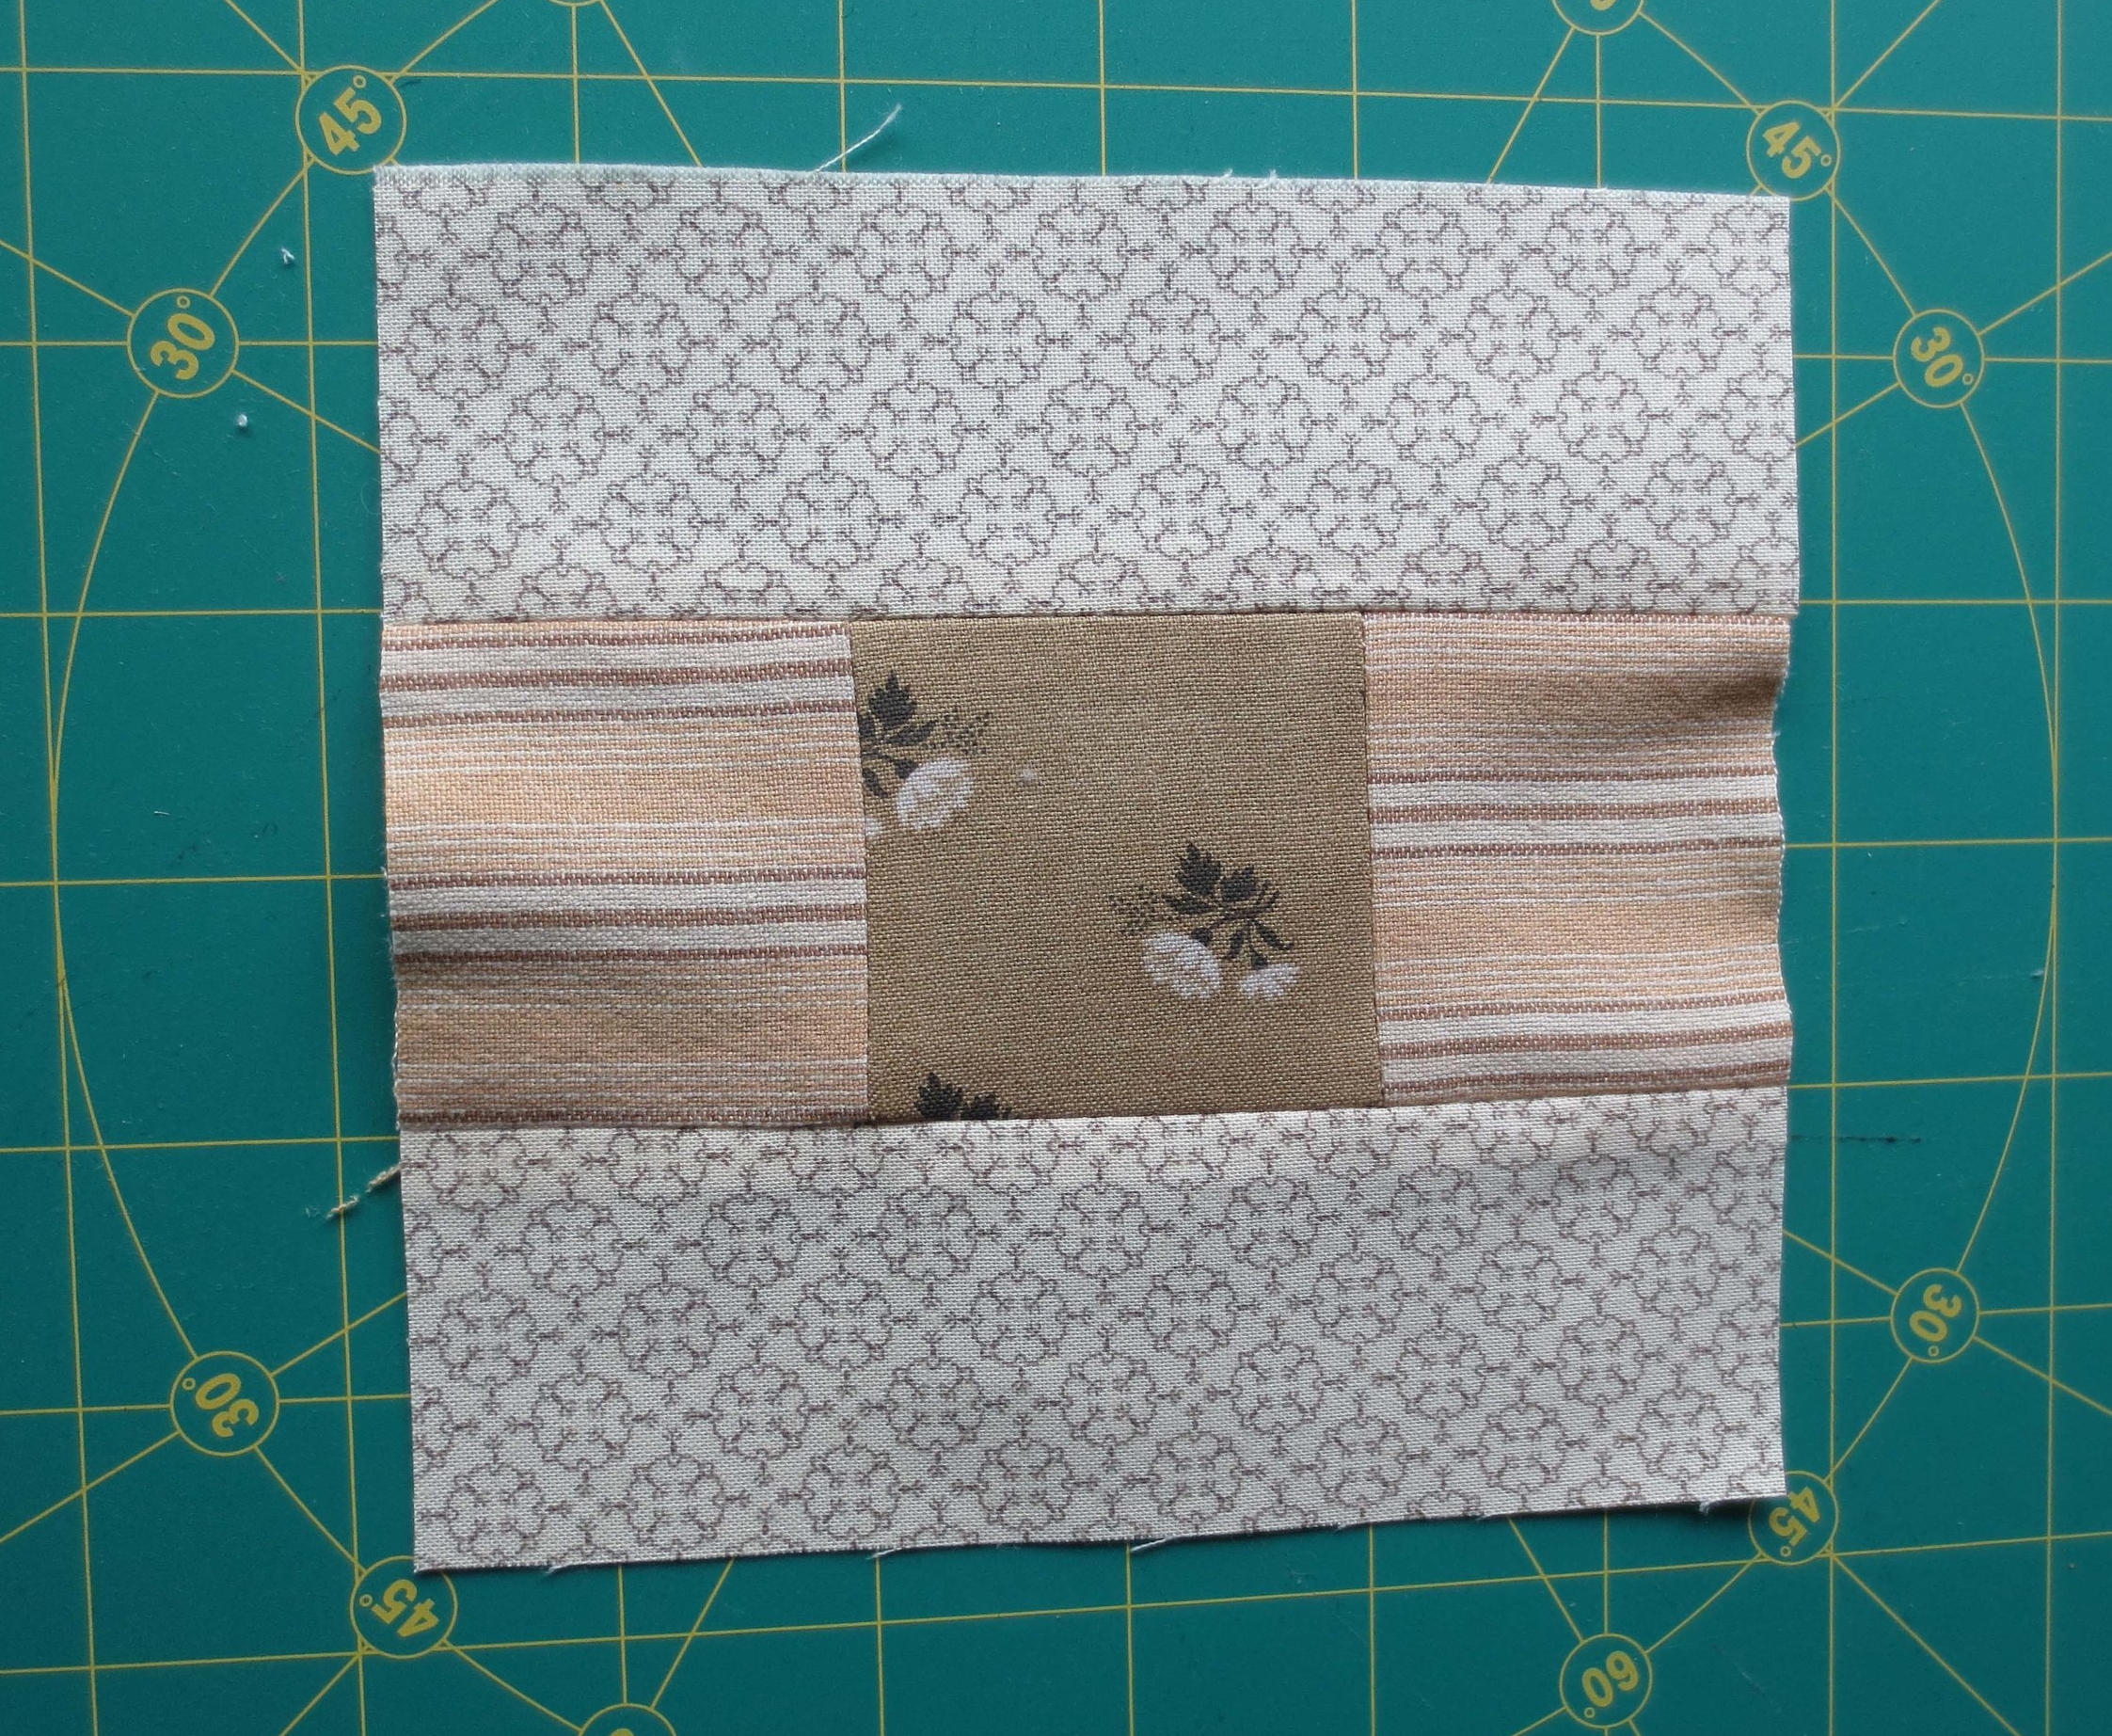
2. Sew a 2” x 6” fabric D strip to the top and bottom of the block above. The strips are longer than the base block so you will need to trim the excess after it’s sewn. Press.
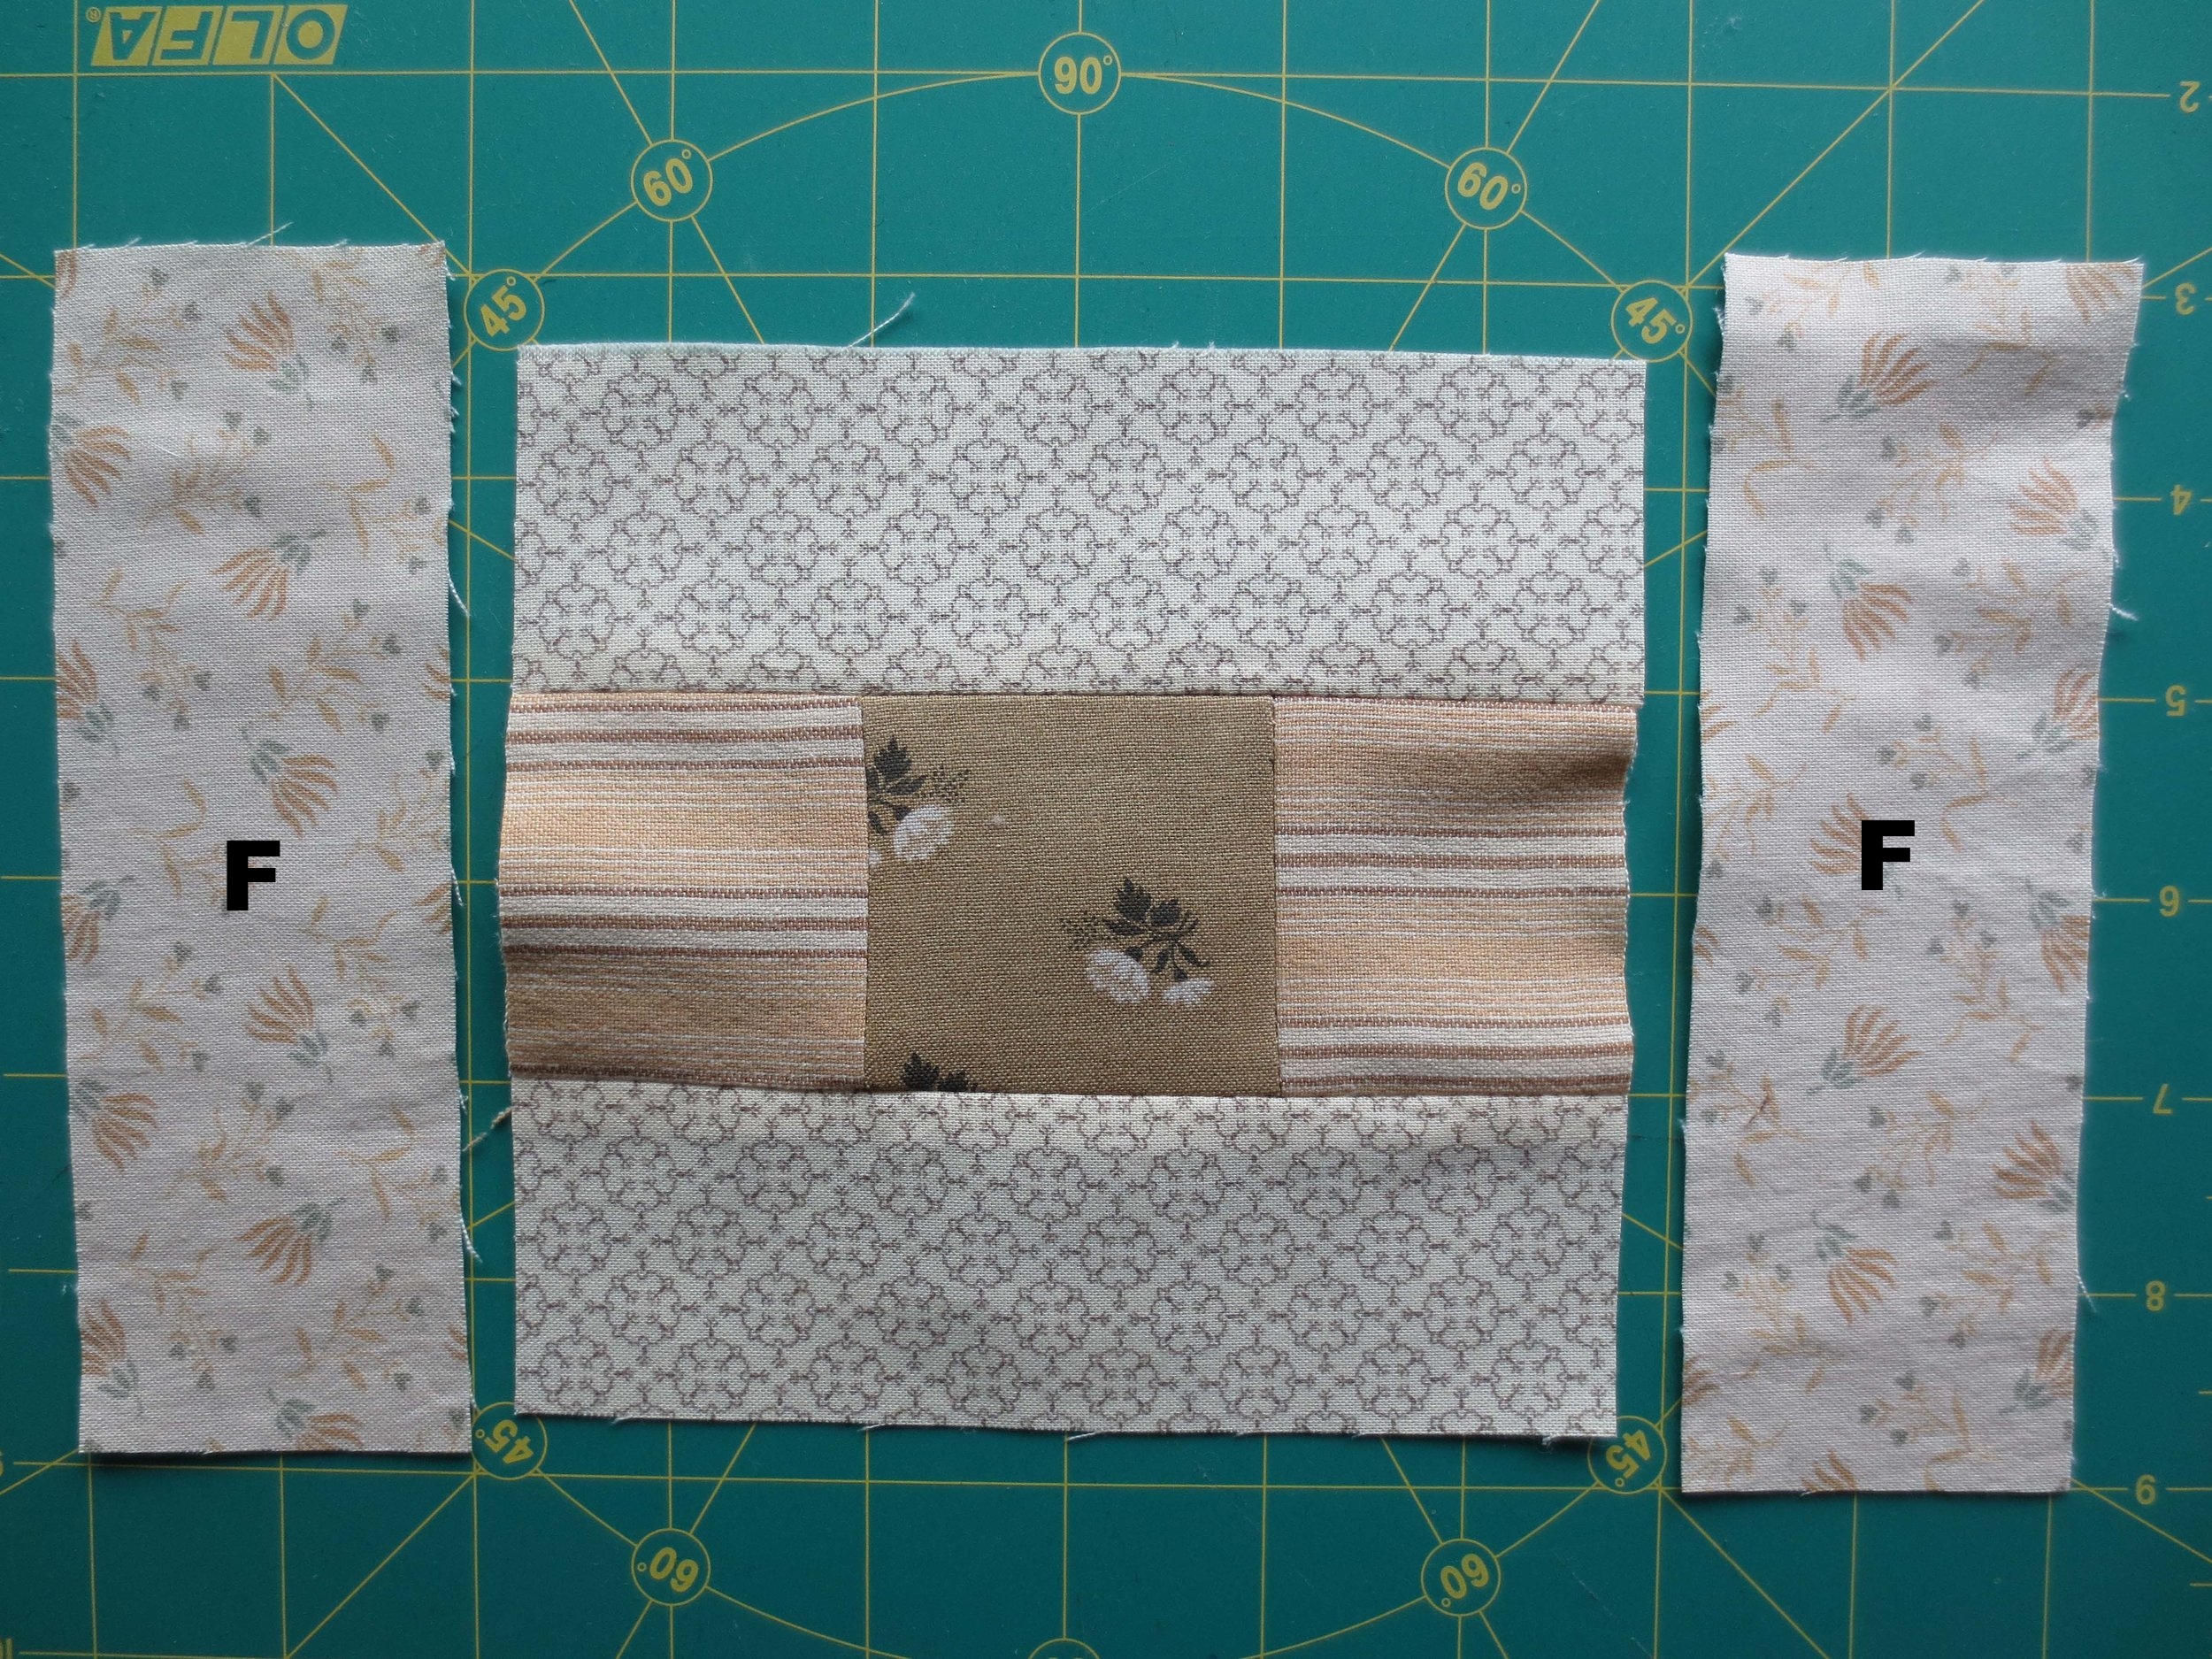
3. Sew a 2” x 7” Fabric F strip to each side of the above block. Trim excess. Press.
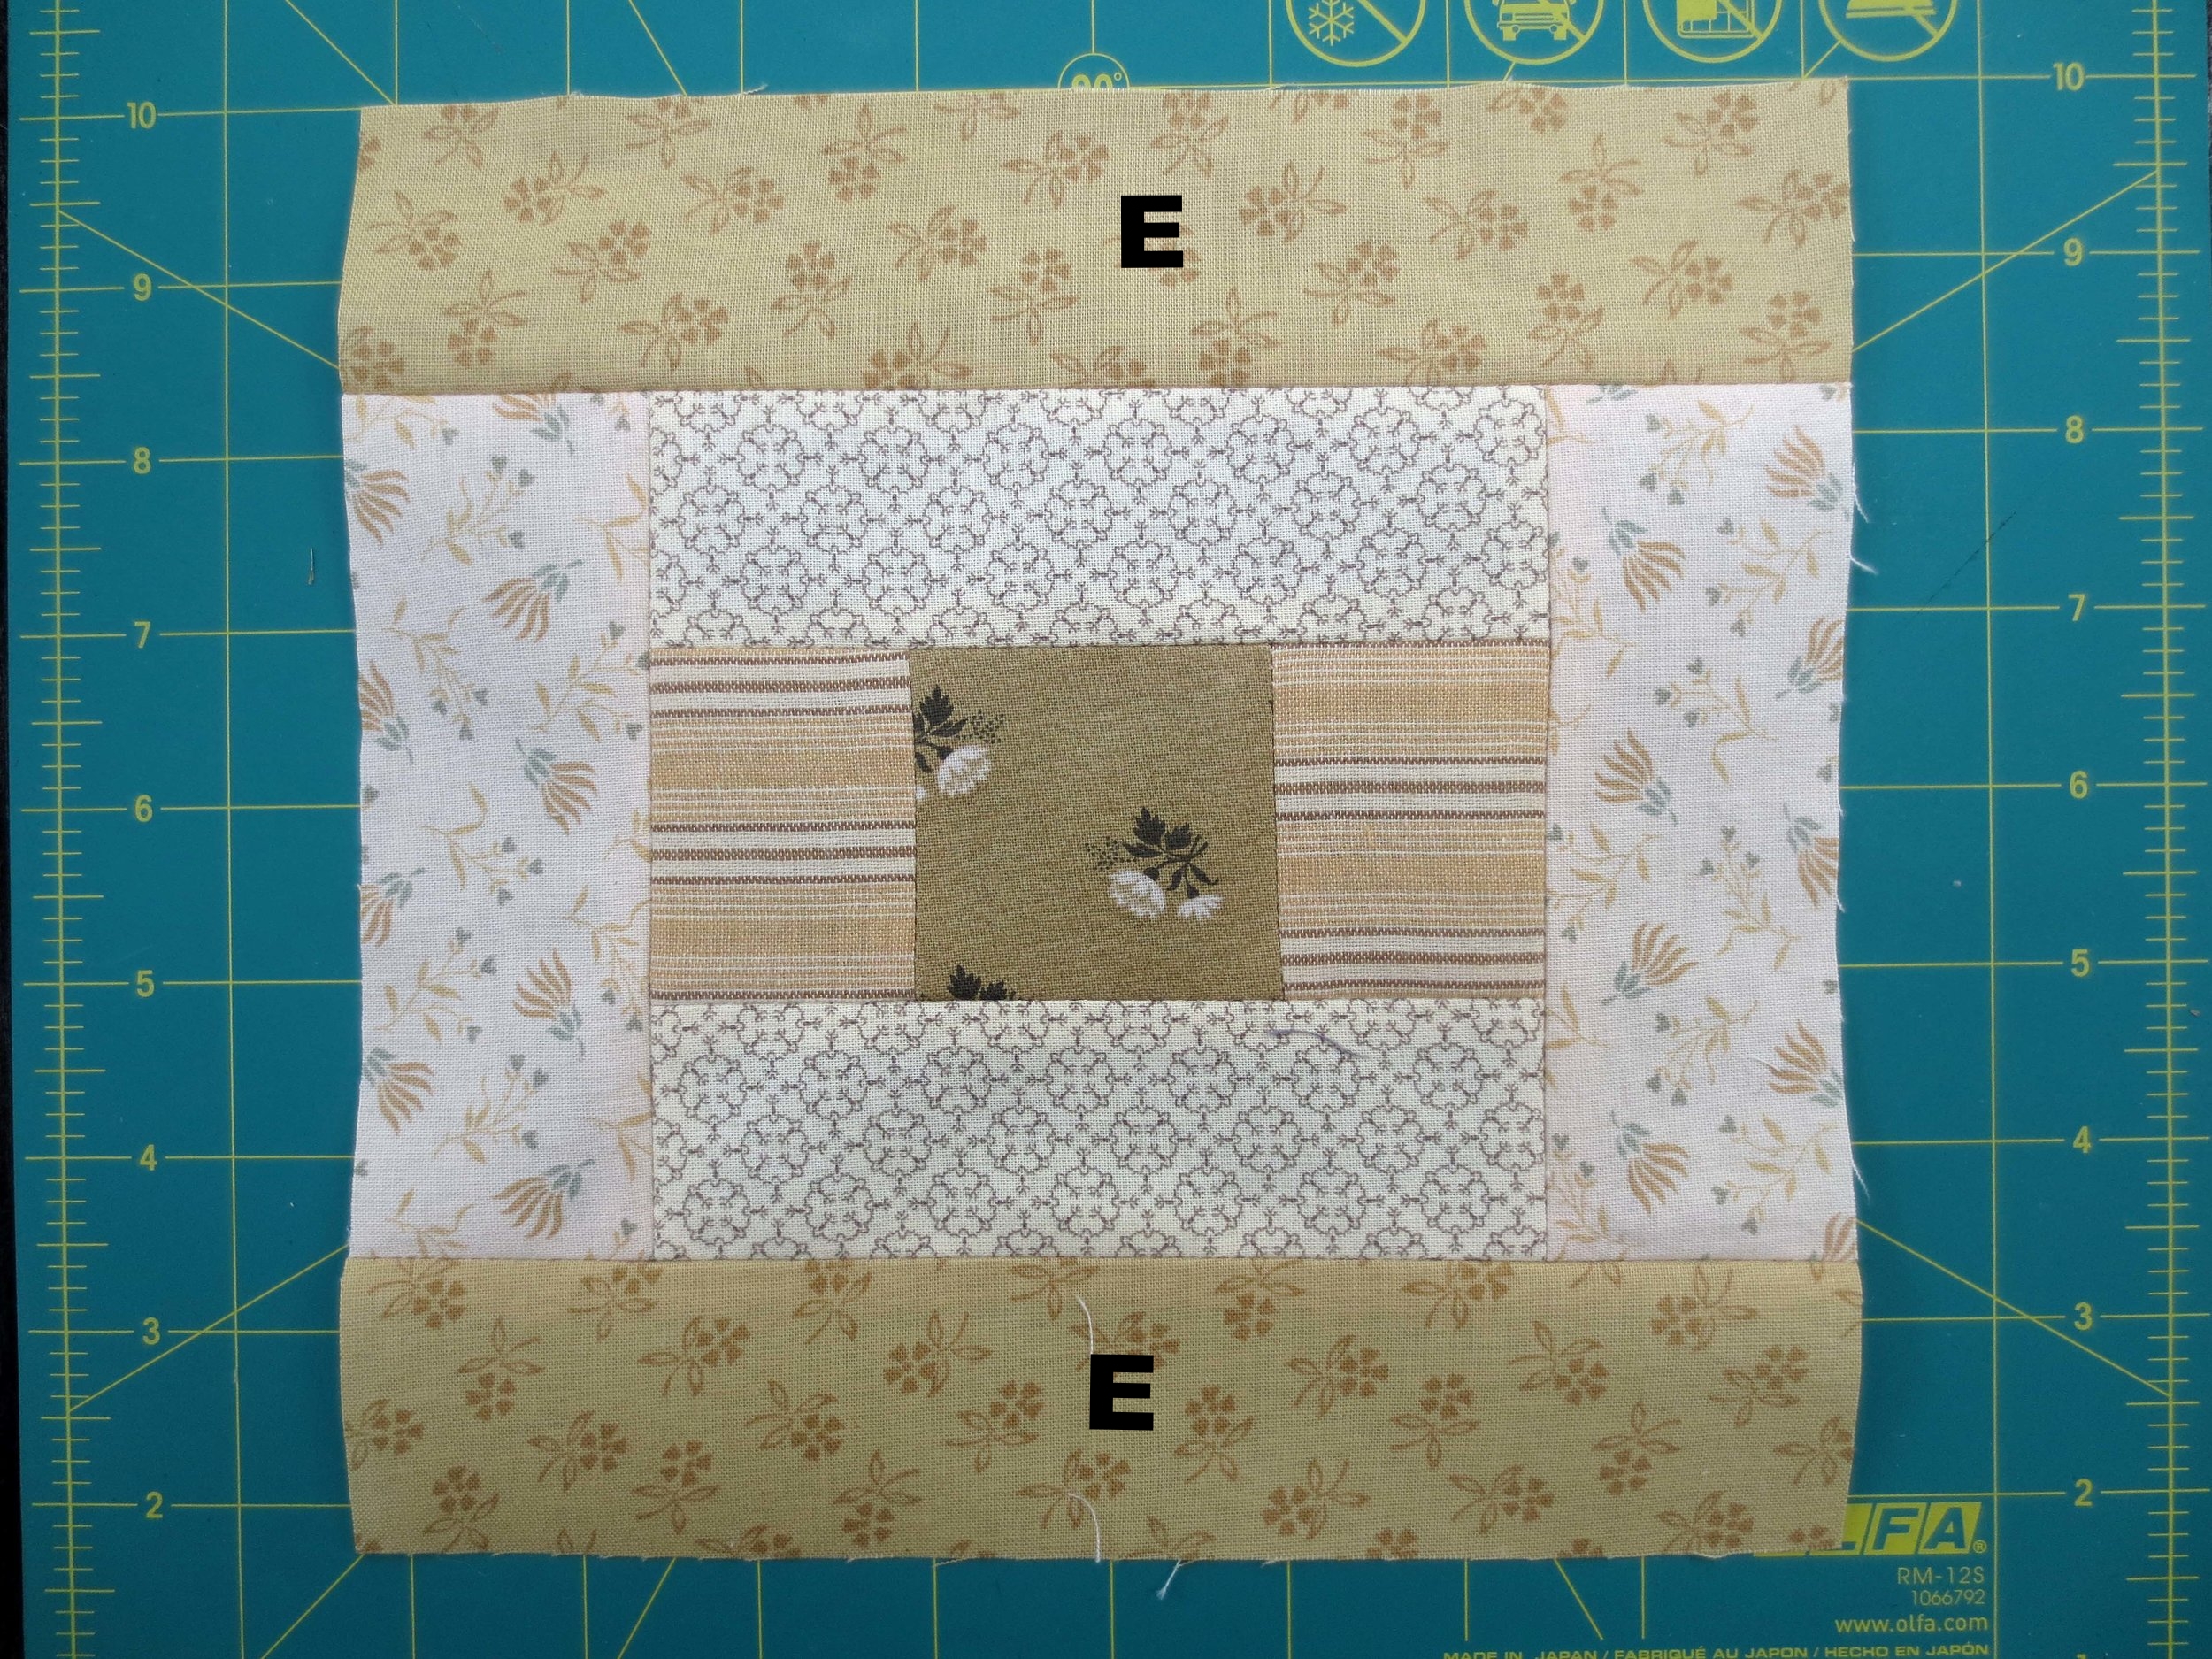
4. Sew a 2” x 9” Fabric E strip to the top and bottom of the block above. Trim excess. Press.
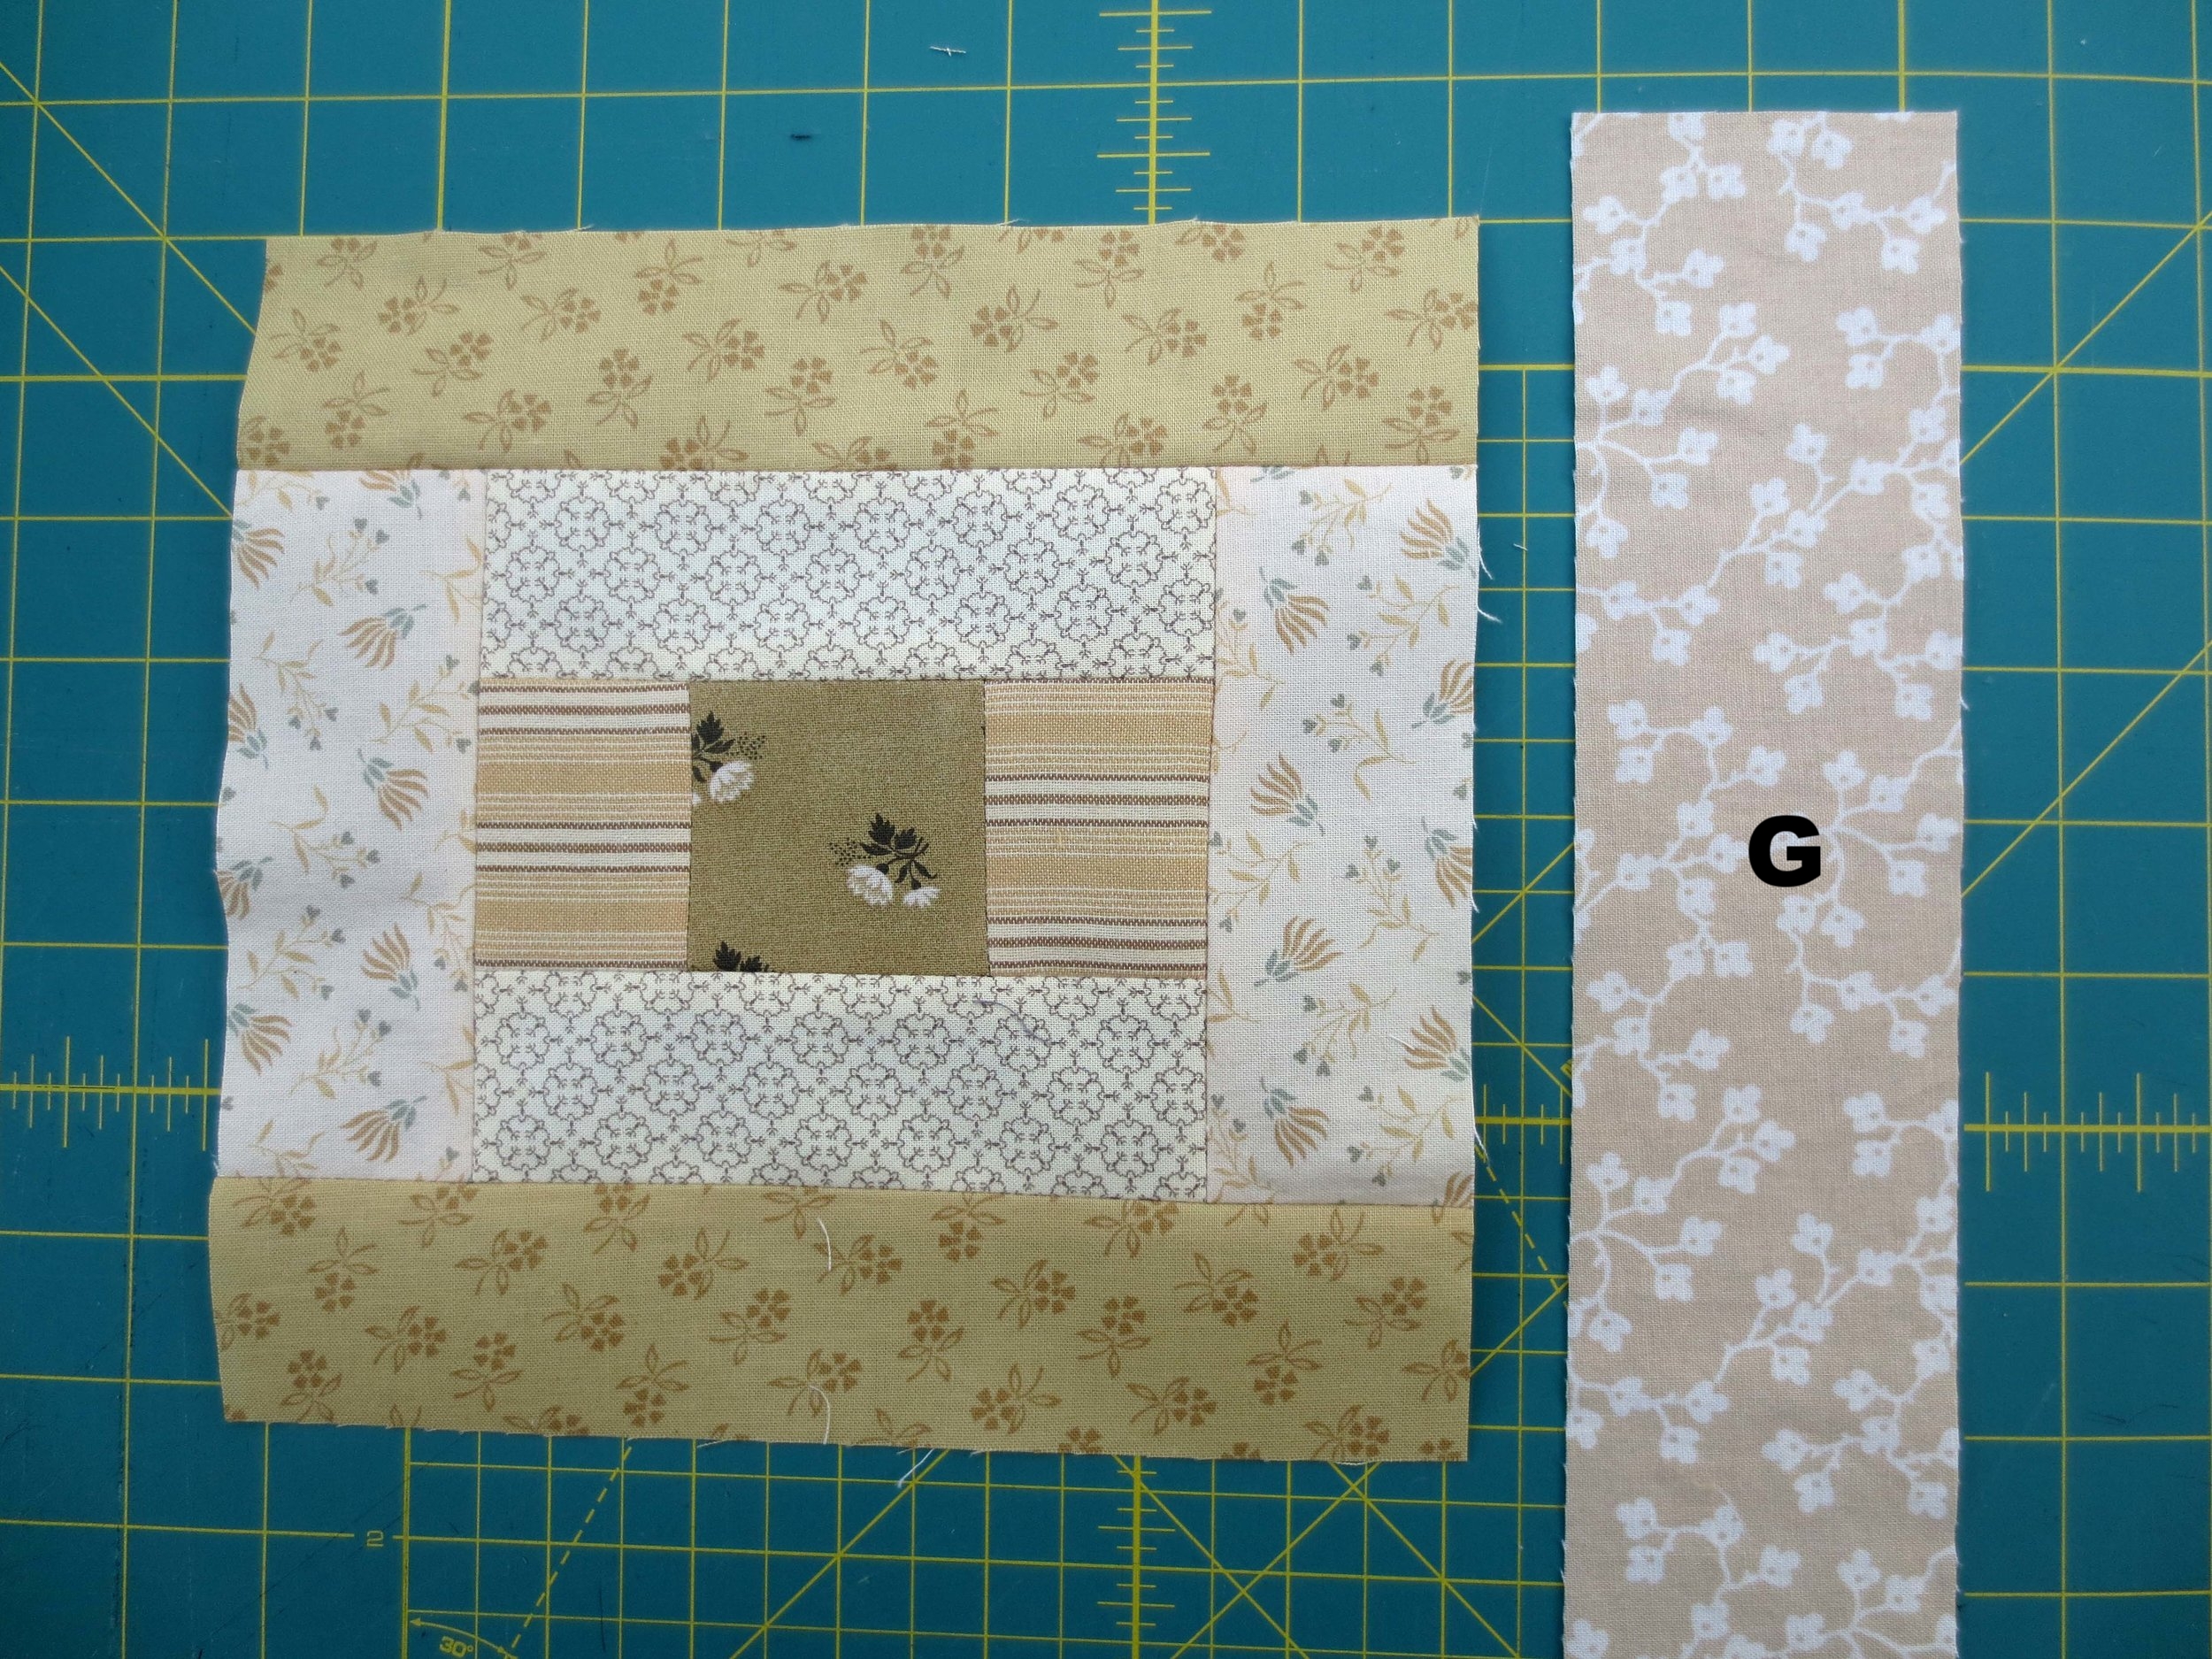
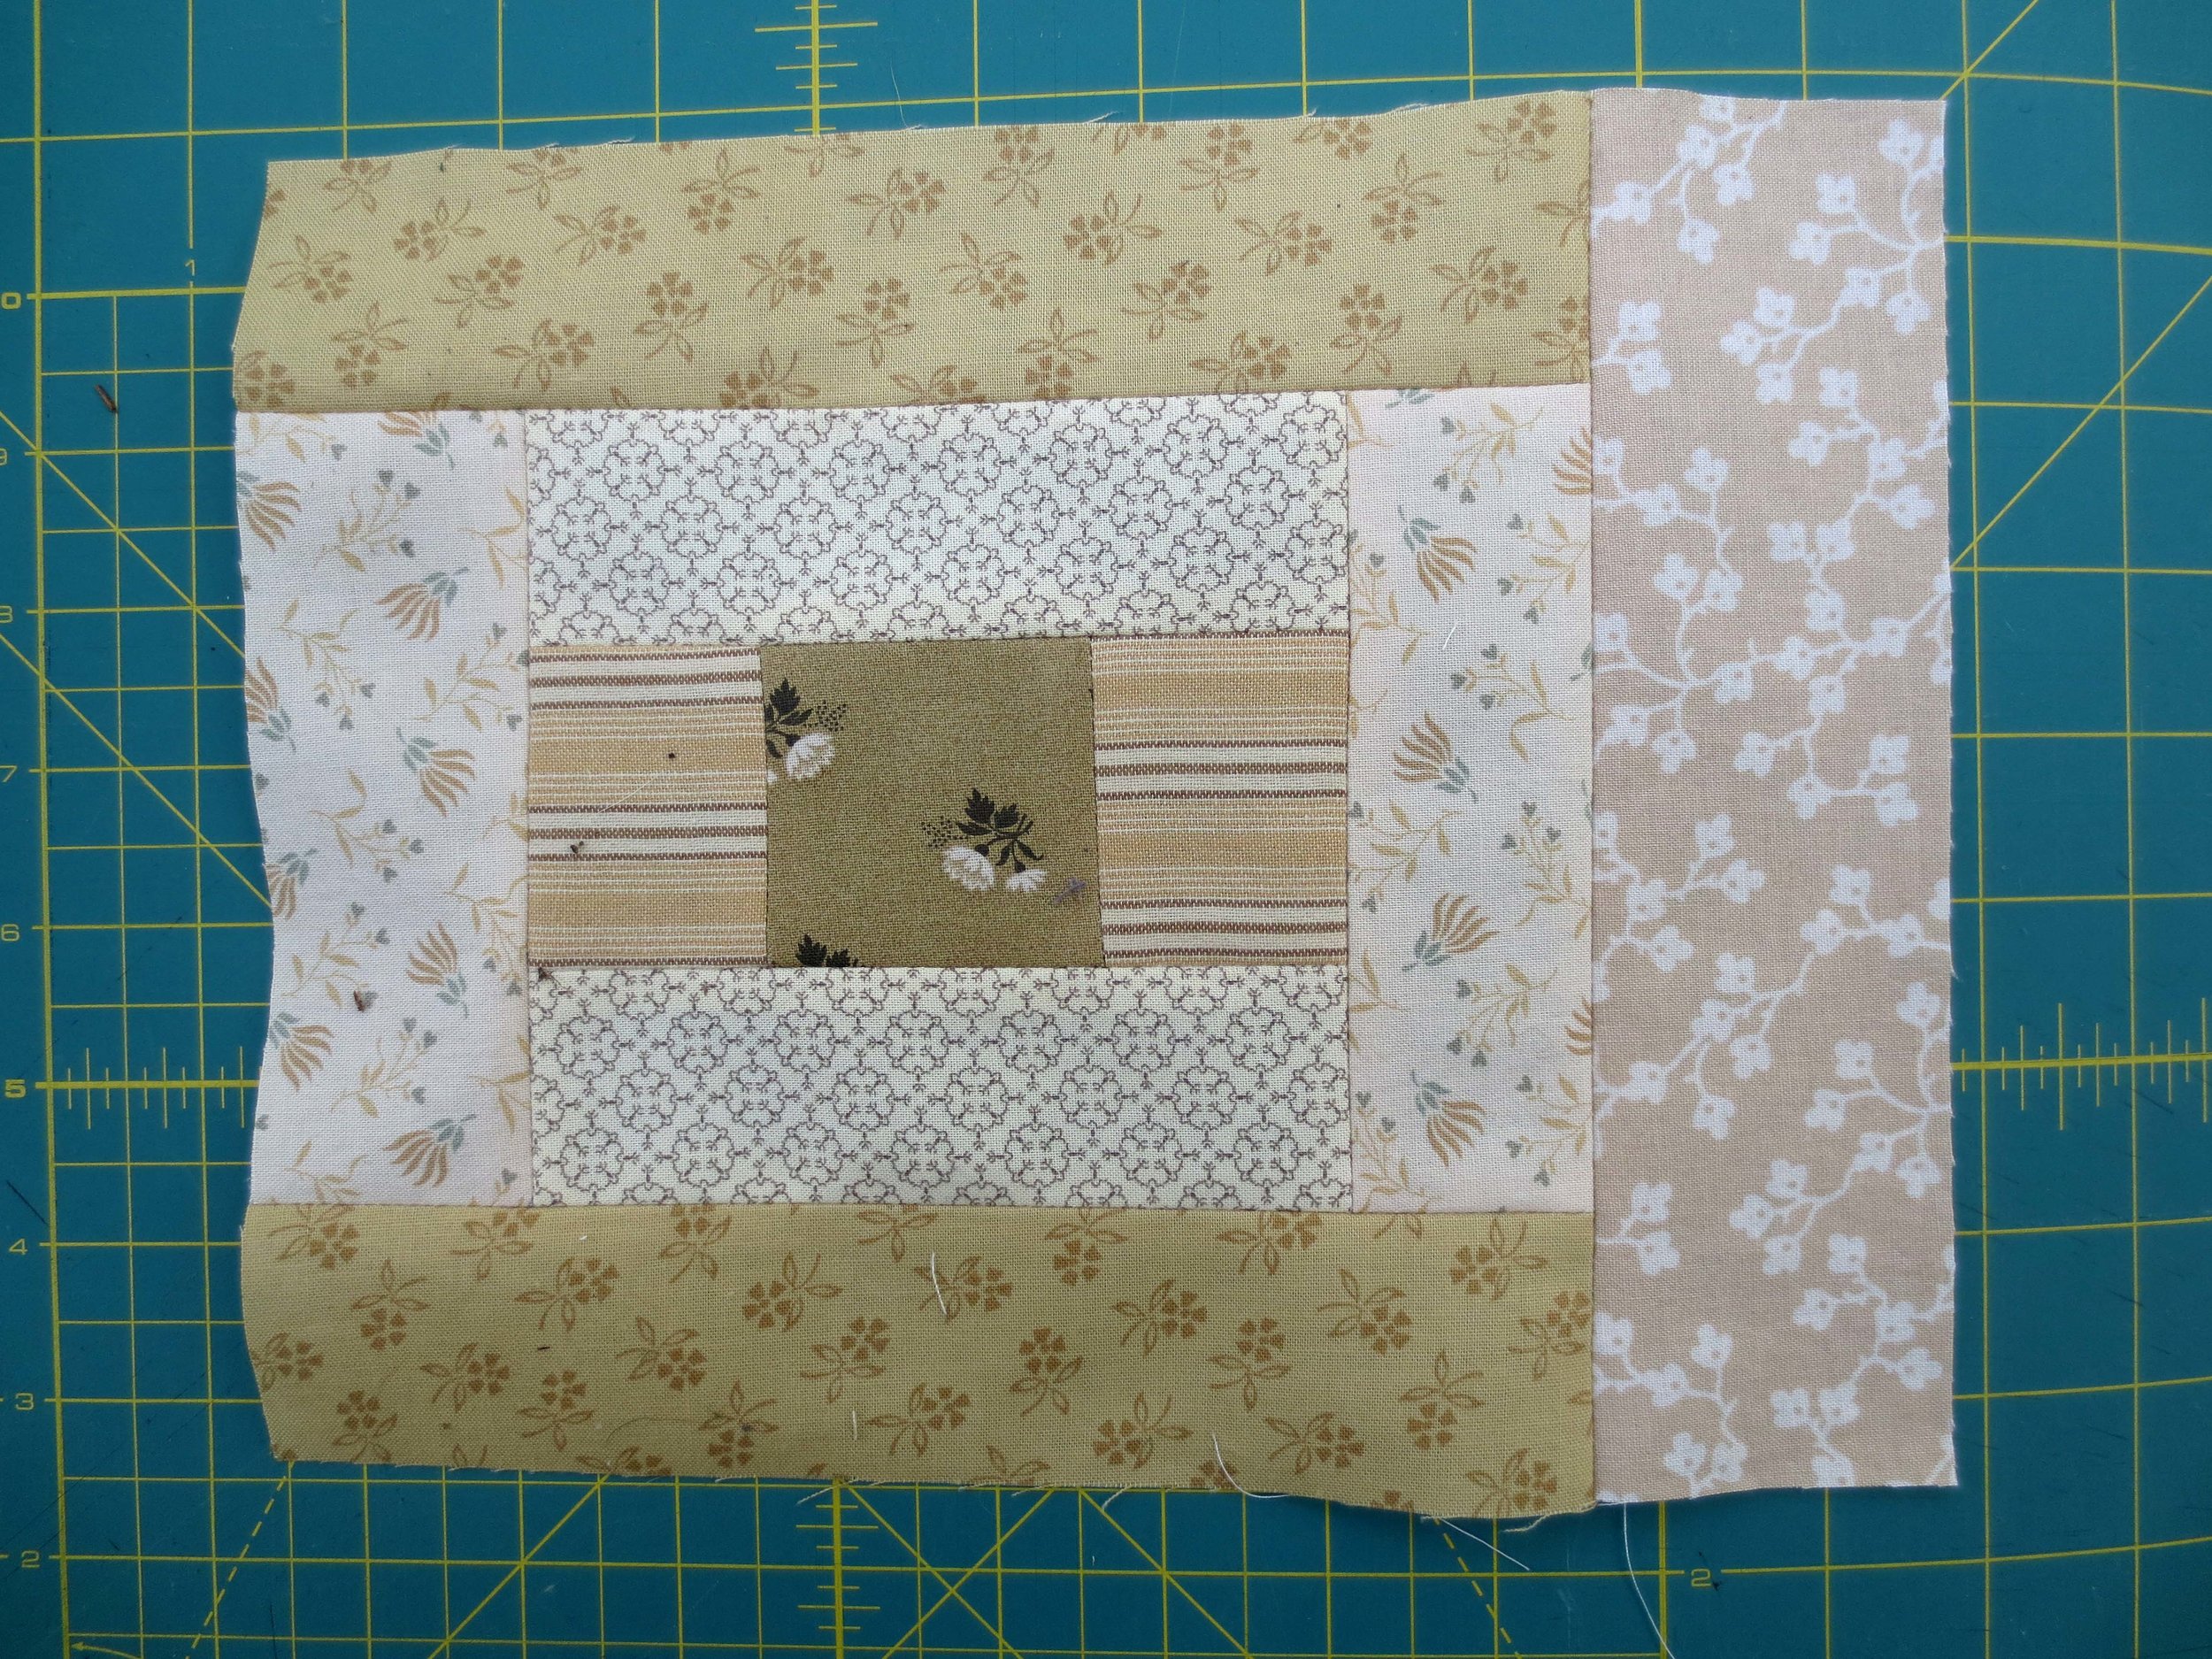
5. Sew the 2 1/2” wide strip of Fabric G to the right side of the block above. Trim excess and set aside for outer border. Press.
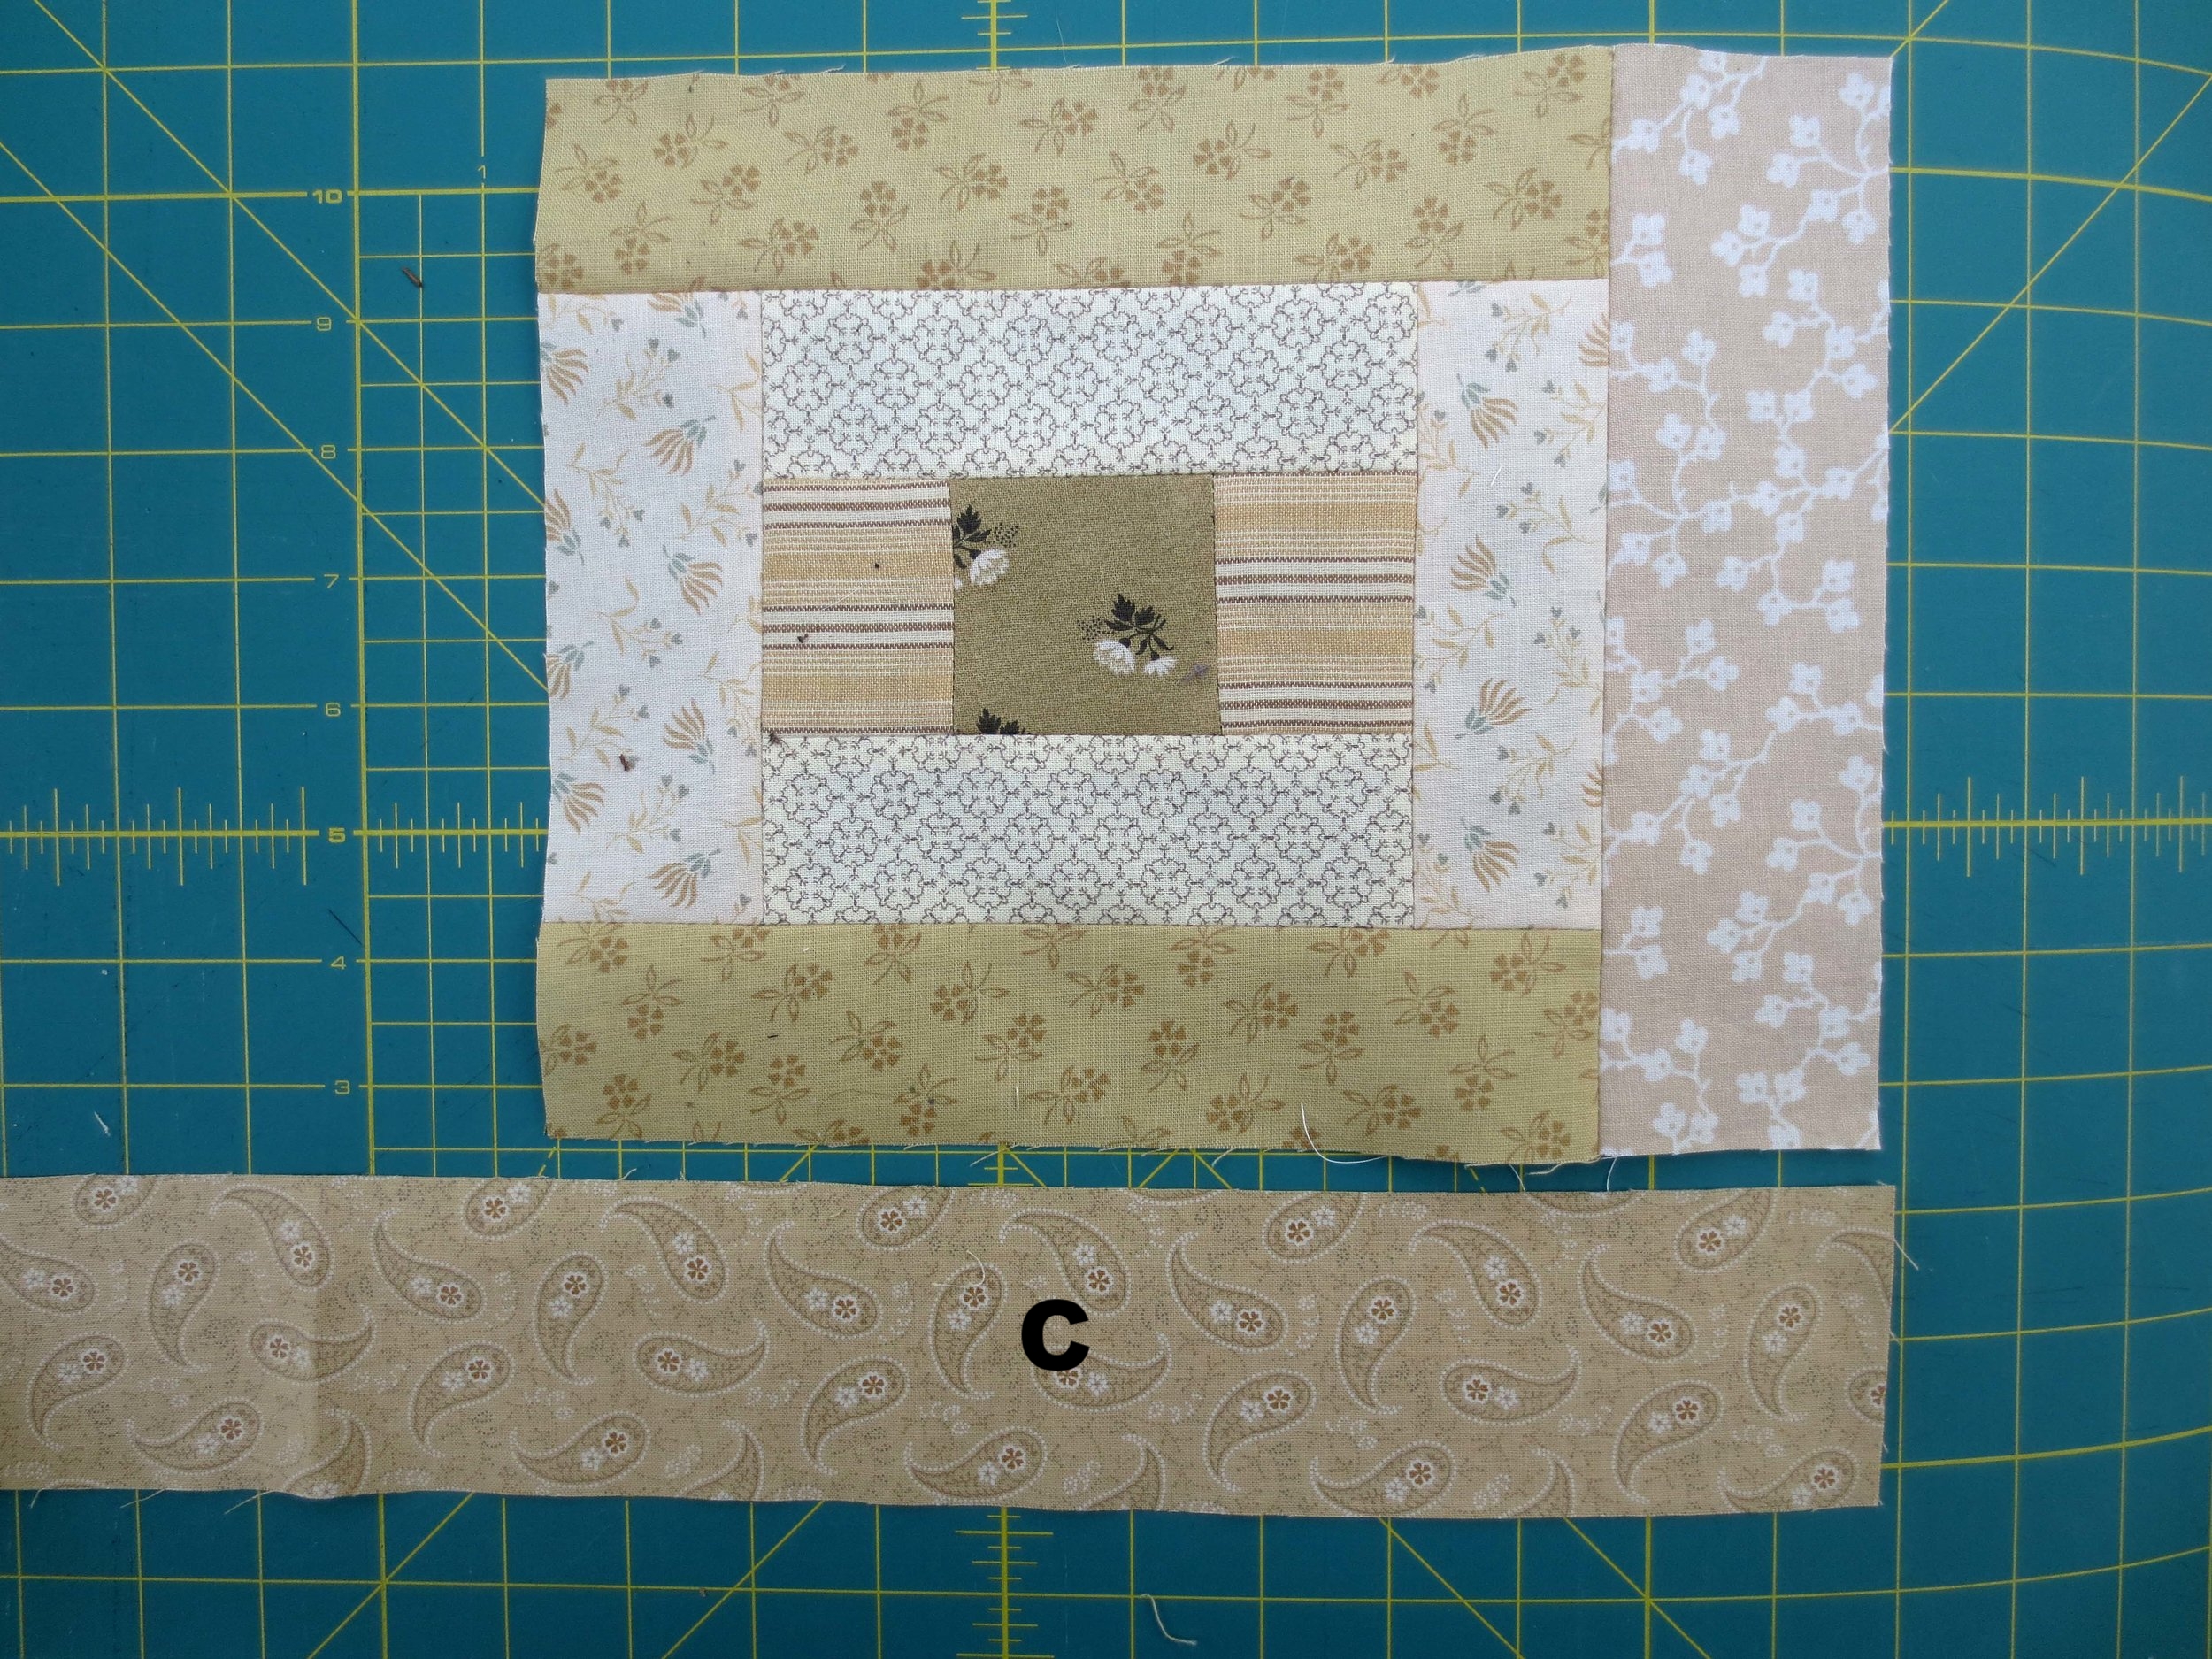
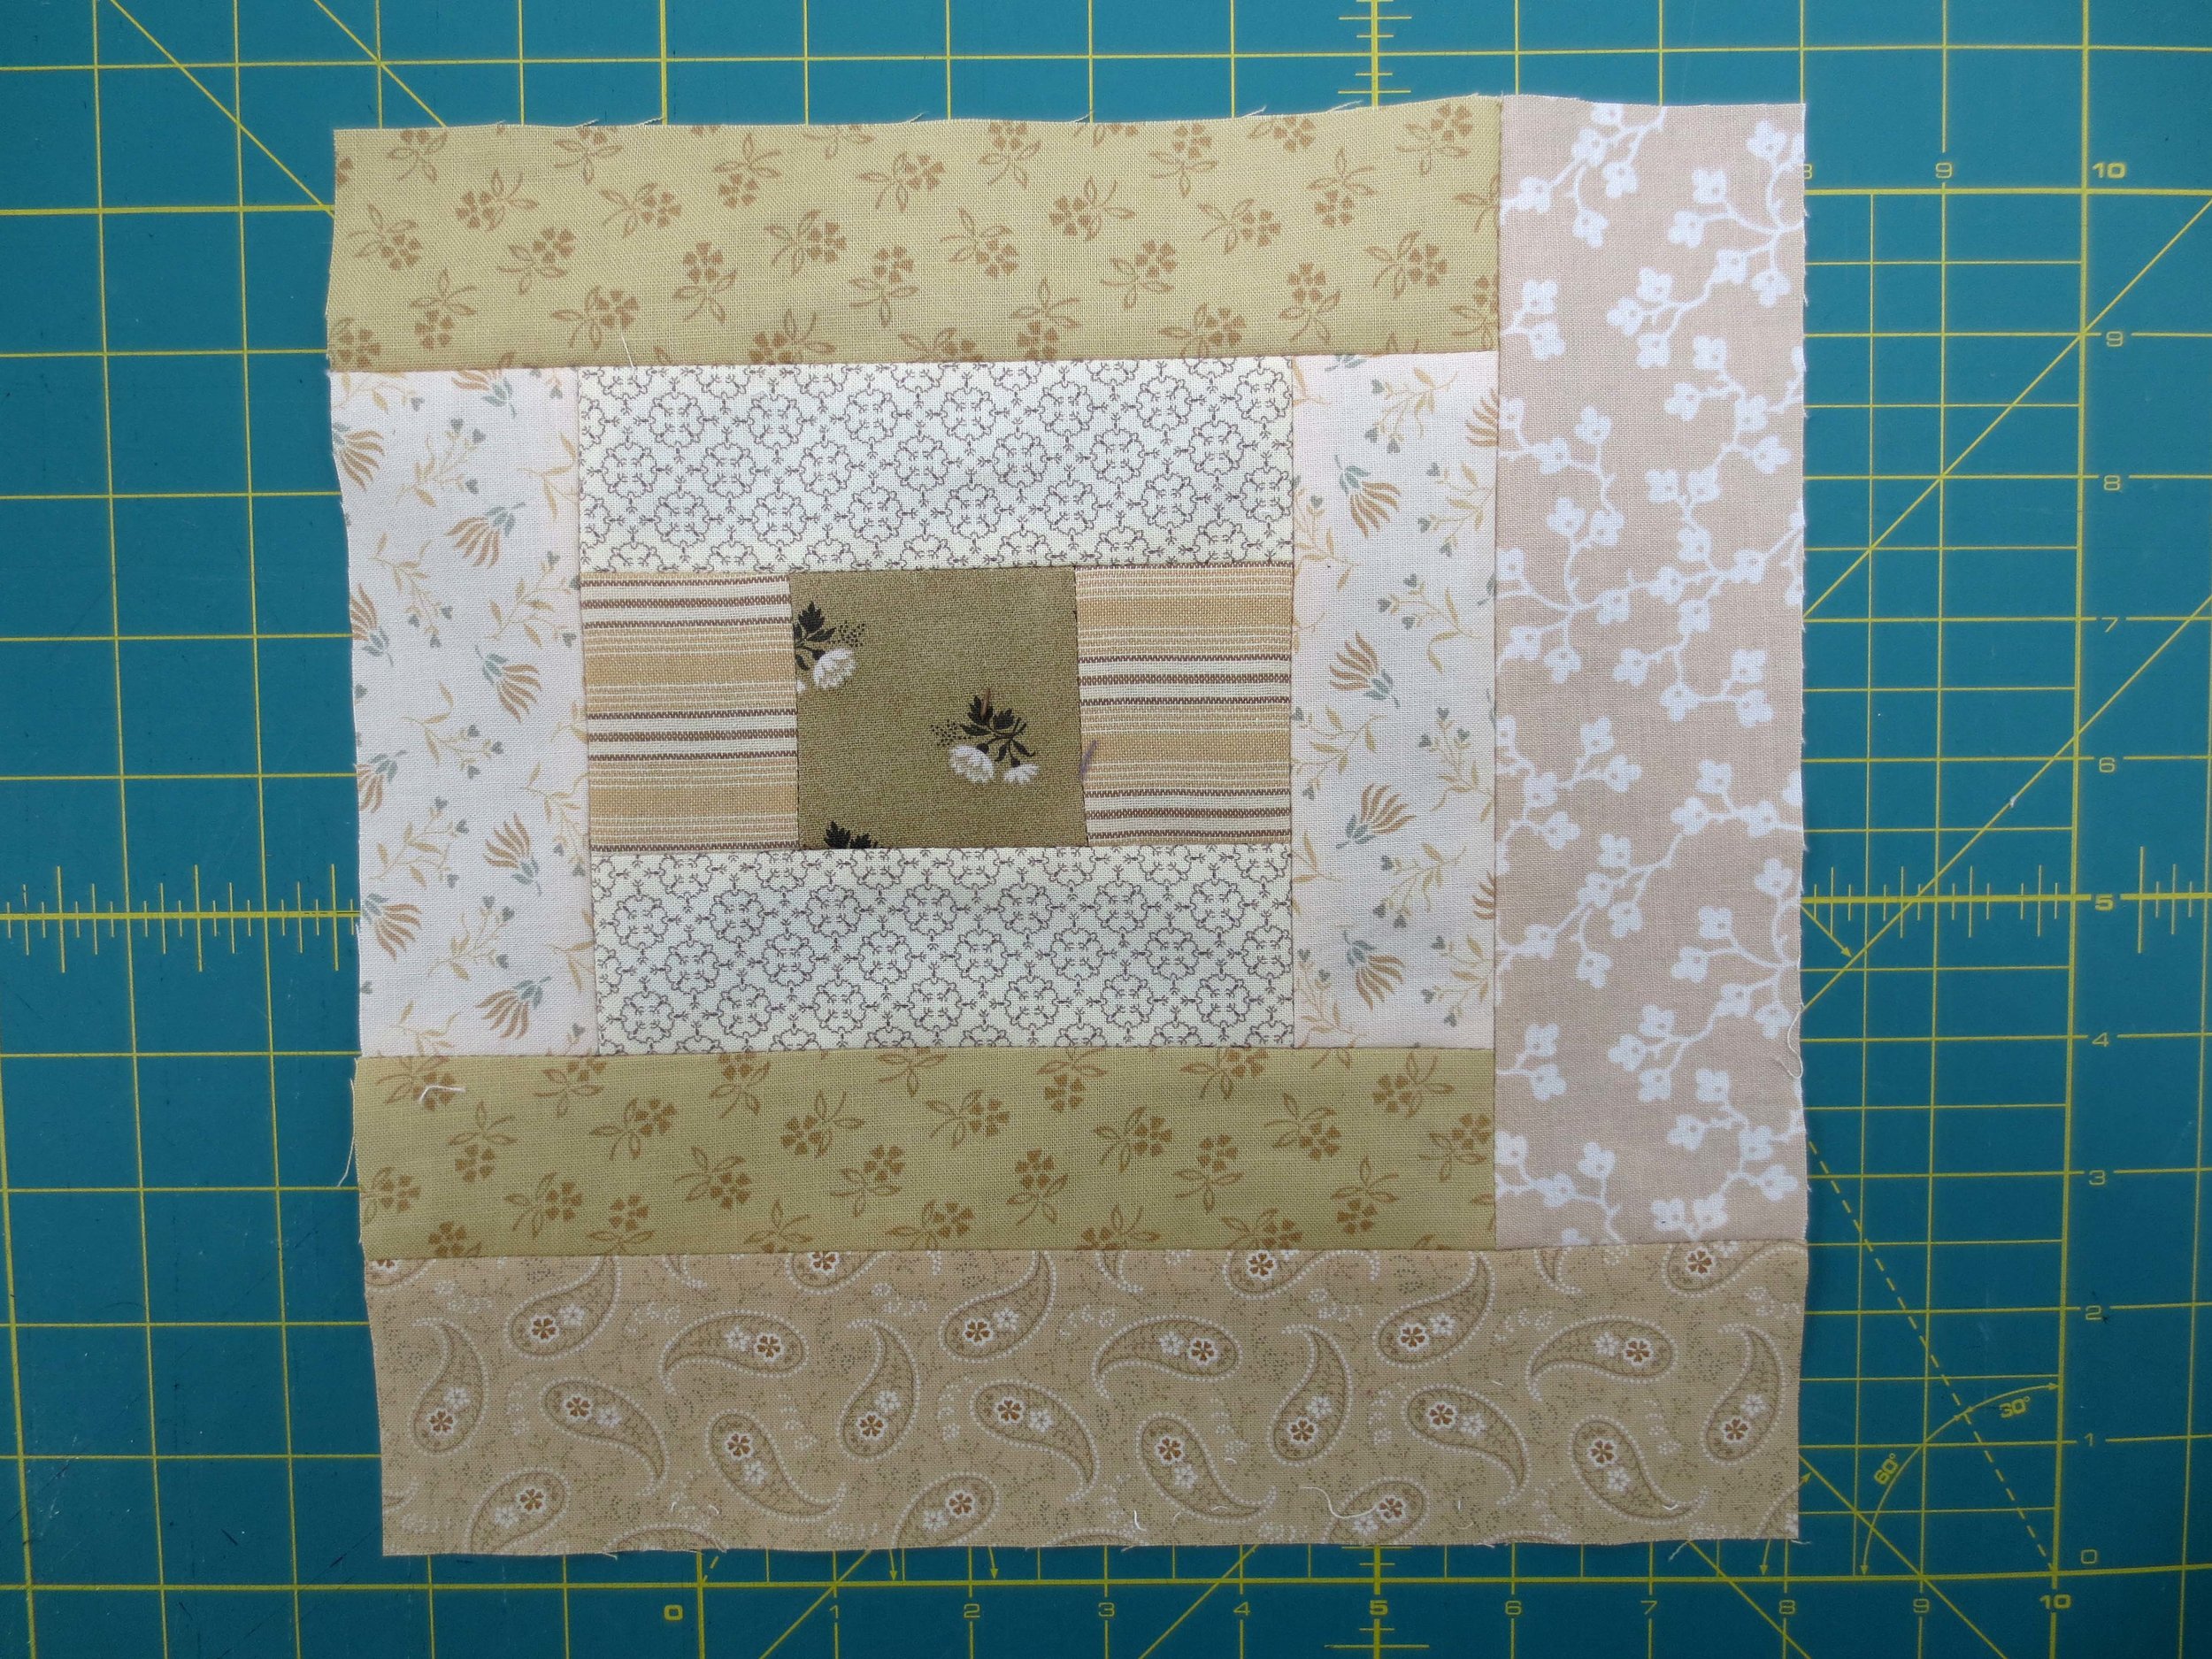
6. Sew the 2 1/2” wide strip of Fabric C to the bottom of the block above. Trim excess and set aside for use in the outer border. Press.
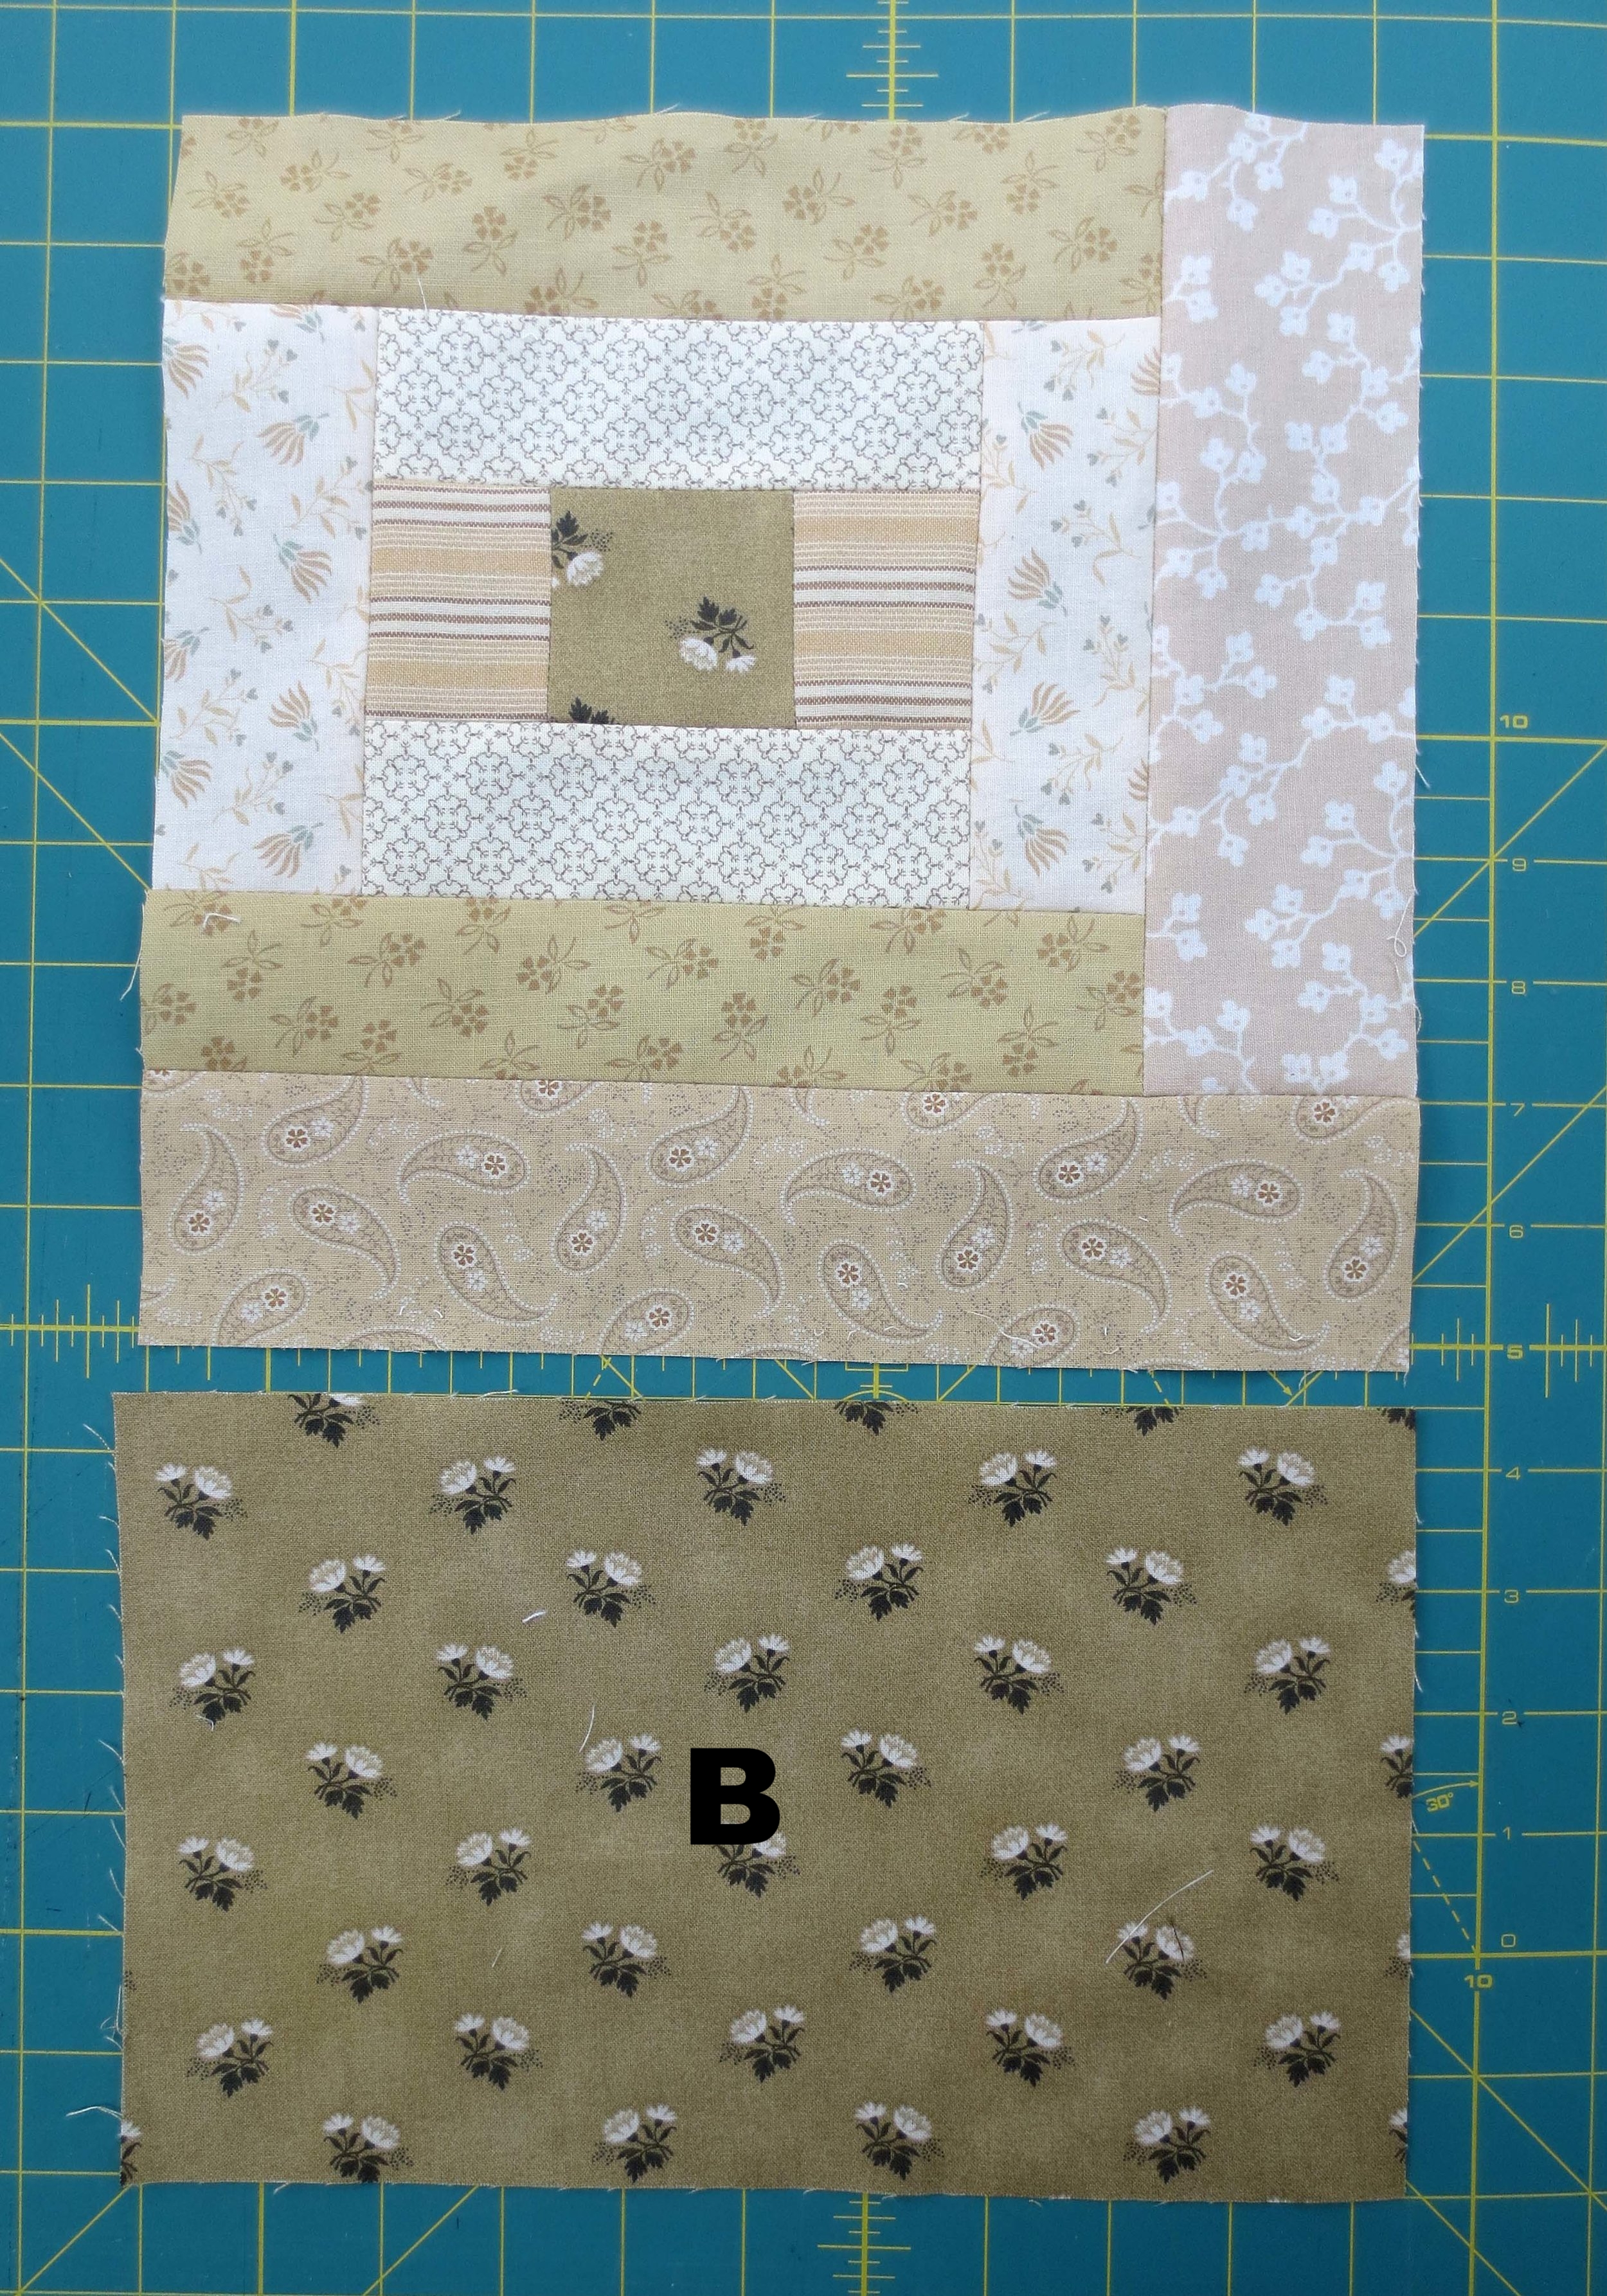
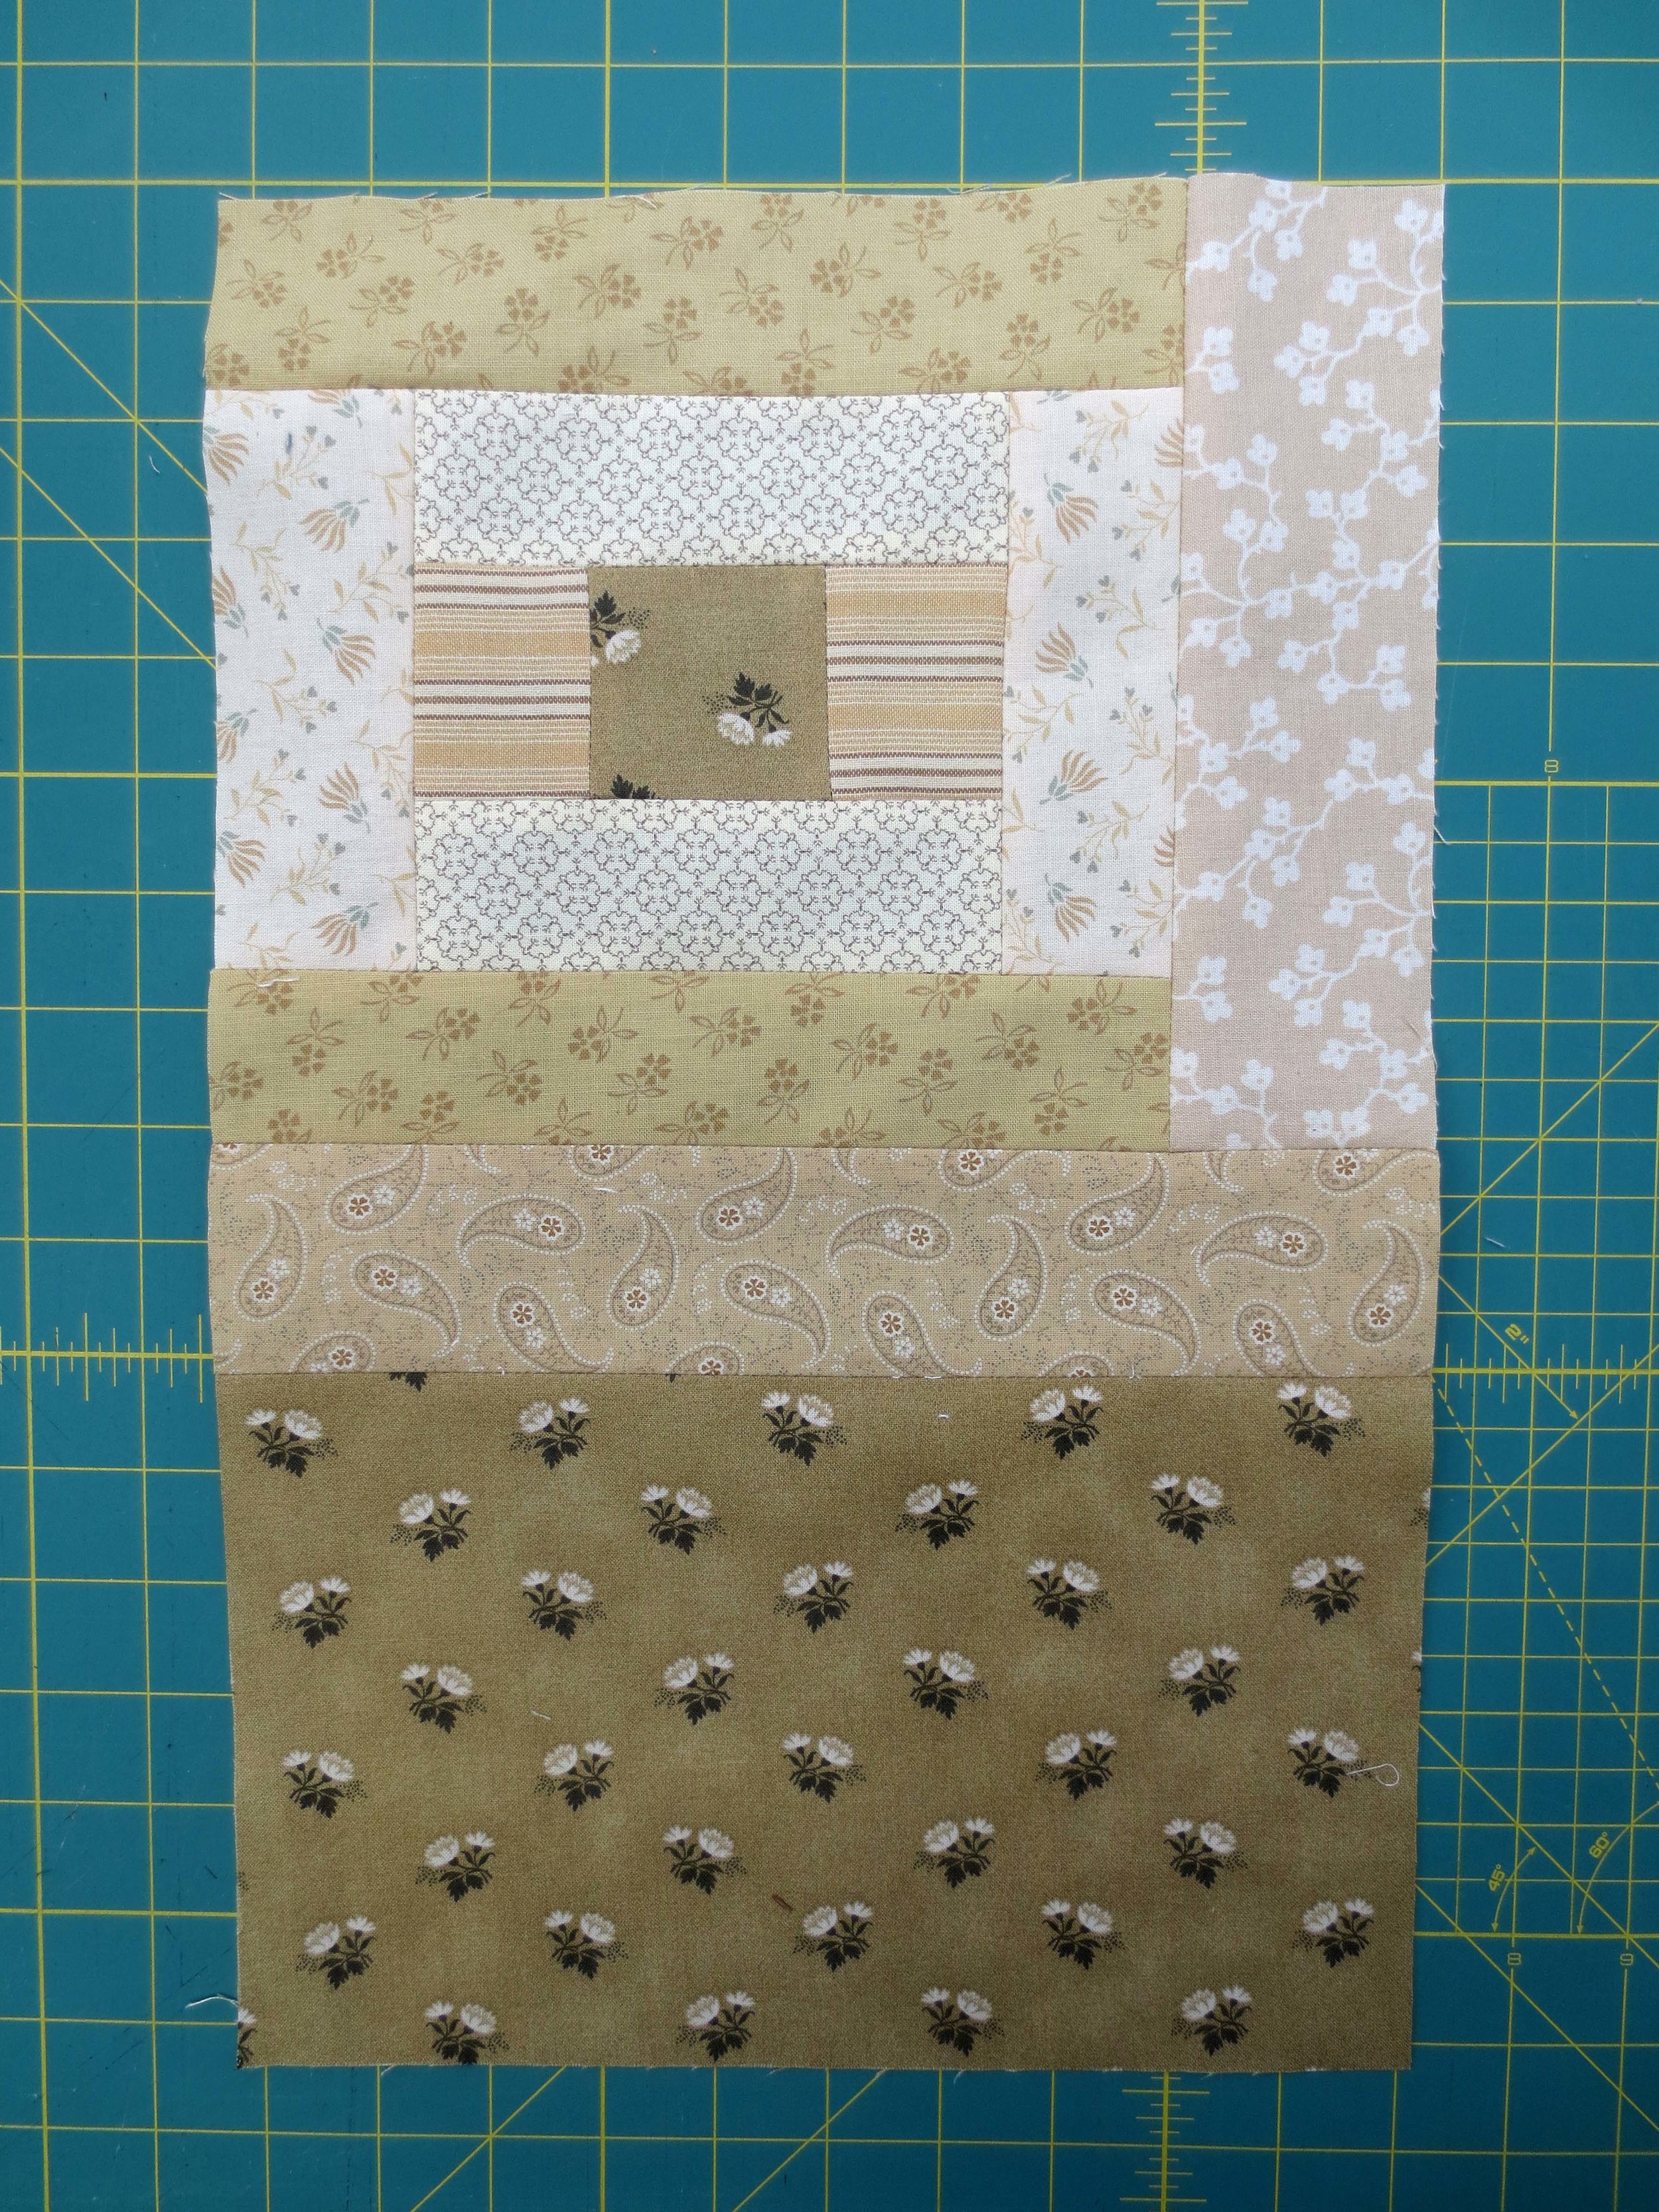
7. Sew the 6 1/2” x 10 1/4 block of Fabric B to the bottom of the block above. Press
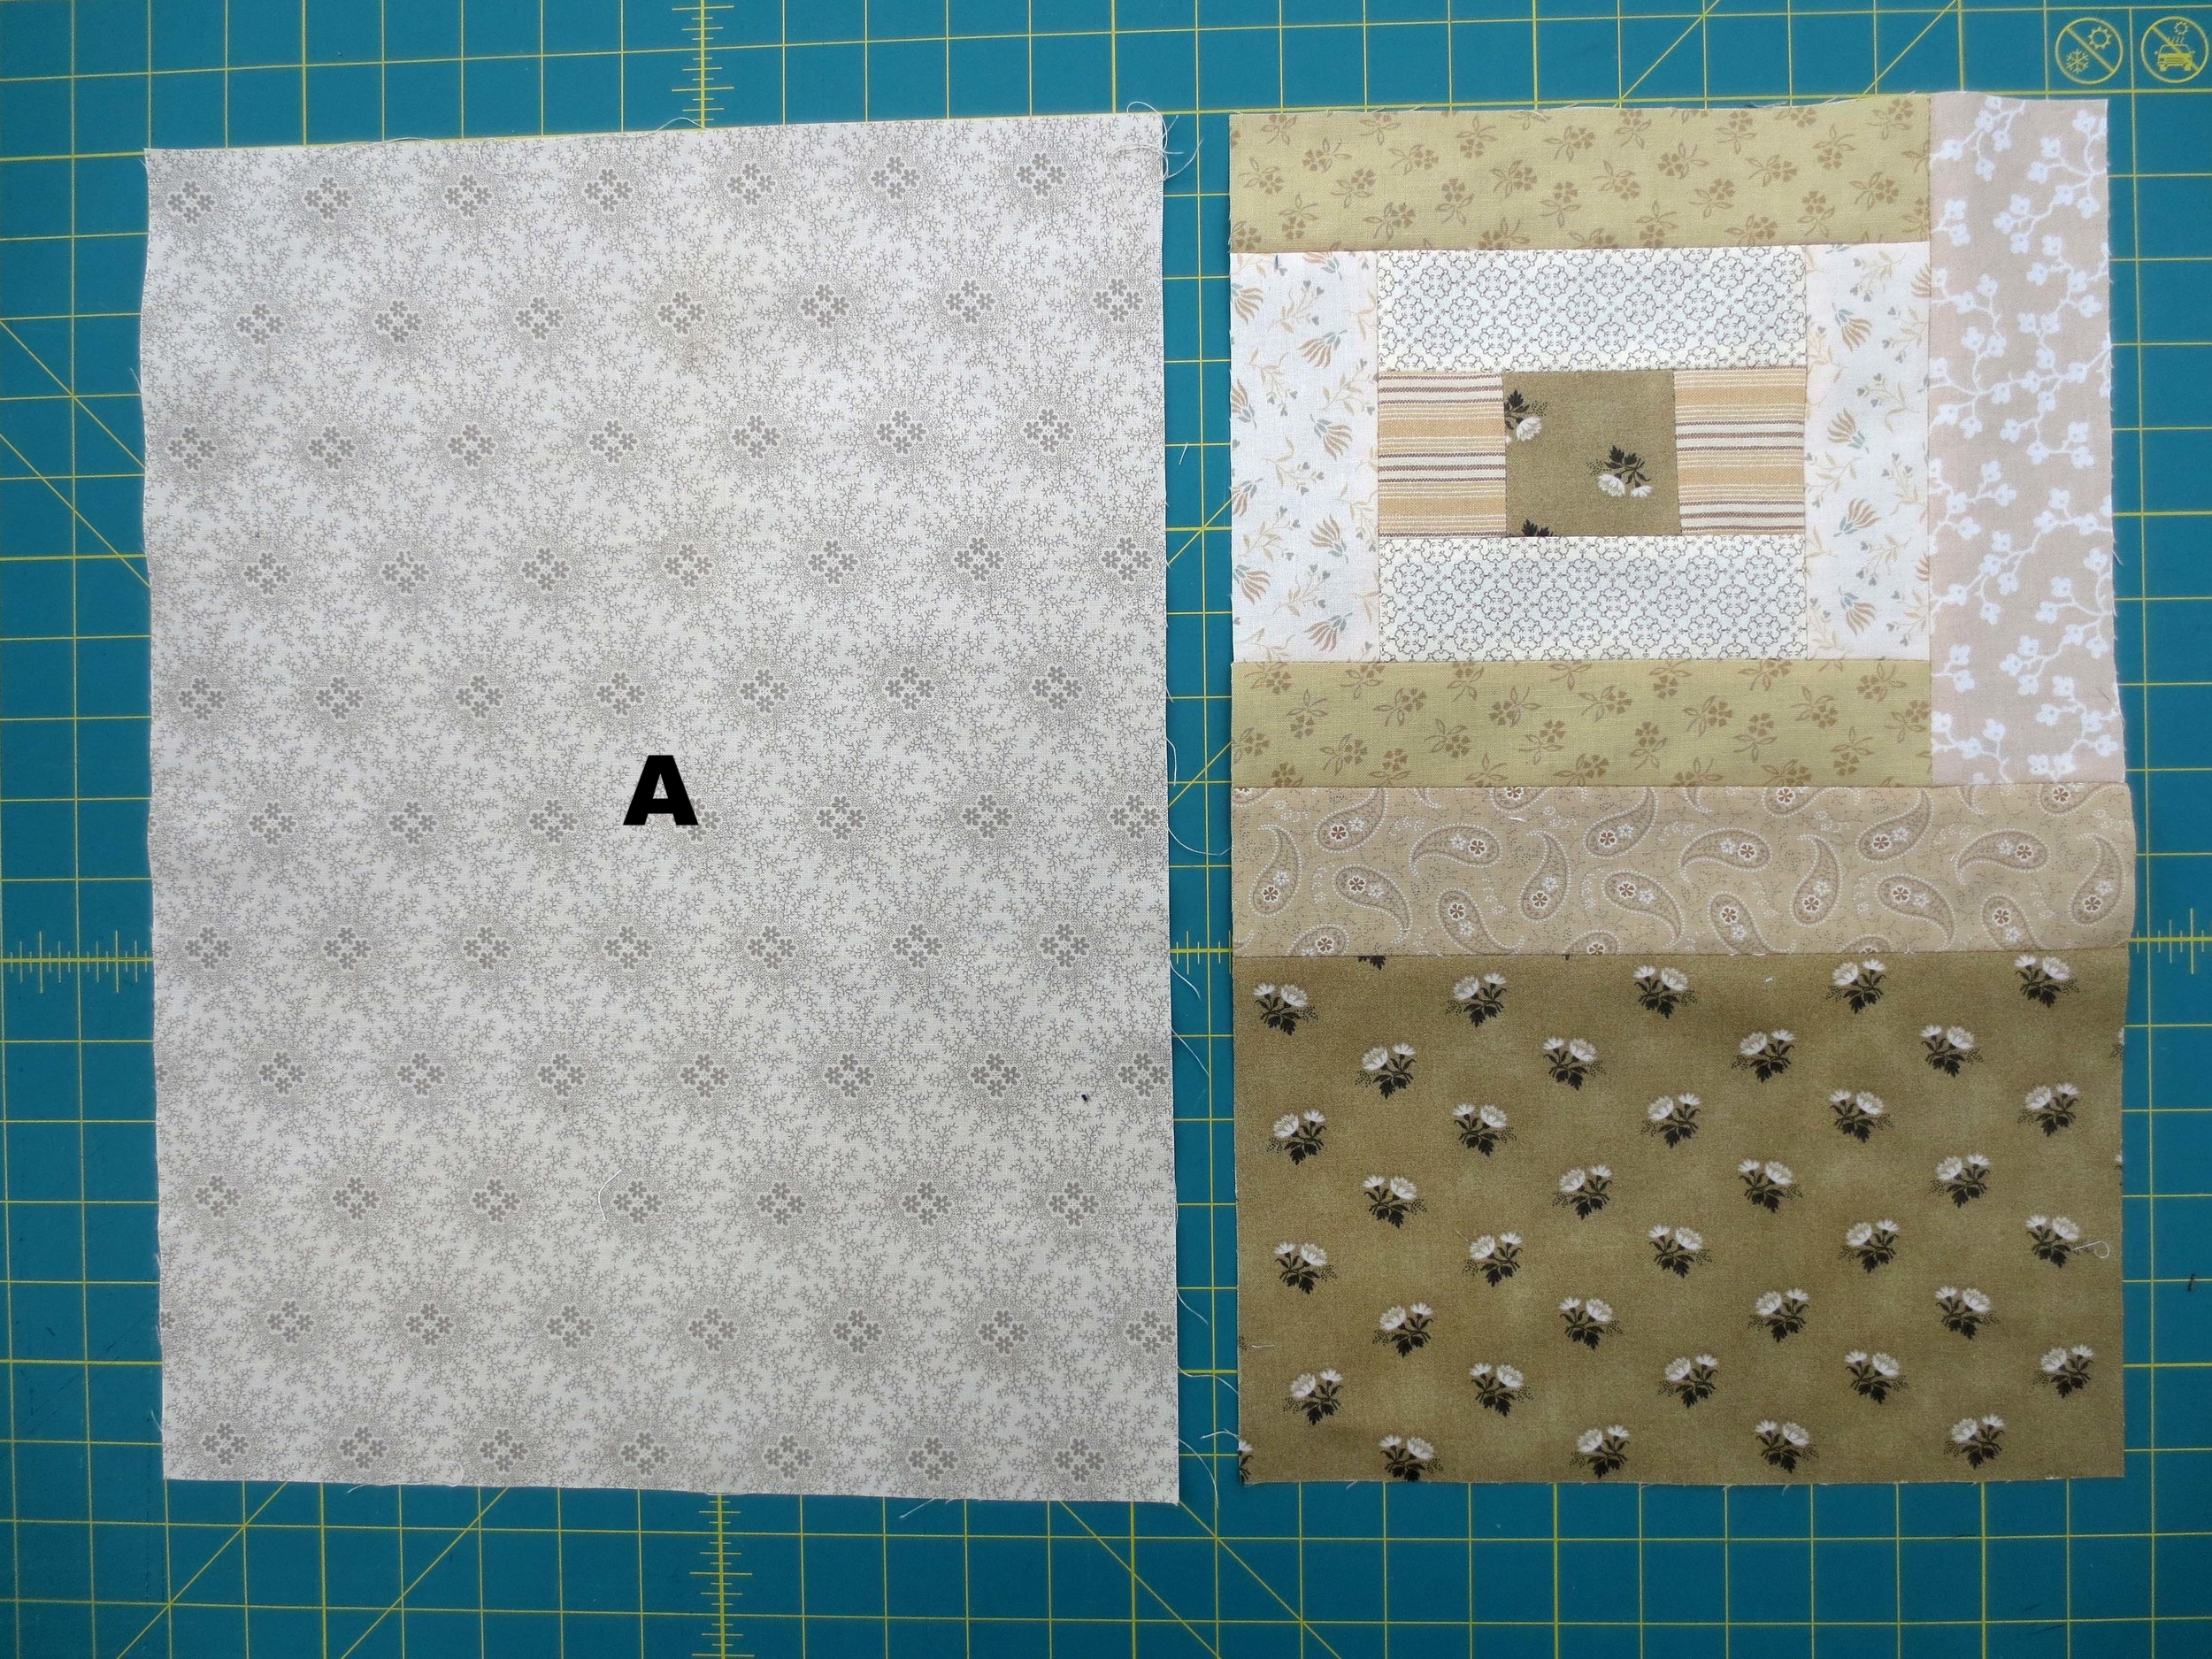
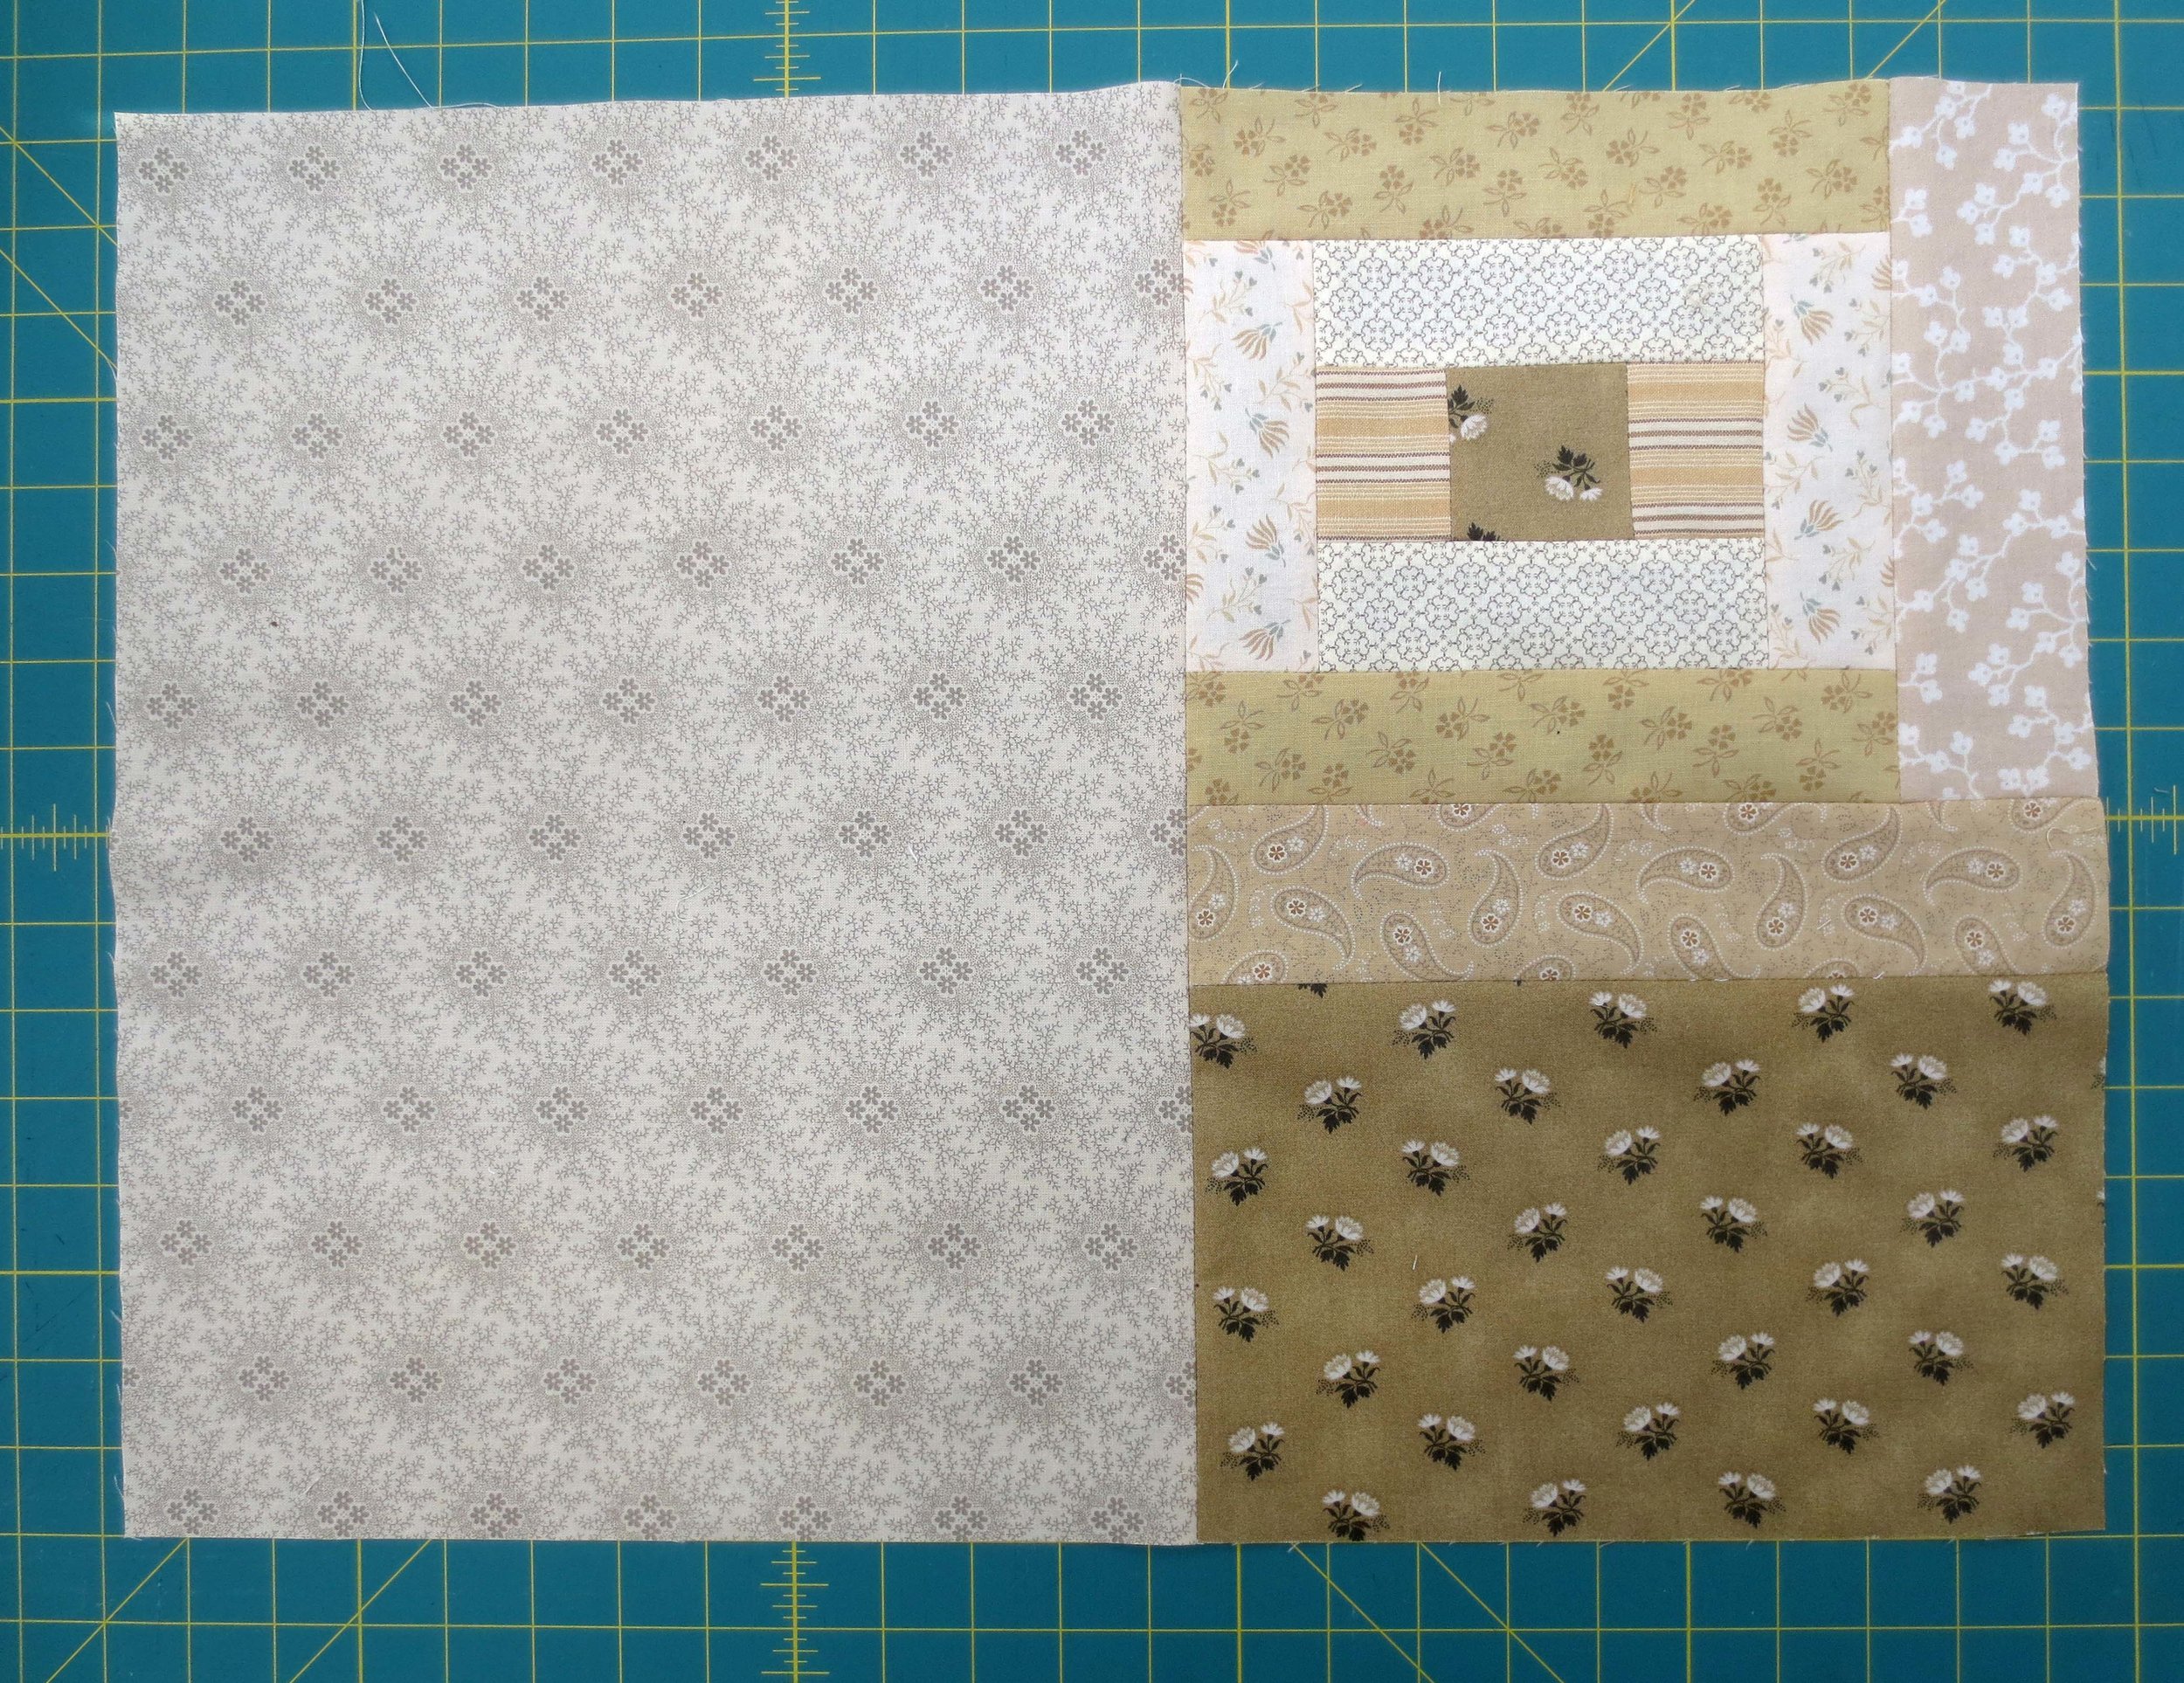
8. Sew the 12 1/2” x 16 1/4” Fabric A block to left side of the block above. Press.
You can zig zag the perimeter of the block above and begin to applique (see applique section), or you can continue and add the borders.
9. Making Half Square Triangles (HST) 8 at a time.
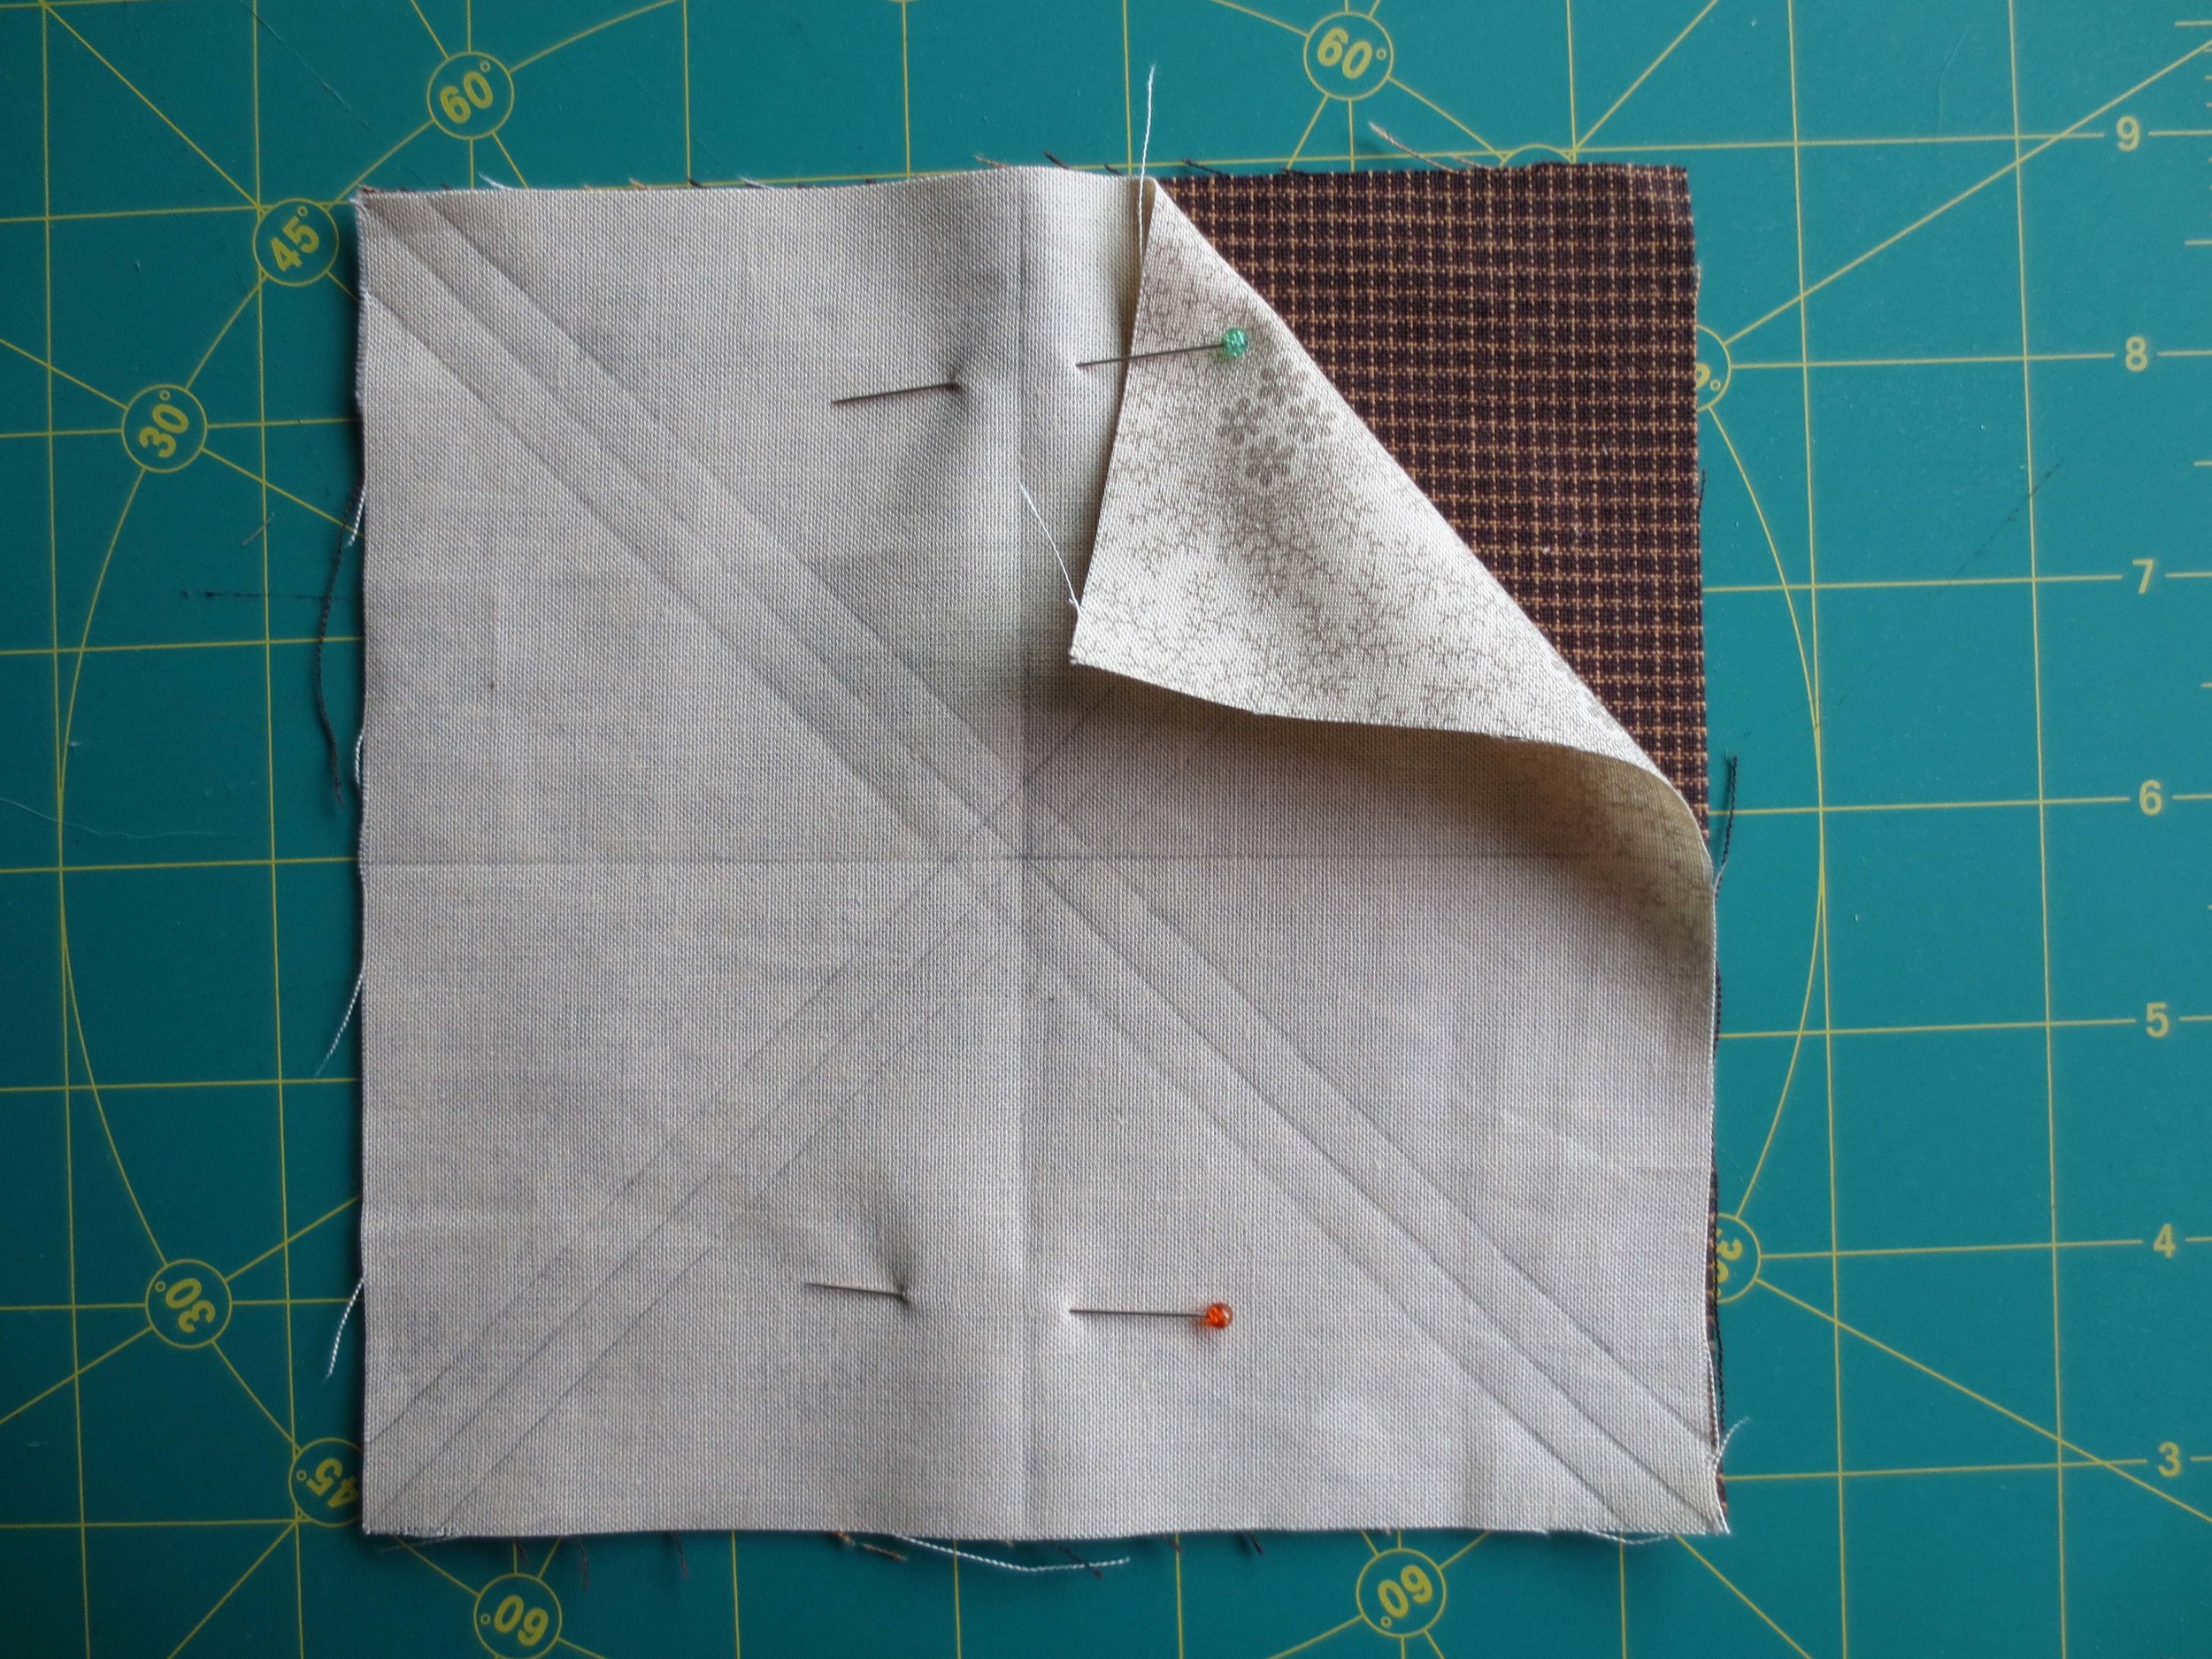
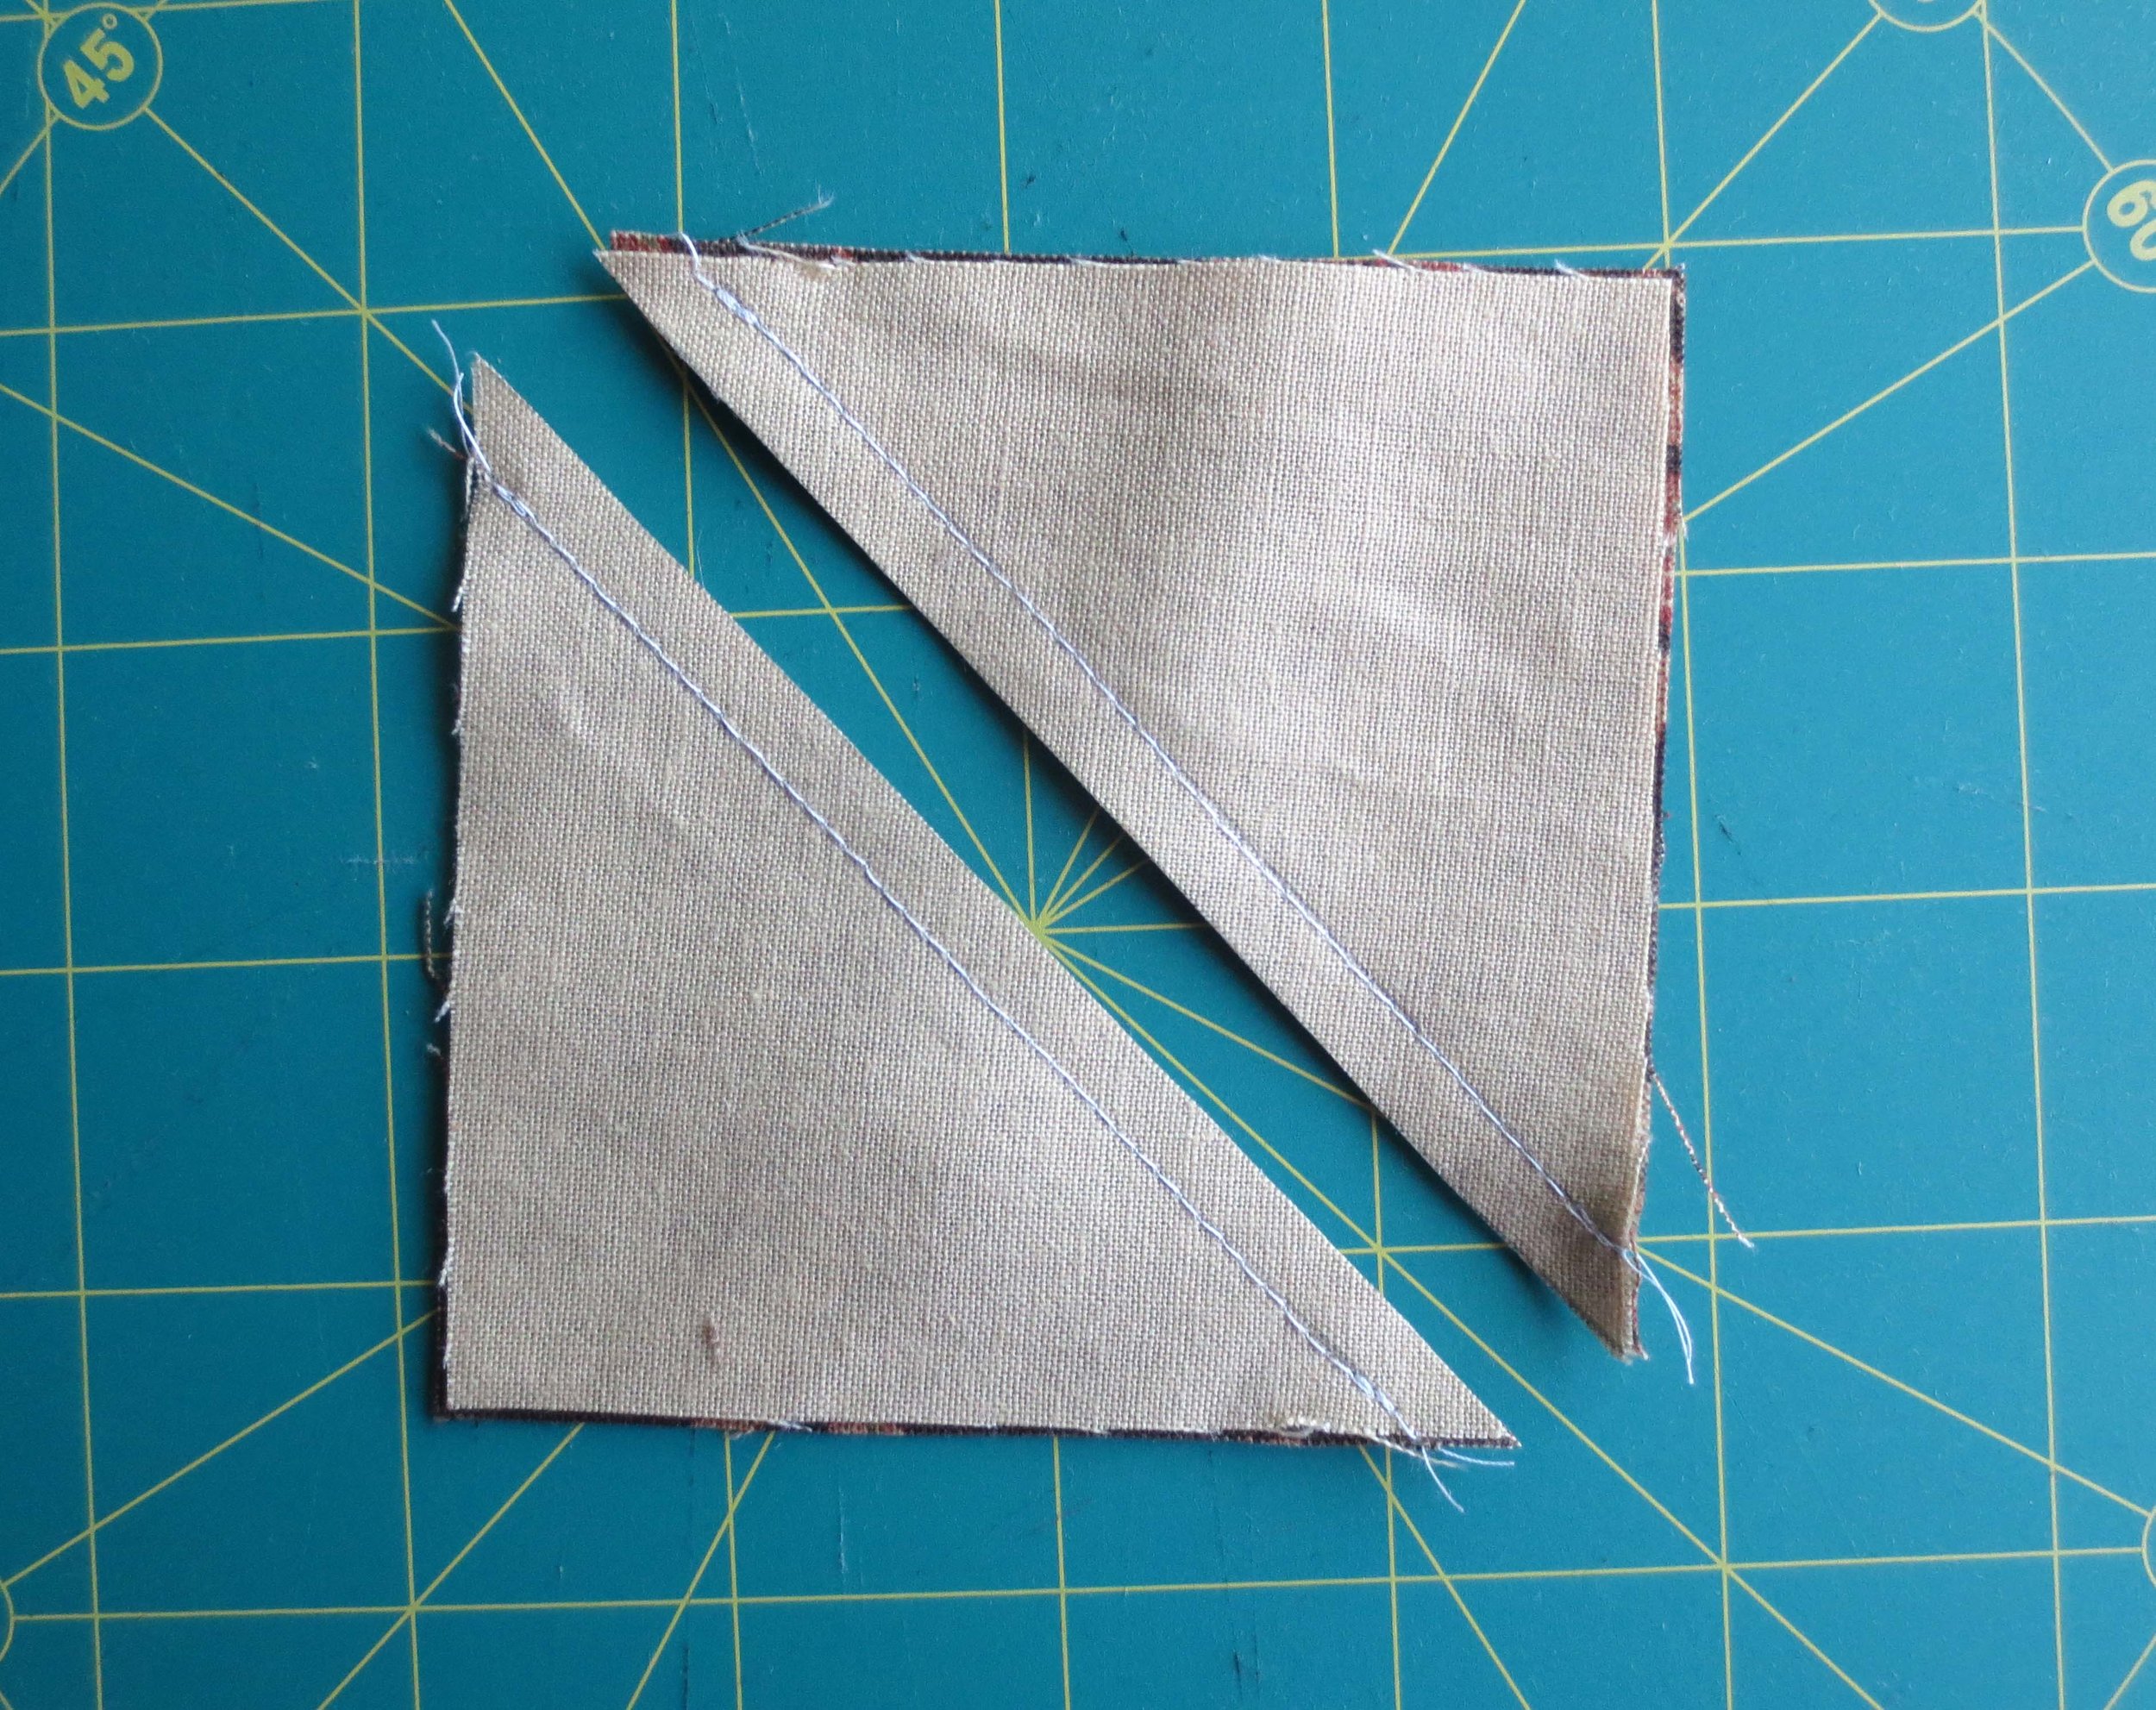
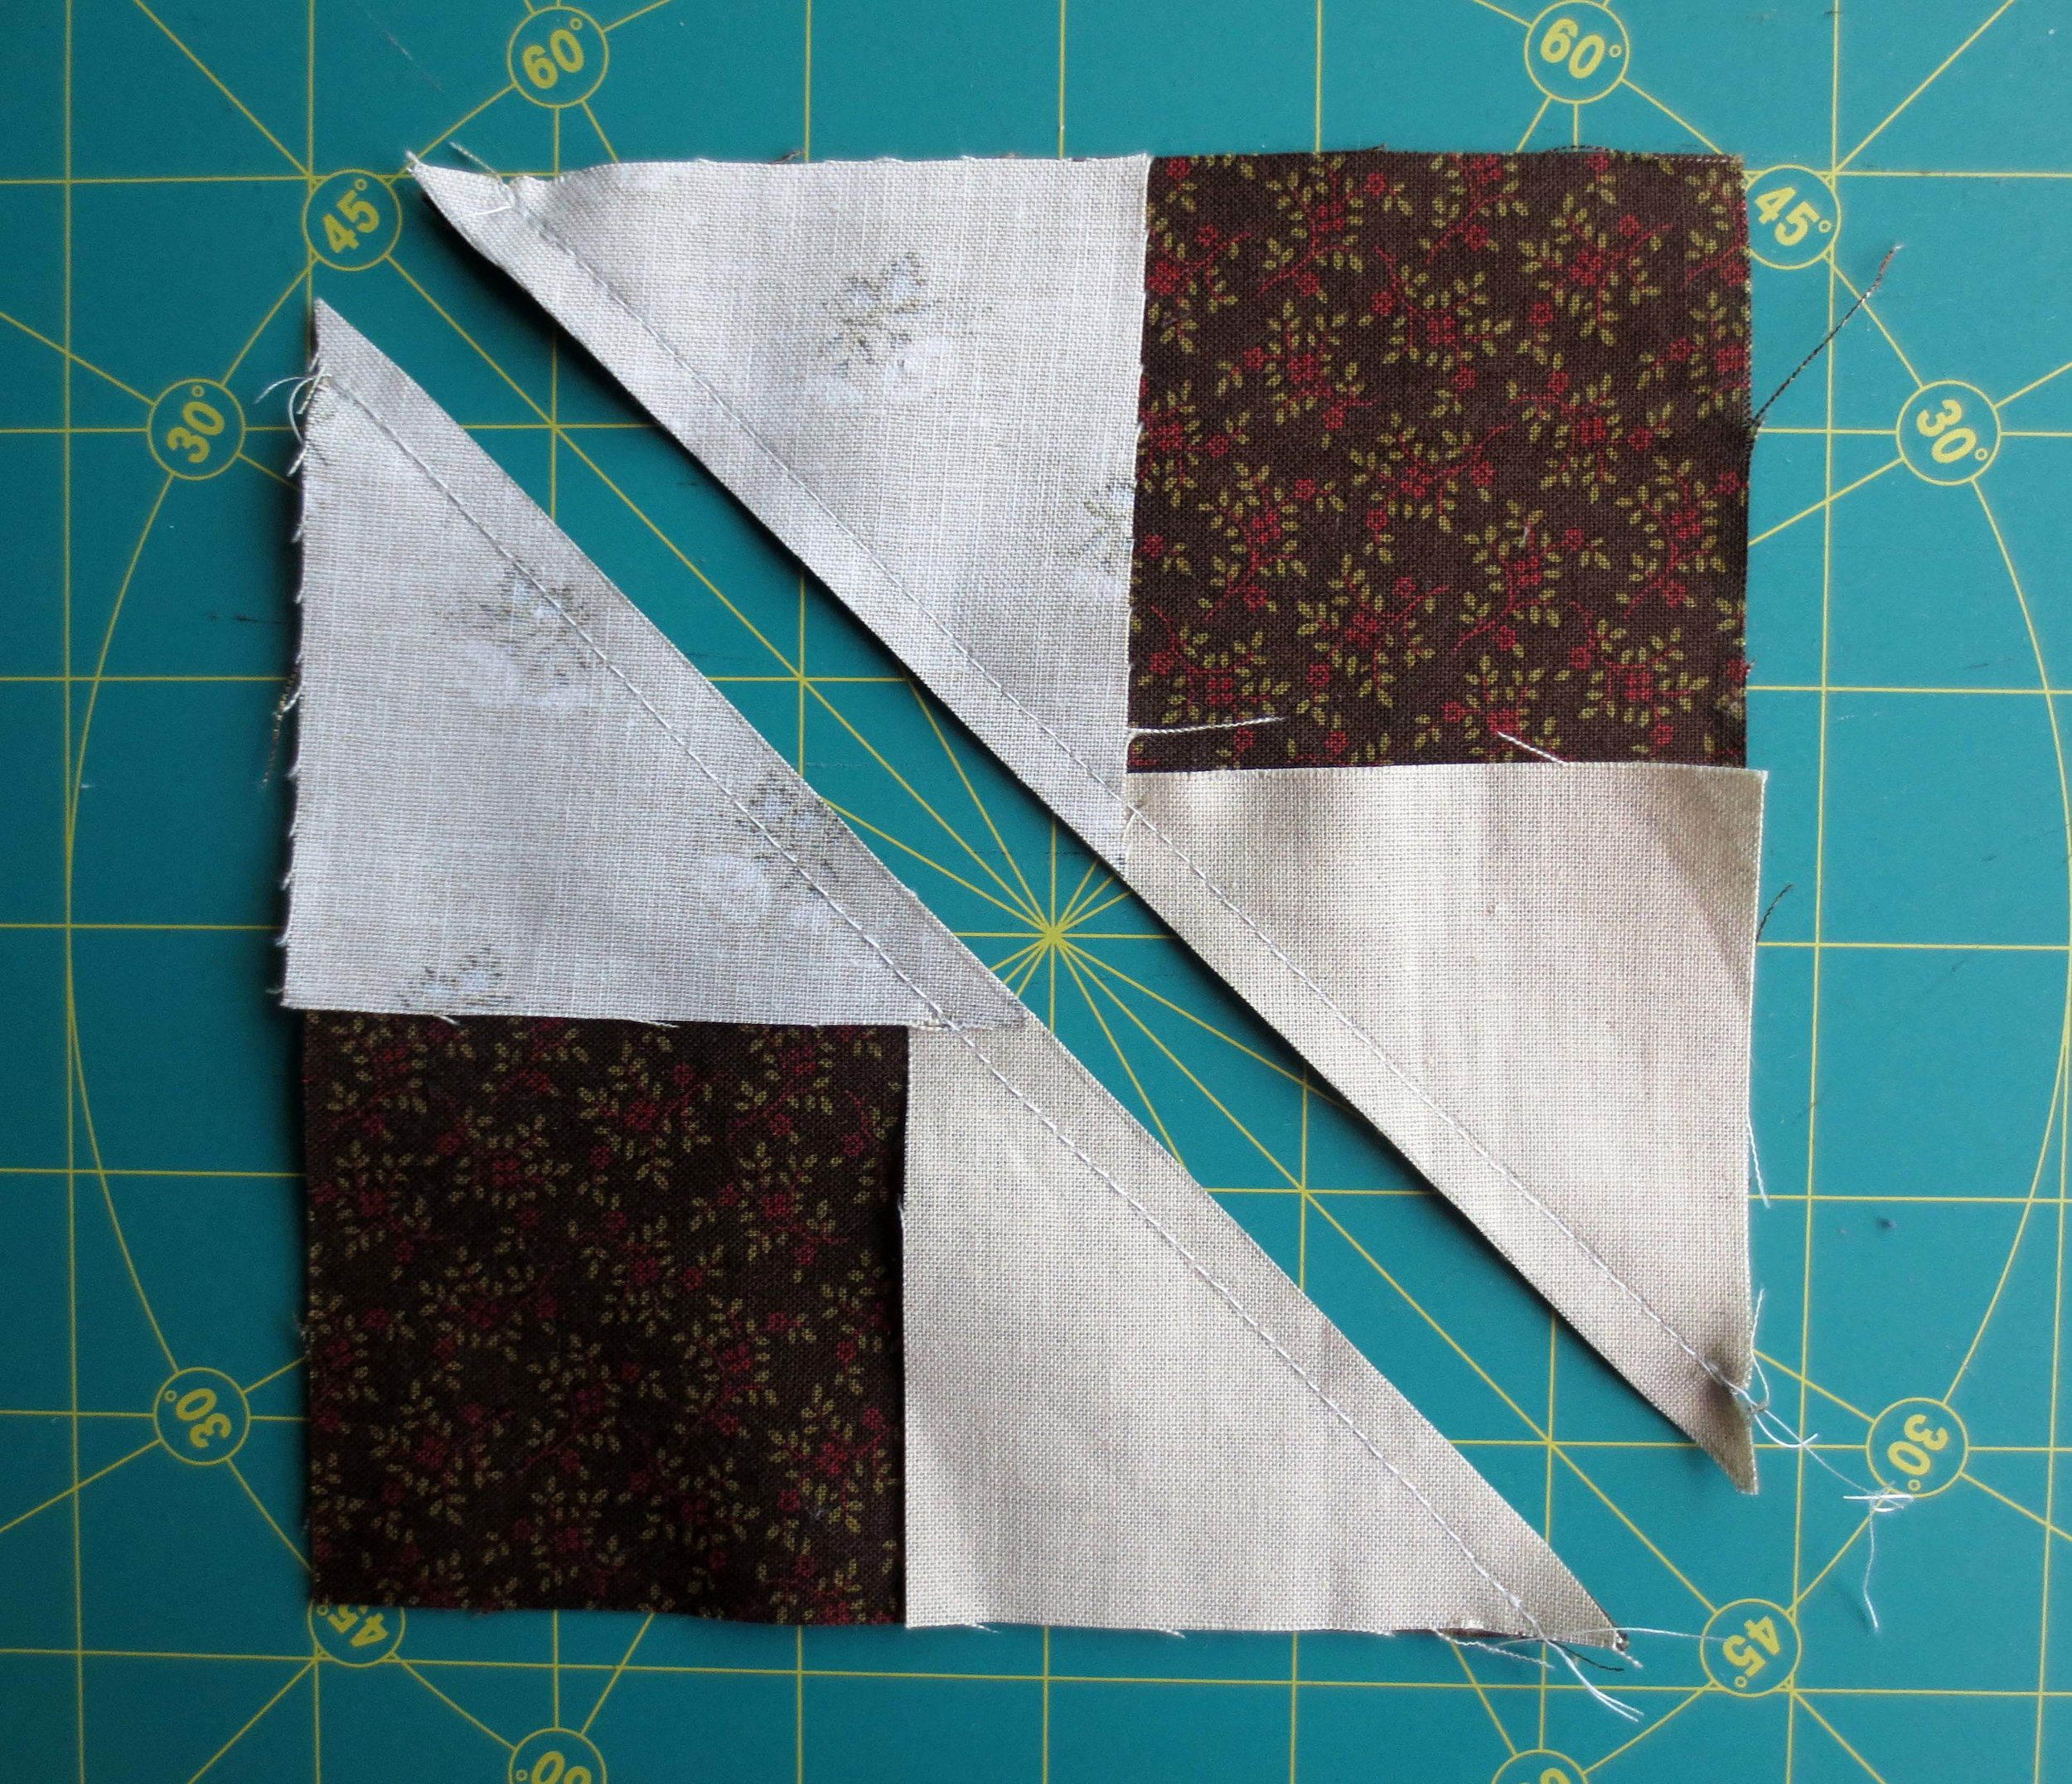
Lay a 6” square of Fabric A on a 6” square of Fabric J, right sides together. Pin to secure.
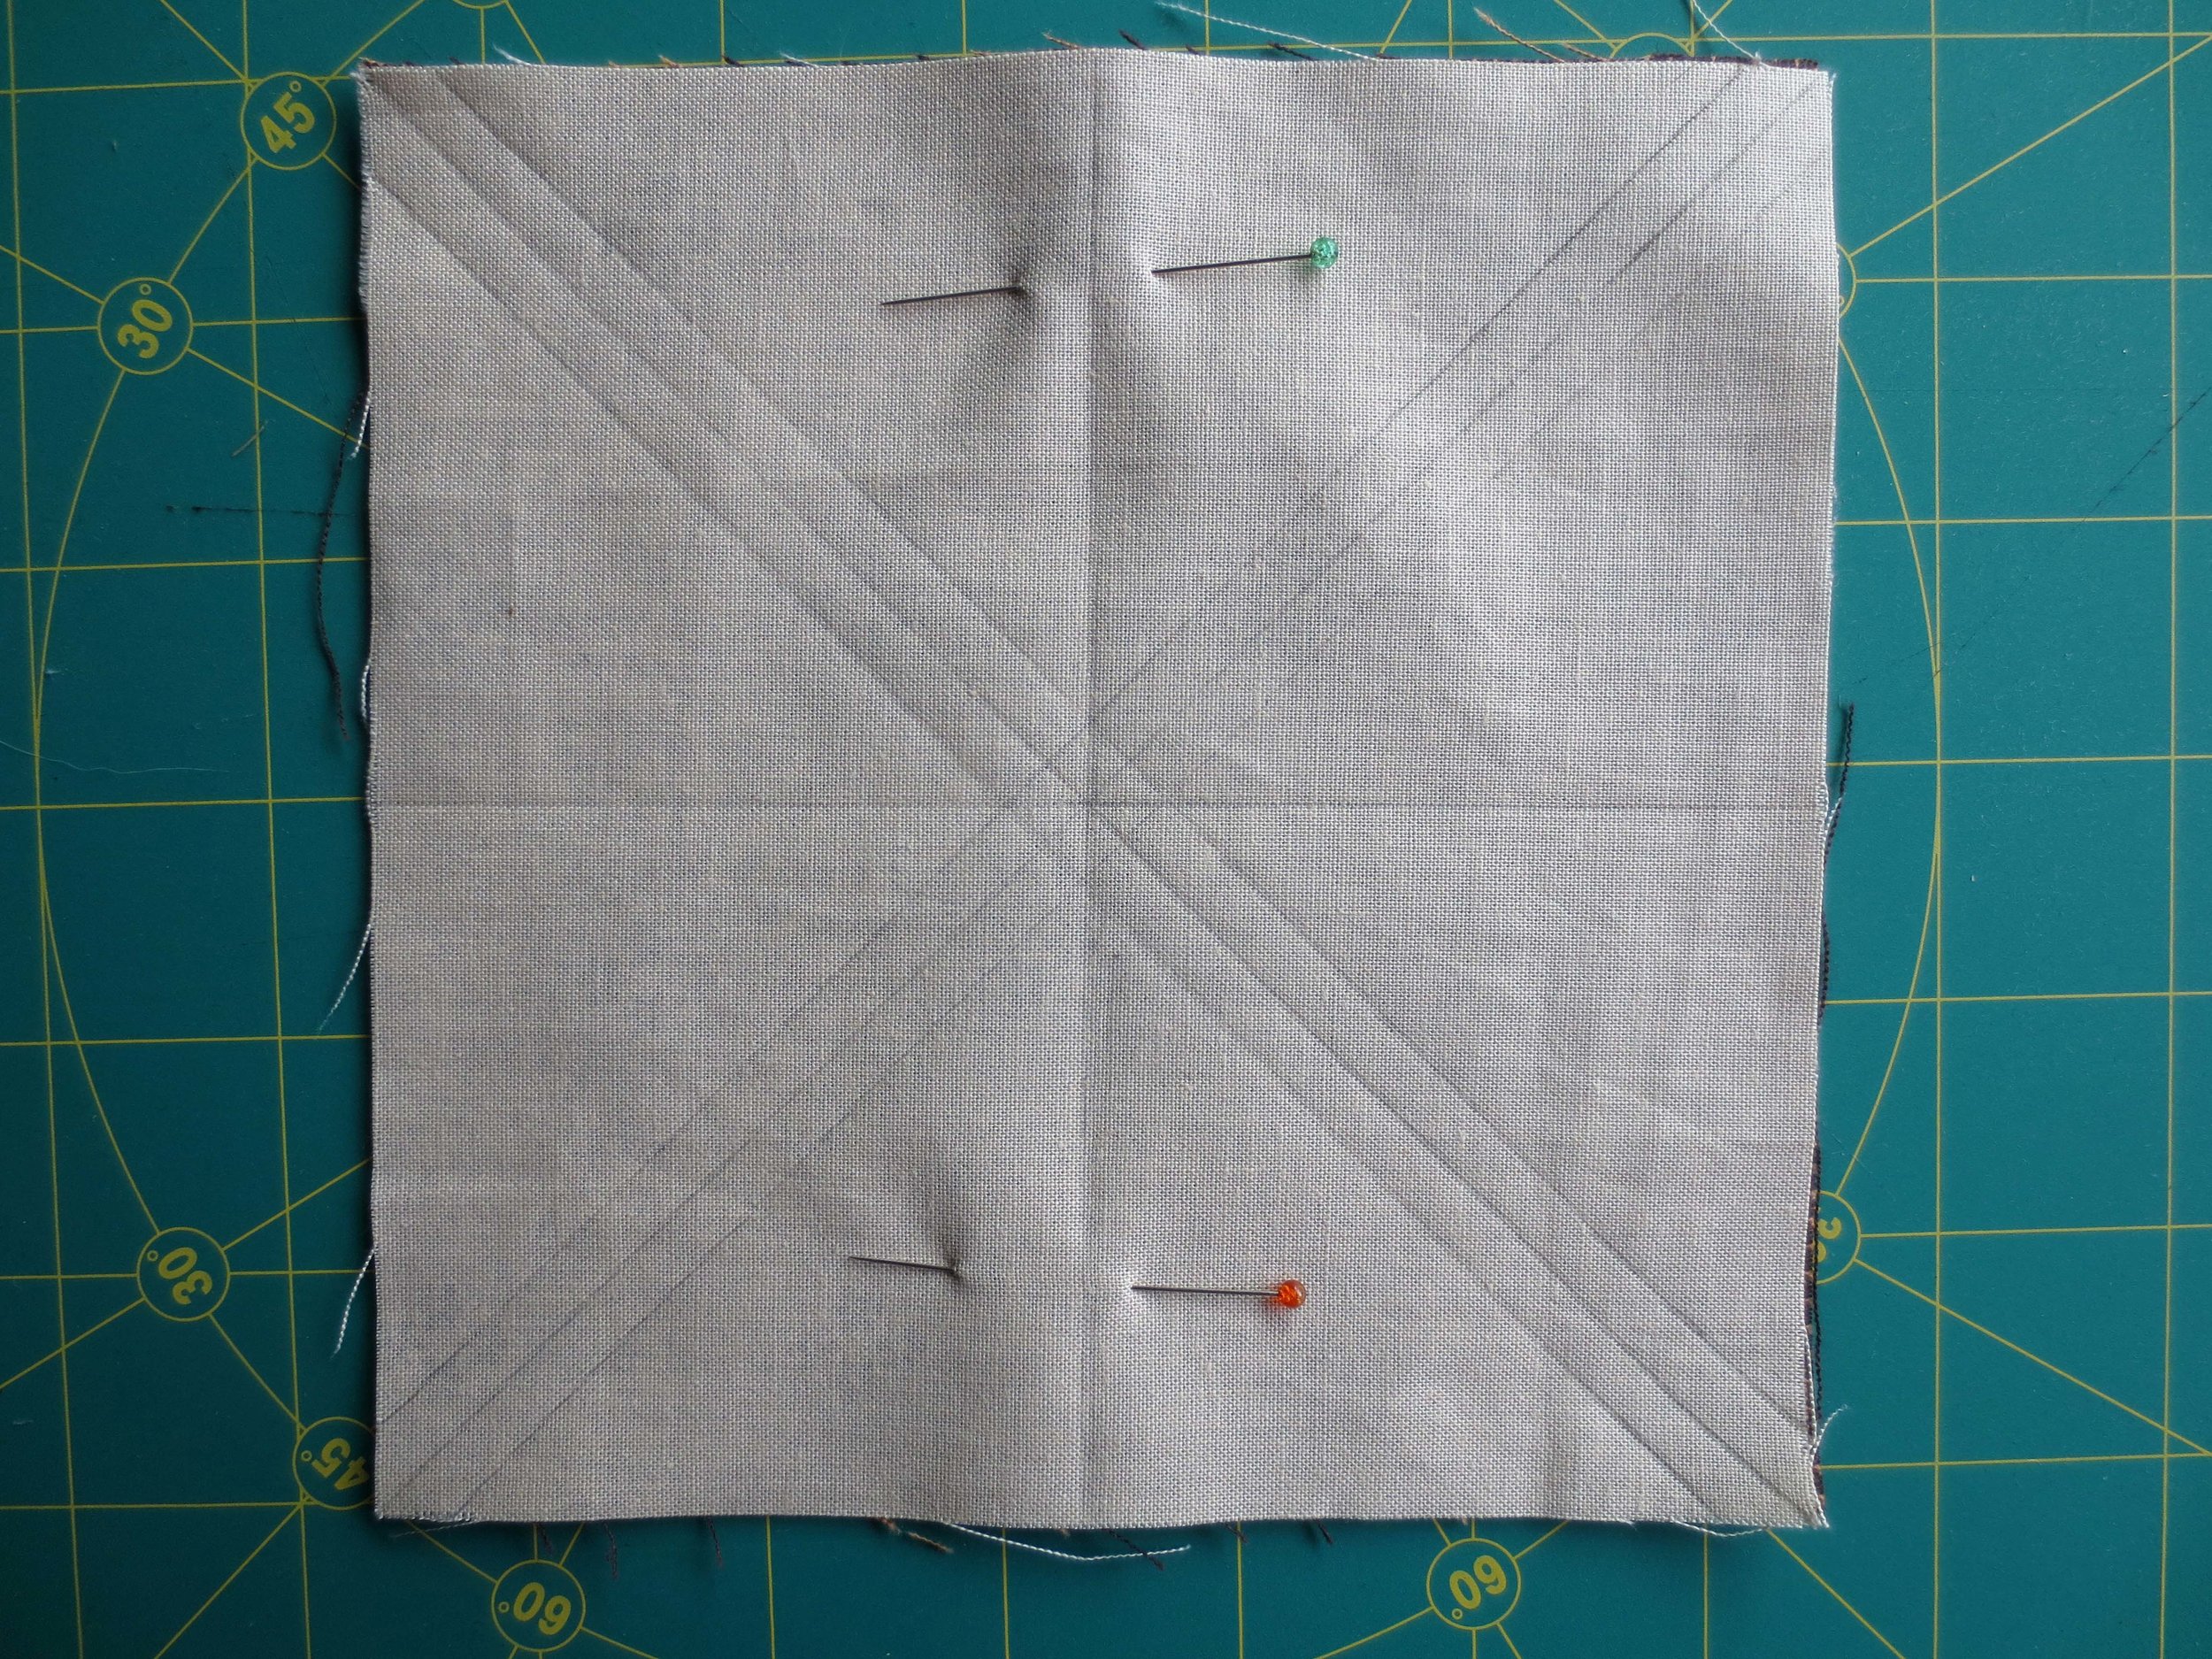
Draw diagonal lines from corner to corner. These will be cutting lines.
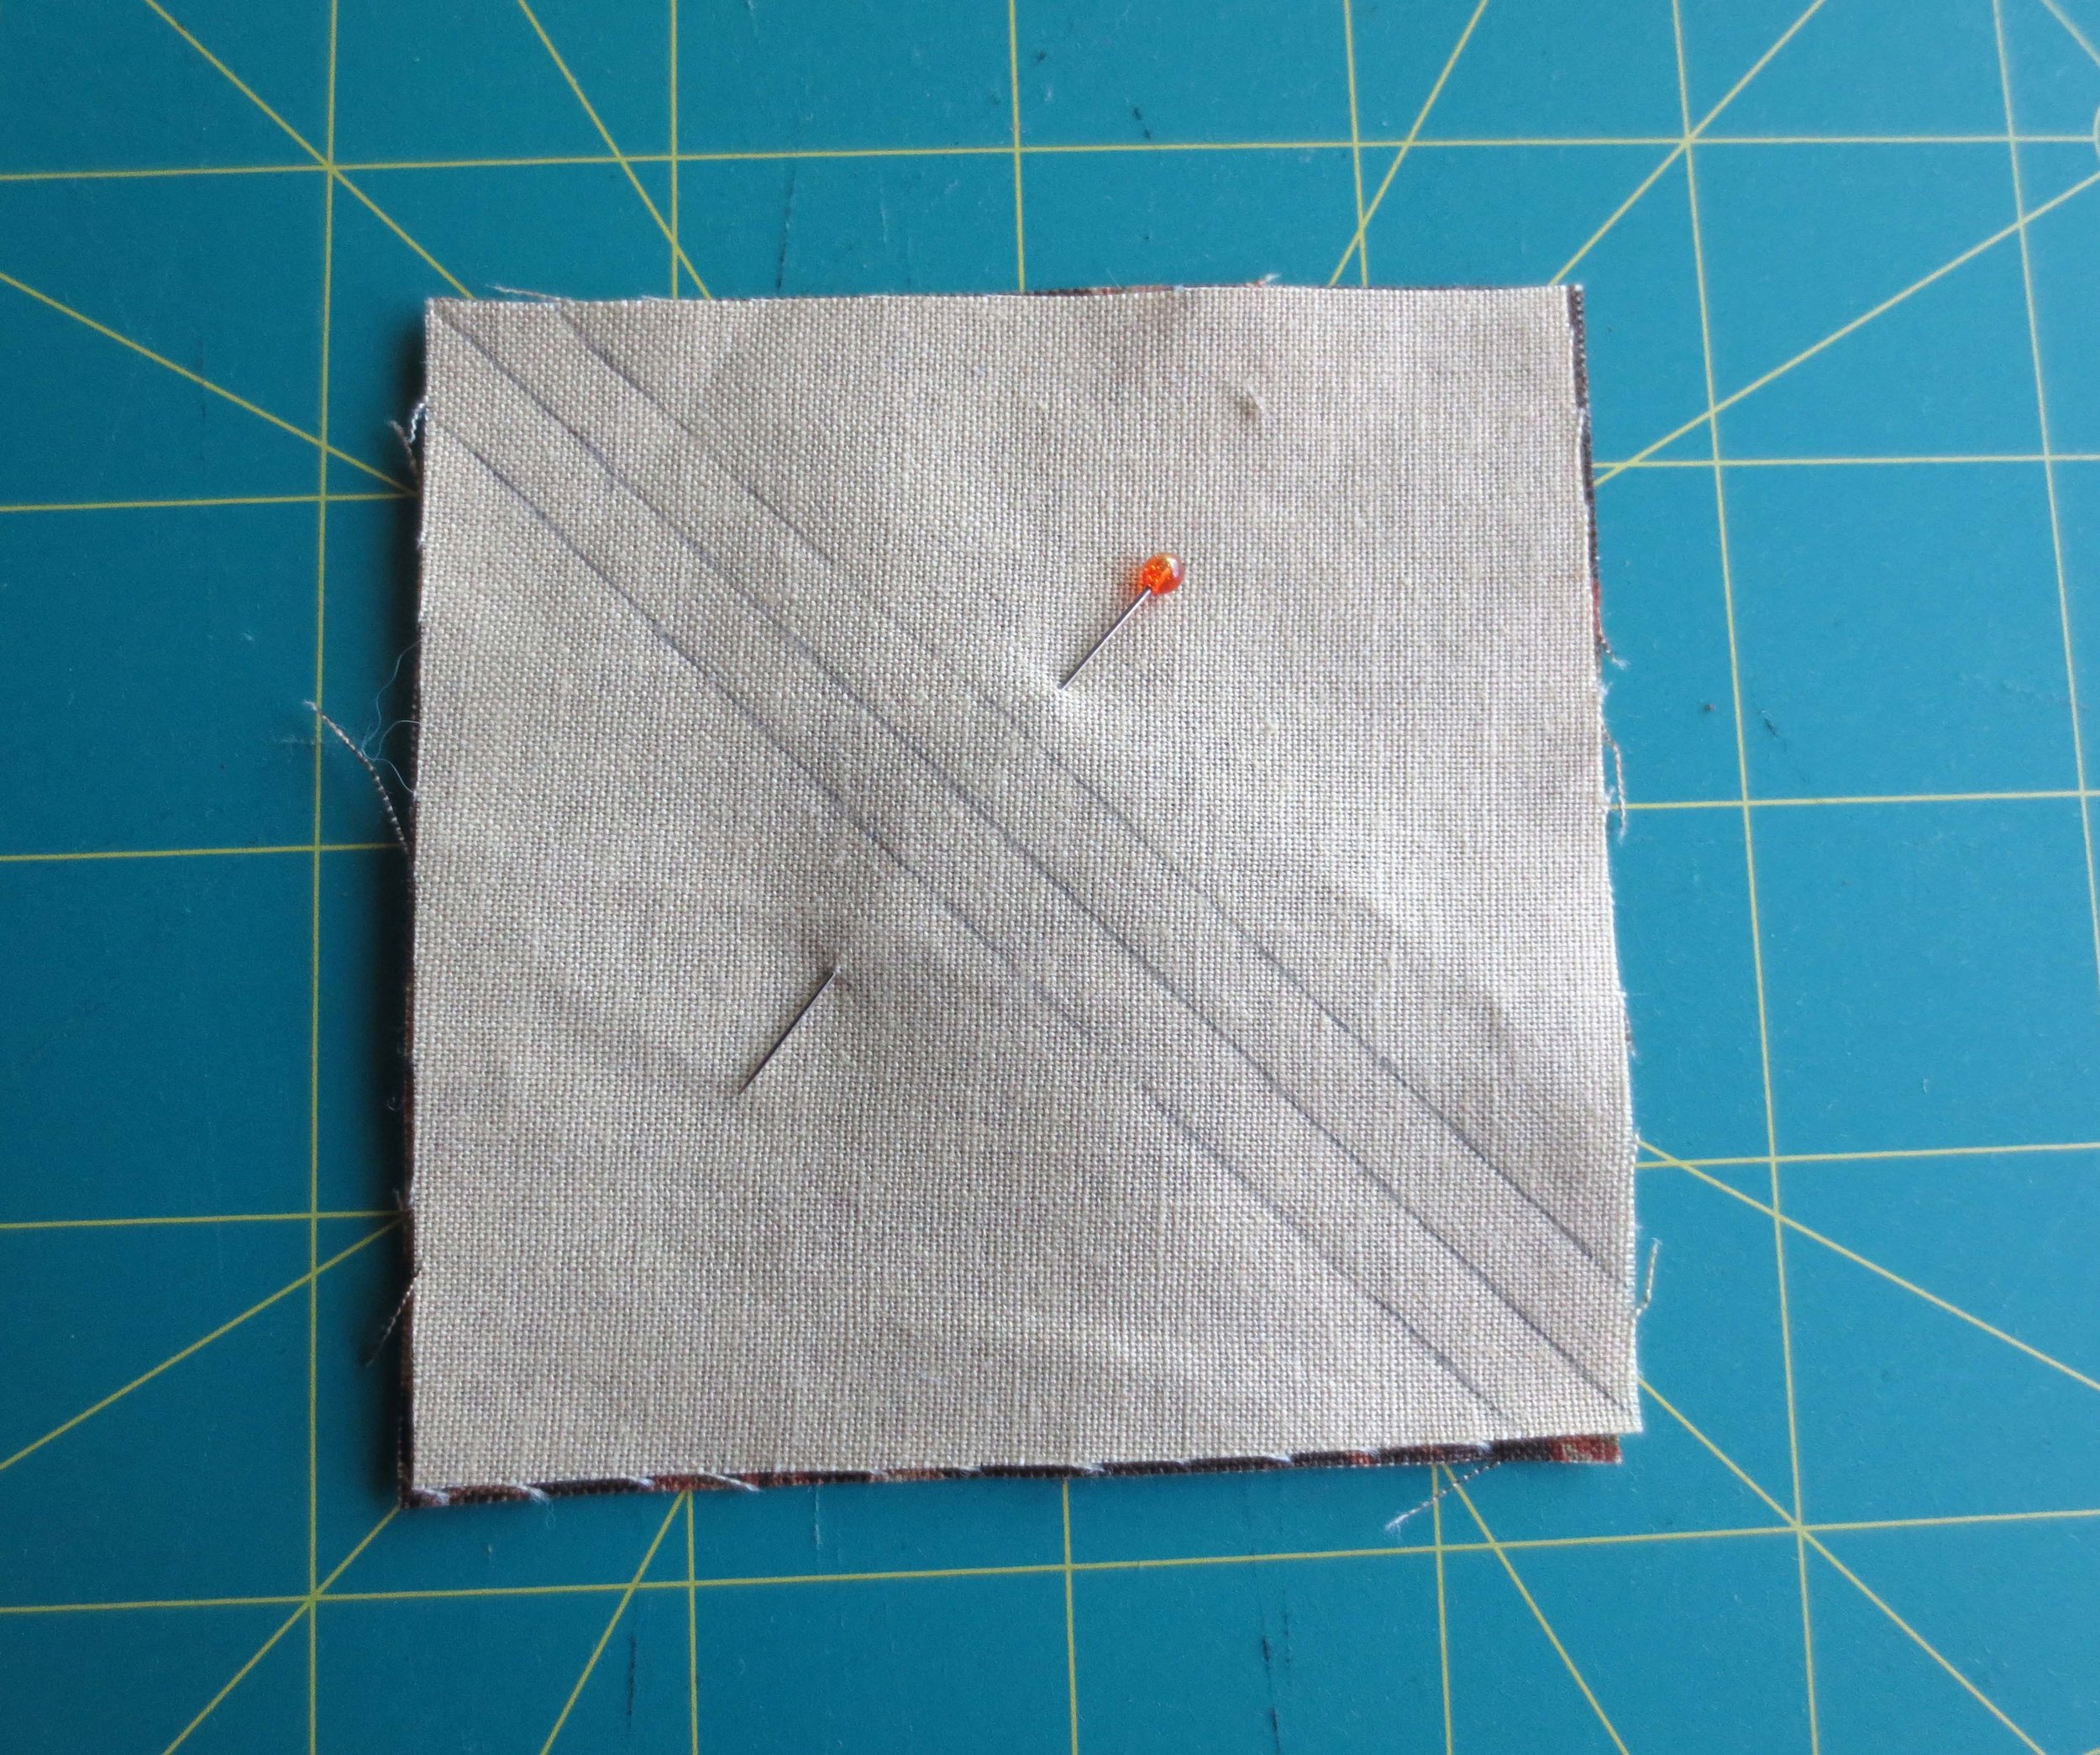
Draw a parallel line 1/4” from each side of the diagonal line. These will be sewing lines.
Draw lines bisecting the block horizontally and vertically. These will be cutting lines.
Sew over the diagonal lines.
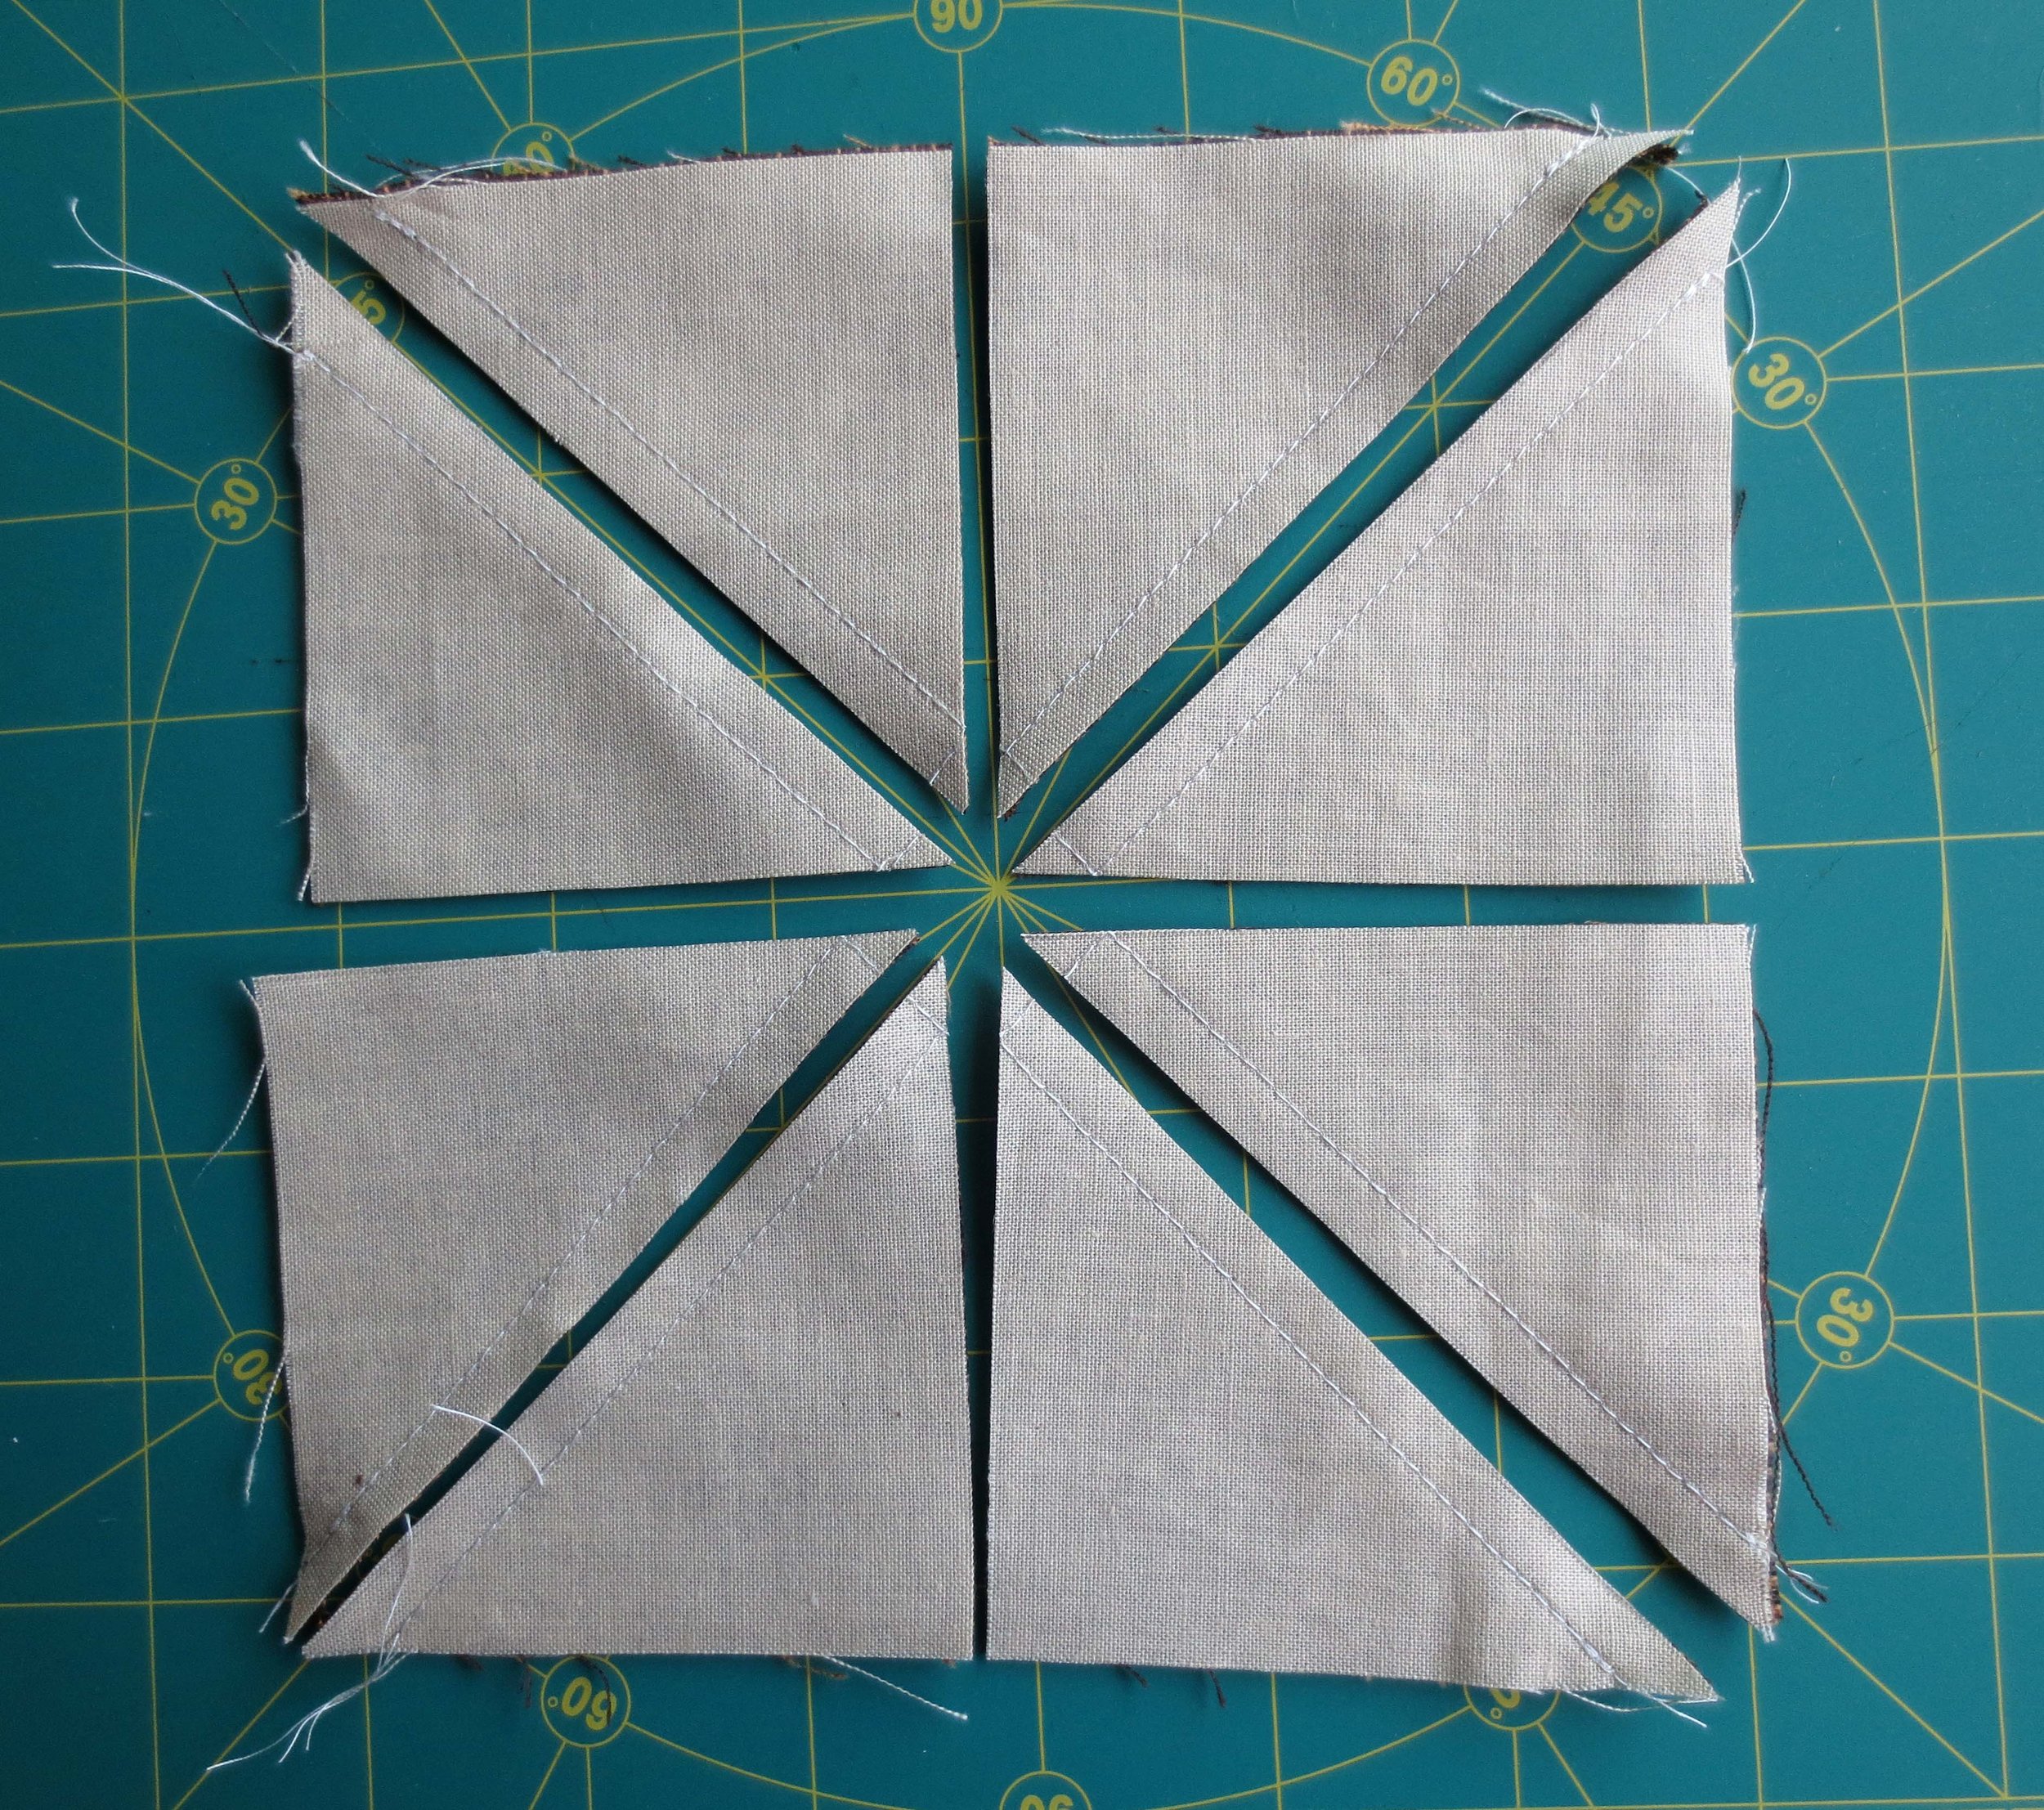
Cut along the diagonal center line.
Cut along the vertical and horizontal lines.
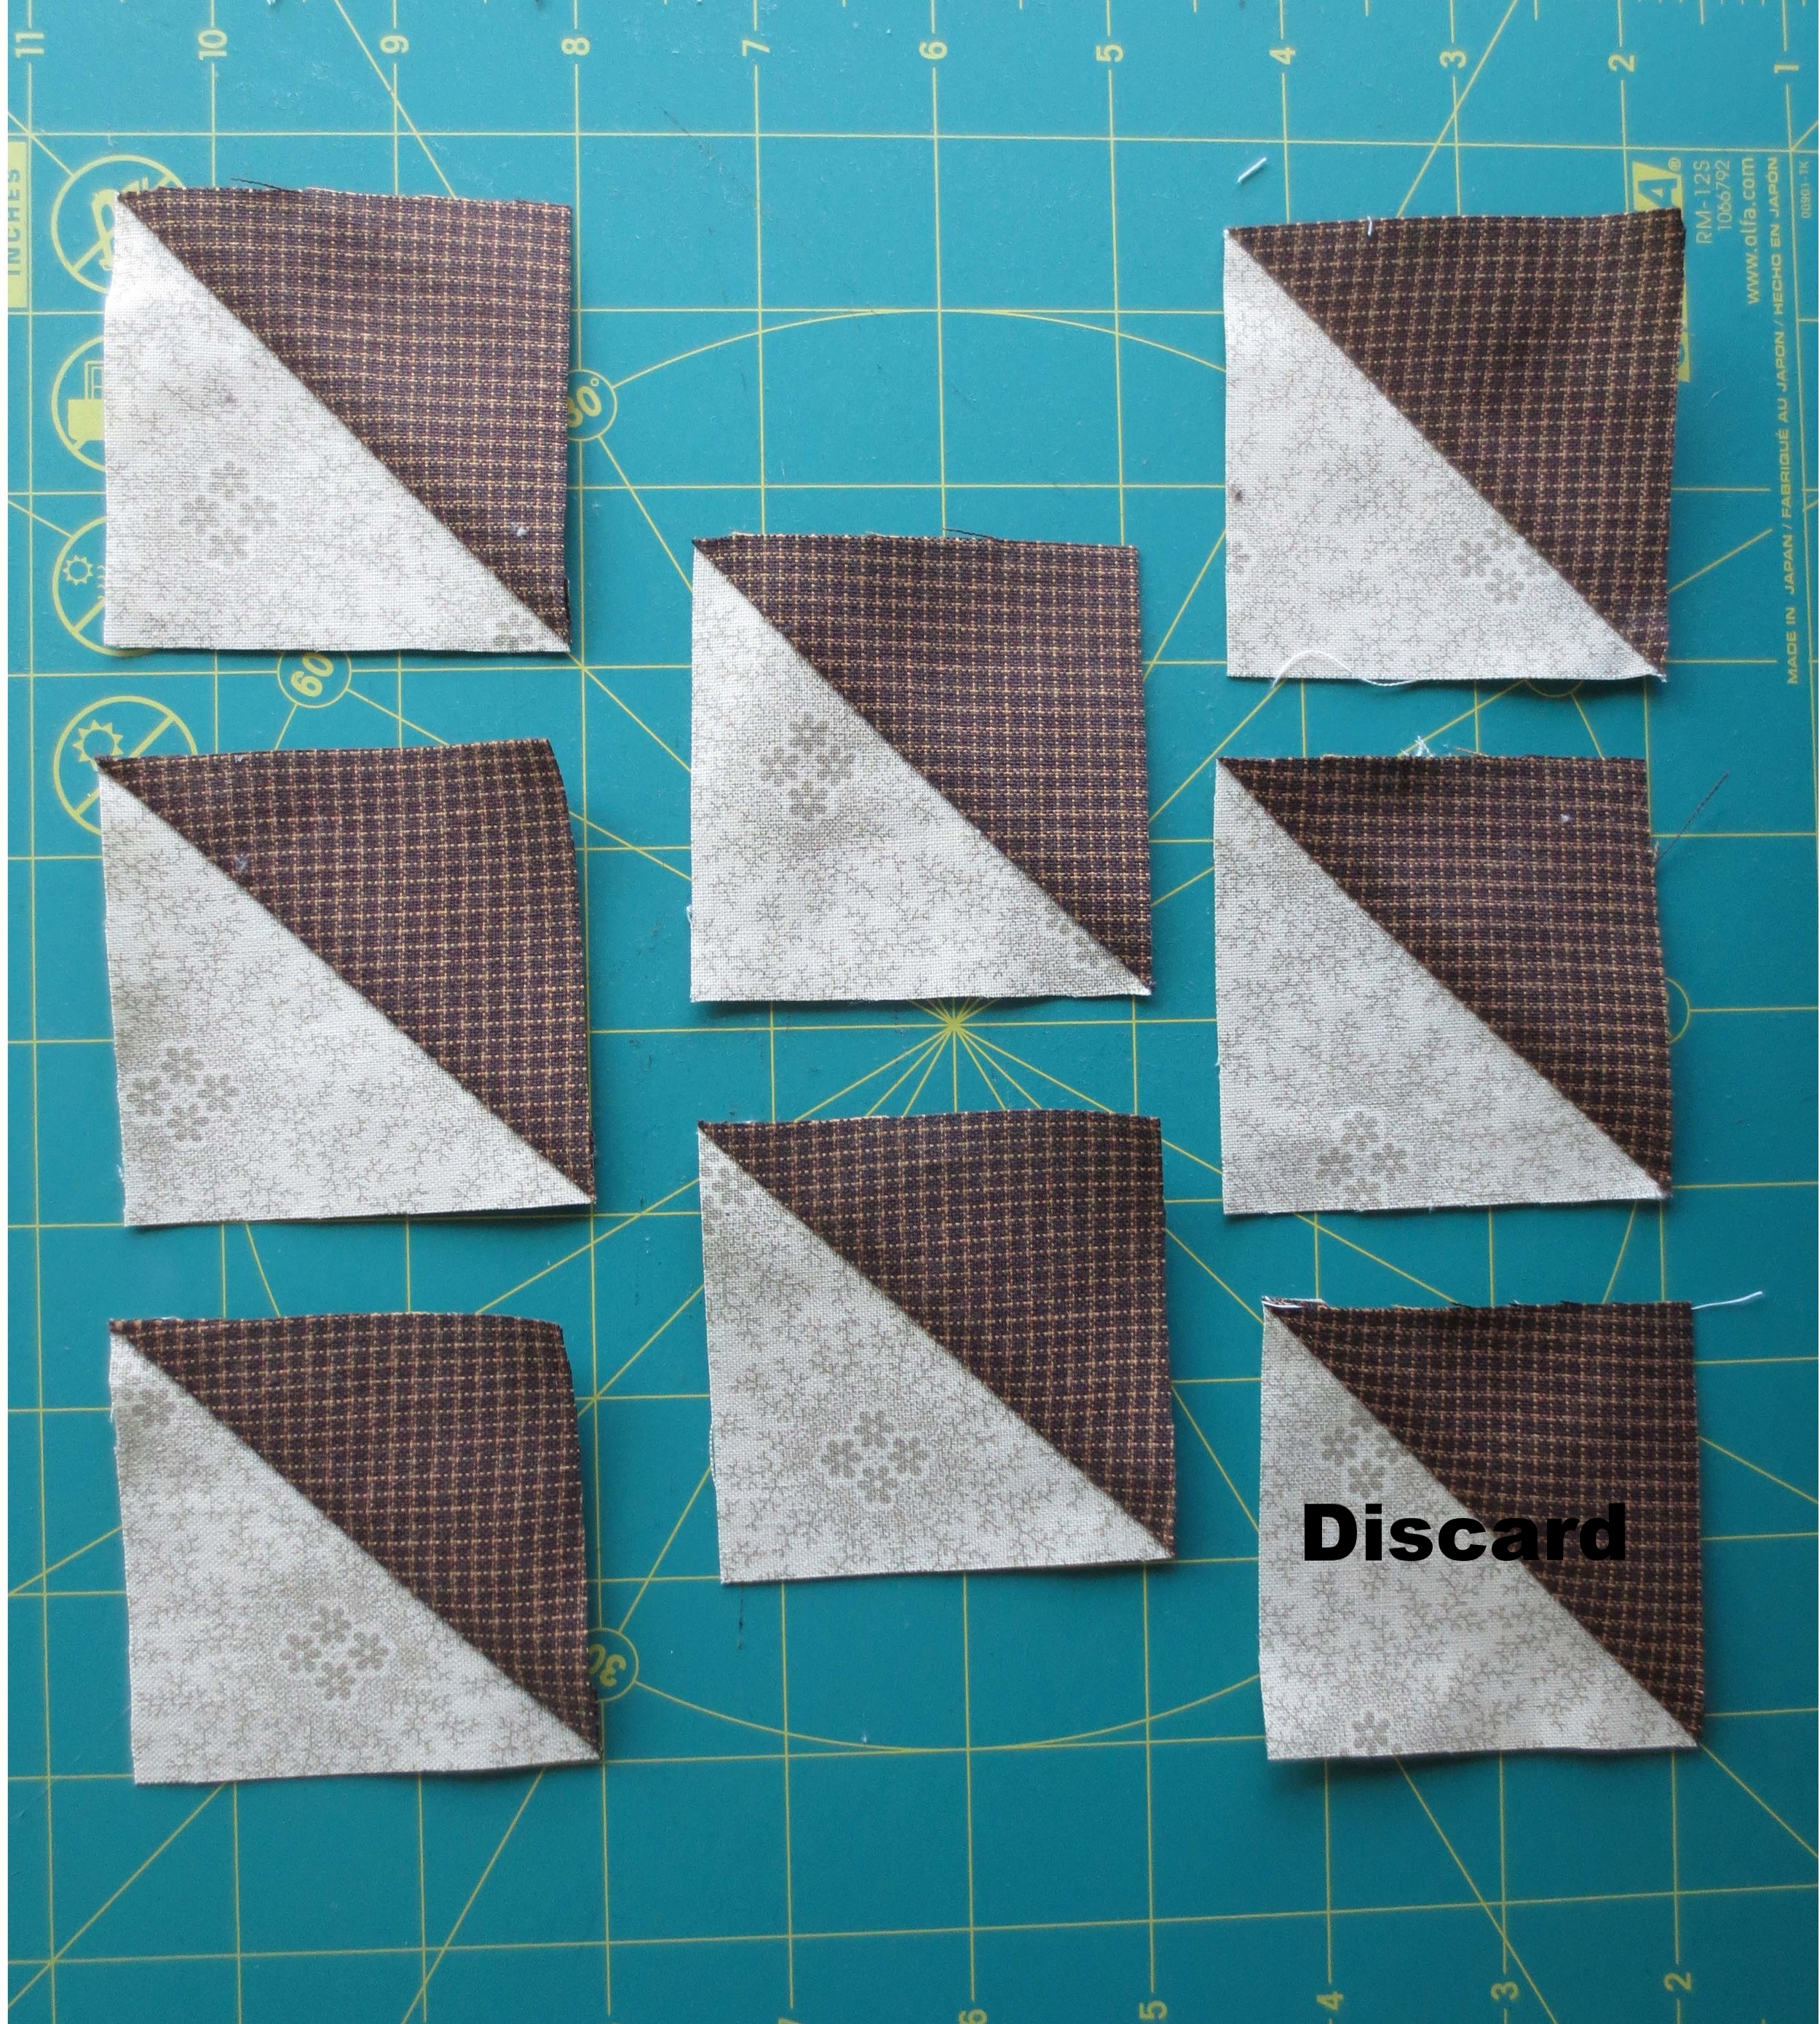
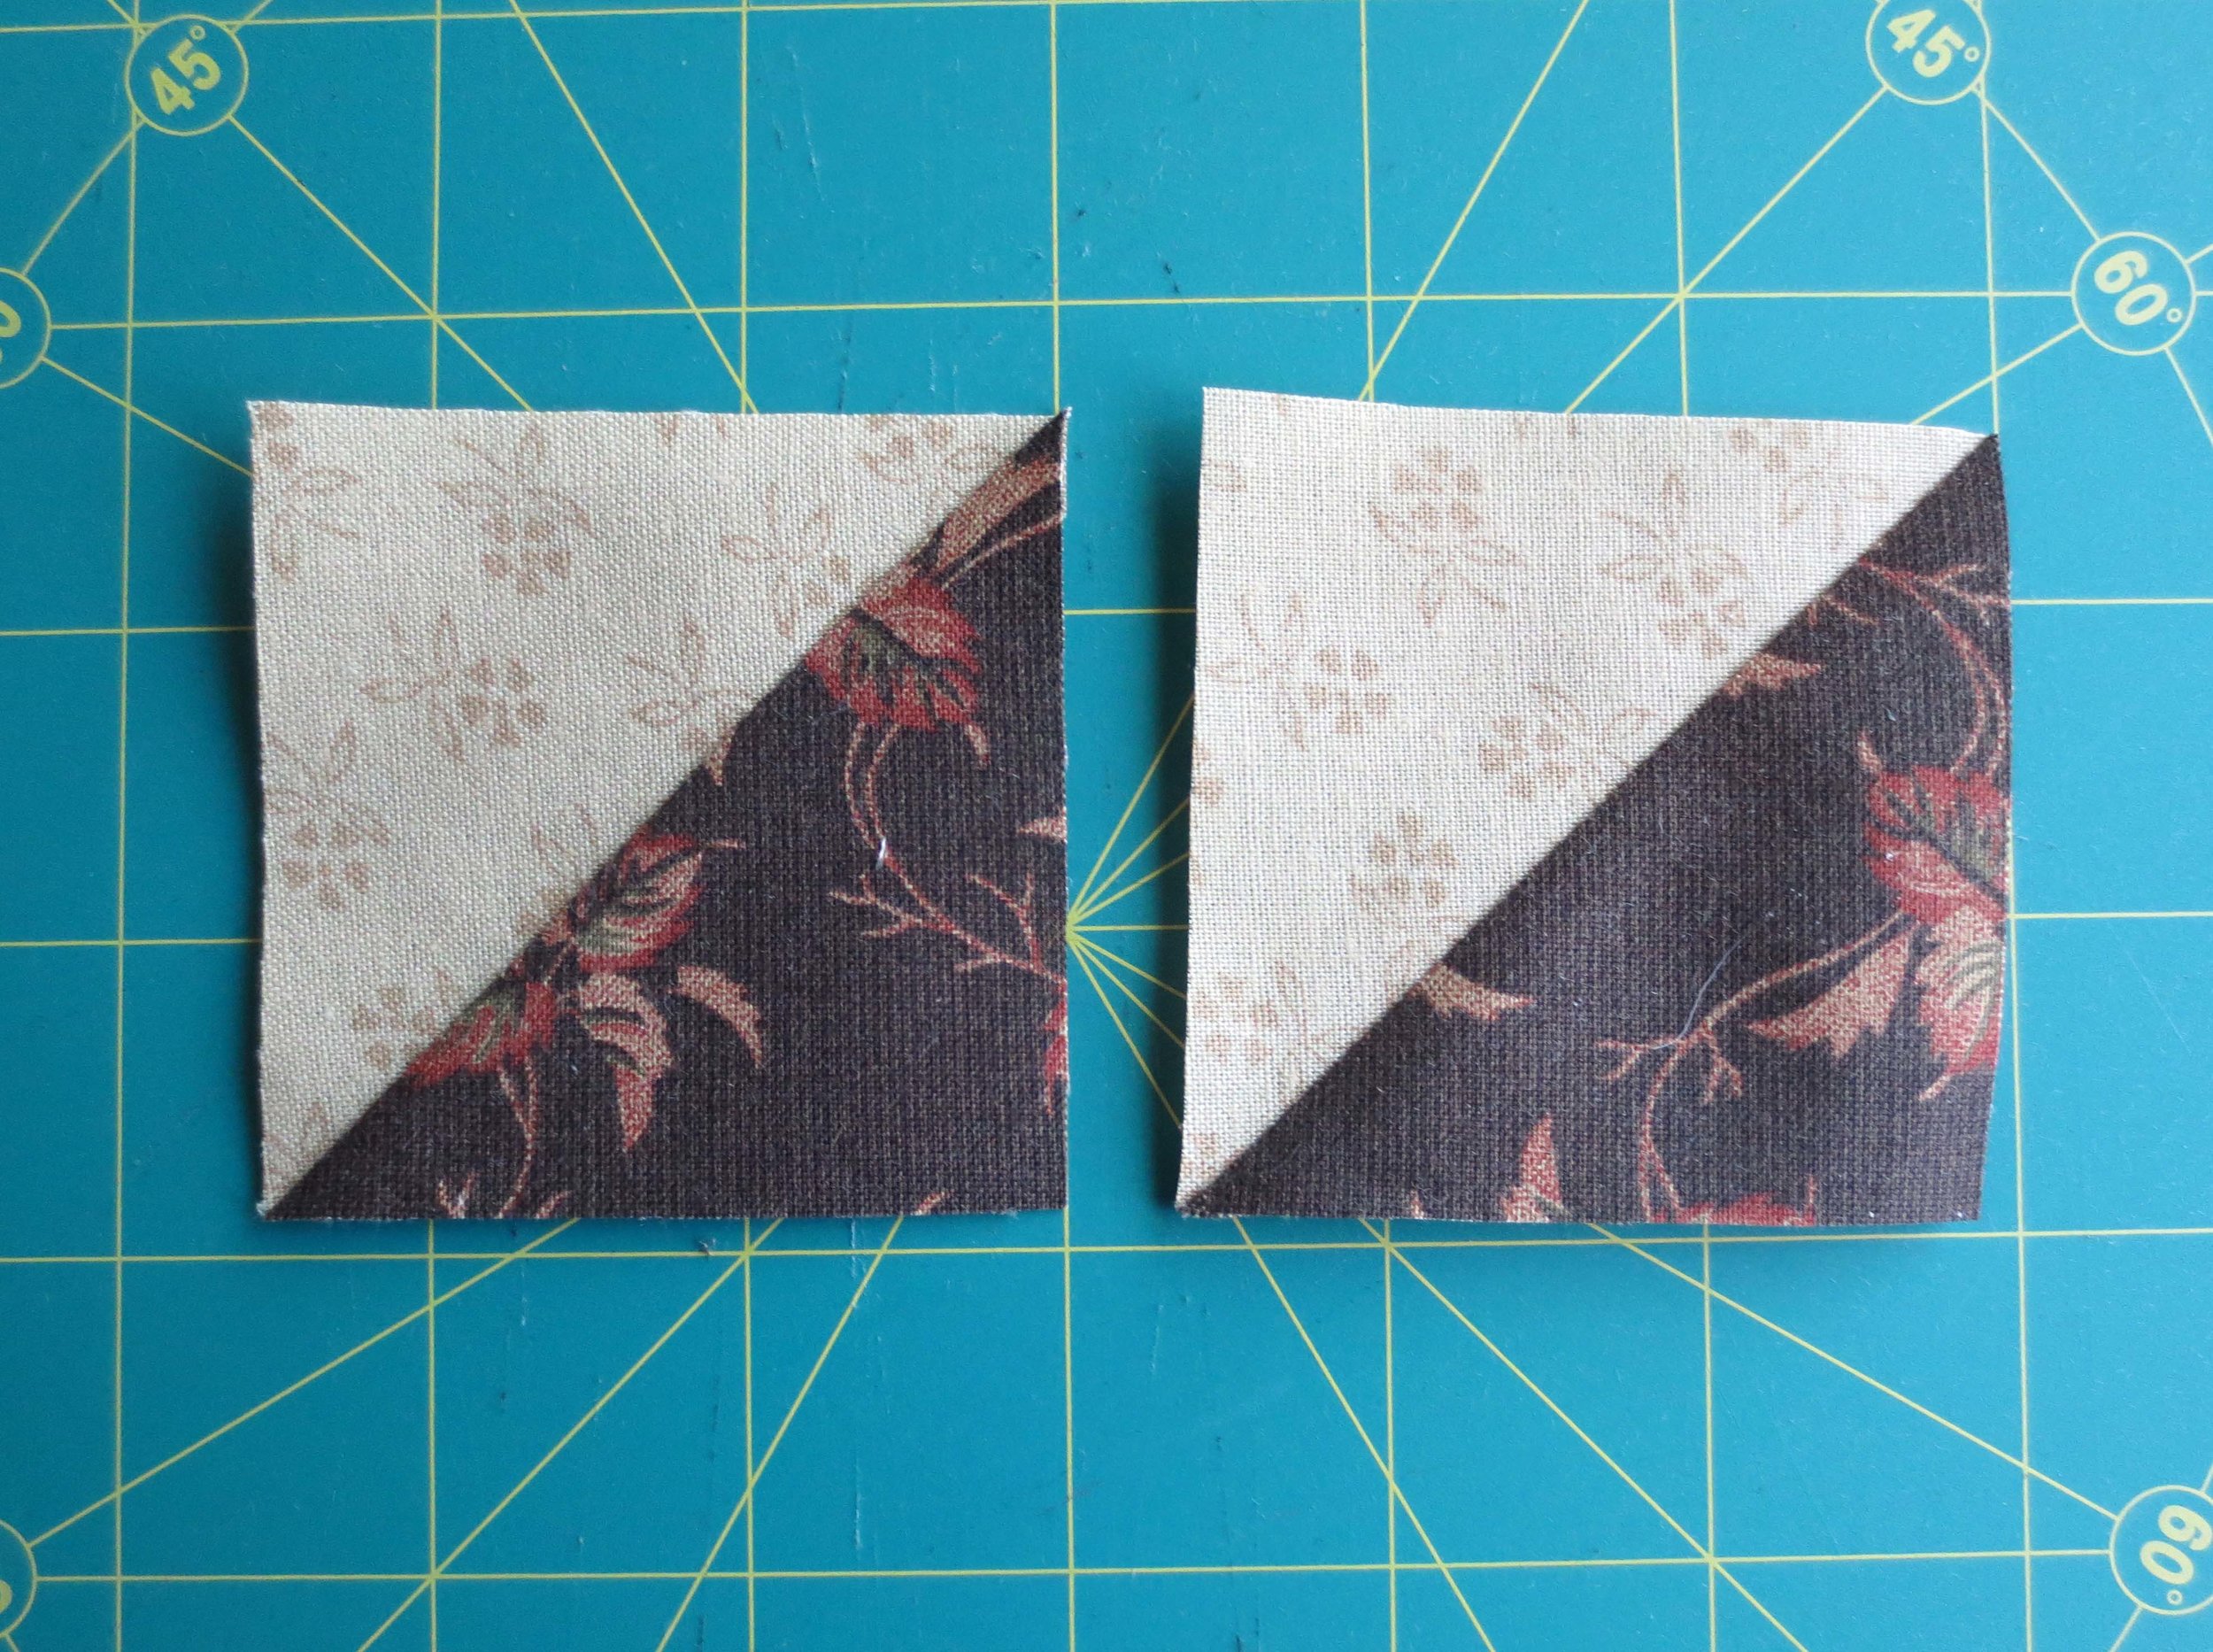
Press each HST open. Press the seam toward the dark fabric.
Trim each to 2 1/2” x 2 1/2”.
You will need two additional HSTs. made with Fabric K and E.
Lay the 3 1/4” square of fabric E on top of a 3 1/4” square of Fabric K.
Draw a diagonal line from corner to corner. This will be a cutting line.
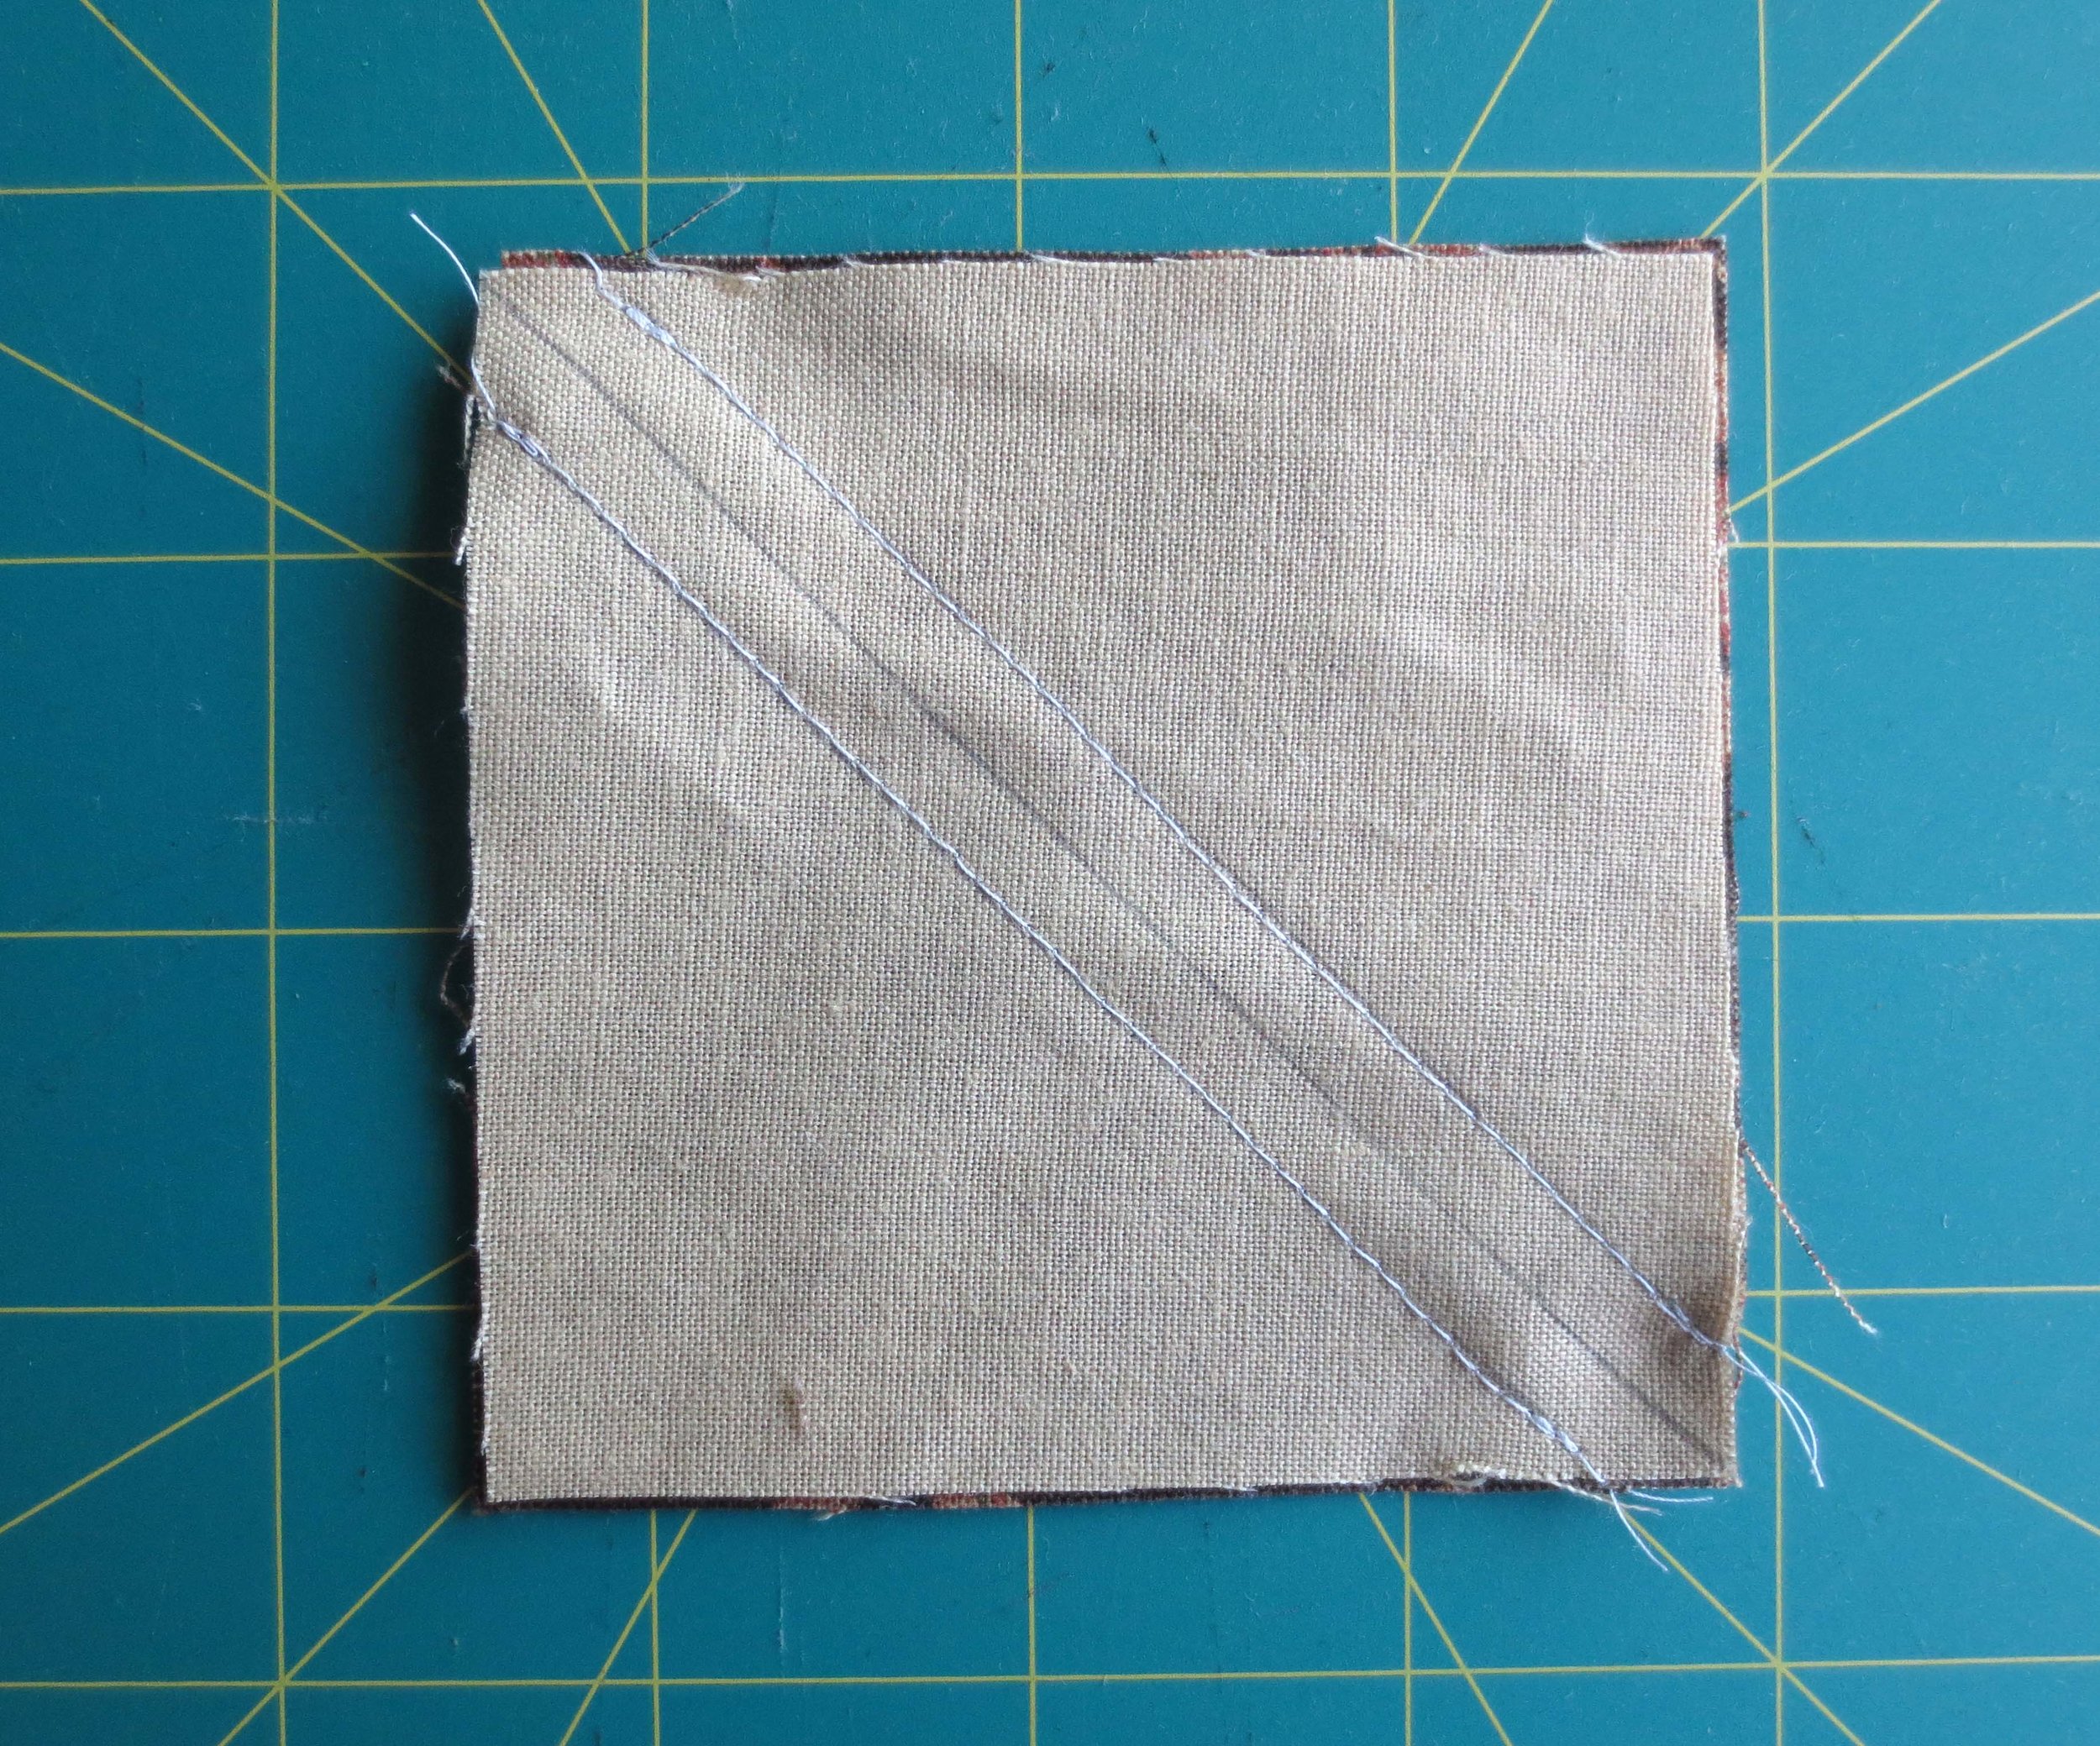
Draw a parallel line 1/4” from the center line. Repeat on the opposite side of the center line. These are the sewing lines.
Sew over the two outside lines.
Cut along center line.
Press HST open. Press seams toward darker fabric.
Trim each to 2 1/2” square.
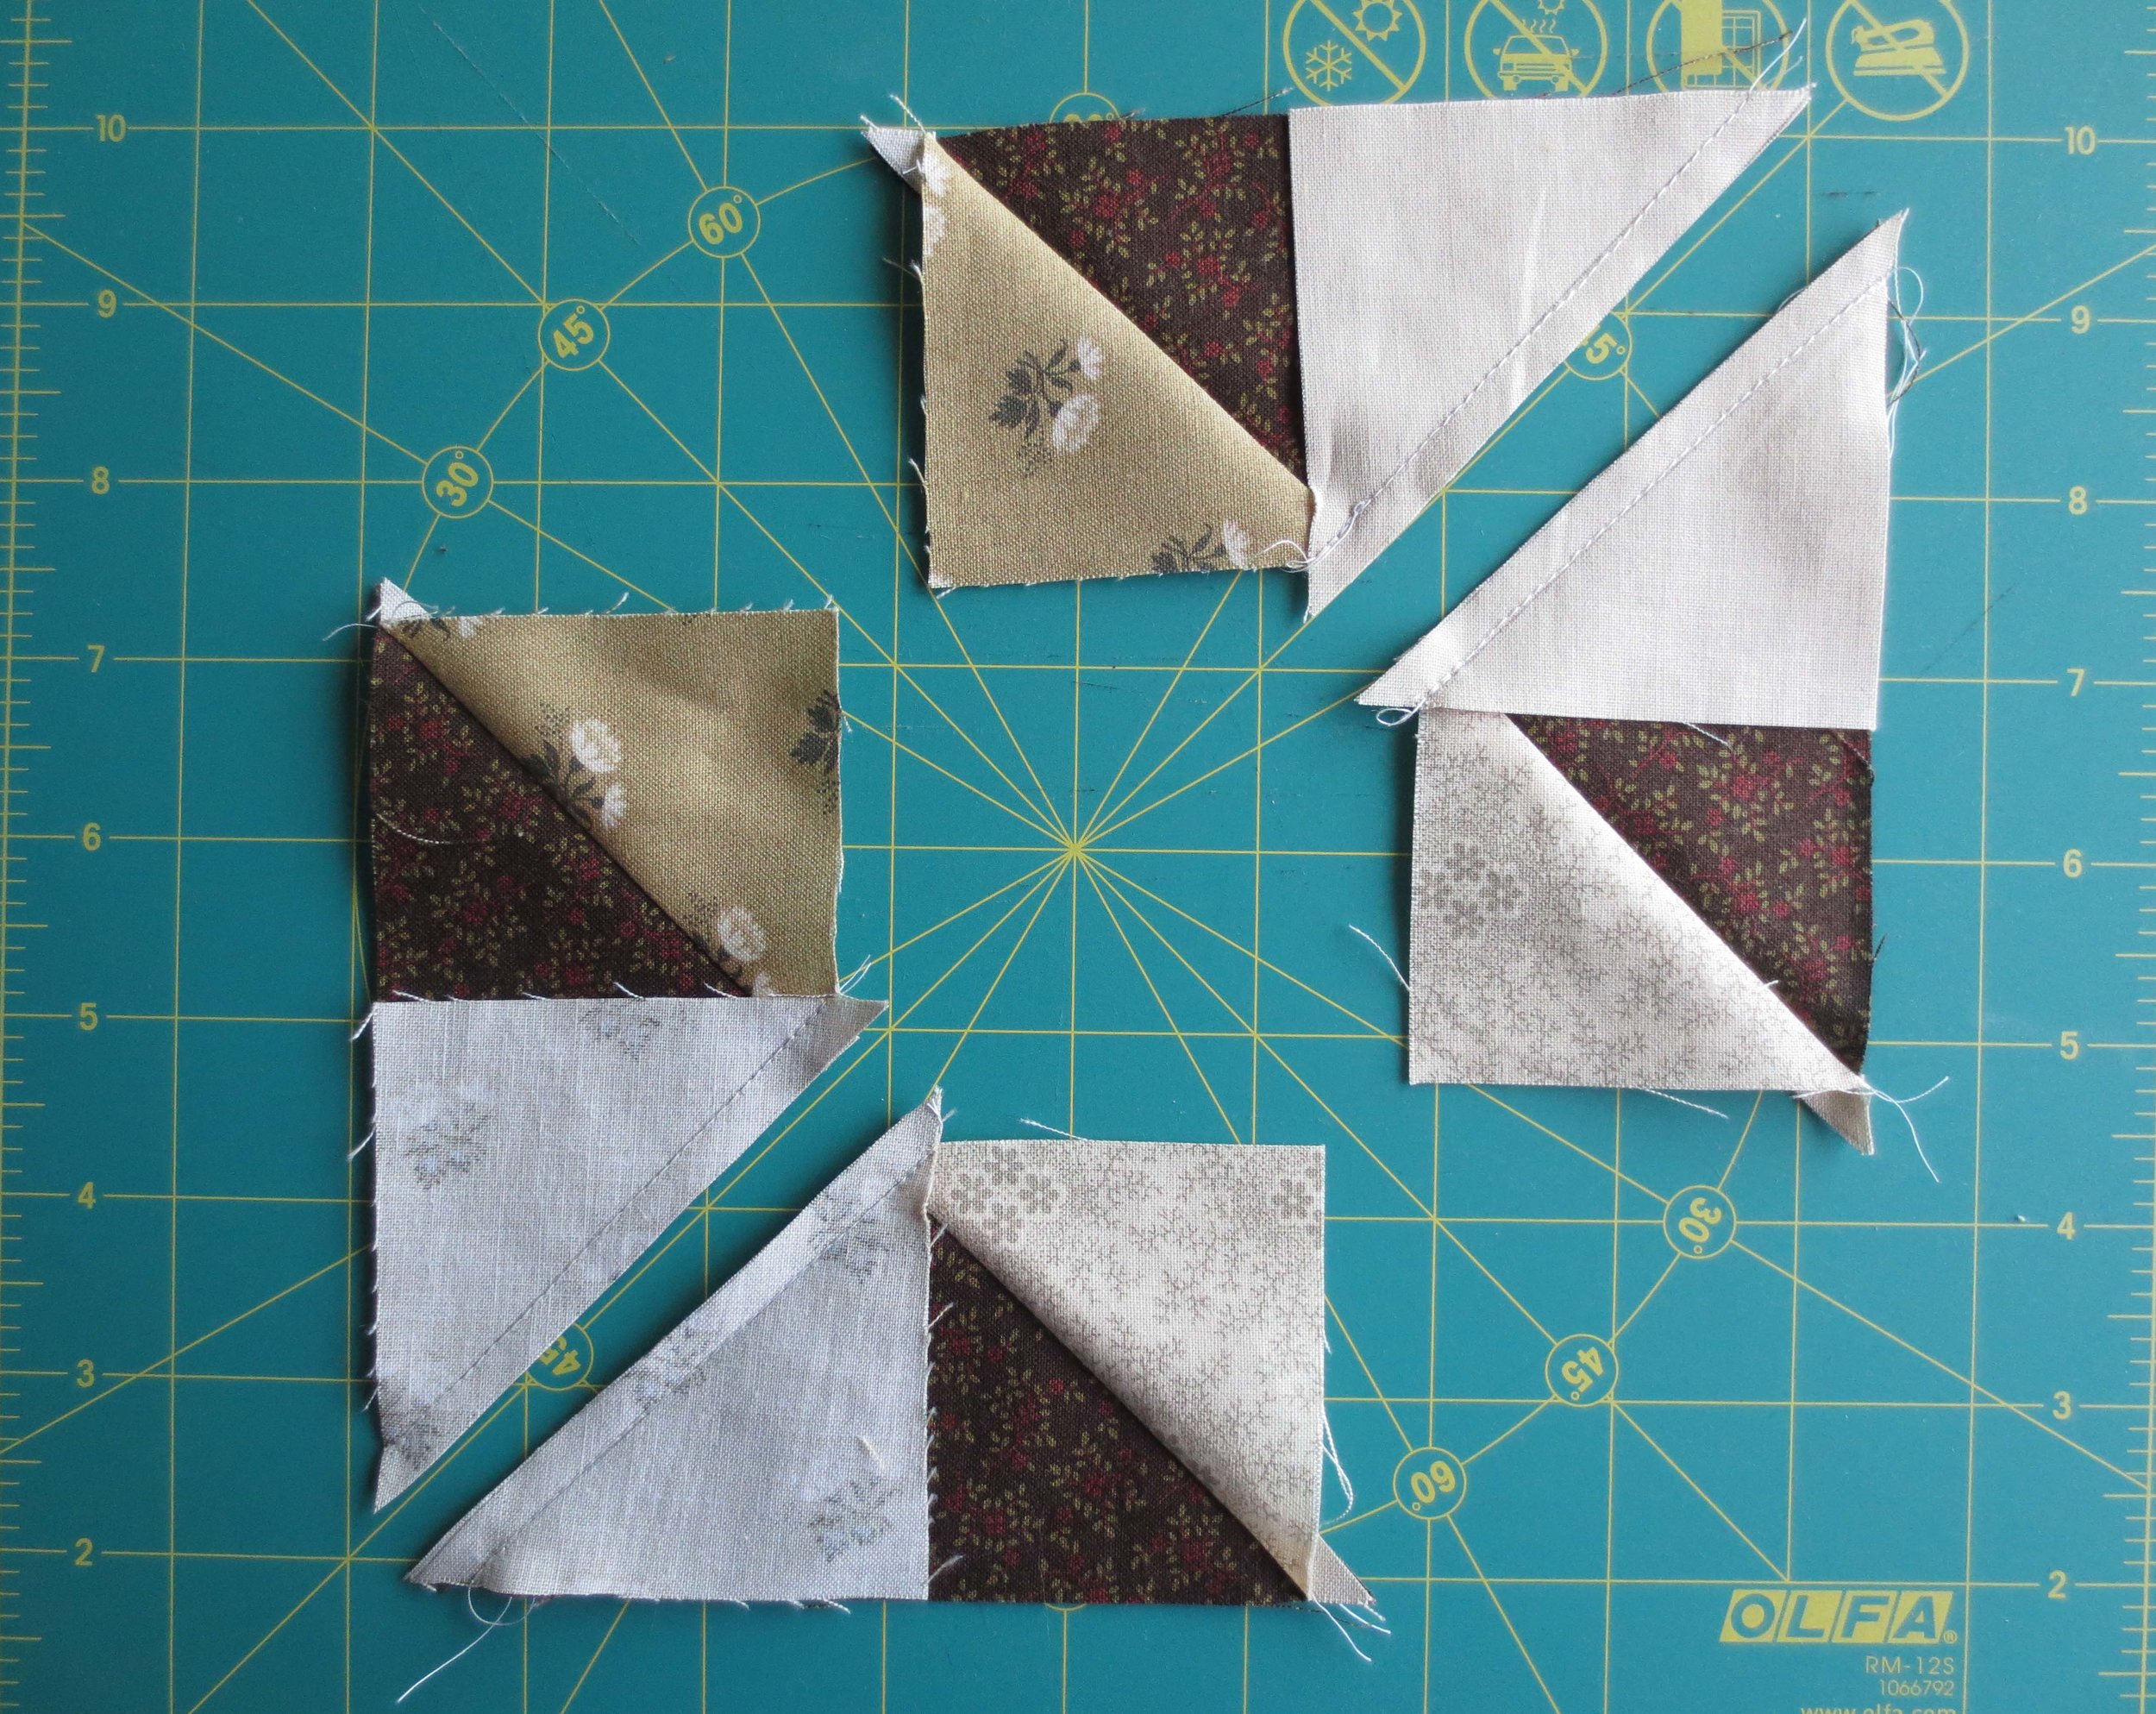
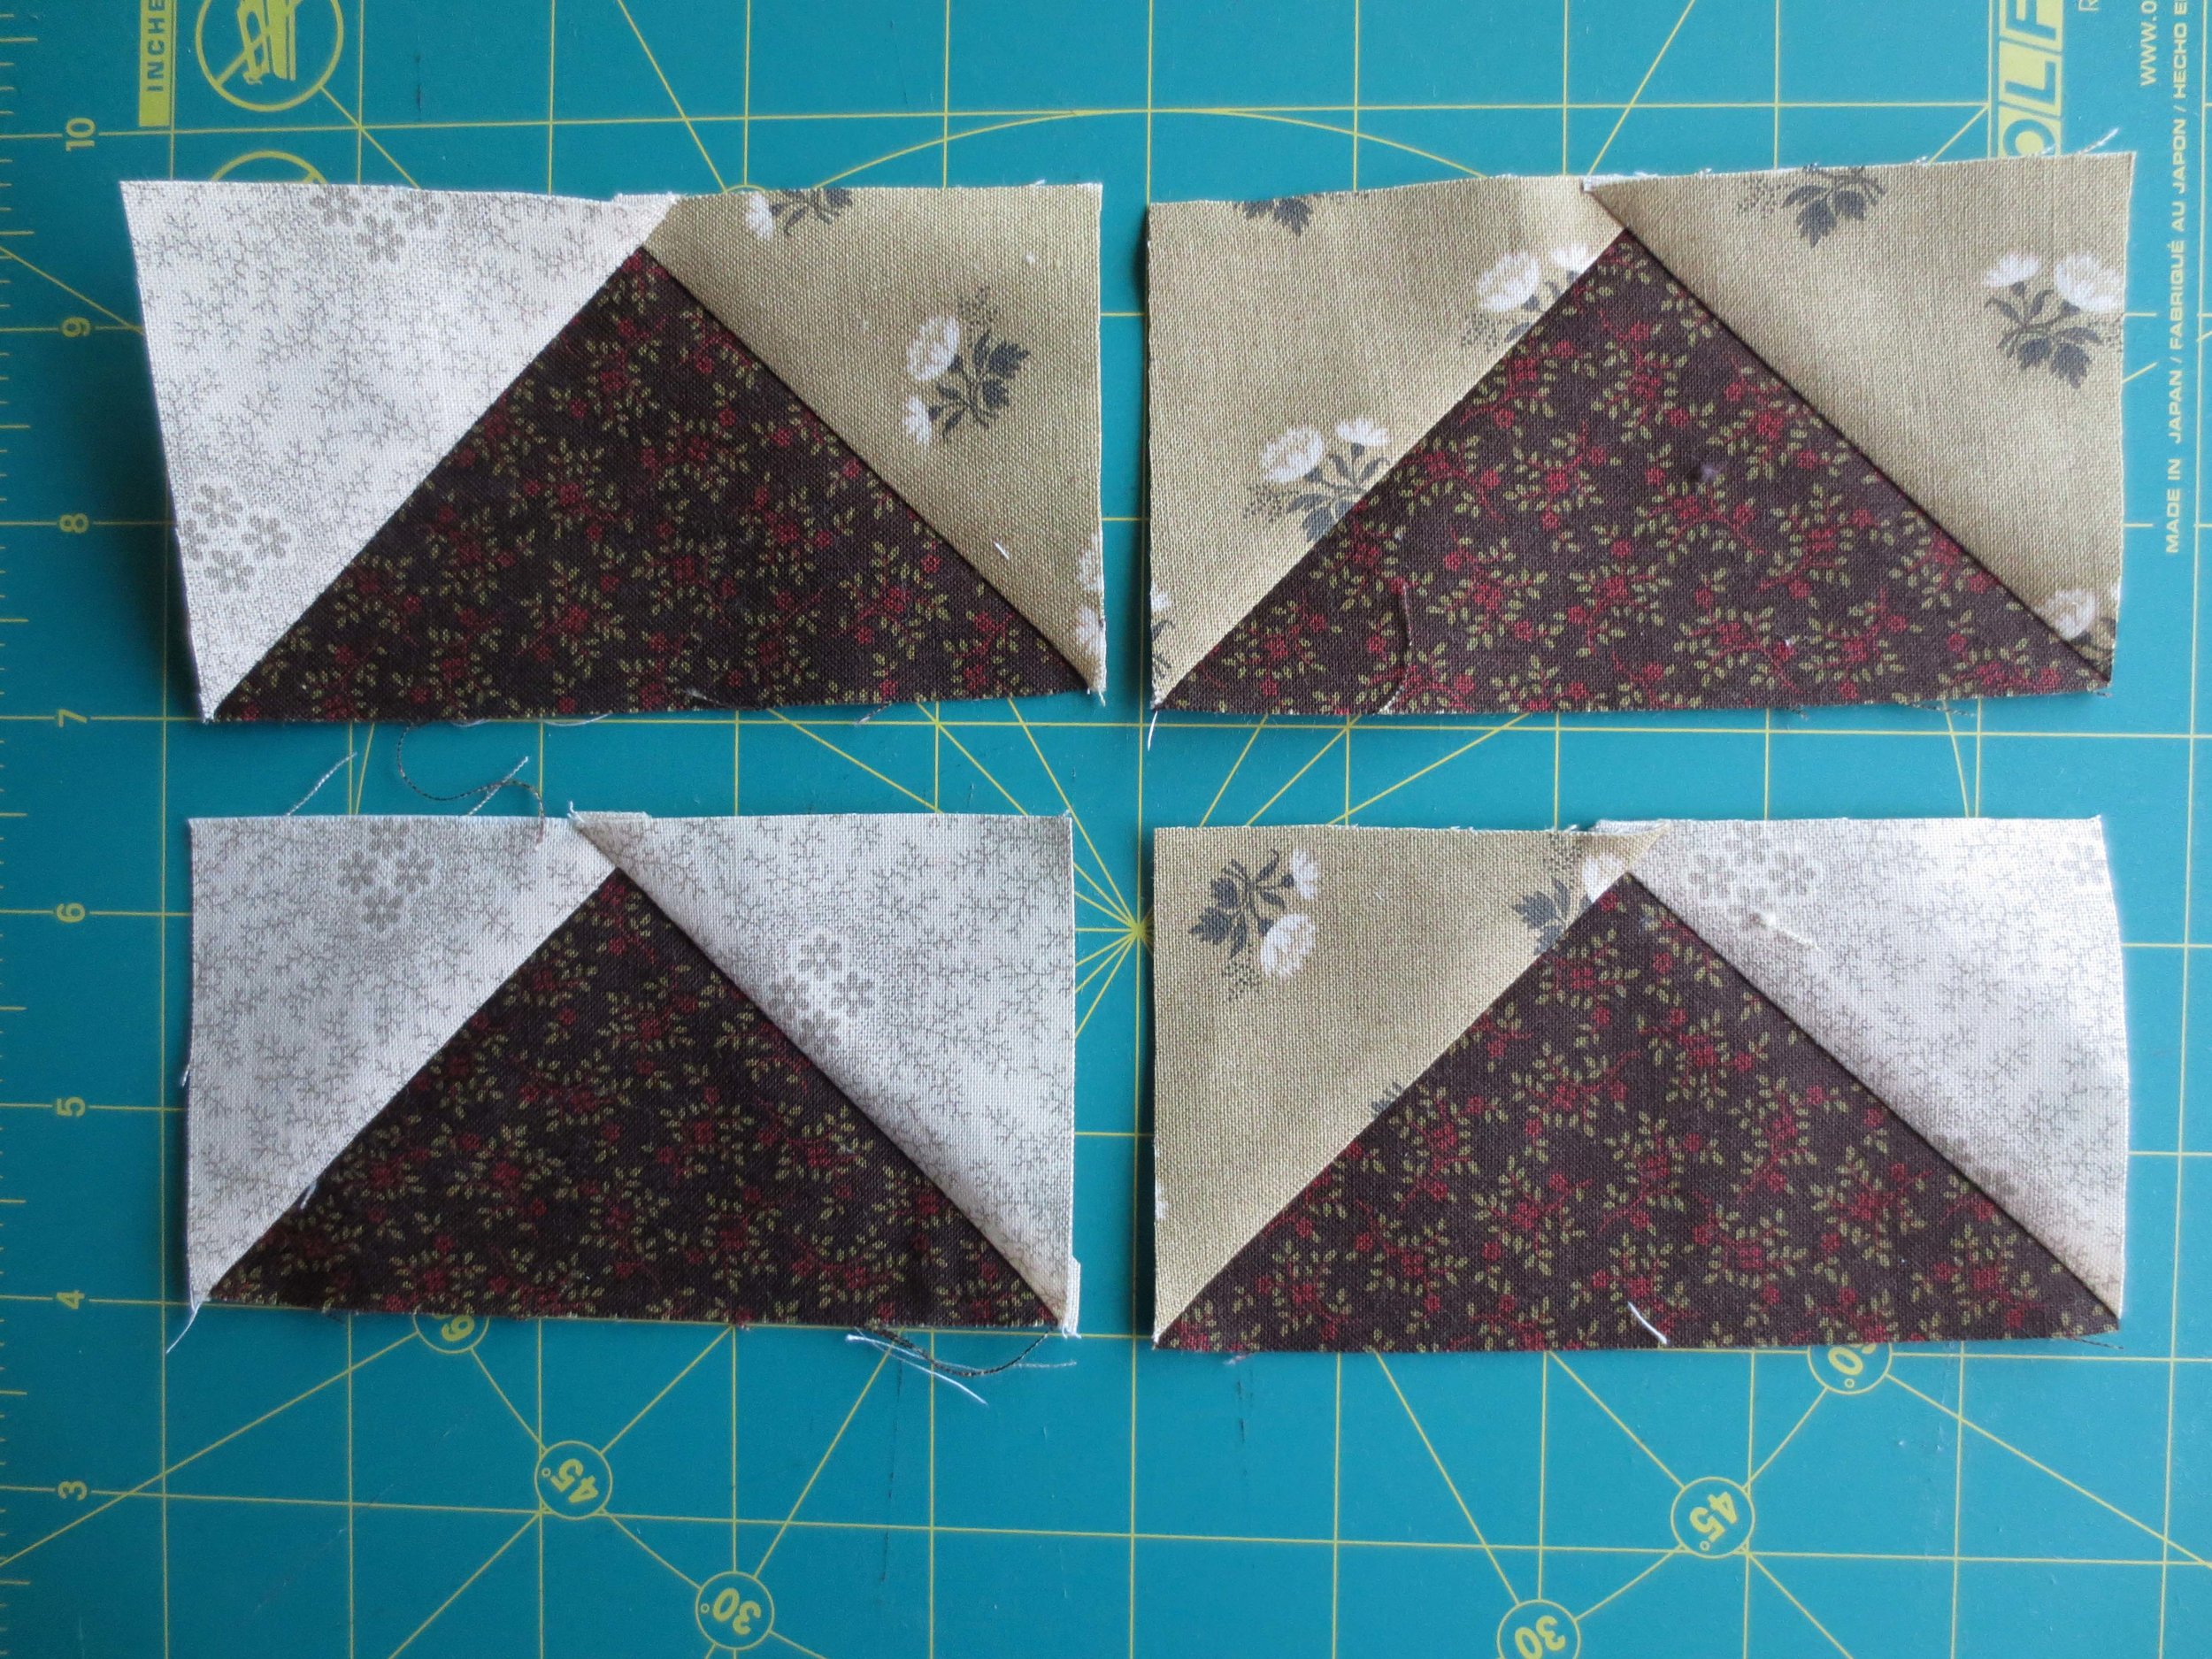
10. Make 4 flying geese units
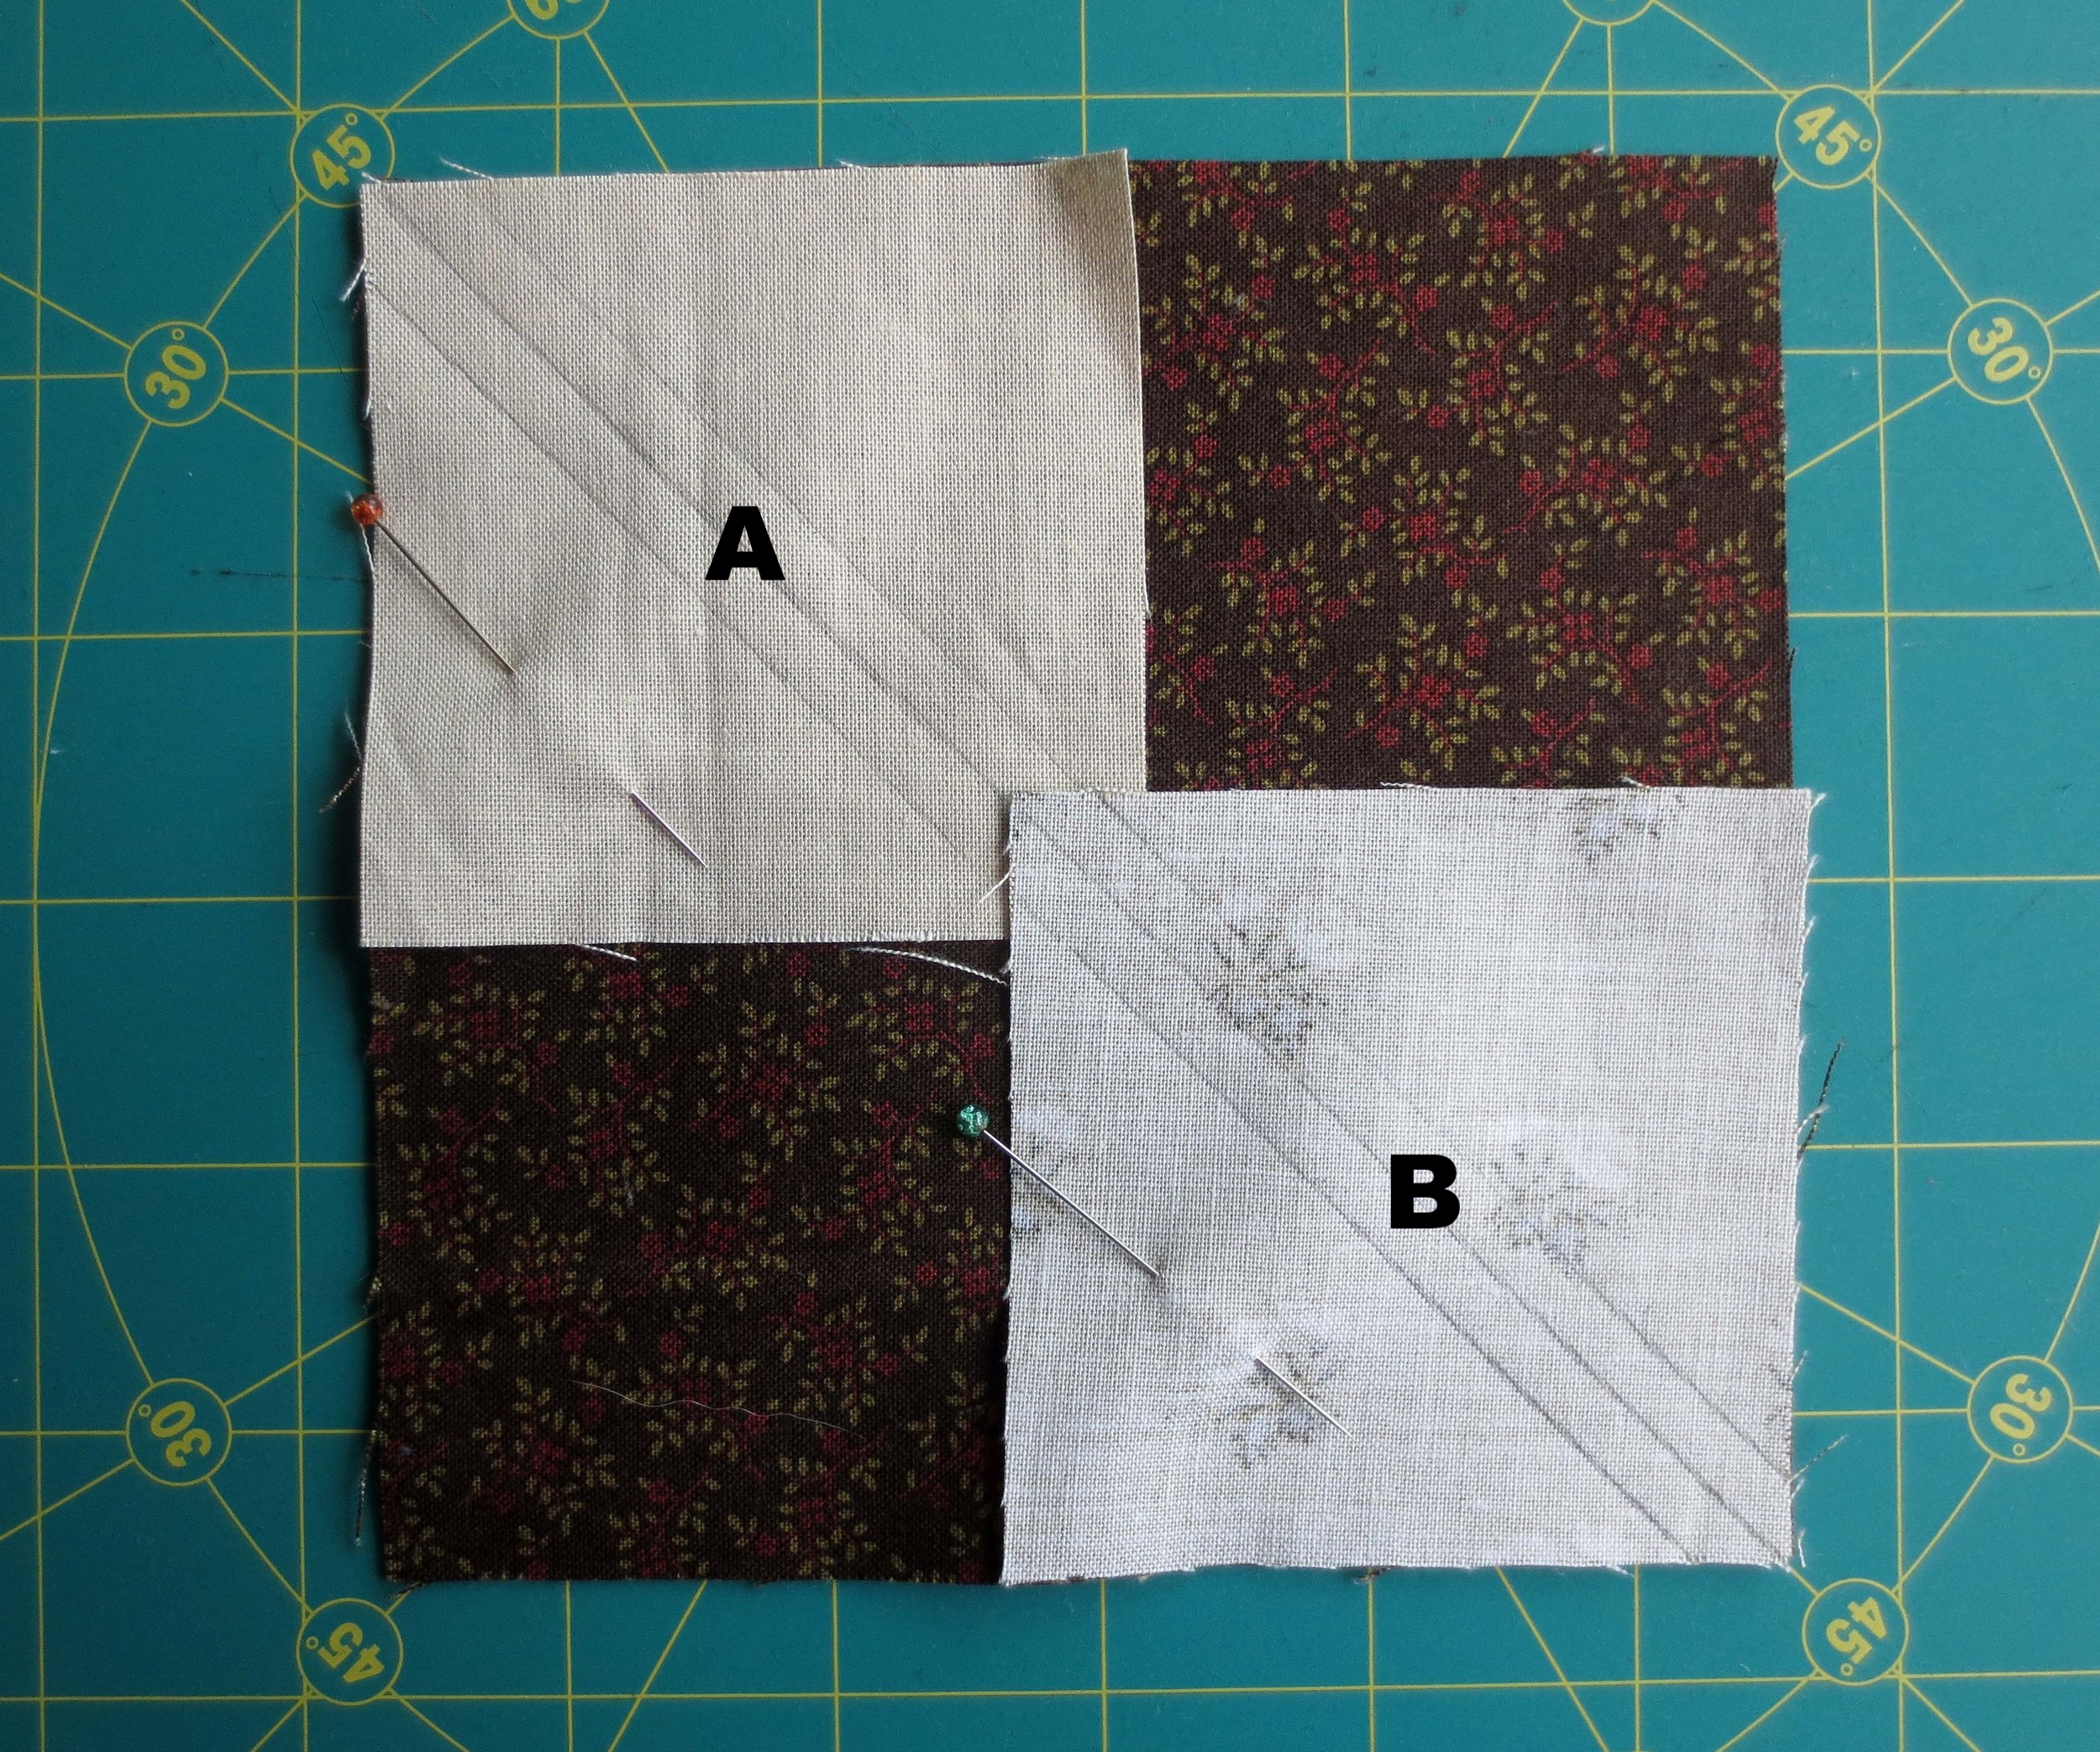
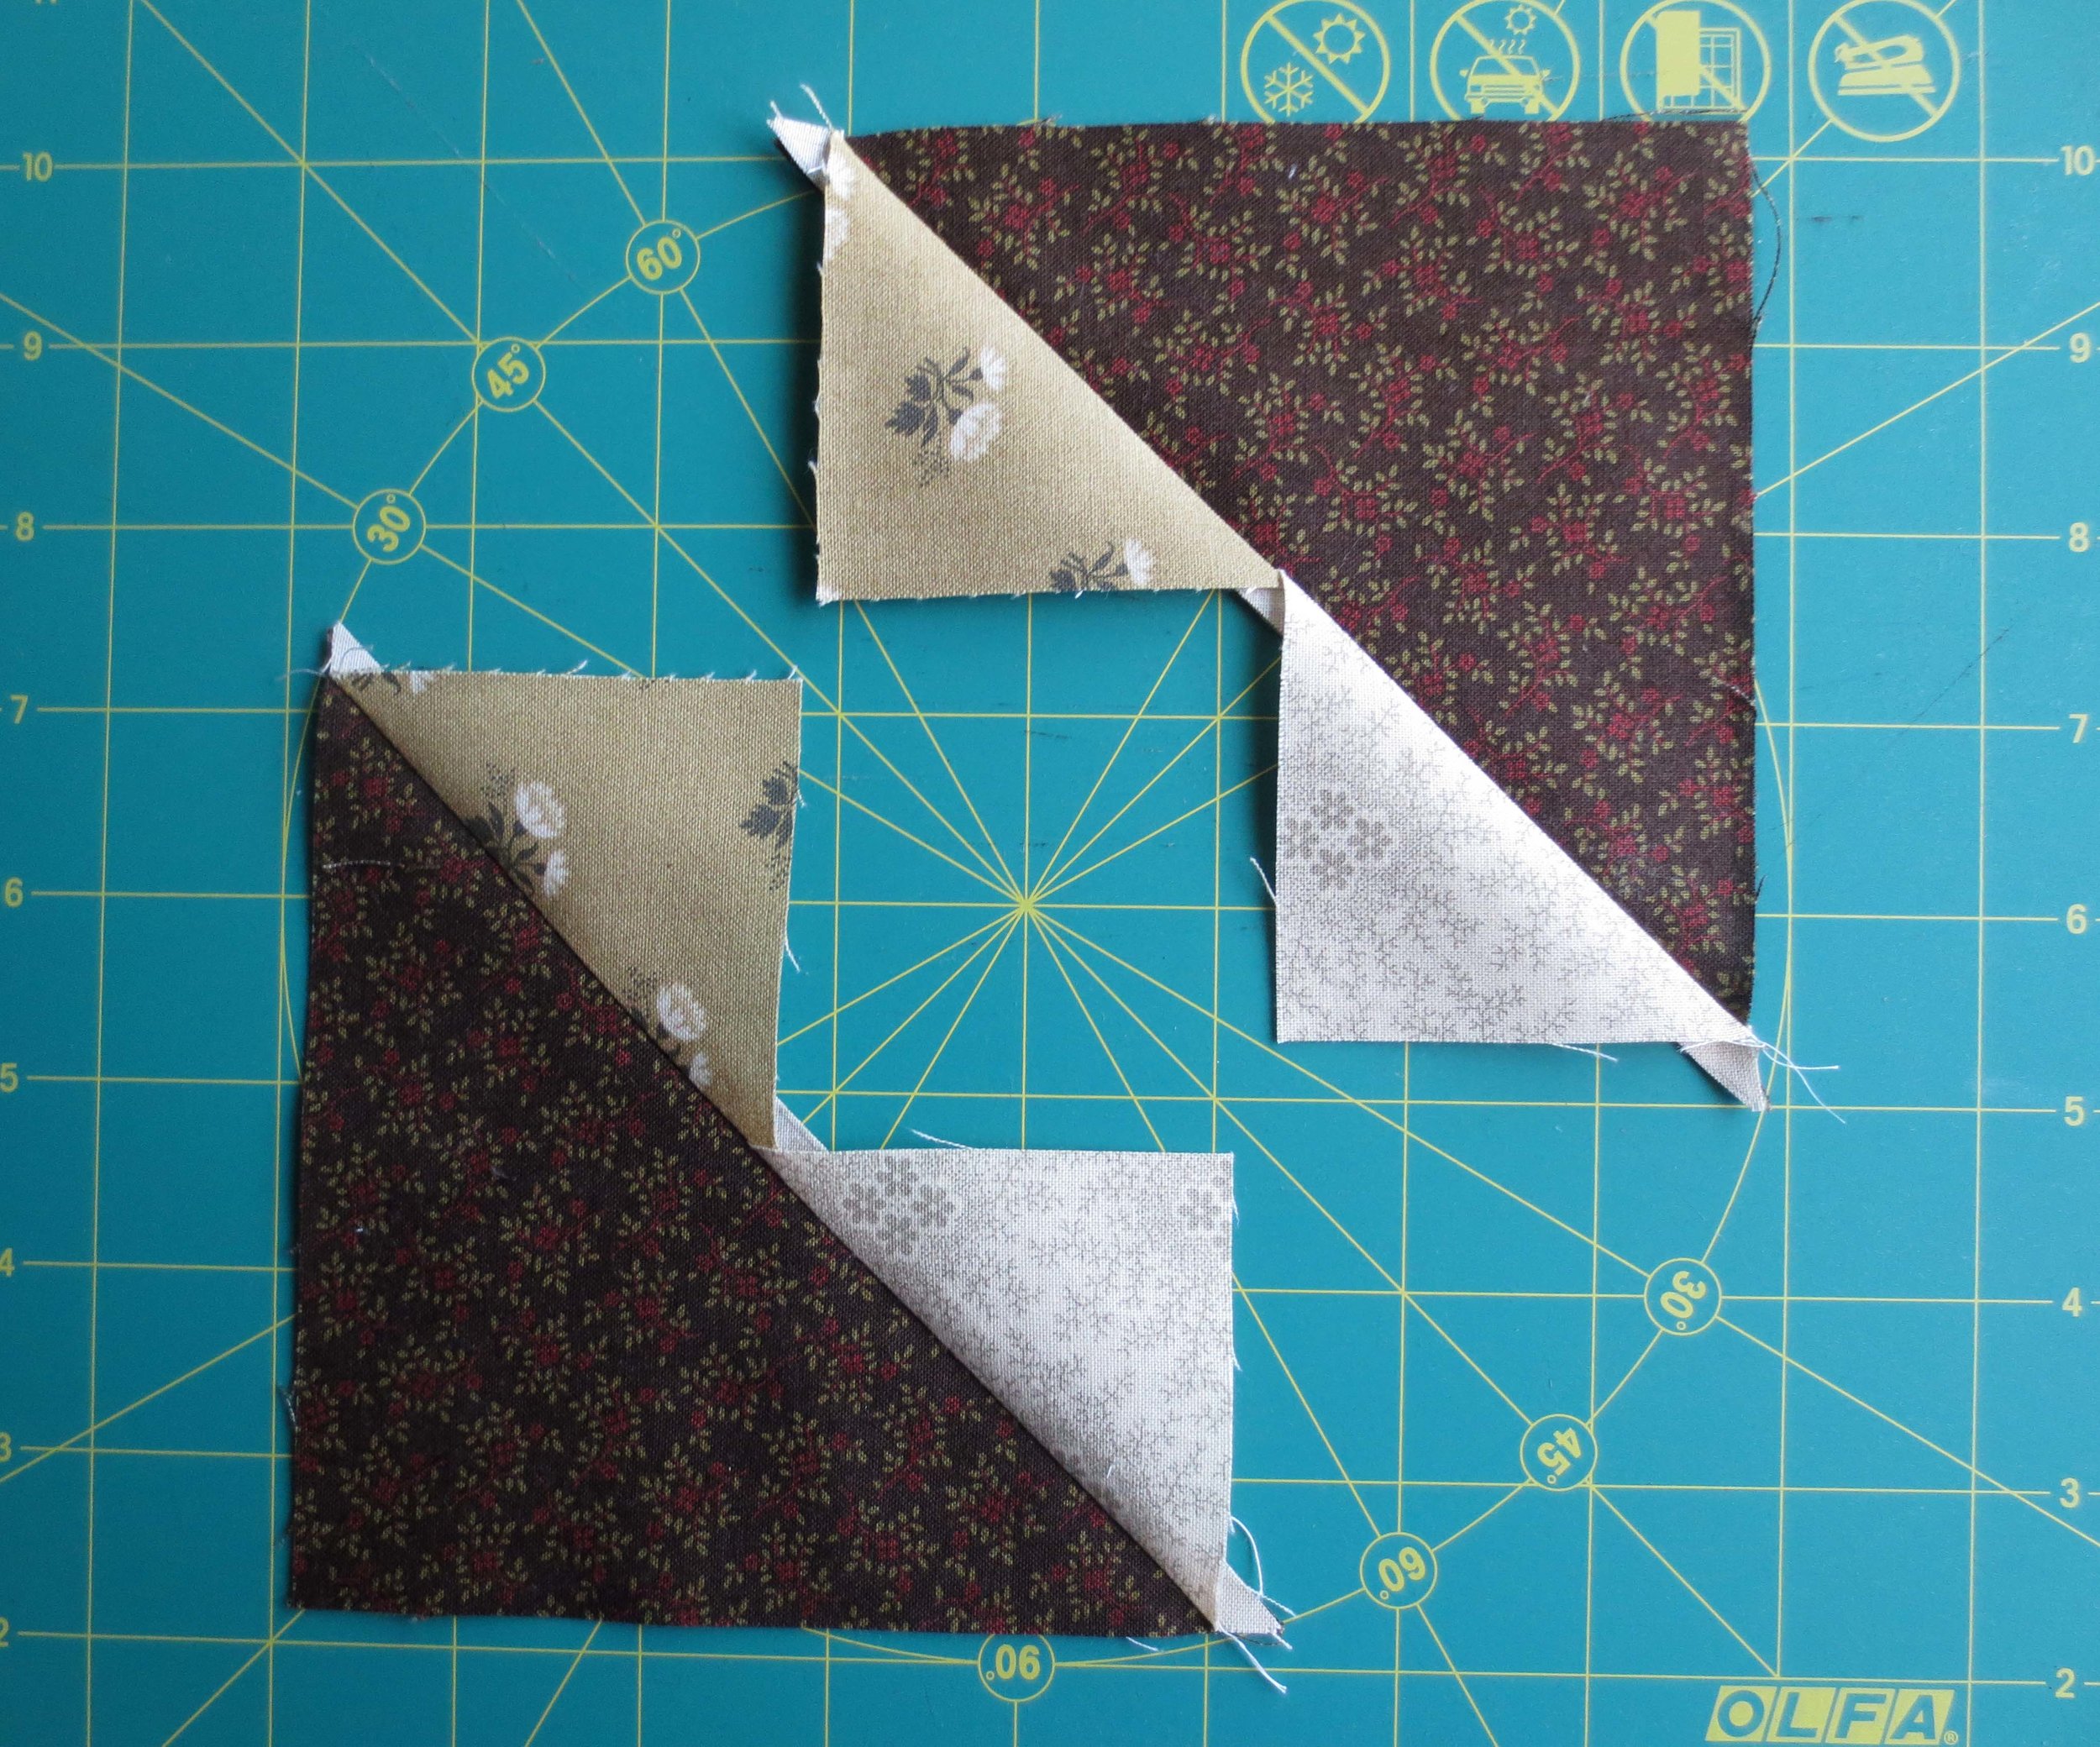
Lay one 3 3/8” square of Fabric A and one 3 3/8” square of Fabric B on a 6" square of Fabric J as shown below. Pin to secure.
Draw a line from corner to corner. This will be a cutting line.
Draw a parallel line 1/4”on each side of the cutting line.
Cut along the center line.
Press open toward lighter fabric.
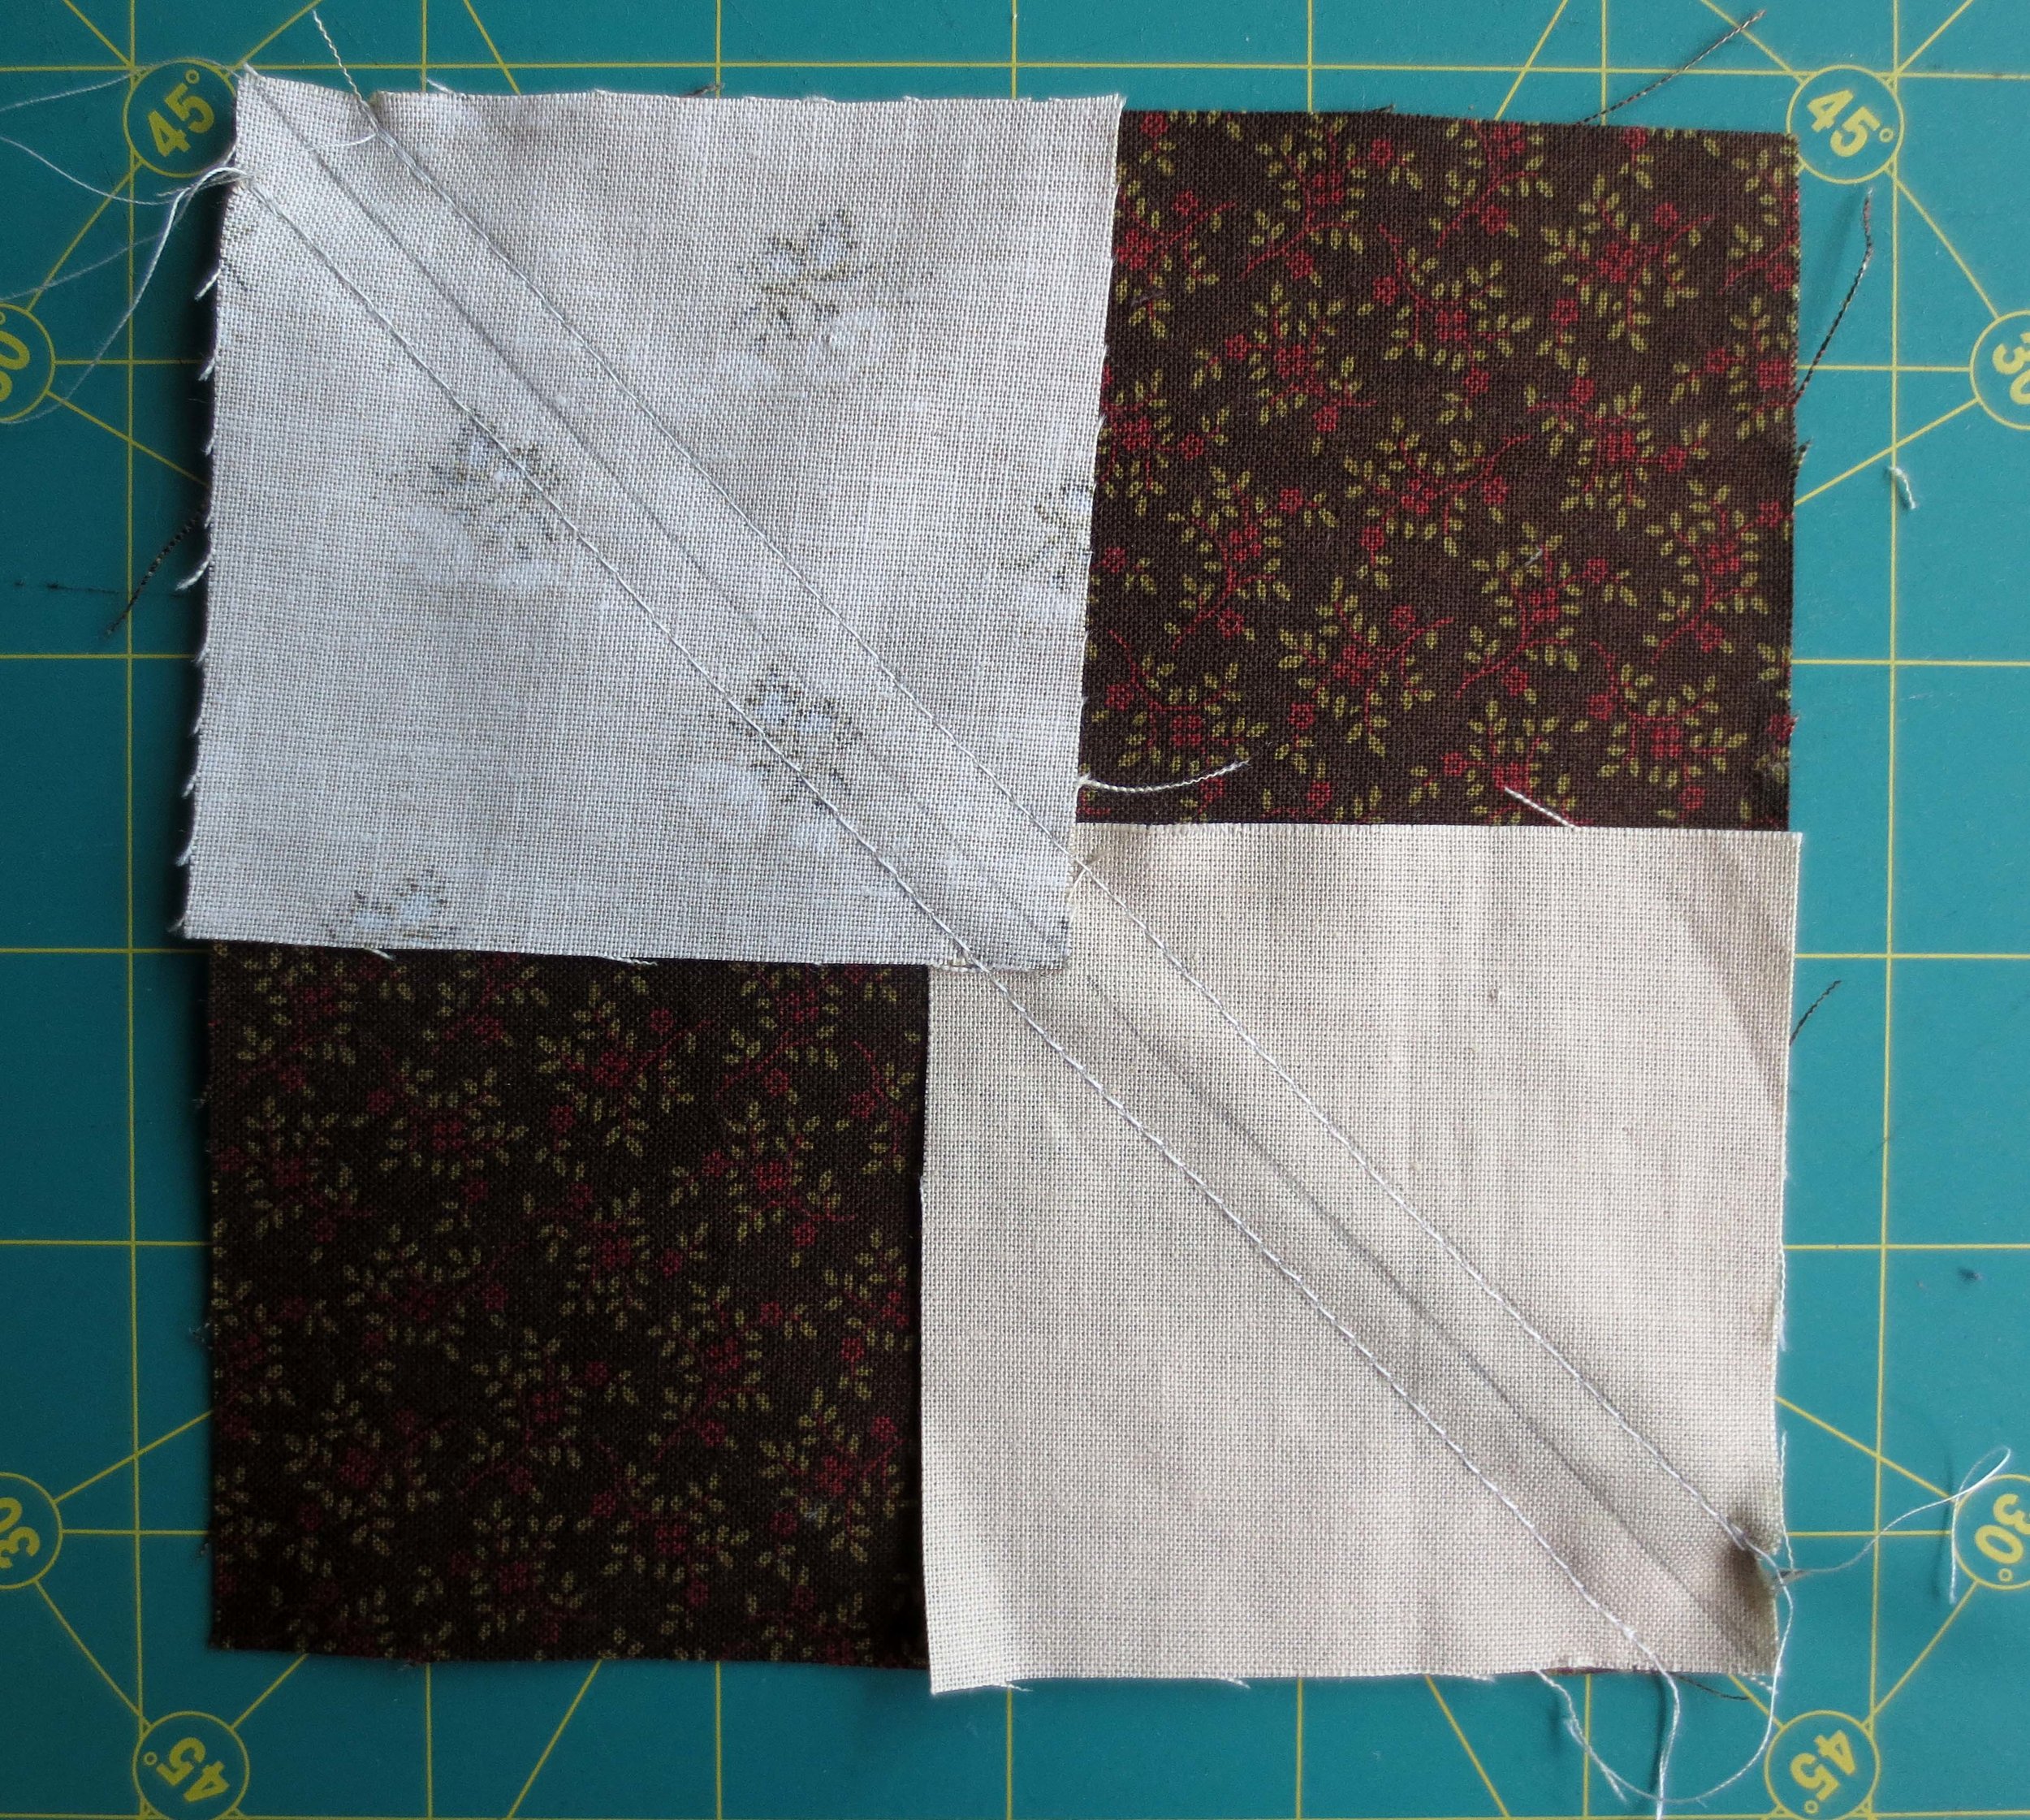
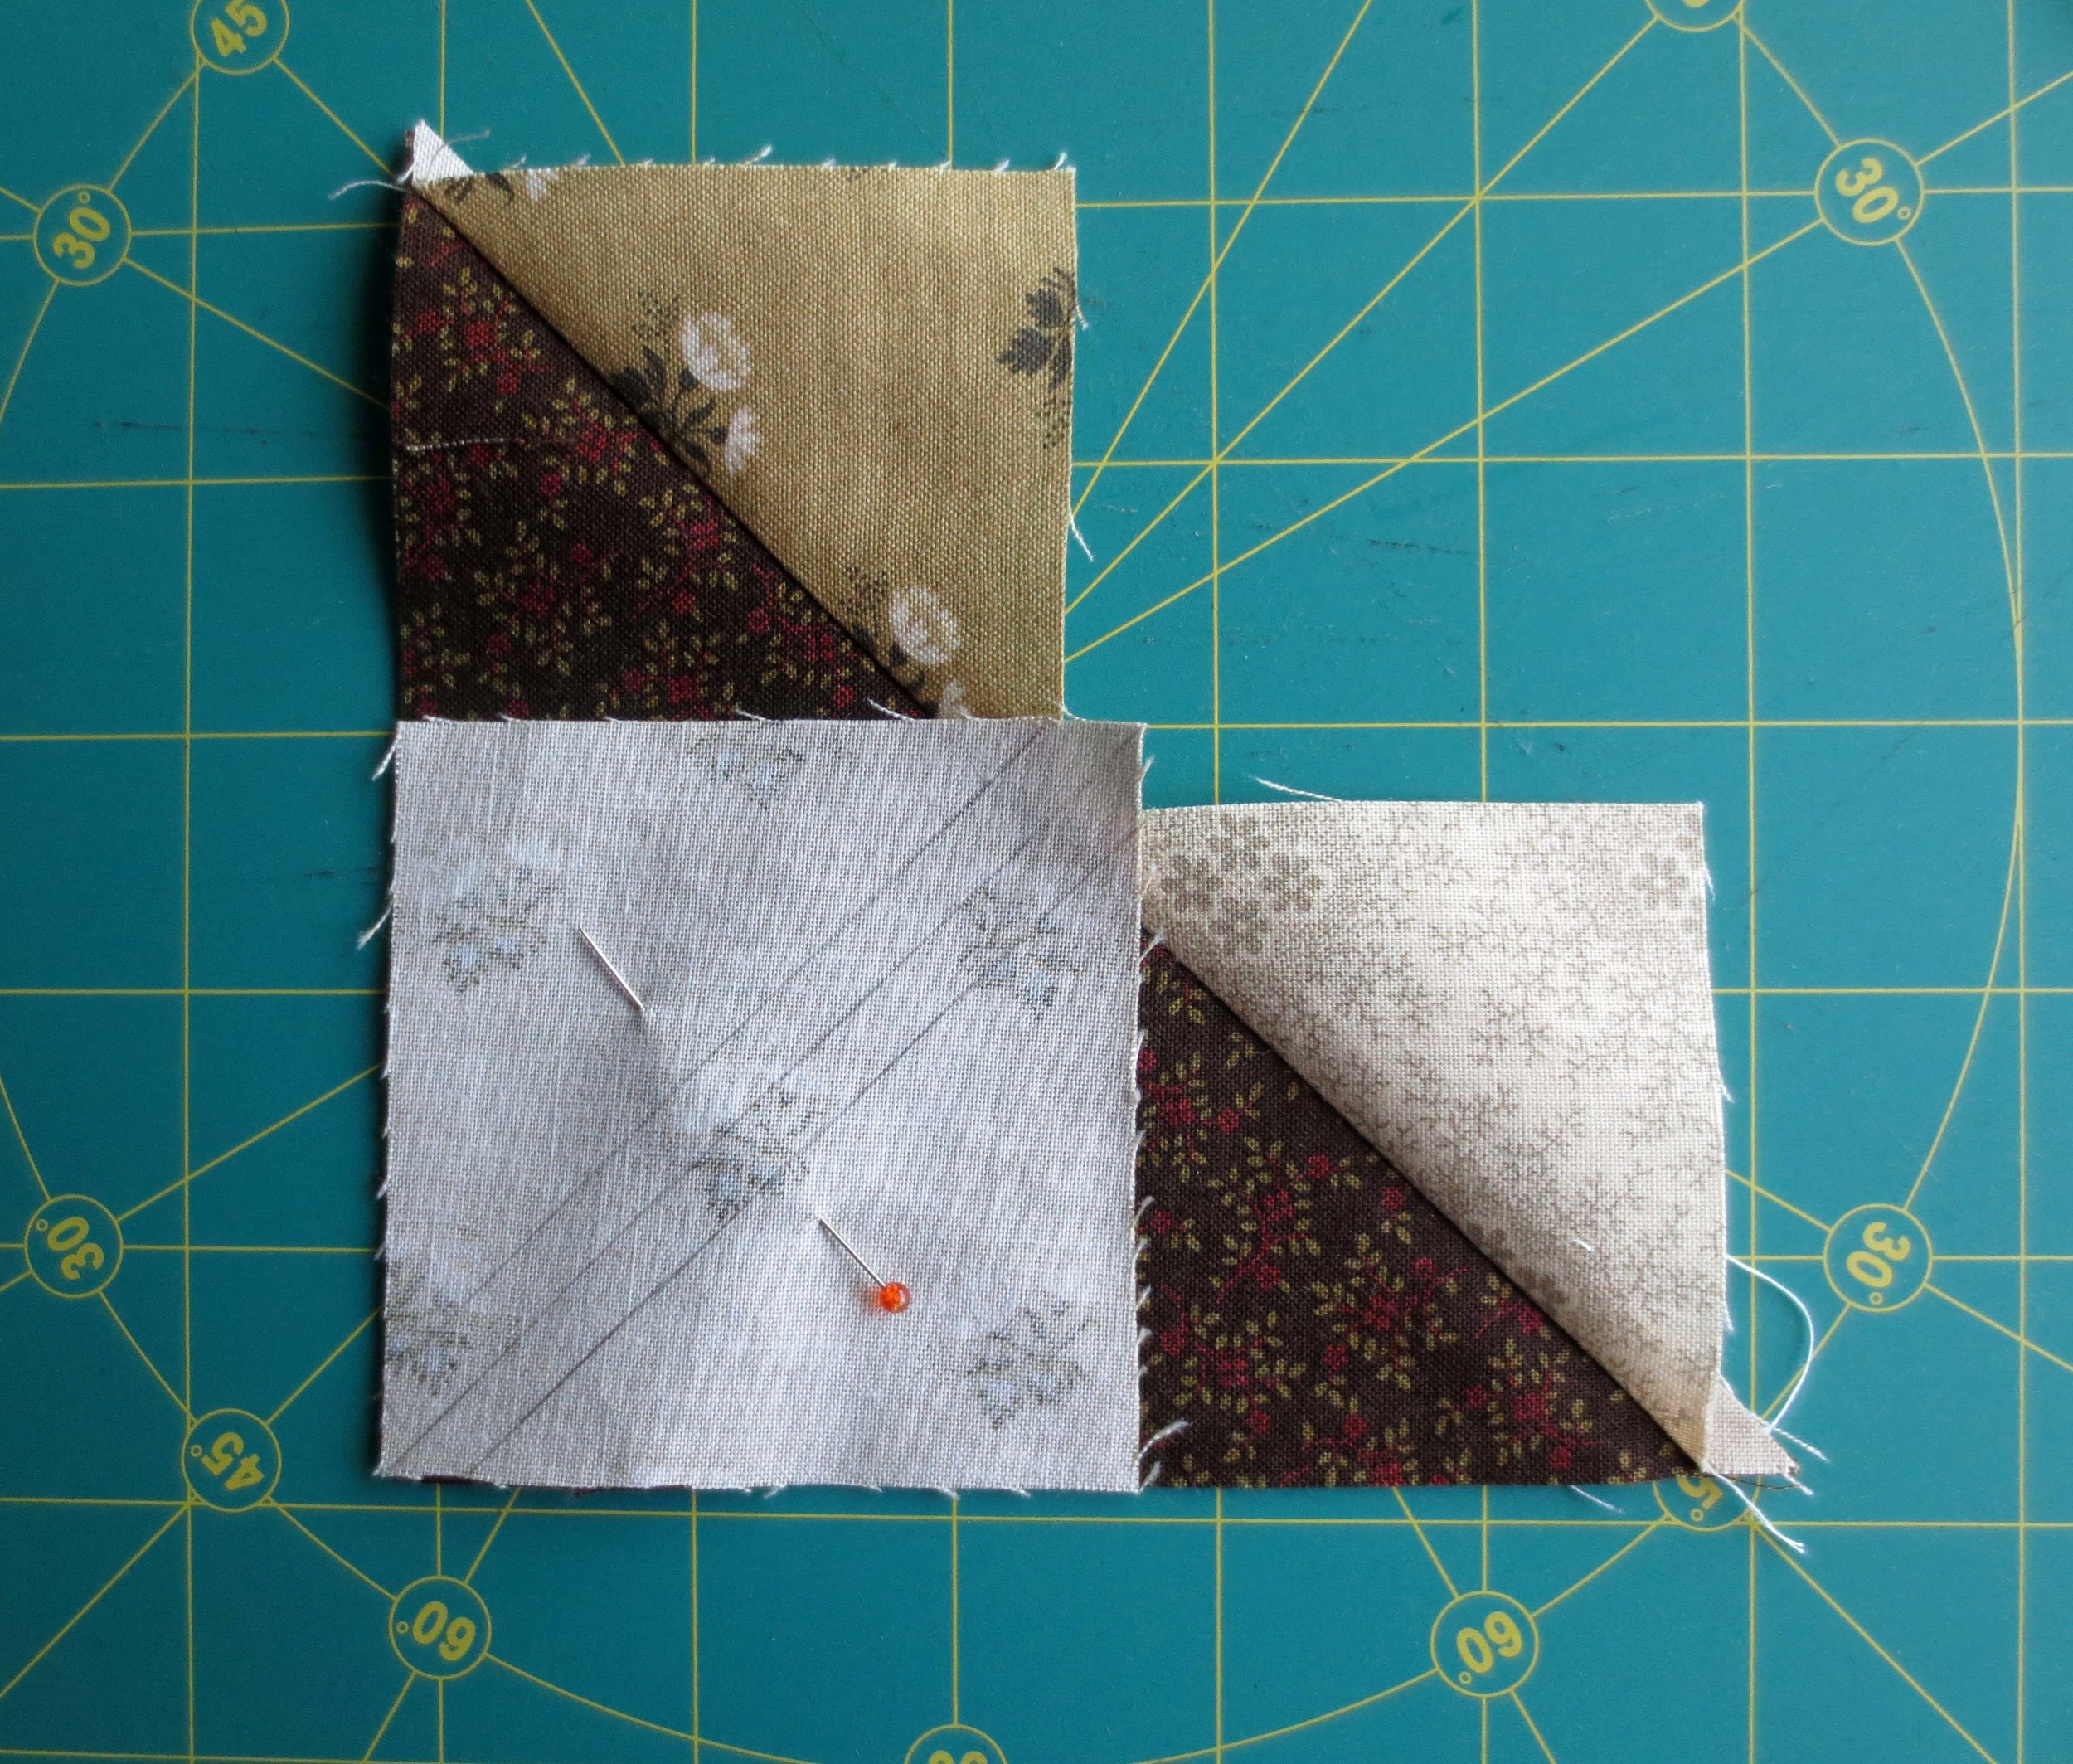
Draw a diagonal line on the back sides of the remaining 3 3/8” squares of Fabric A and B.
Draw parallel lines on each side of the diagonal line.
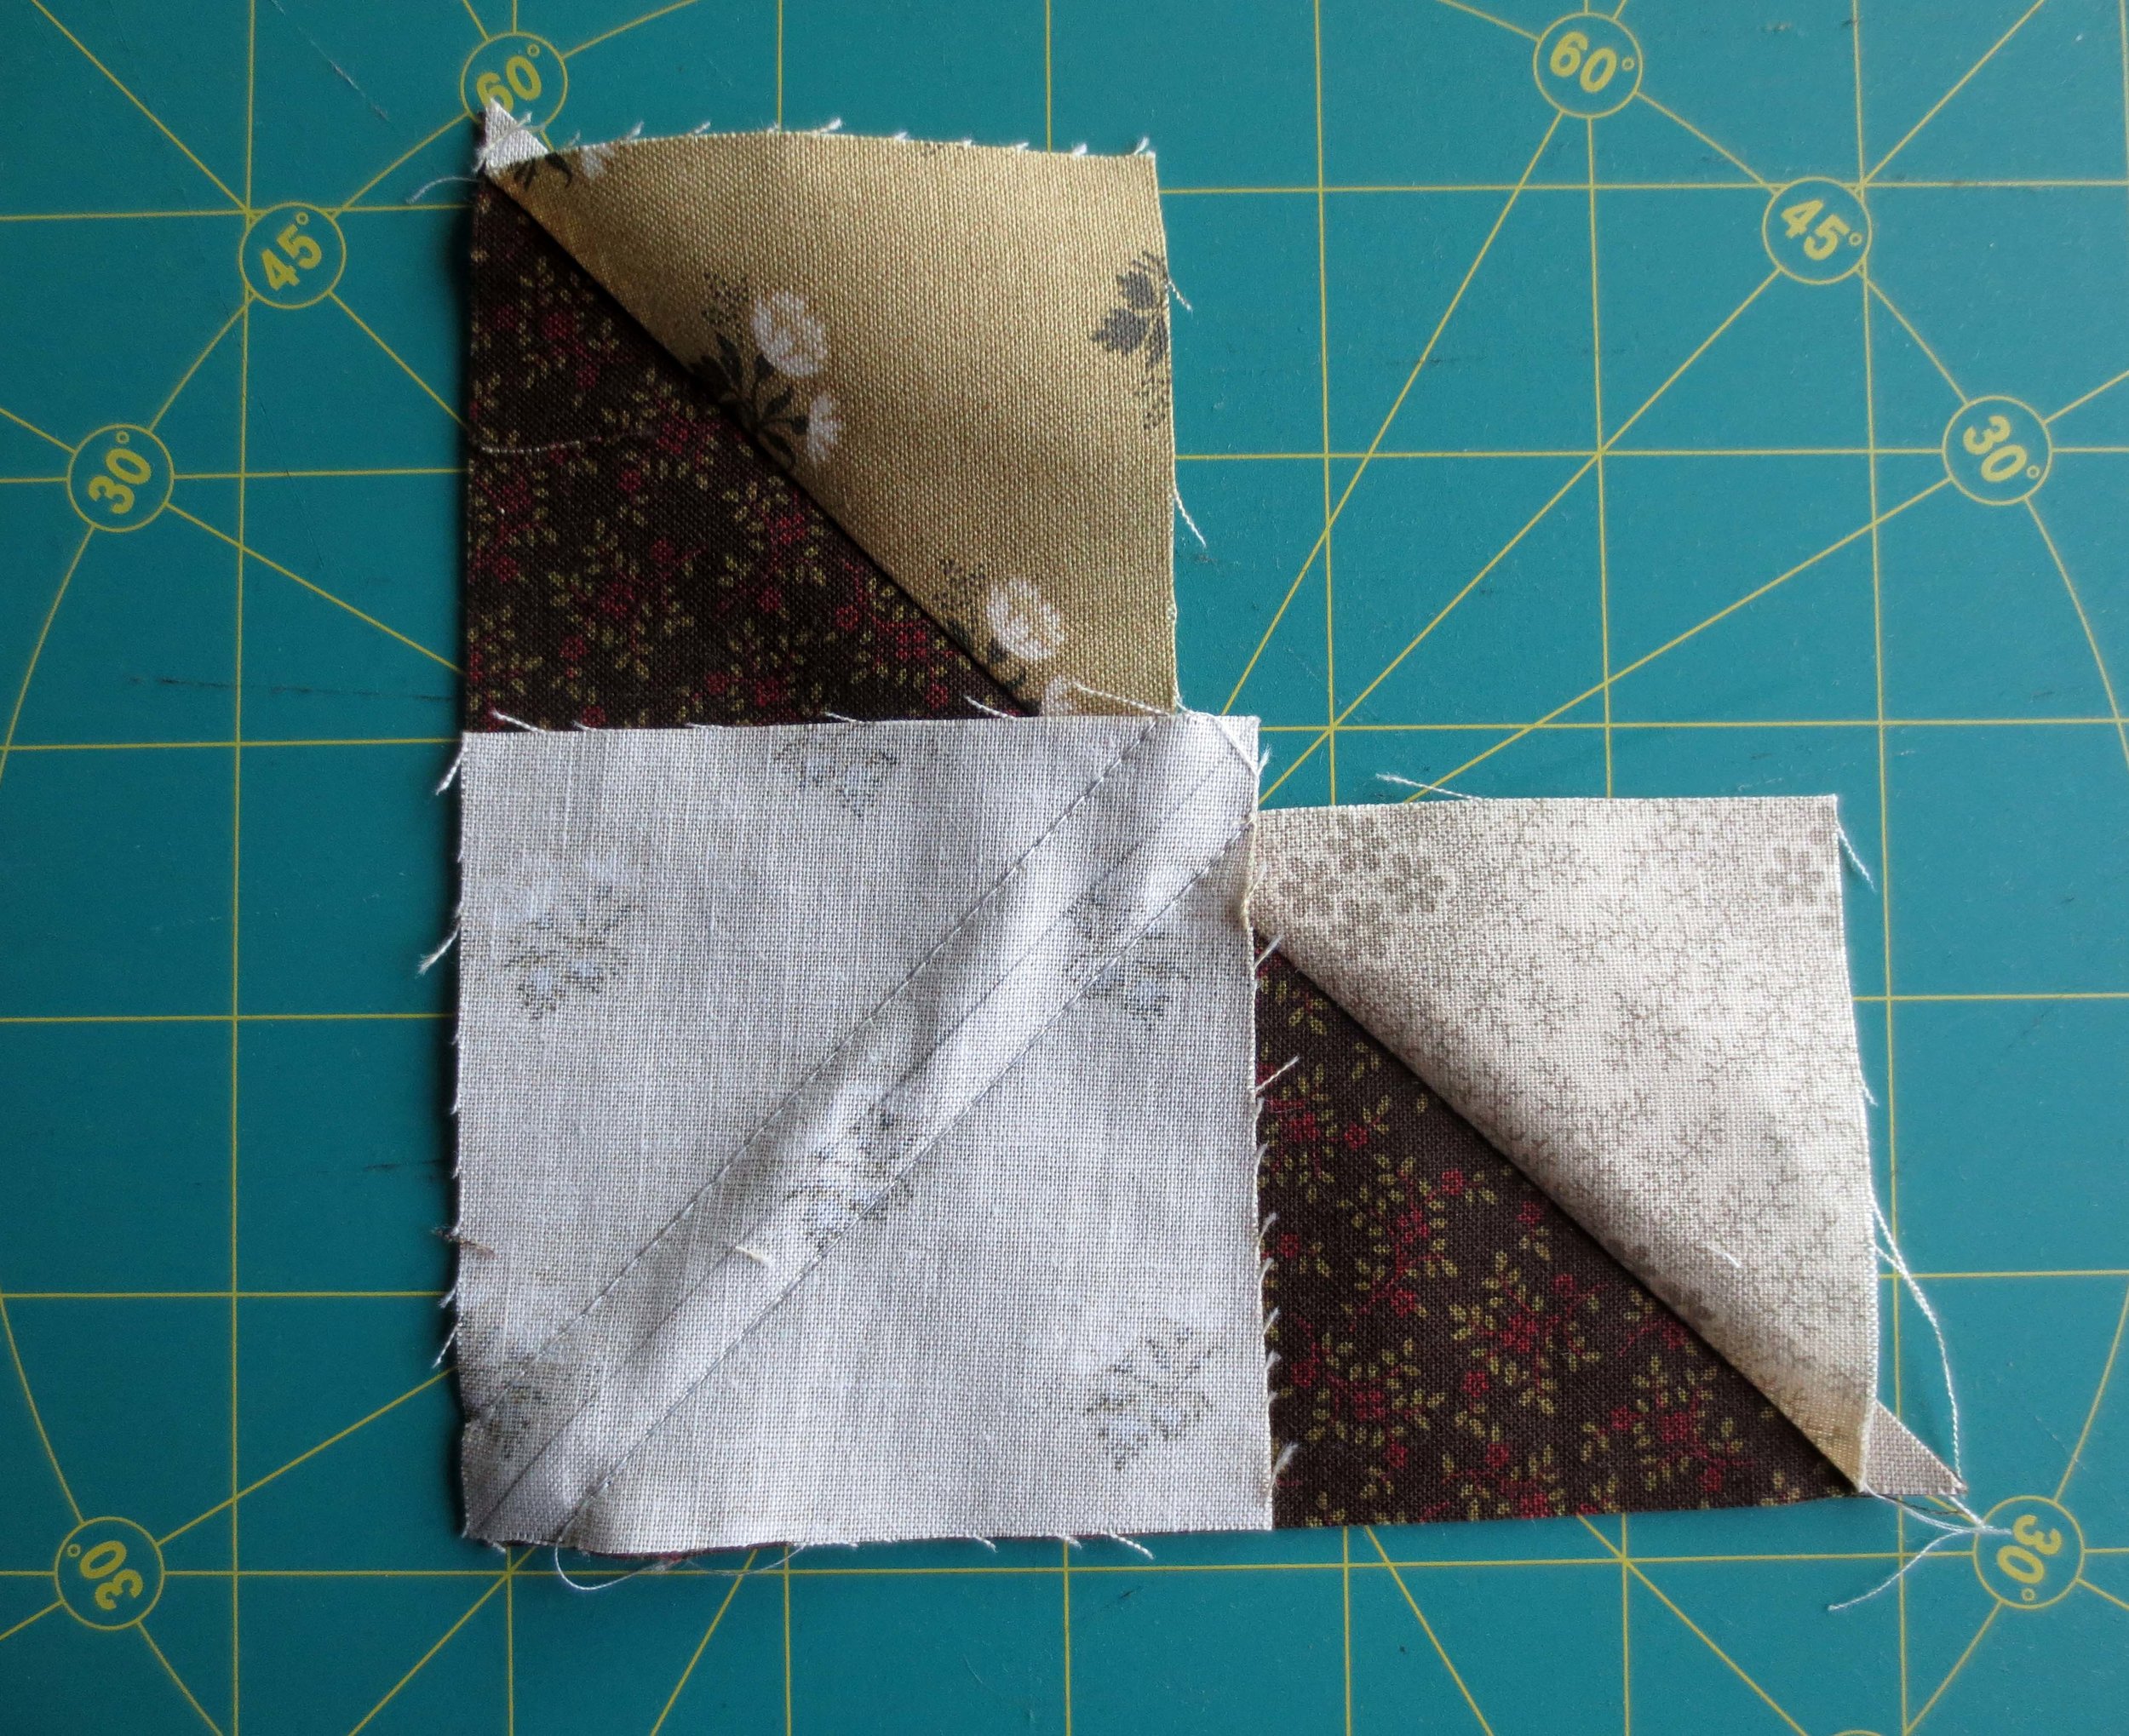
Place the 3 3/8” squares of Fabric A and B on Fabric J side of the block as shown below. Pin in place.
Sew over the outer lines.
Cut along the center line.
Press open toward the lighter fabric.
Trim to 2 1/2” x 4 1/2”.
11. Inner border
Sew the 1” x WOF of Fabric J to the bottom of center block. Trim excess and reserve for use on sides. Press the seam toward the dark fabric.
Sew the 1” x WOF of Fabric I to the top of the center block. Trim excess and reserve for use on sides. Press the seam toward the dark fabric.
The reserved pieces of Fabrics I and J should be about 20” long each. Cut two 1” x 9” strips from each of the reserved pieces.
Sew one Fabric I strip to one Fabric J strip end to end. Repeat for the remaining two strips.
Sew the I/J strips to the right and left sides of the center block. Note: Align the strips so that the fabrics alternate (see below). Trim excess. Press seams toward the dark fabric.
12. Outer border
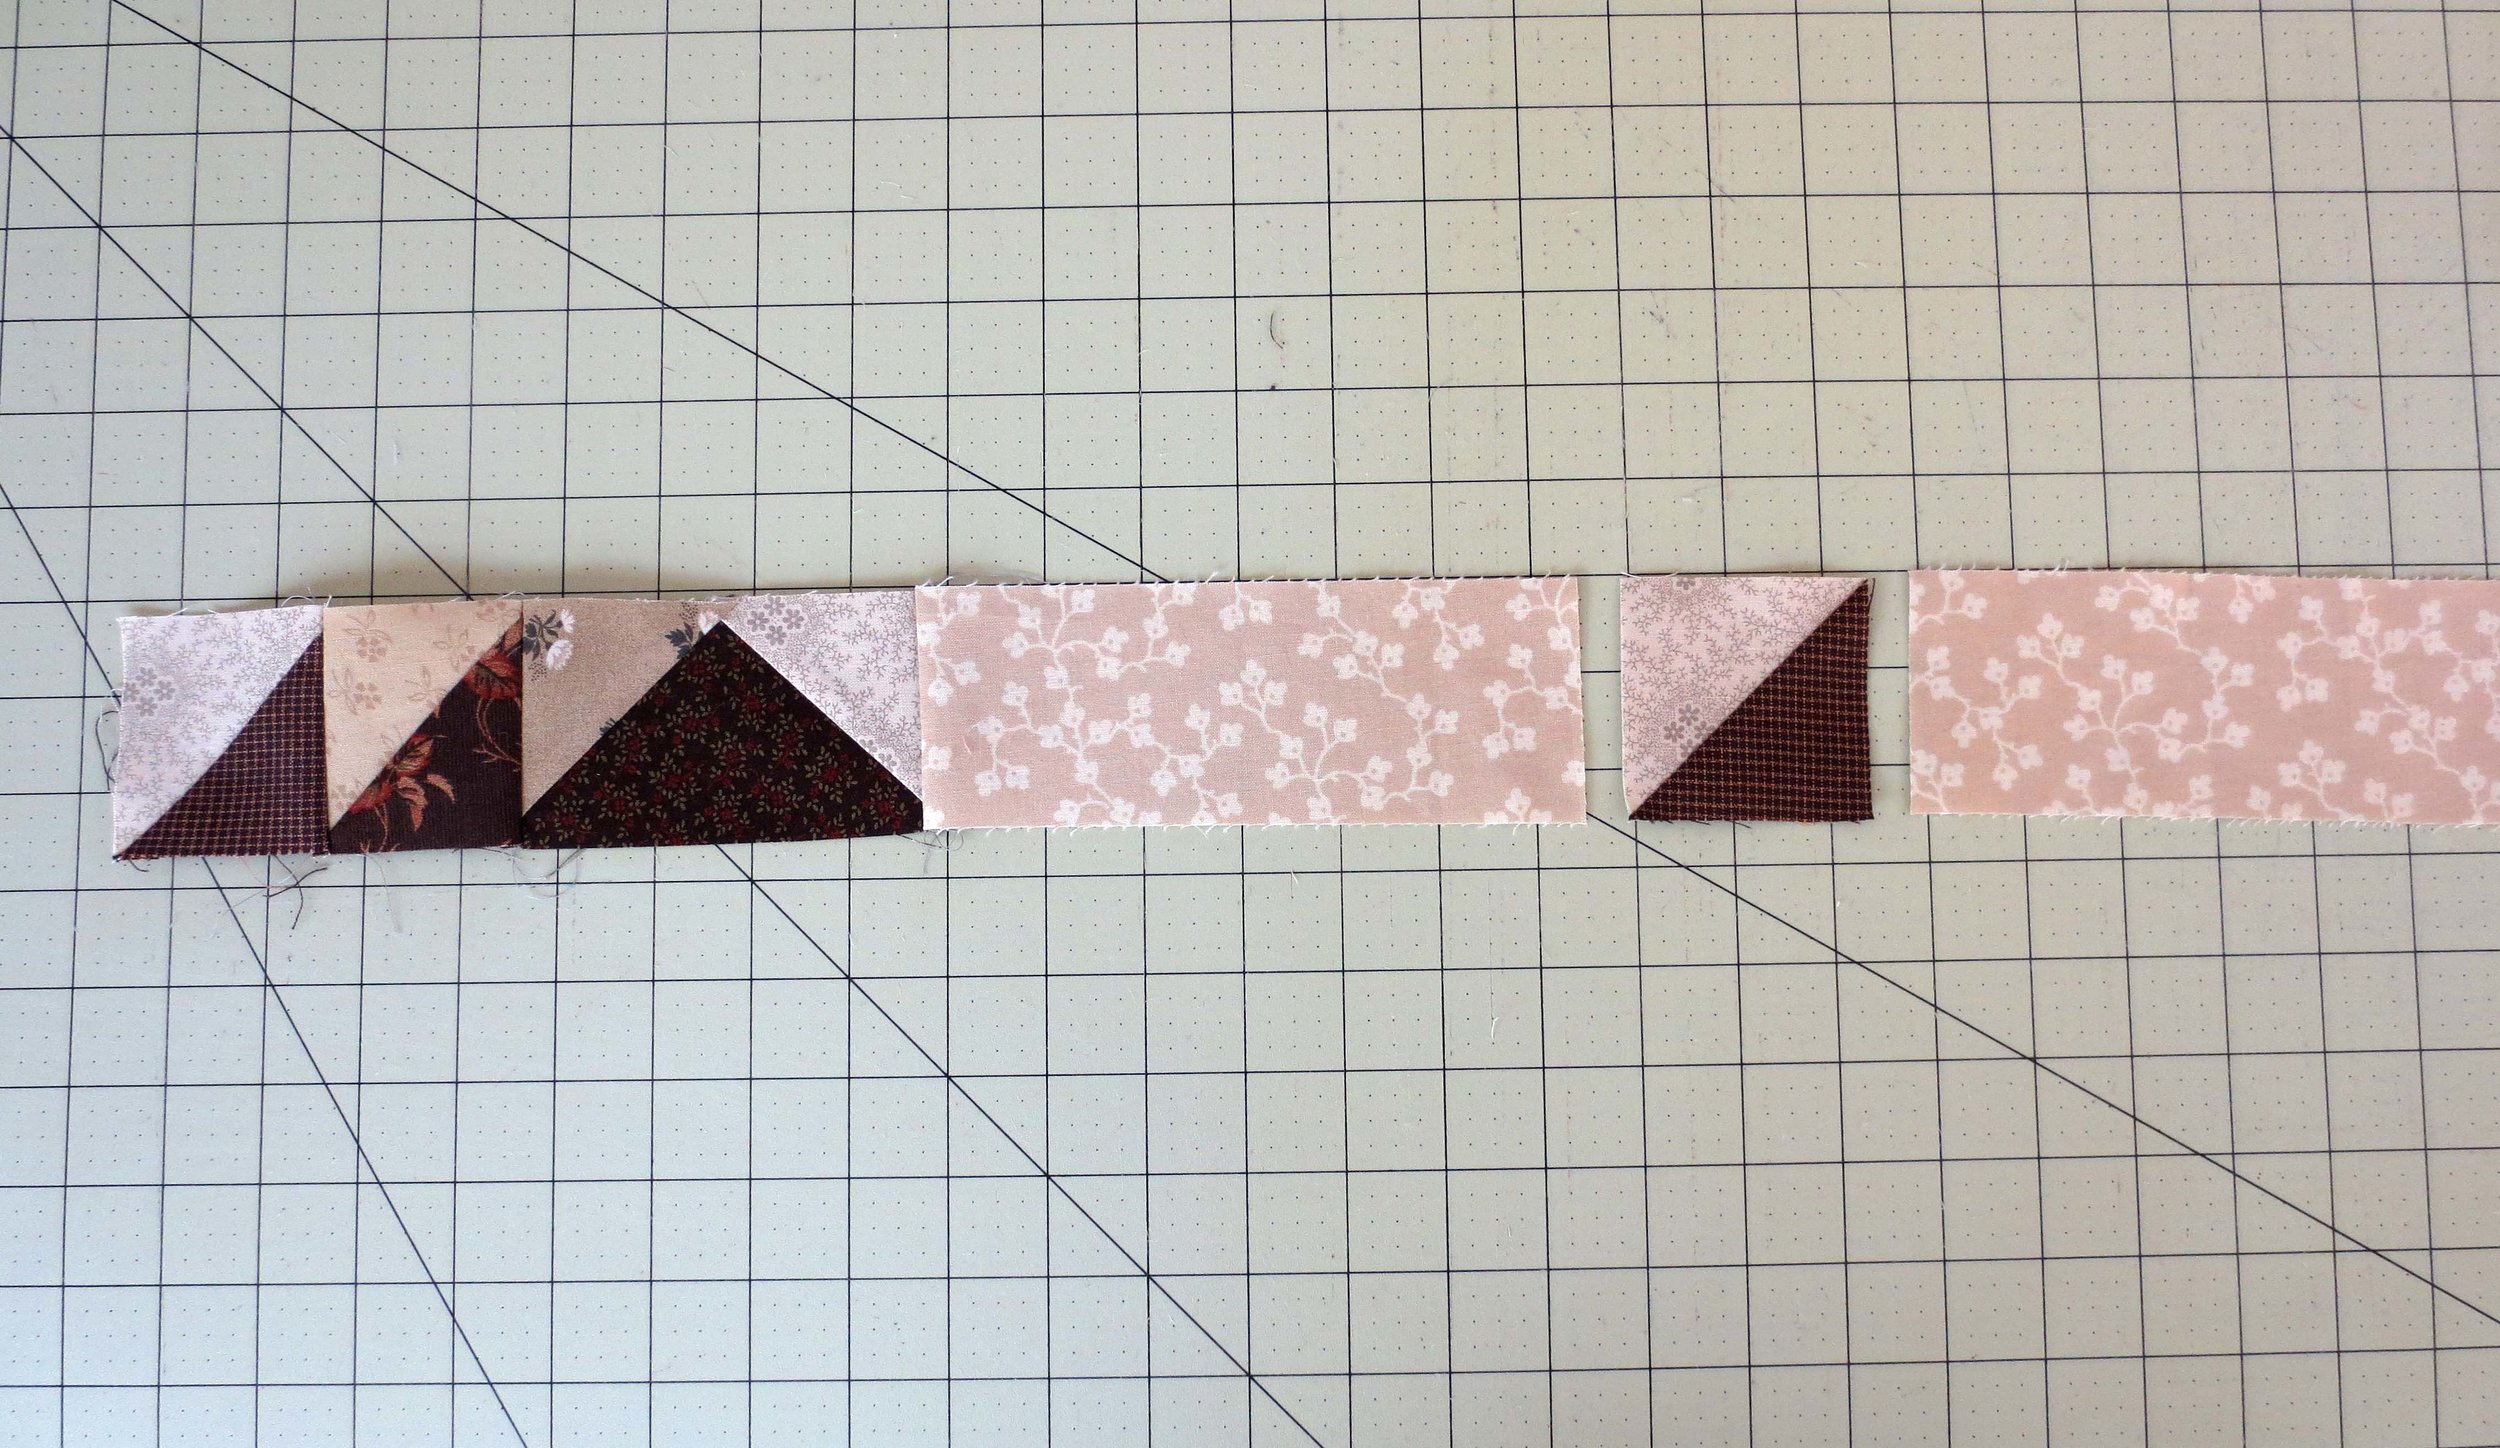
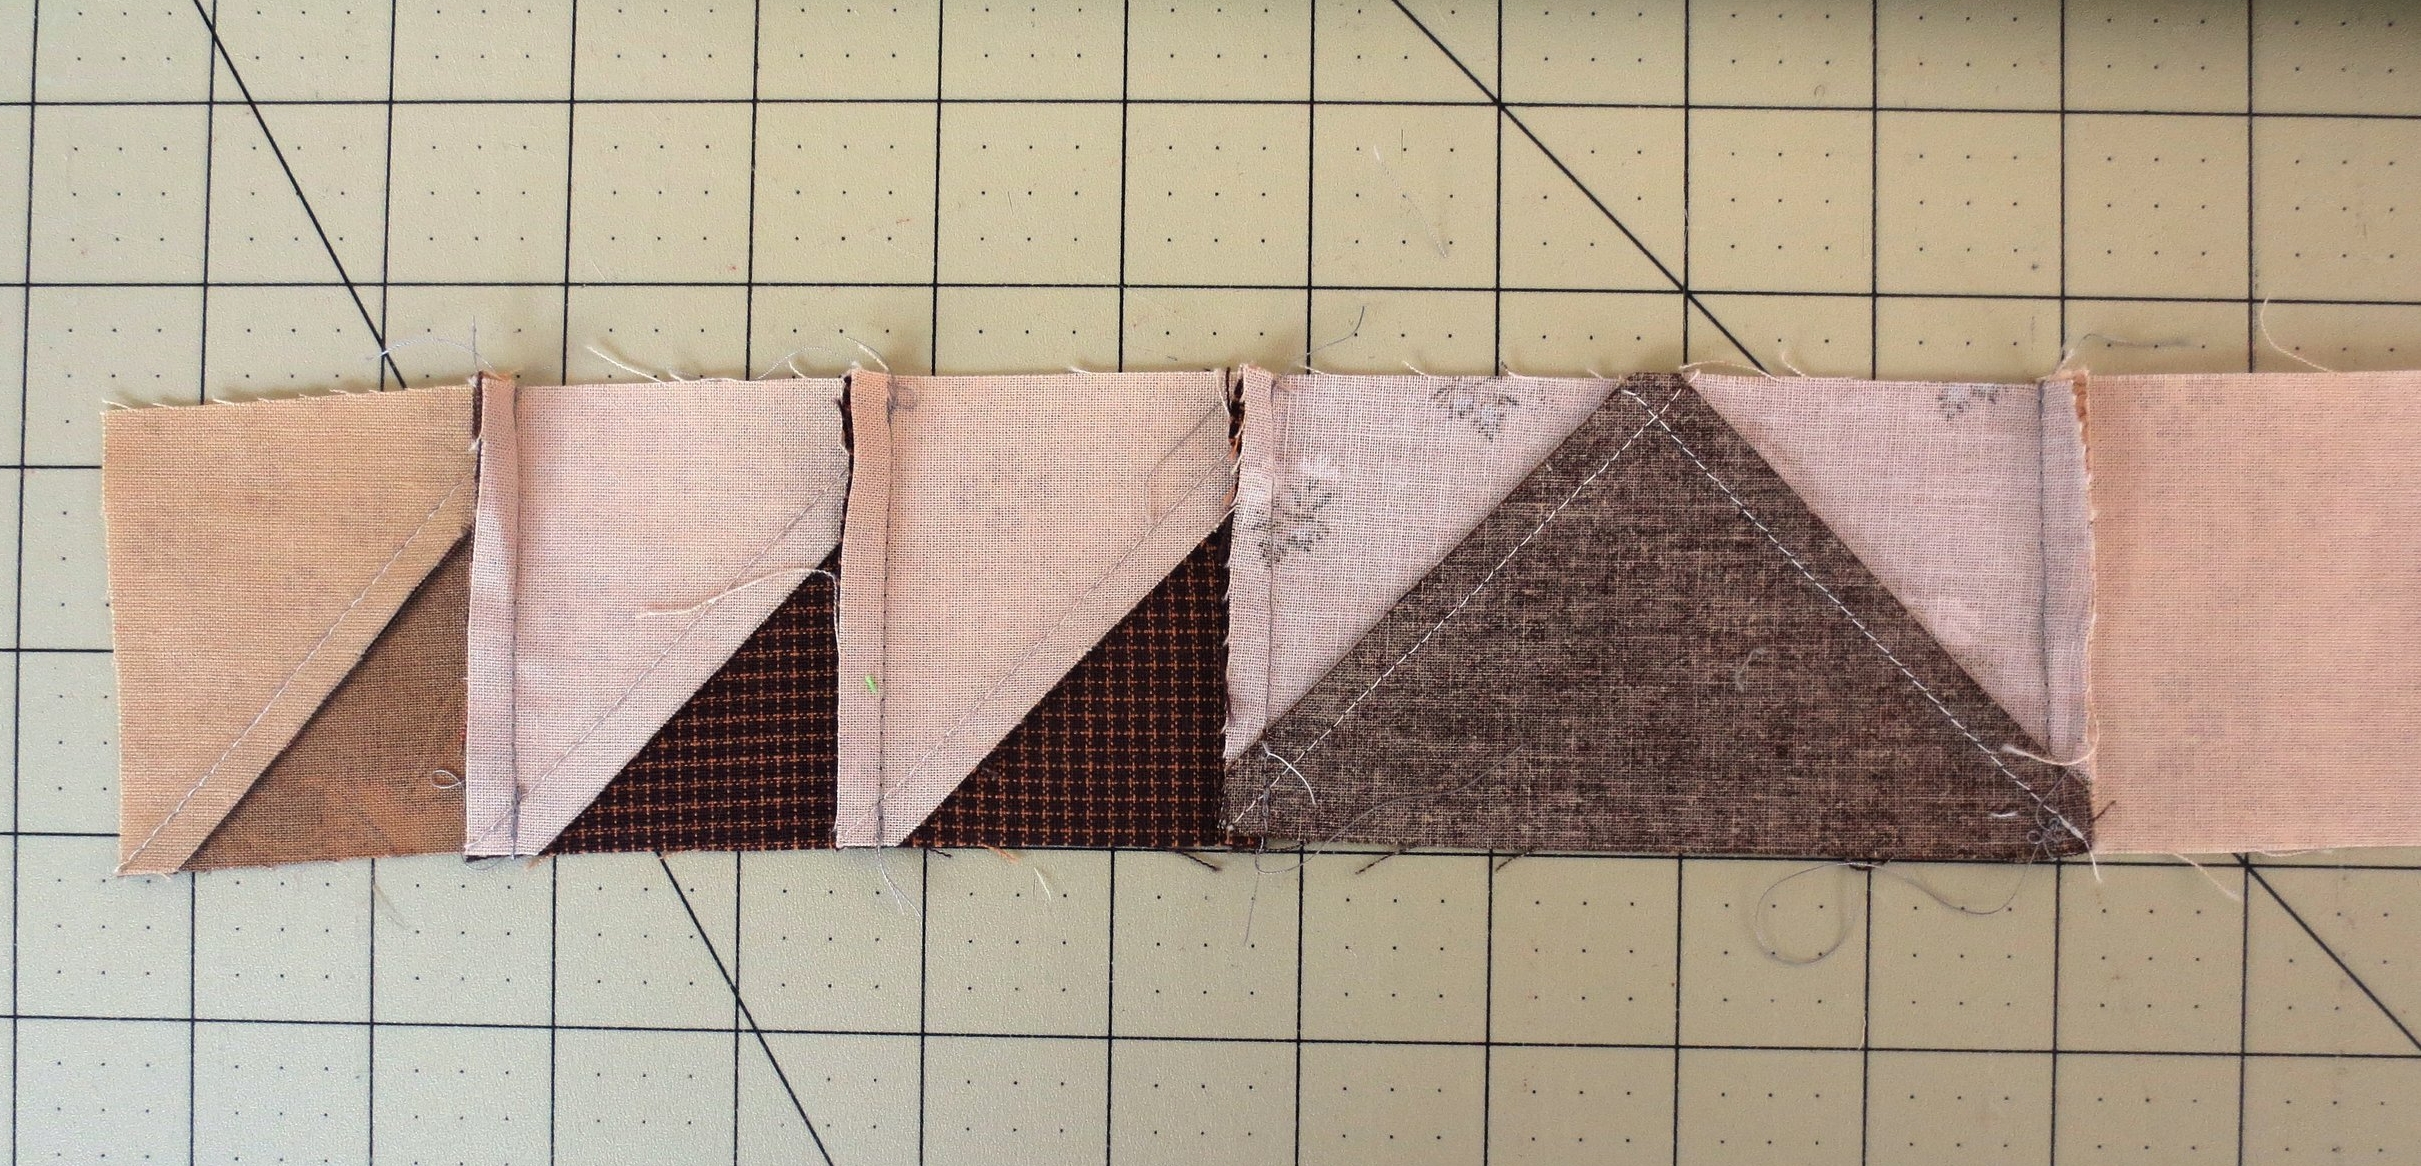
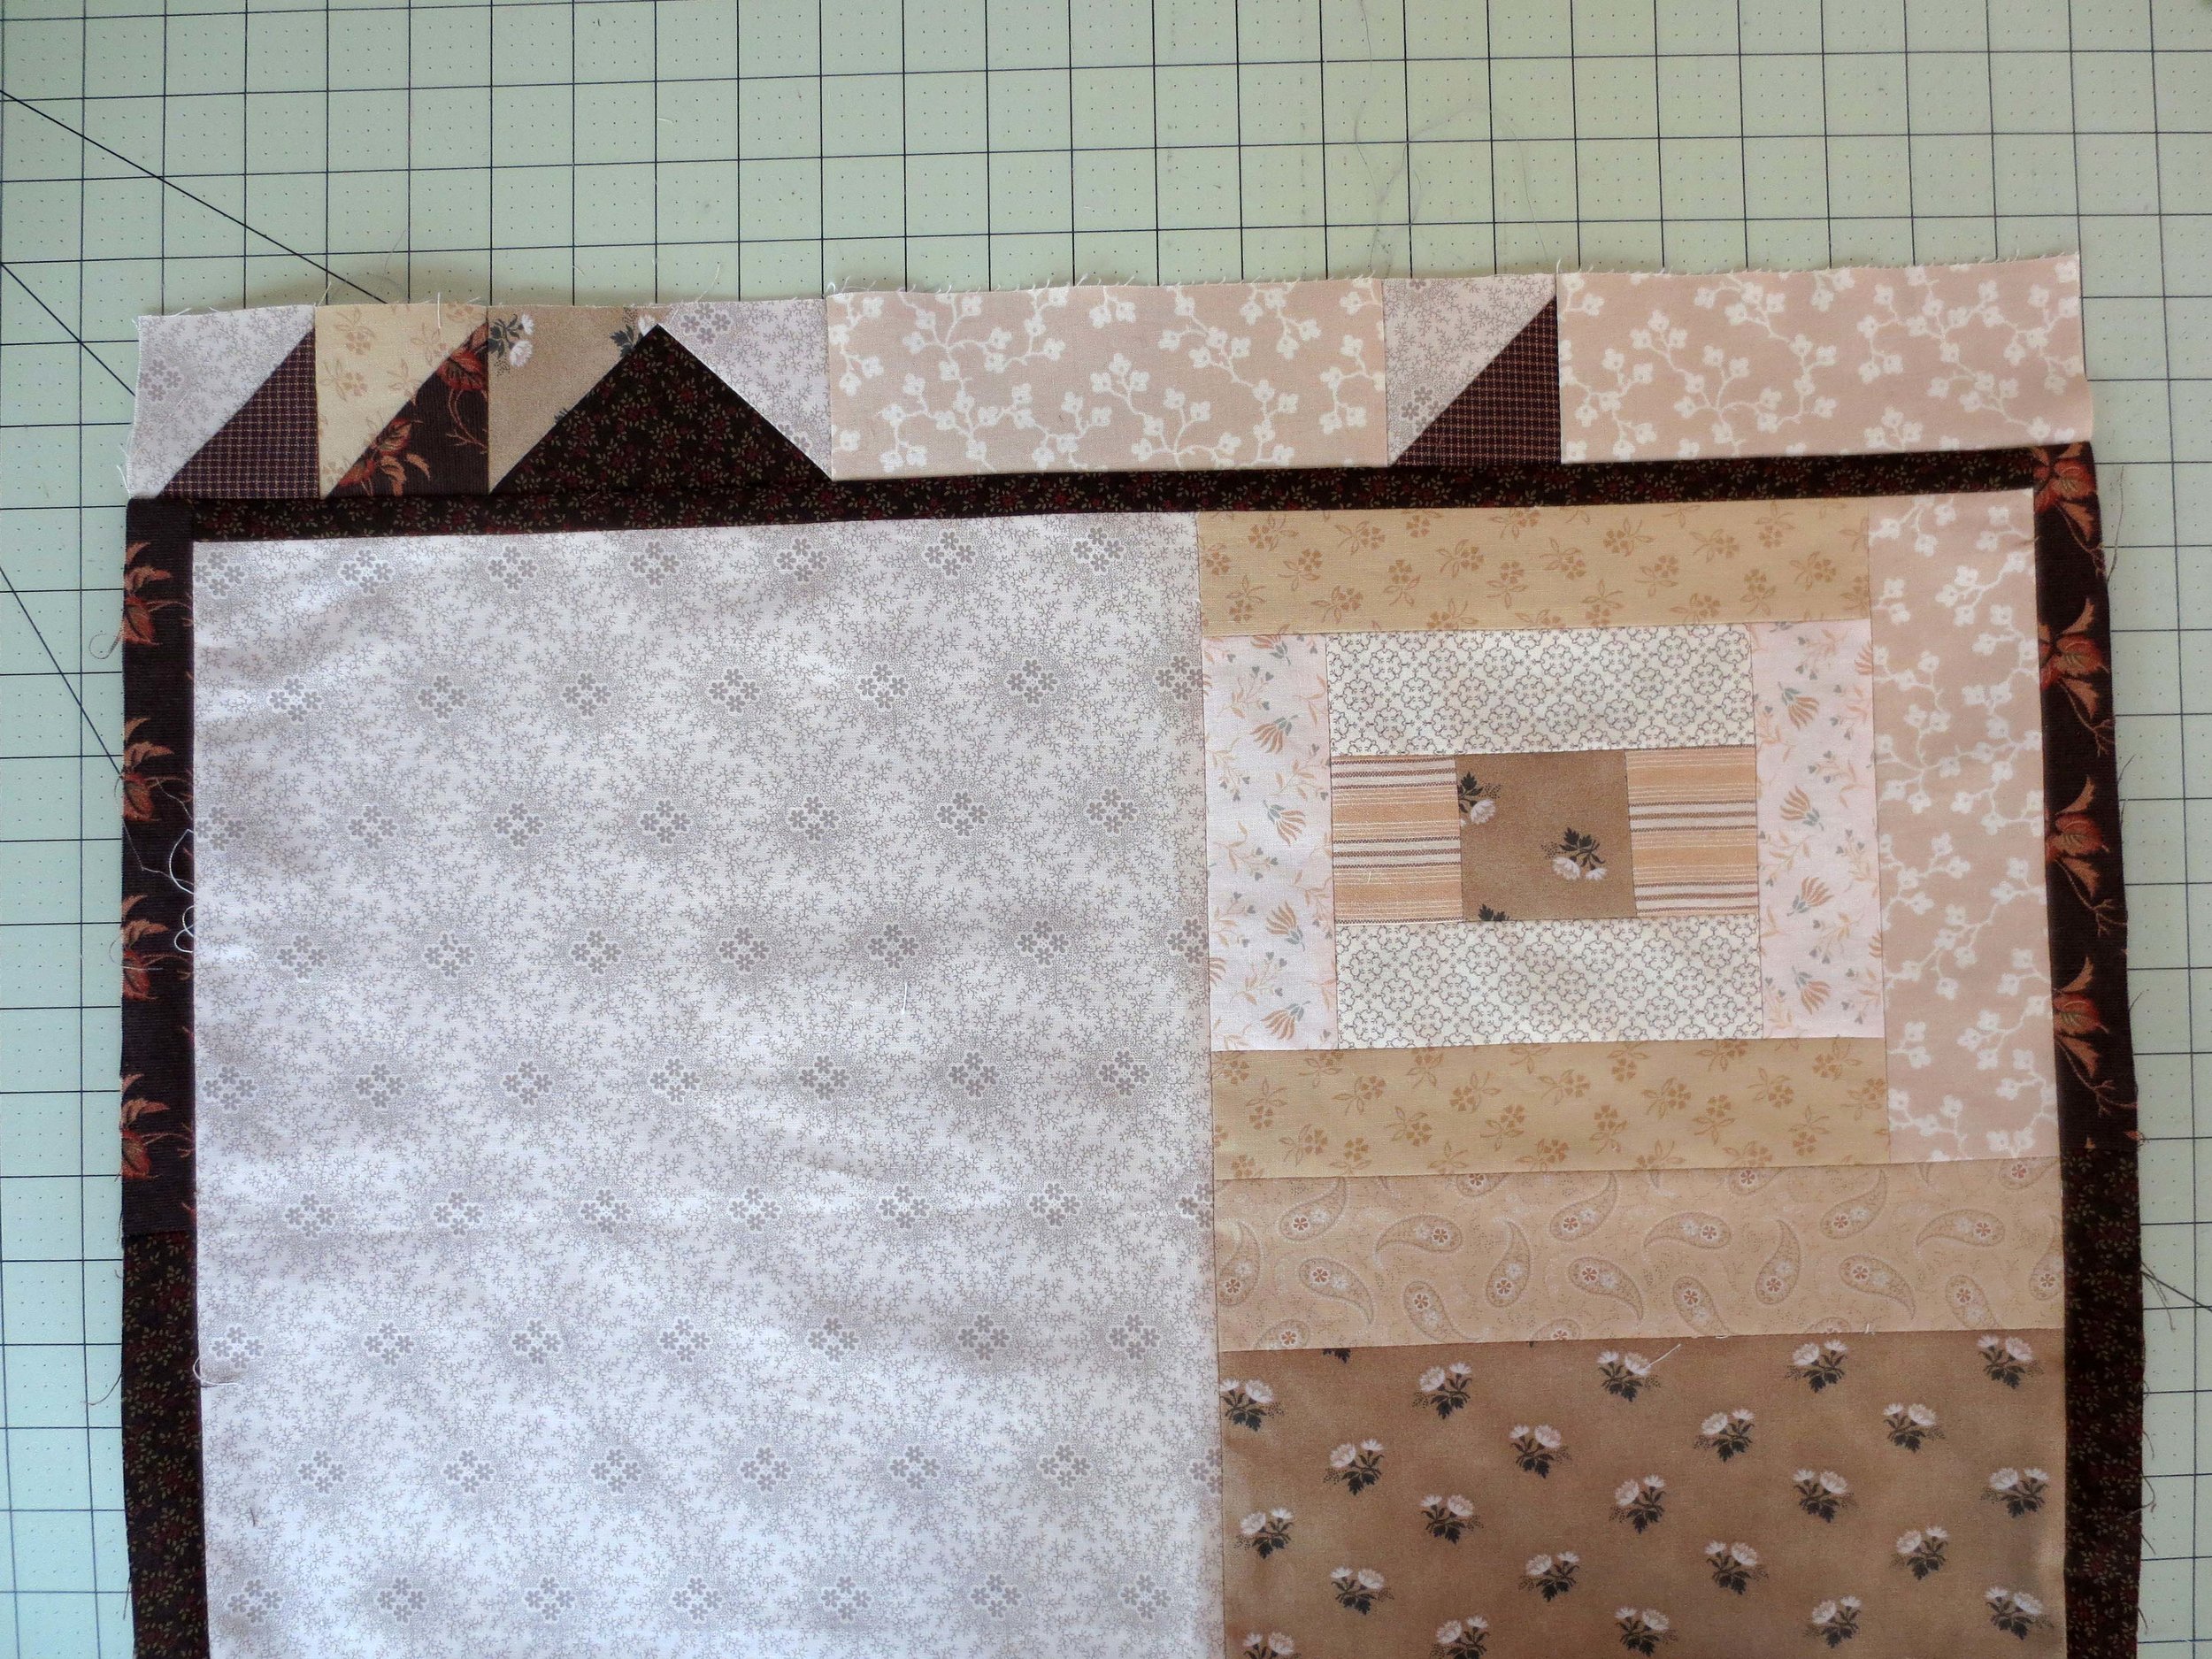
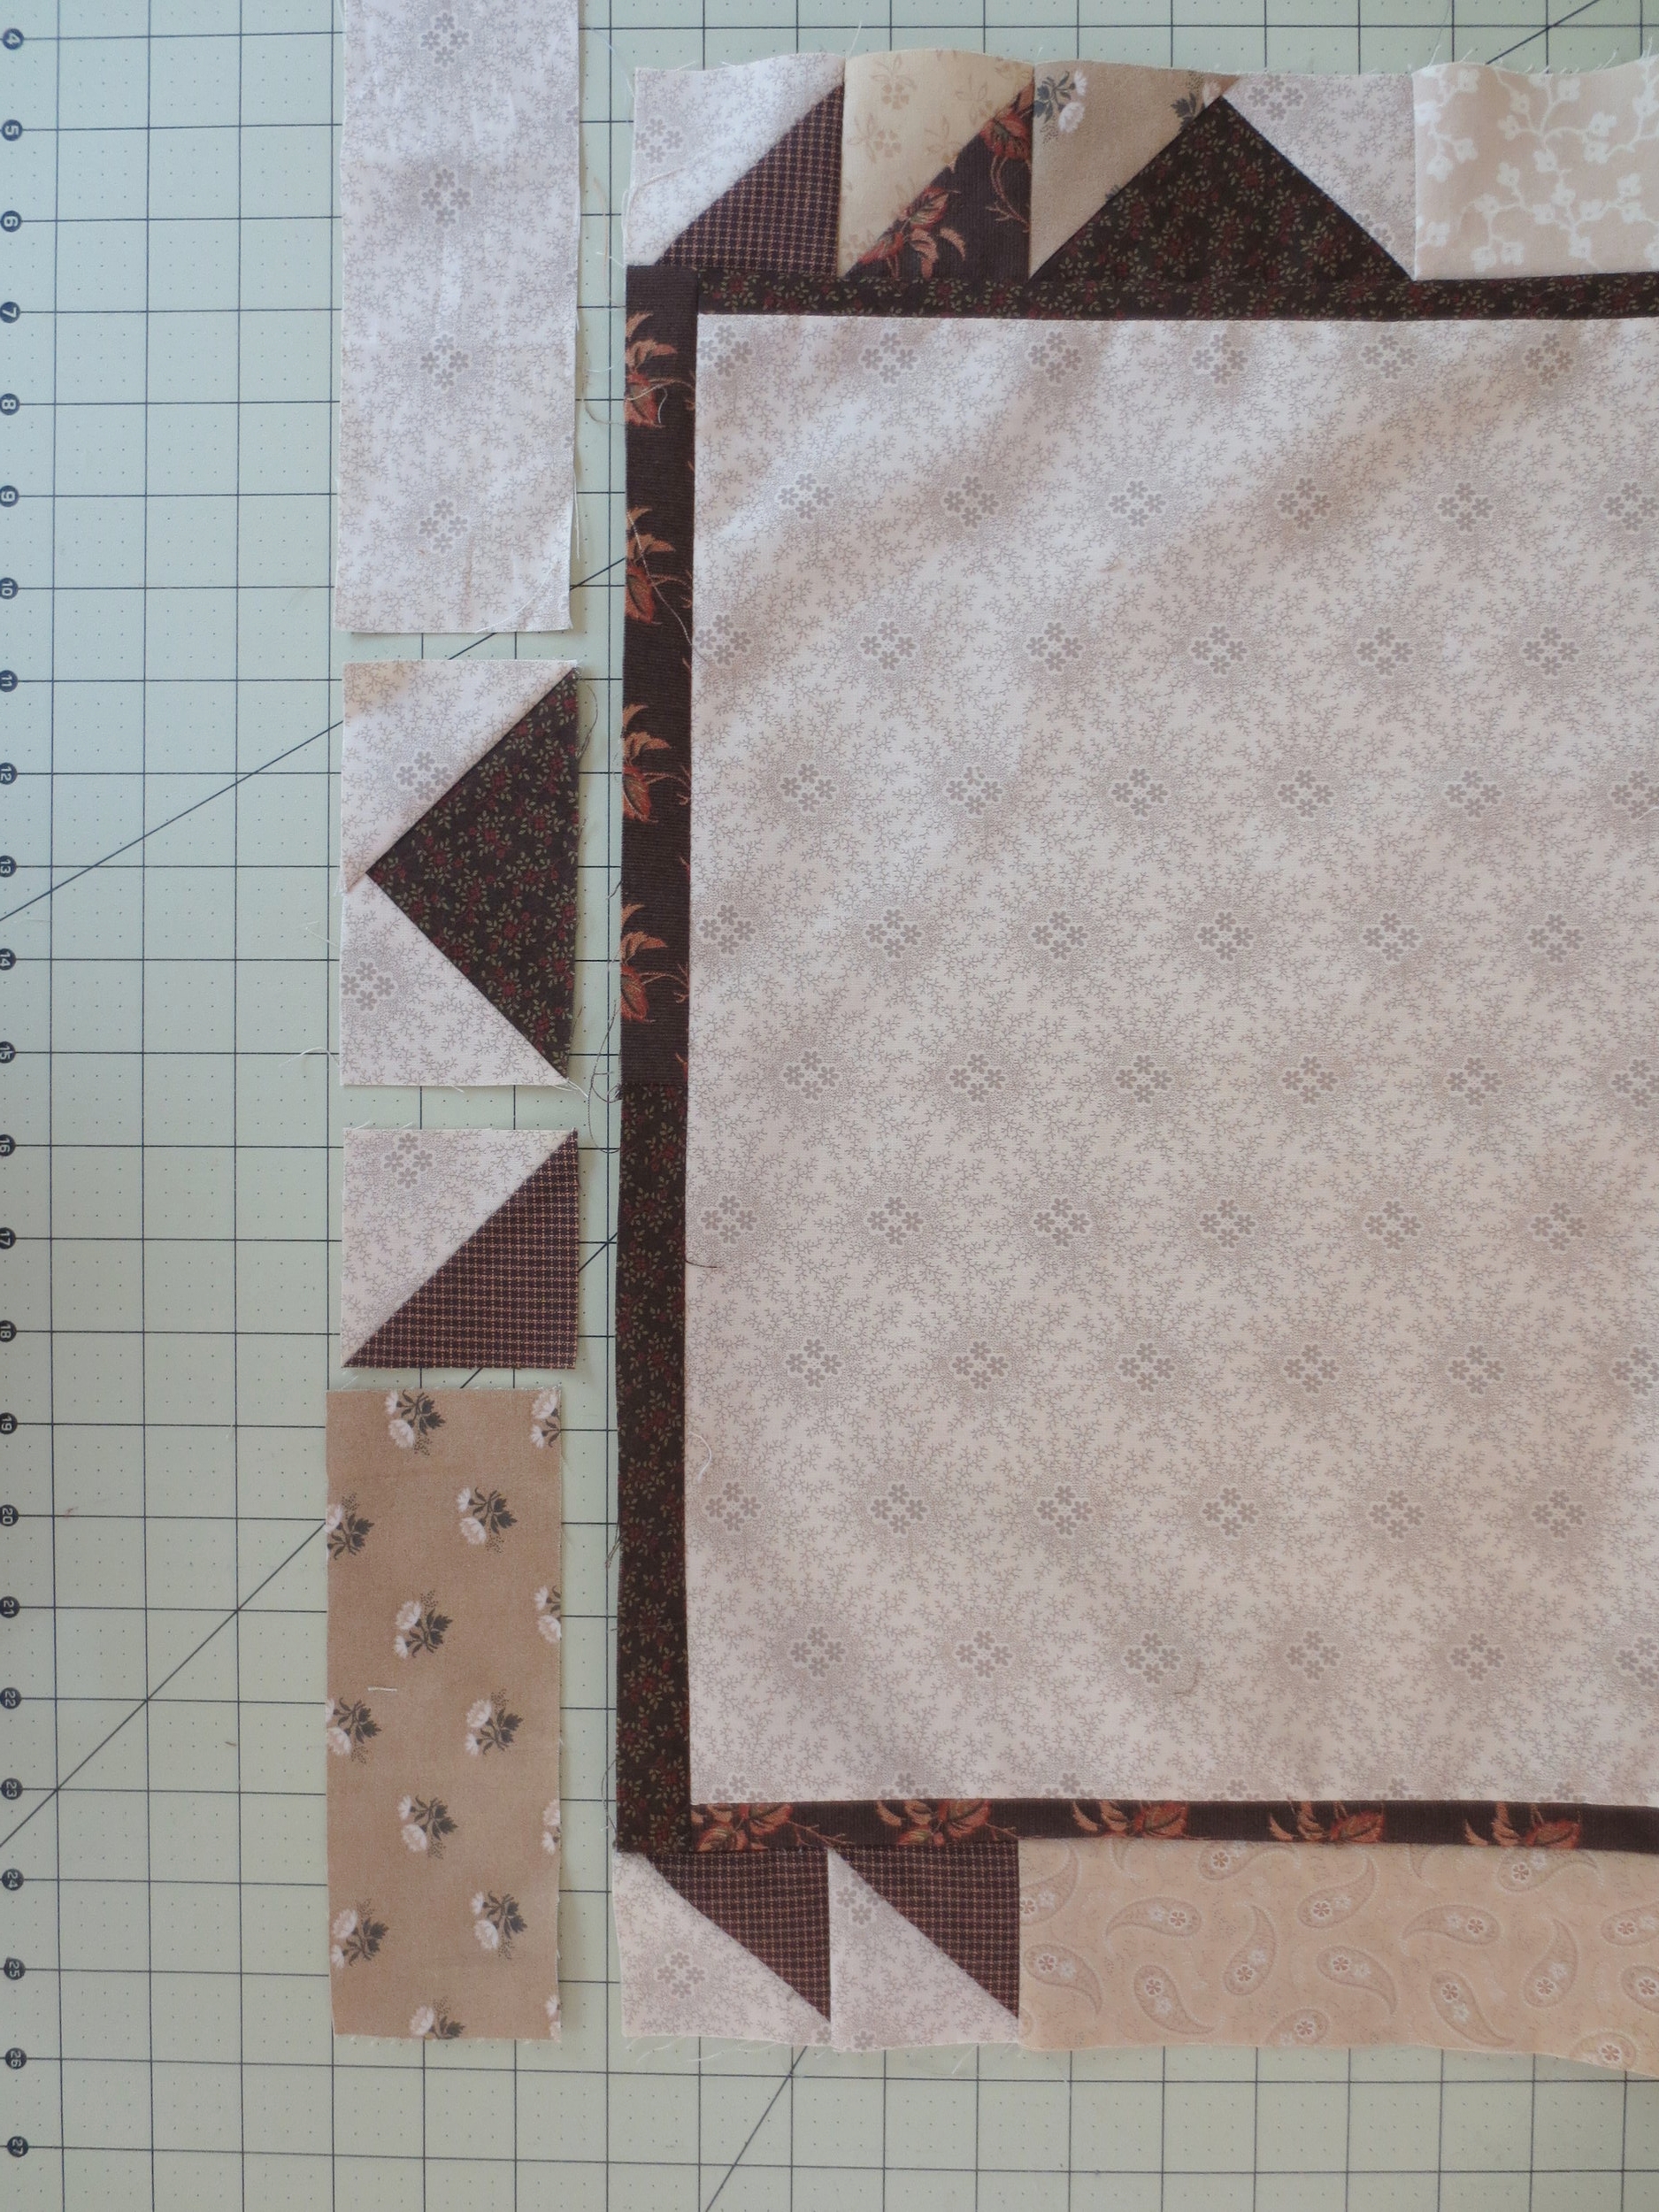
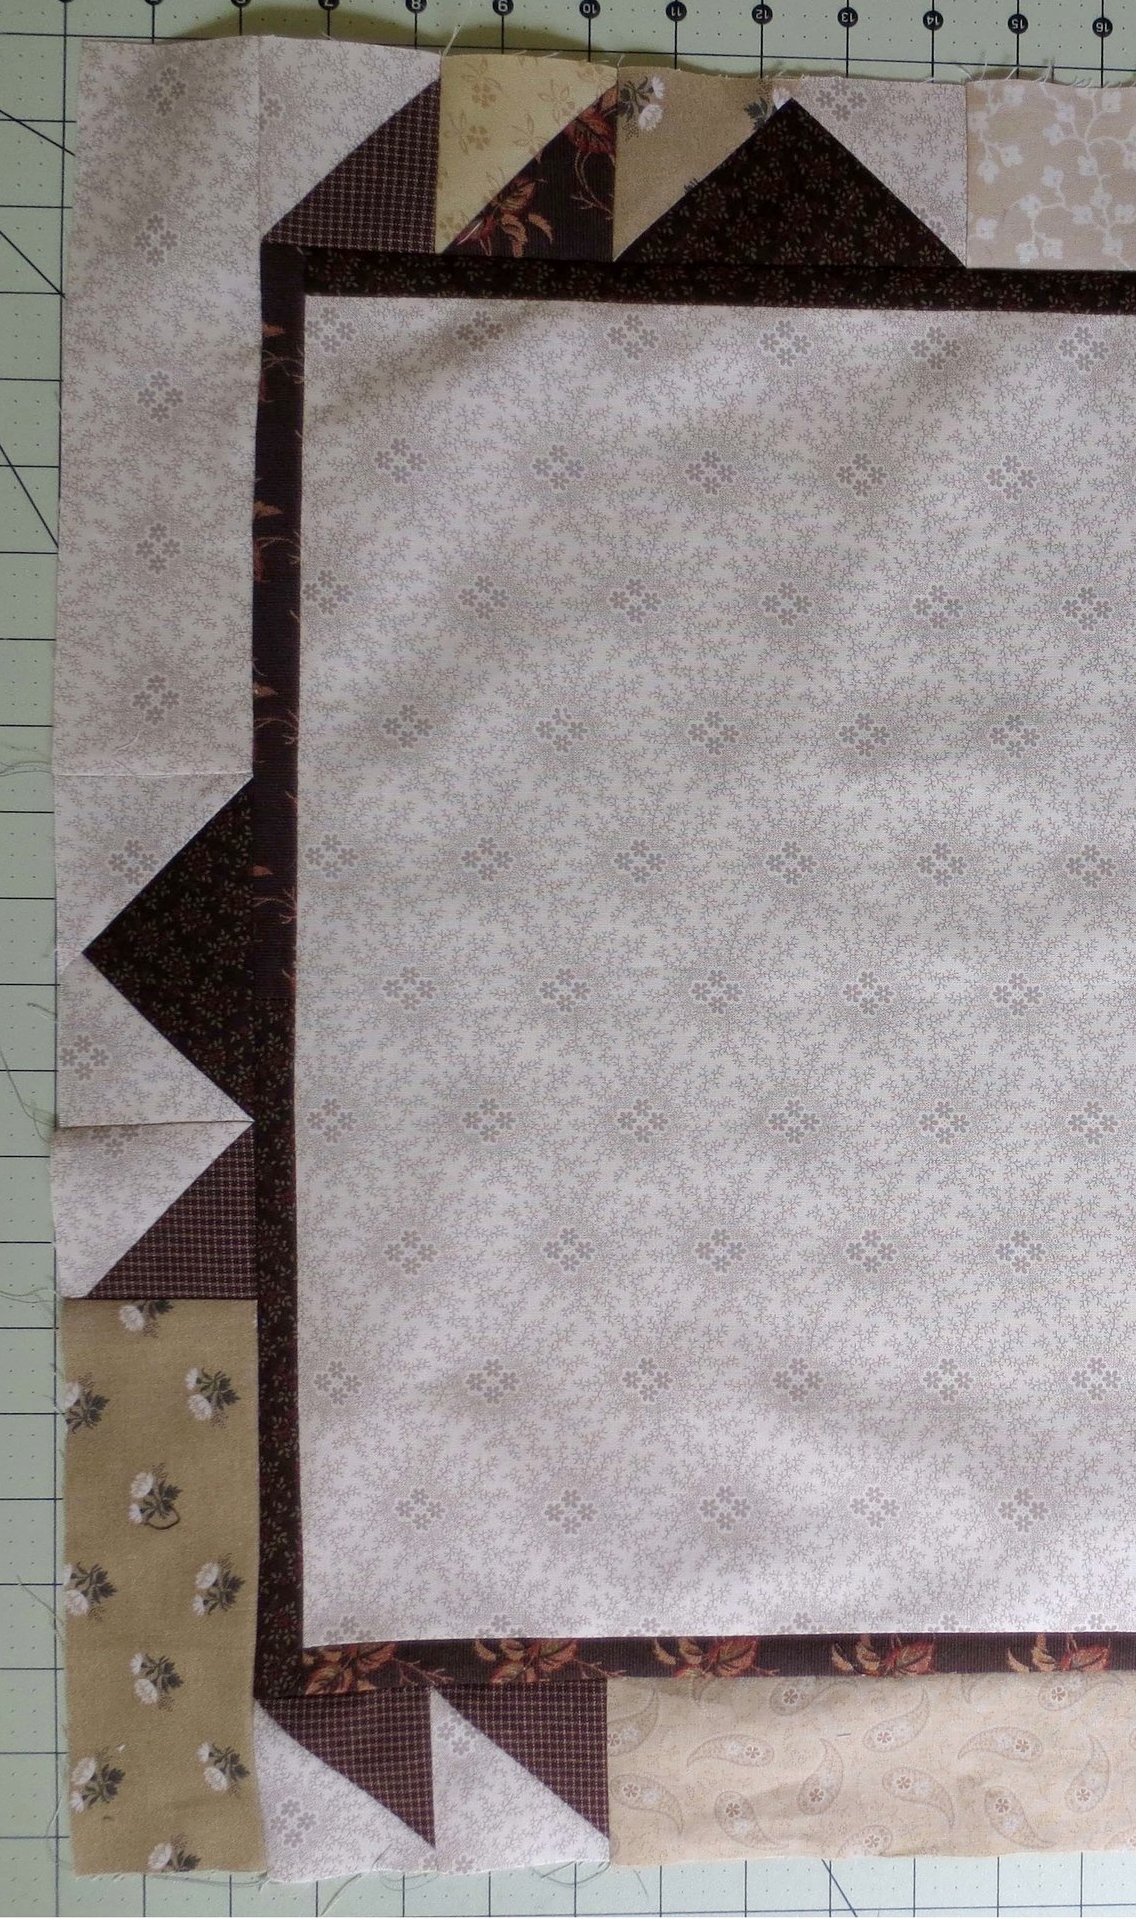
Assemble two HST, one flying Geese unit, 7” length of 2 1/2” wide strip of Fabric G, one HST, and the remaining 2 1/2” strip of Fabric G.
Press.
Note: The seams will tend to lay in the direction that they want to be pressed (See below). This is not the strip you just assembled, so don’t freak out. It’s just an example of the direction of the pressed seams.
Sew this strip to the top of the block. Trim the excess Fabric G strip.
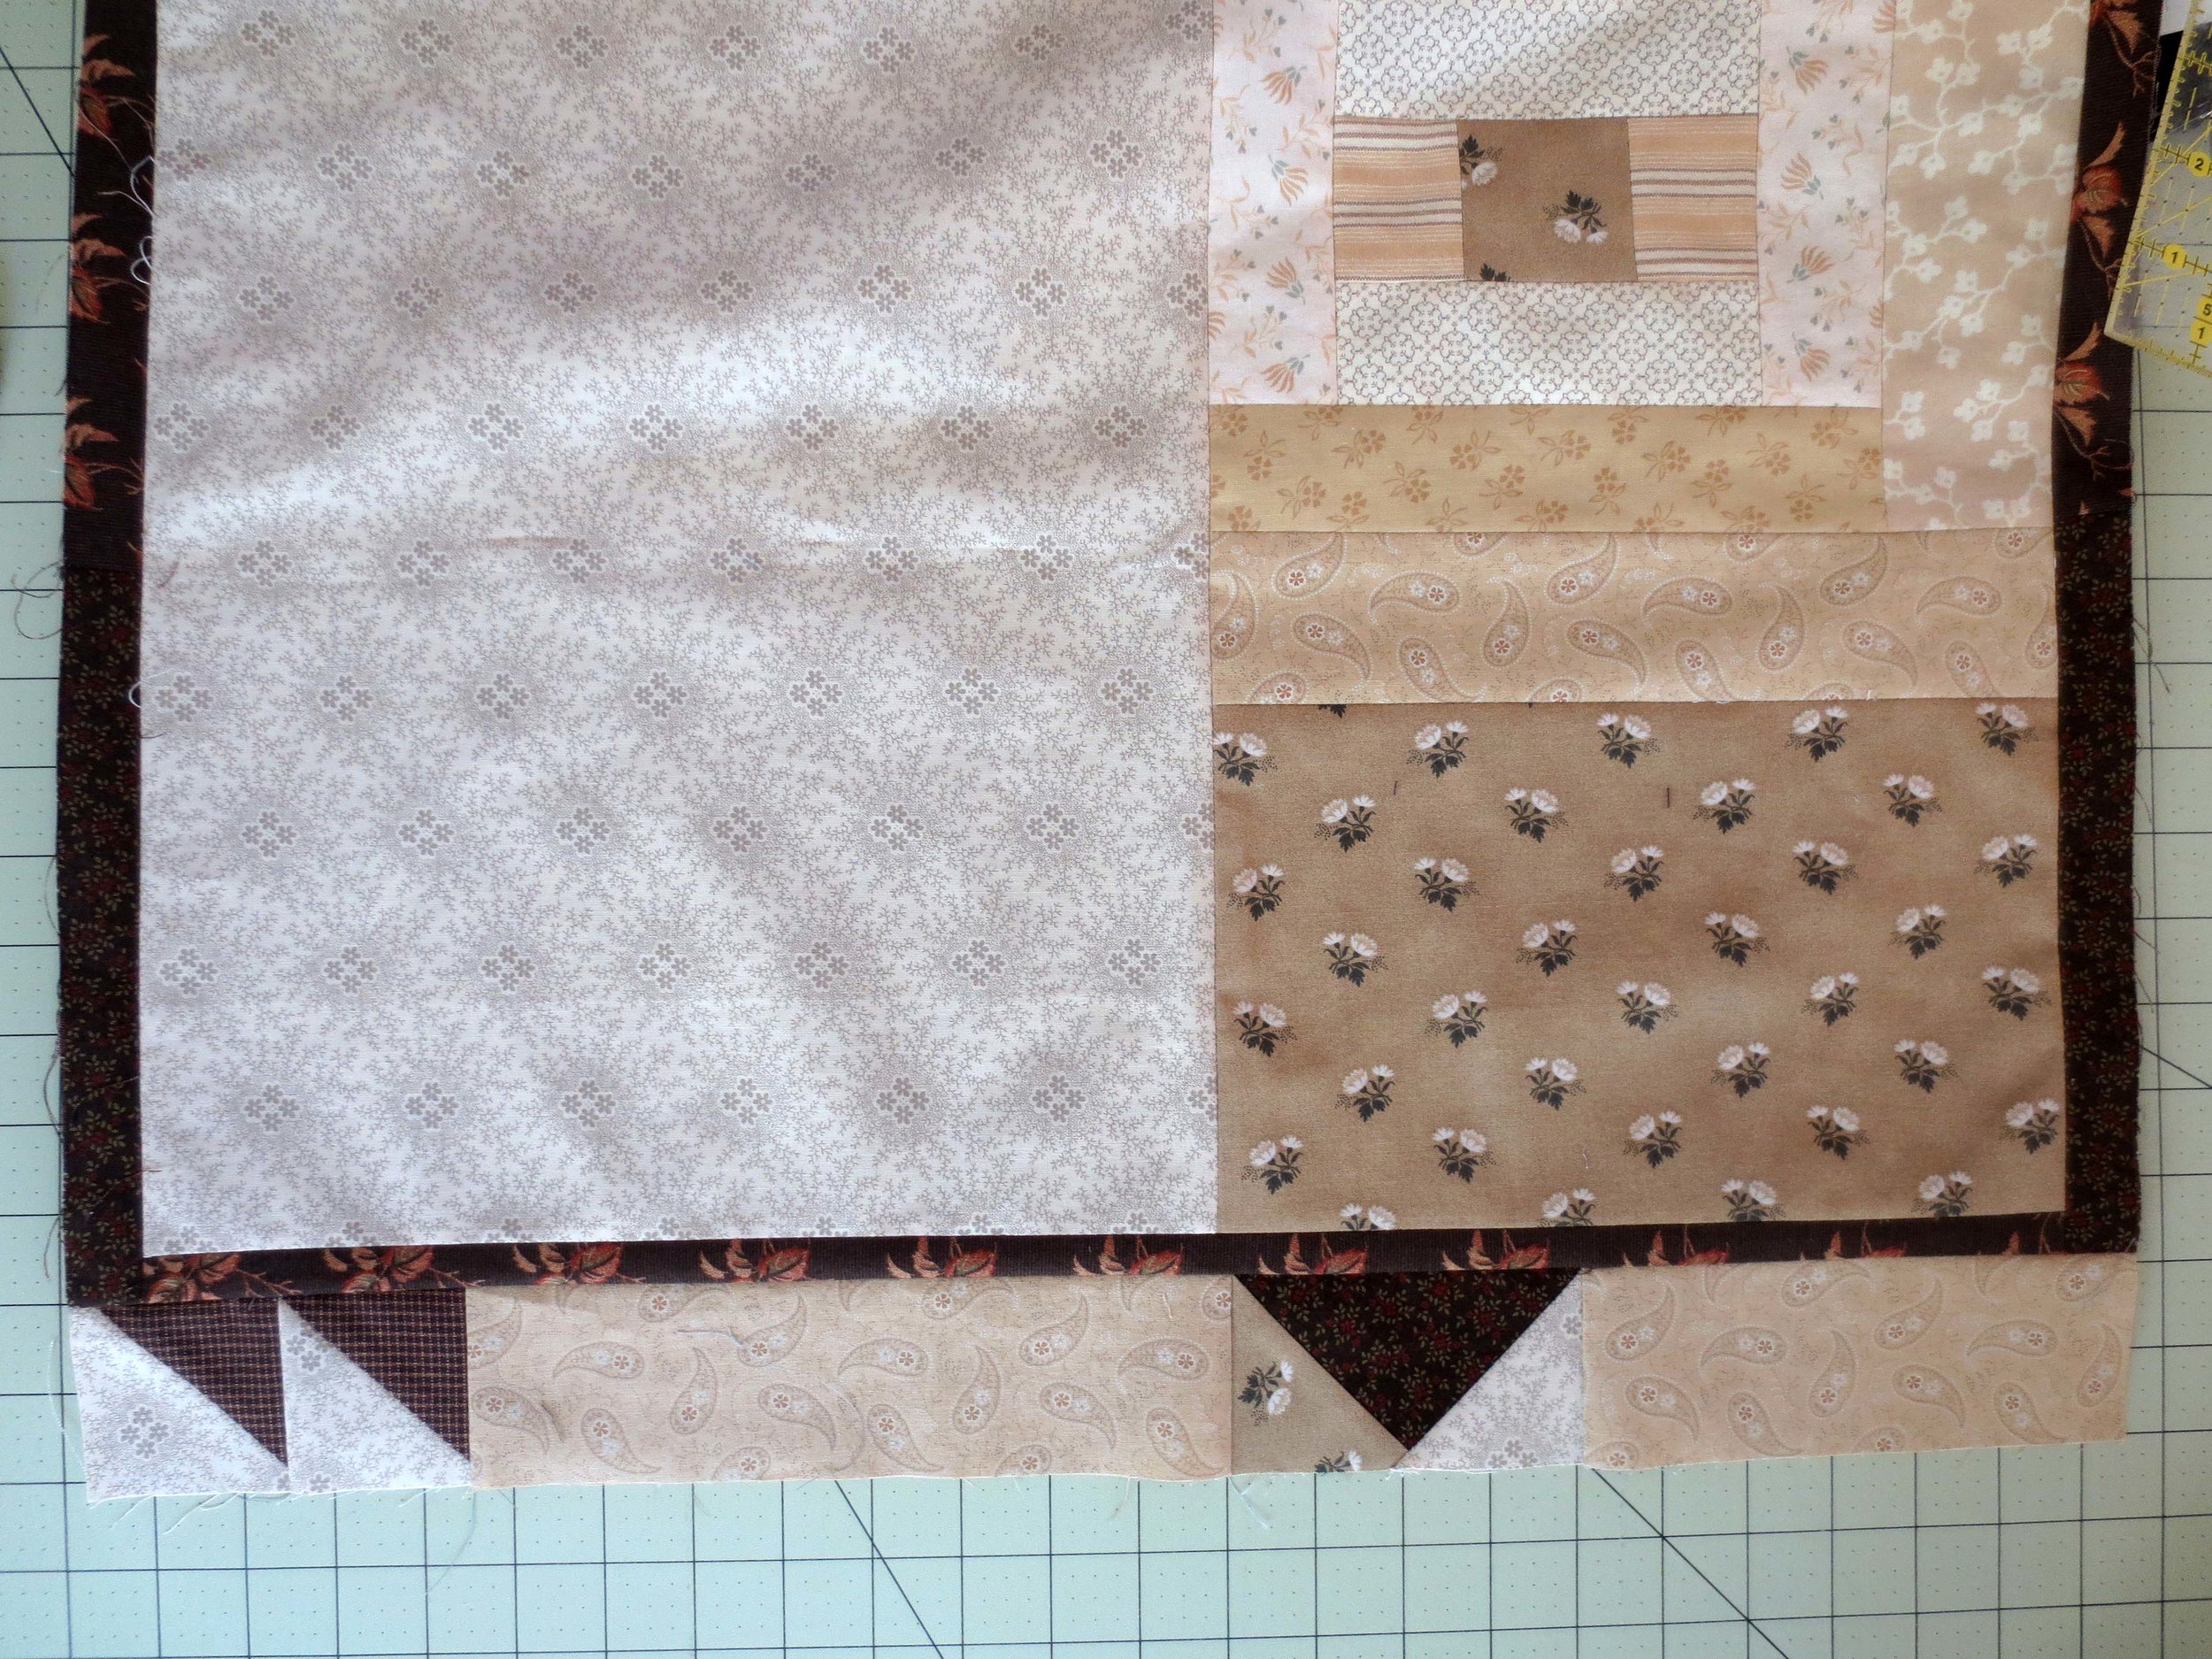
Assemble the bottom border as follows: two HST, 2 1/2” x 9” strip of Fabric C, one flying geese unit, and the remaining 2 1/2” wide strip of Fabric C (see below). Press.
Sew the strip onto the bottom of the block.
Press the seam toward the inner border.
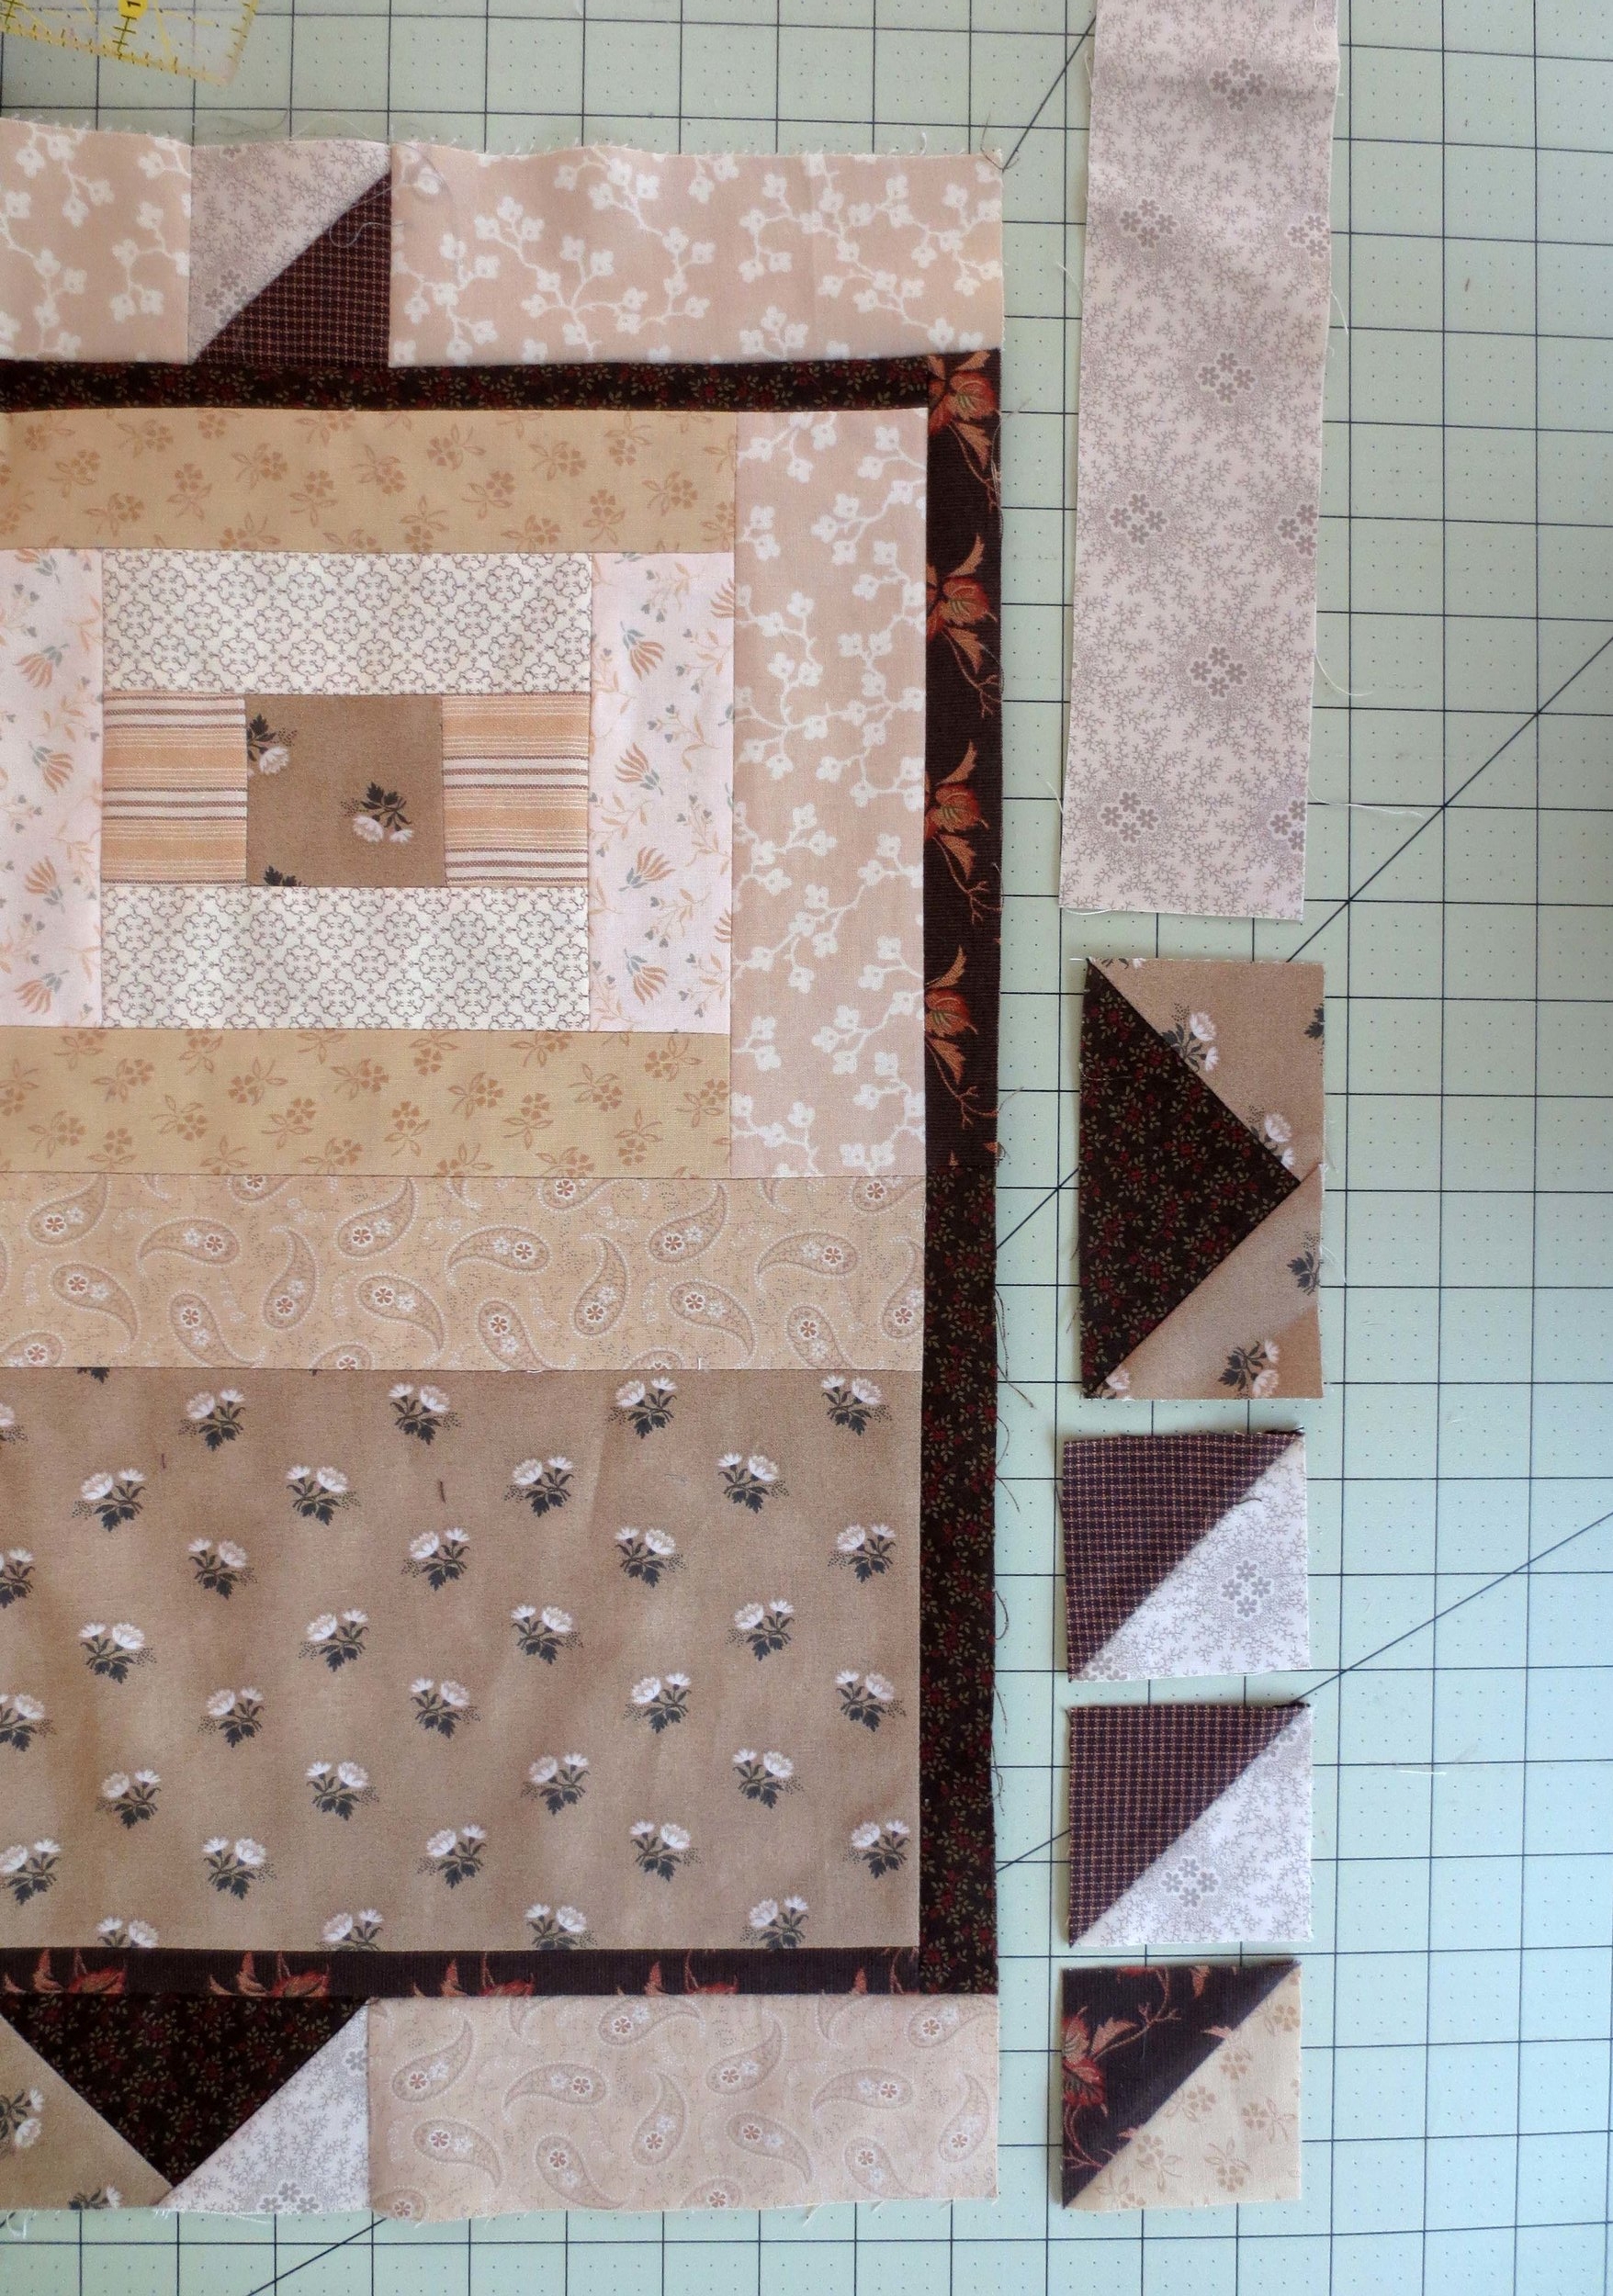
Assemble the right side strip as follows: three HST’s, one flying geese unit, and a 2 1/2” wide strip of
Fabric A (the strip will be longer than needed). Press.
Sew this to the right side of the center block (see below). Trim excess.
Press the seam toward the inner border.
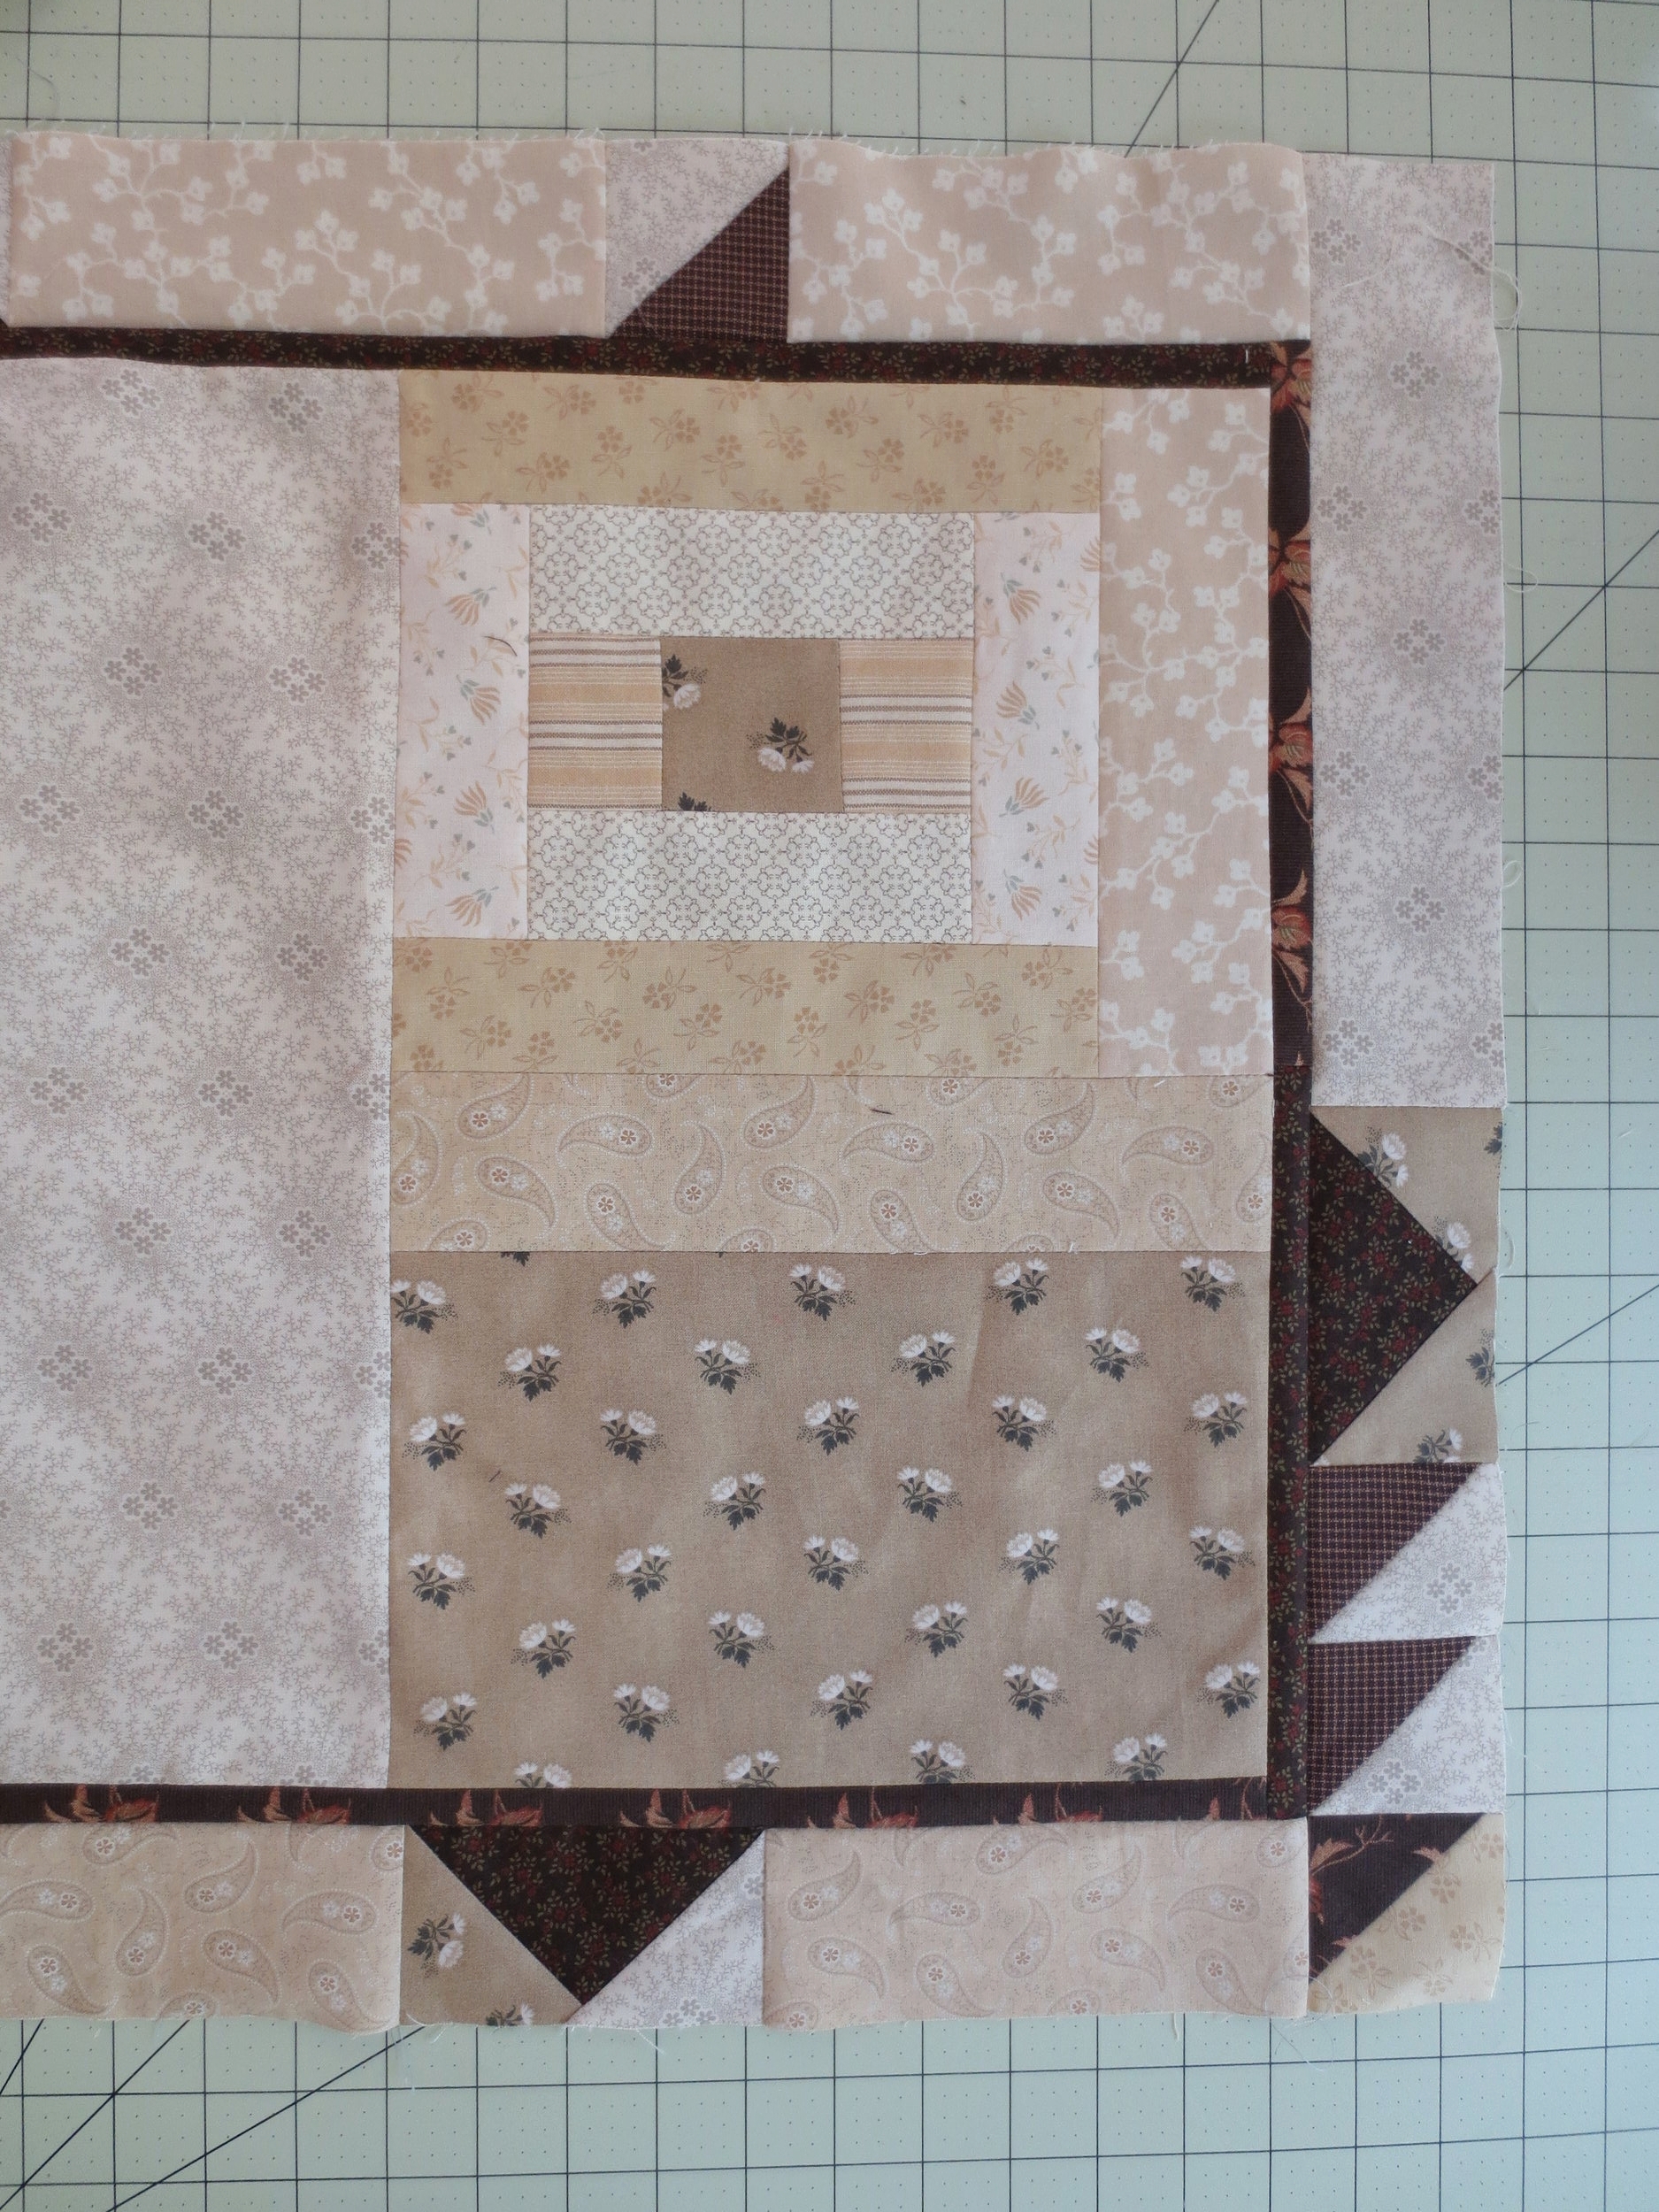
Assemble the left side border strip as follows: 2 1/2” x 7 1/2” strip of Fabric B, one HST, one flying geese block, and a 2 1/2” wide strip of Fabric A (the strip will be longer than needed).
Sew this to the left side of the center block. Trim the excess Fabric A.
Press the seam toward the inner border.
The background block is complete!
Background for Give Thanks Aplenty
12. Wool Applique
Trace pattern pieces onto the paper side of the fusible web. Cut out leaving a border of approximately 1/4”.
Note: All pattern pieces are already reversed for use with fusible web.
Fuse patterns onto designated wool. Cut out along drawn outine.
Cut two 2 3/4” ribbon legs.
Cut one 2 1/4” pumpkin stem.
Cut one 1 3/4” butternut squash stem.
Cut one 1” delicata squash stem.
Cut one 3 1/2” length of 1/2” rick rack.
Using the layout as your guide, position the wool pieces on the central block. Tuck the ribbon legs ends under the body and cornucopia. DO NOT FUSE!
Remove the longer wattle, delicata and butternut squash. Make sure the remaining pieces are postitioned correctly.
Note: I placed the butternut squash behind the pumpkin by mistake and had to peel it up (yes, you can peel off some fused wool). That is why you need to position the pieces correctly before you fuse. Check twice, fuse once.
Fuse in place using steam.
Now start adding the next layer of wool pieces; the top wattle, wing, wing cap, tail embellishment, butternut squash, and grass.
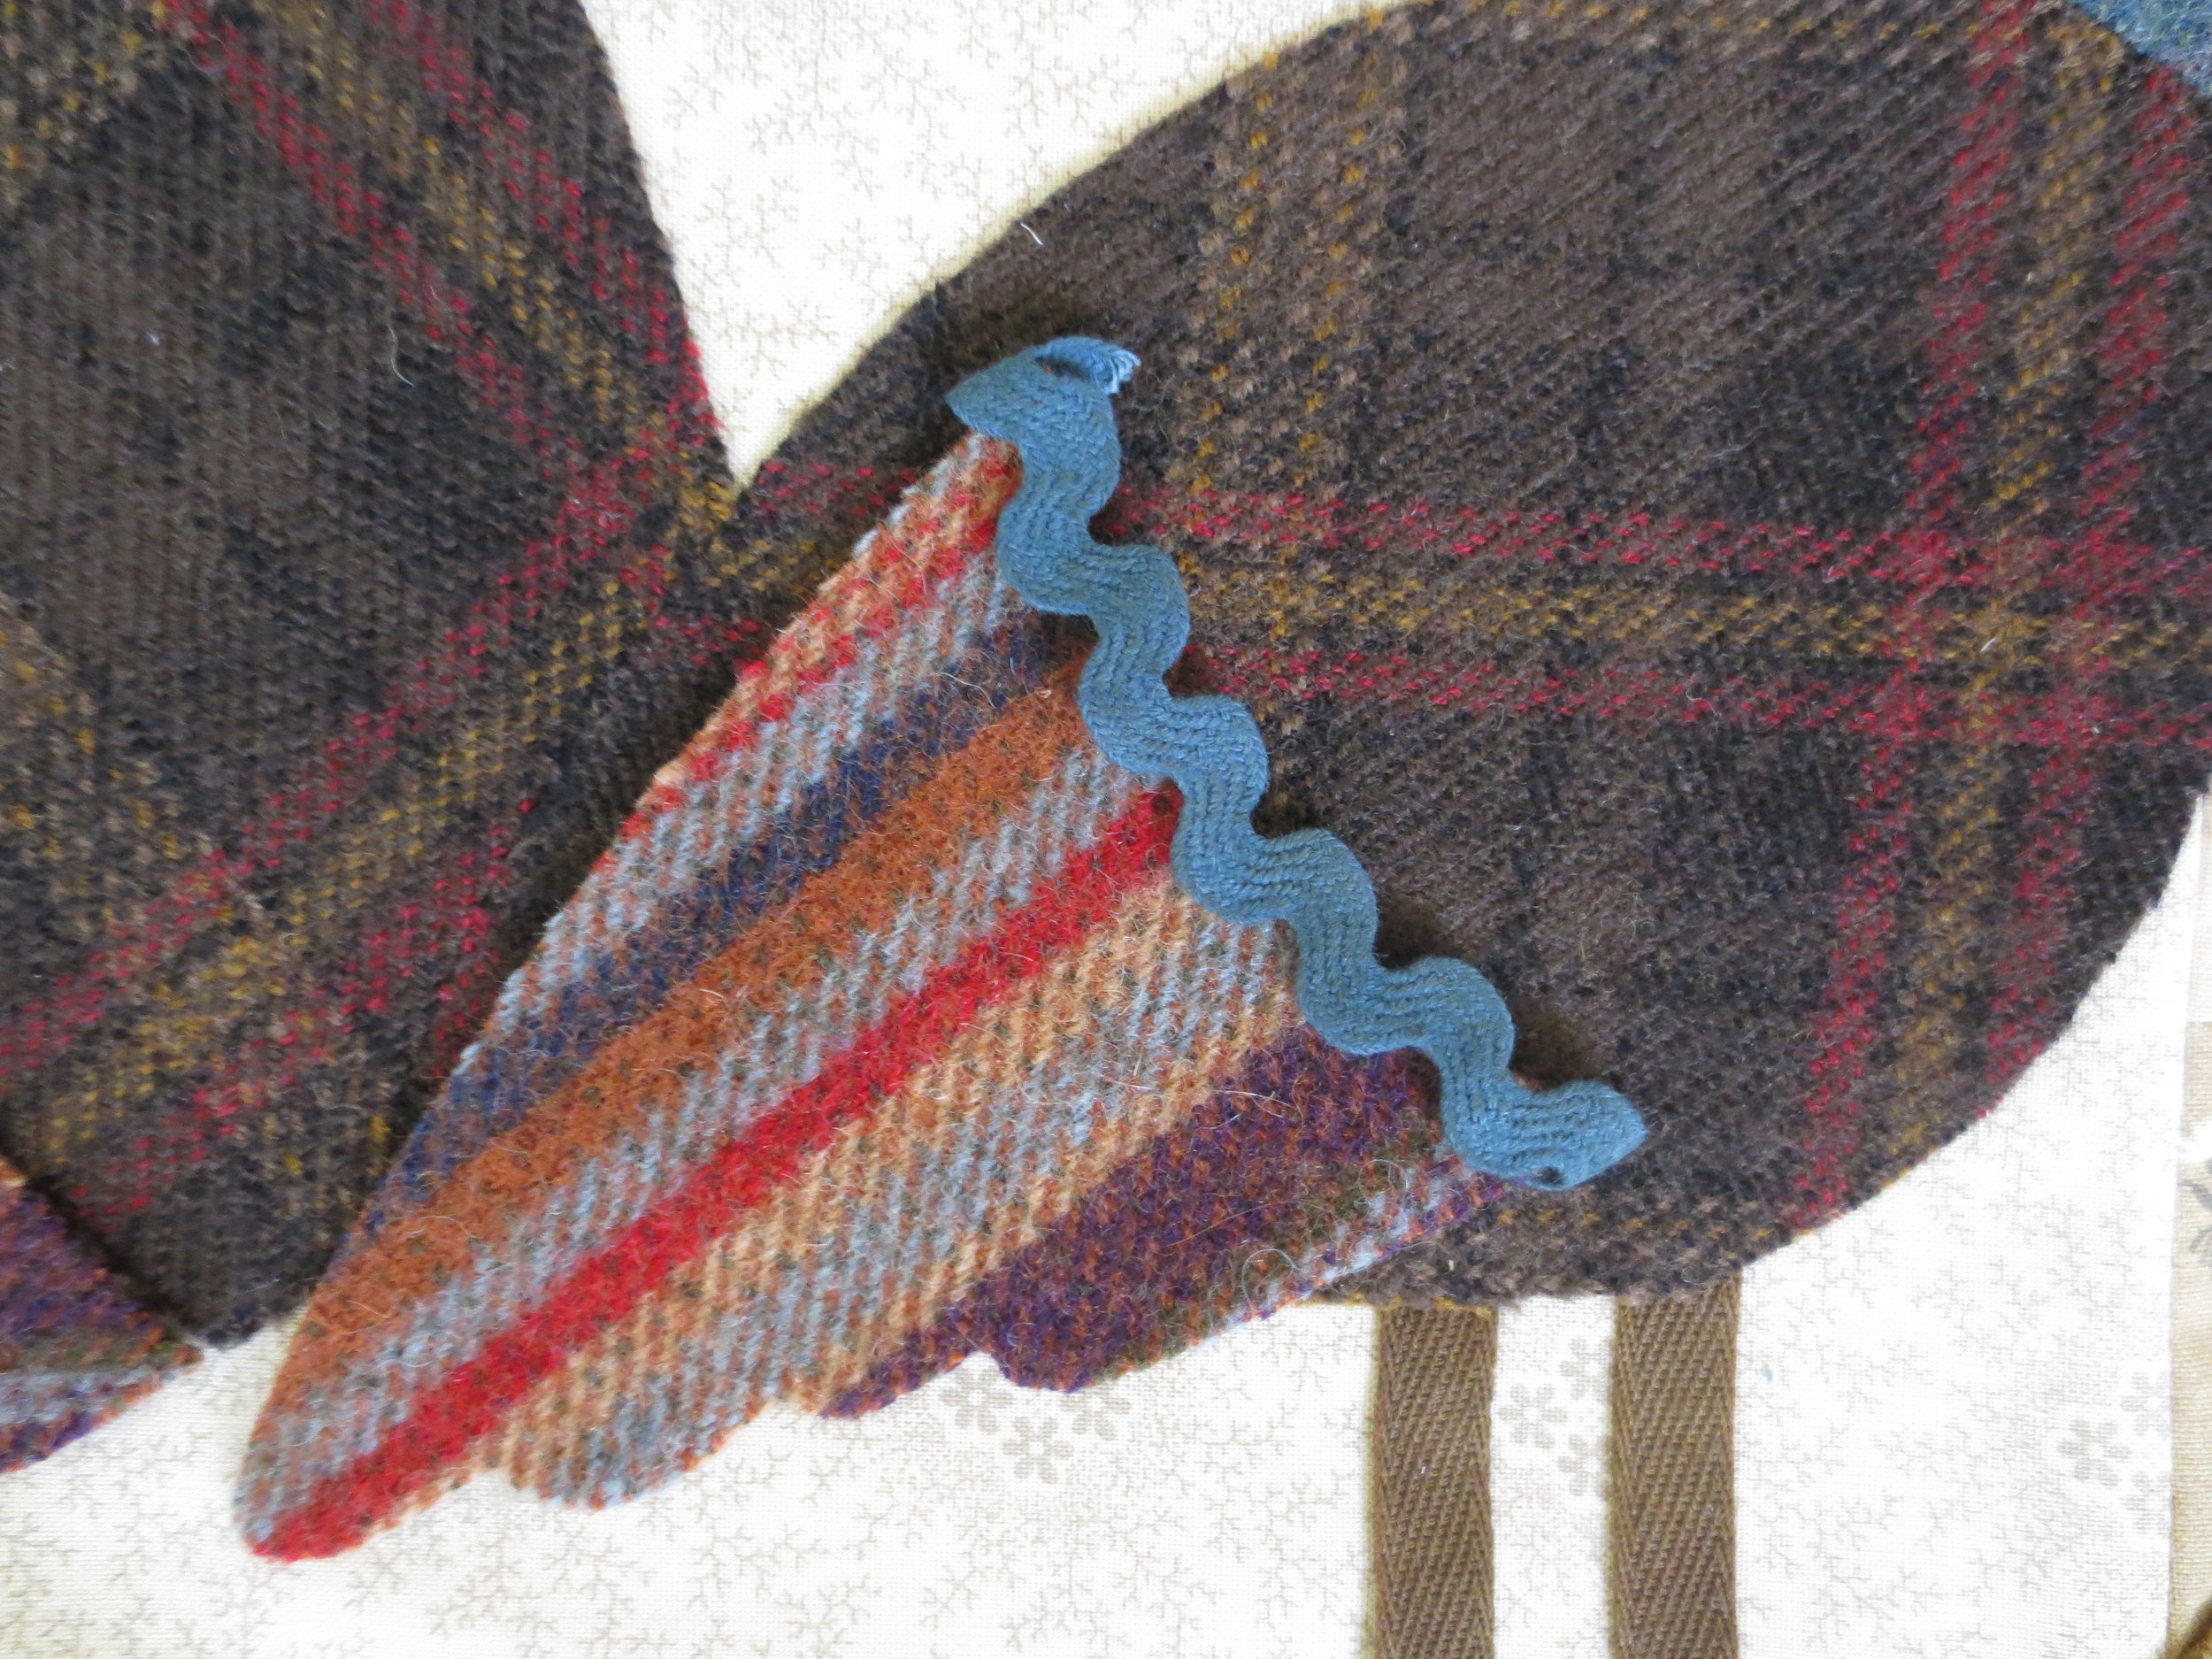
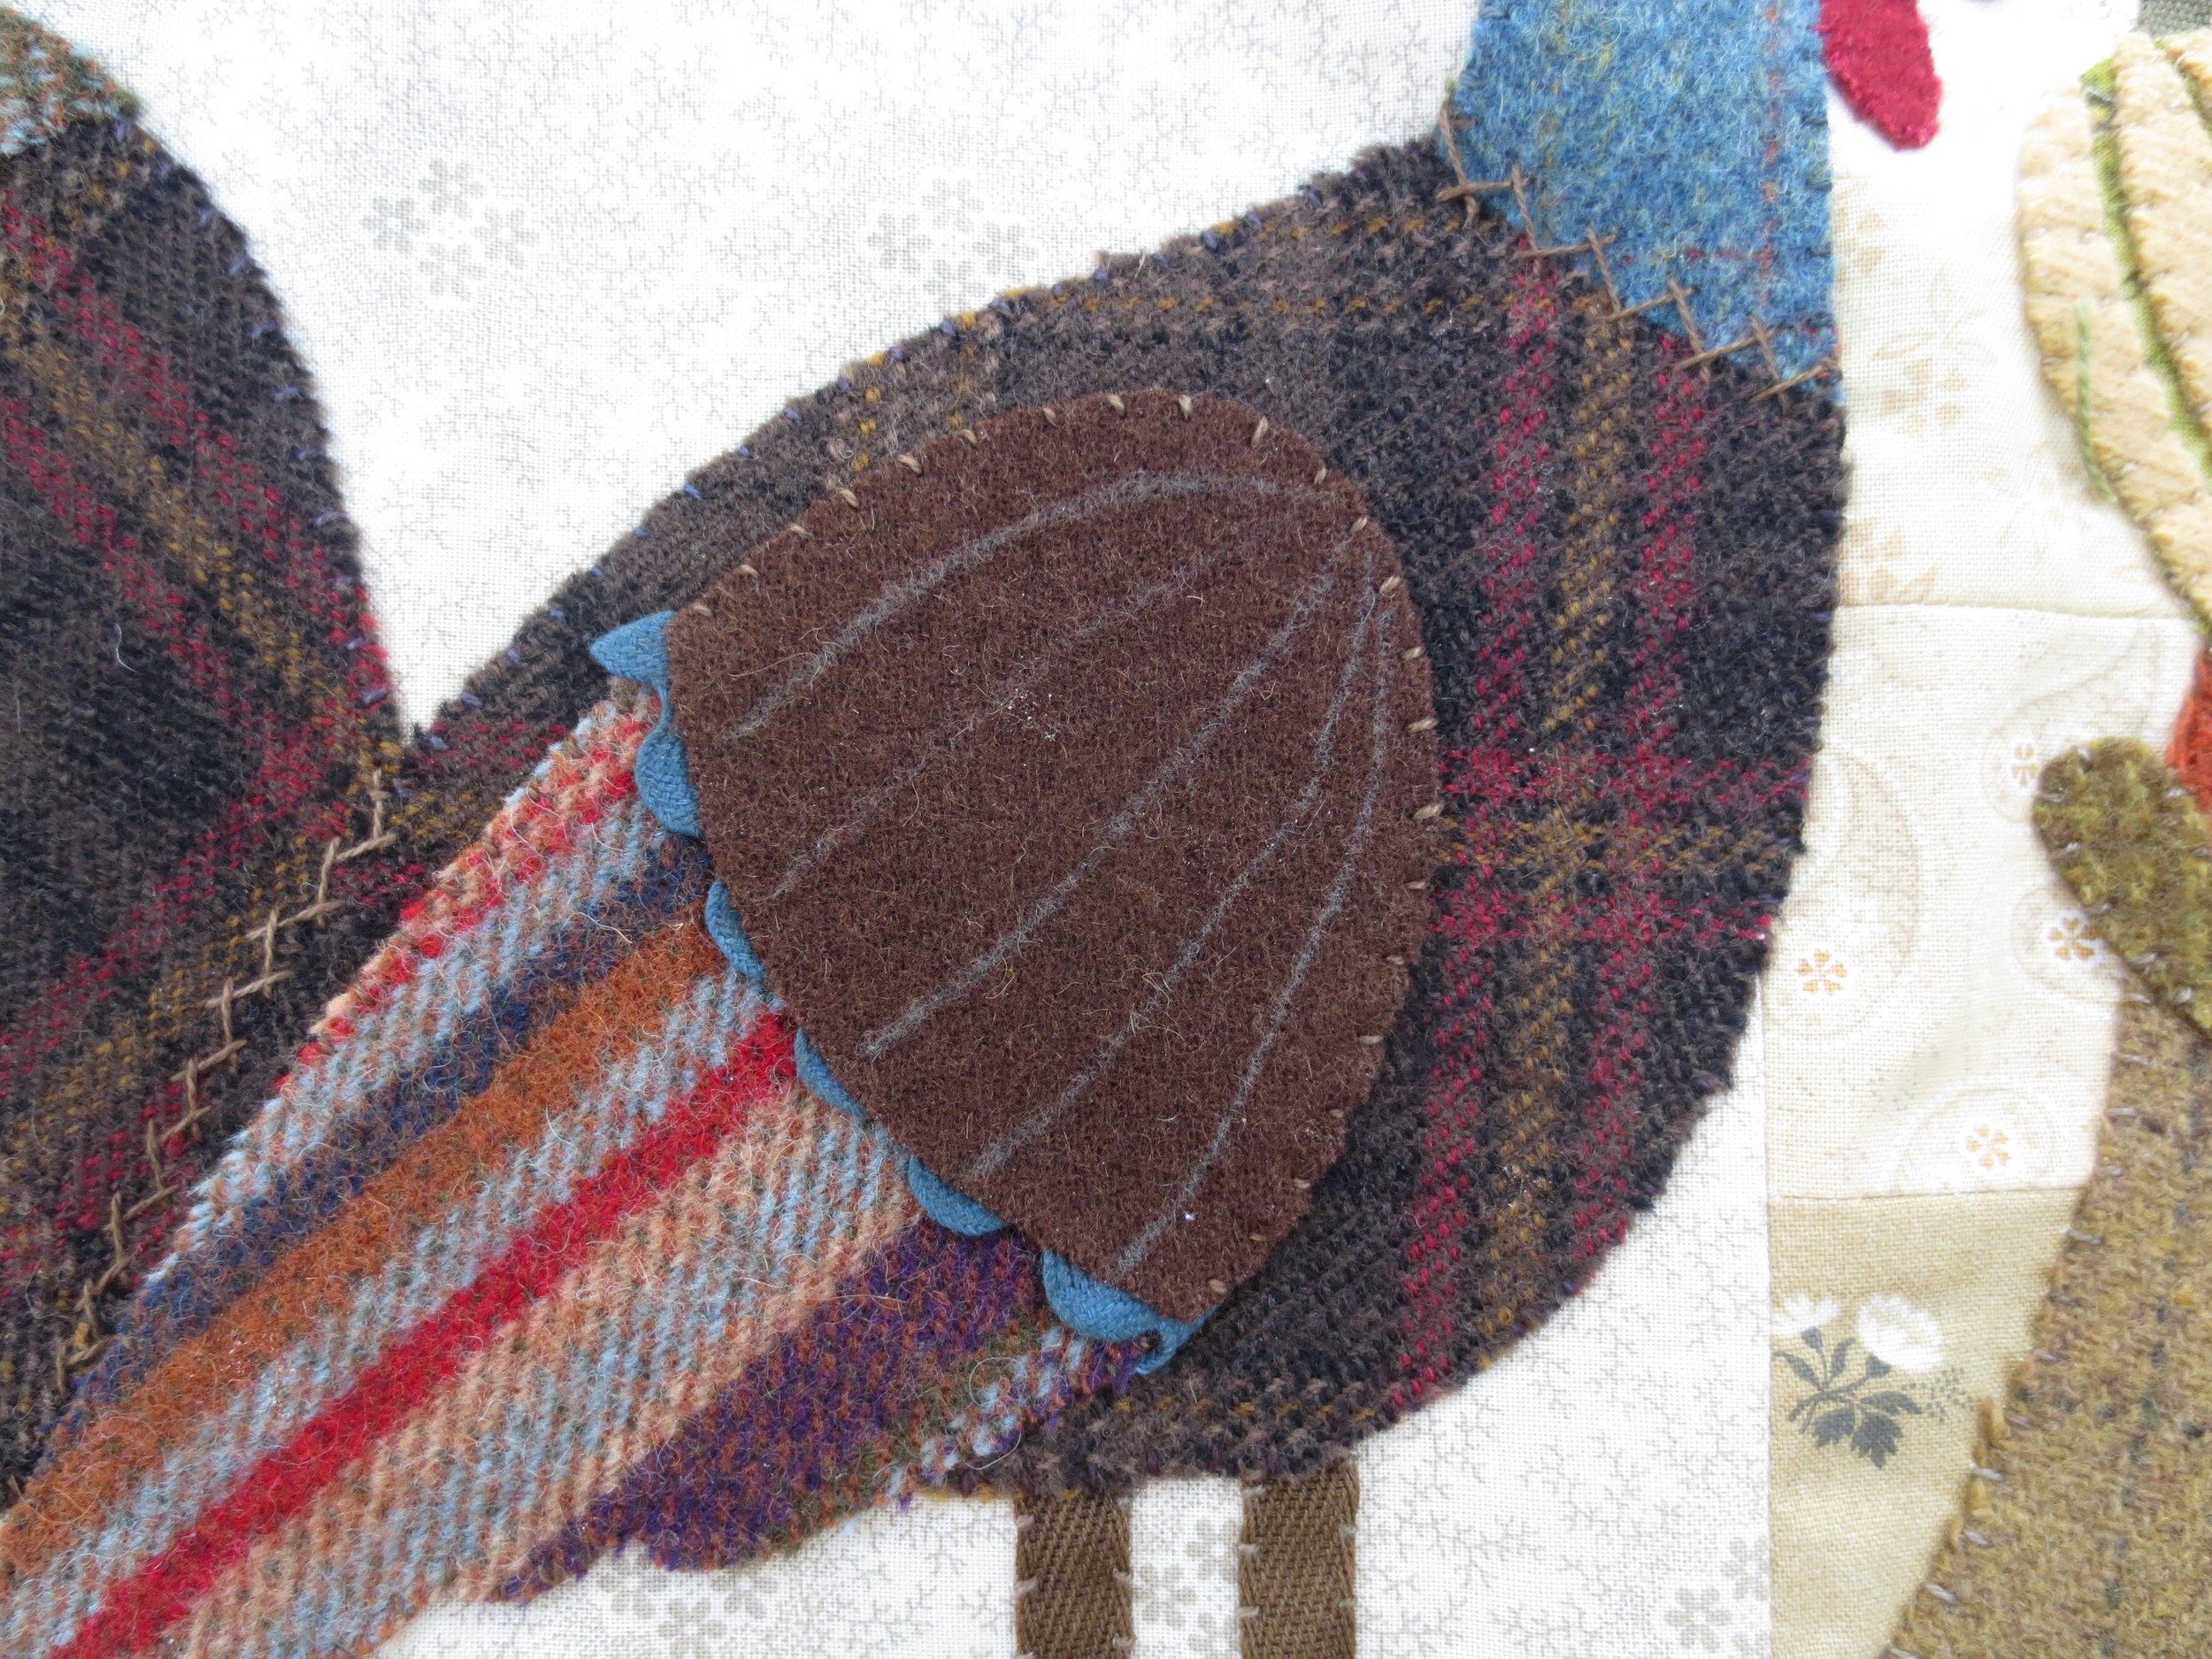
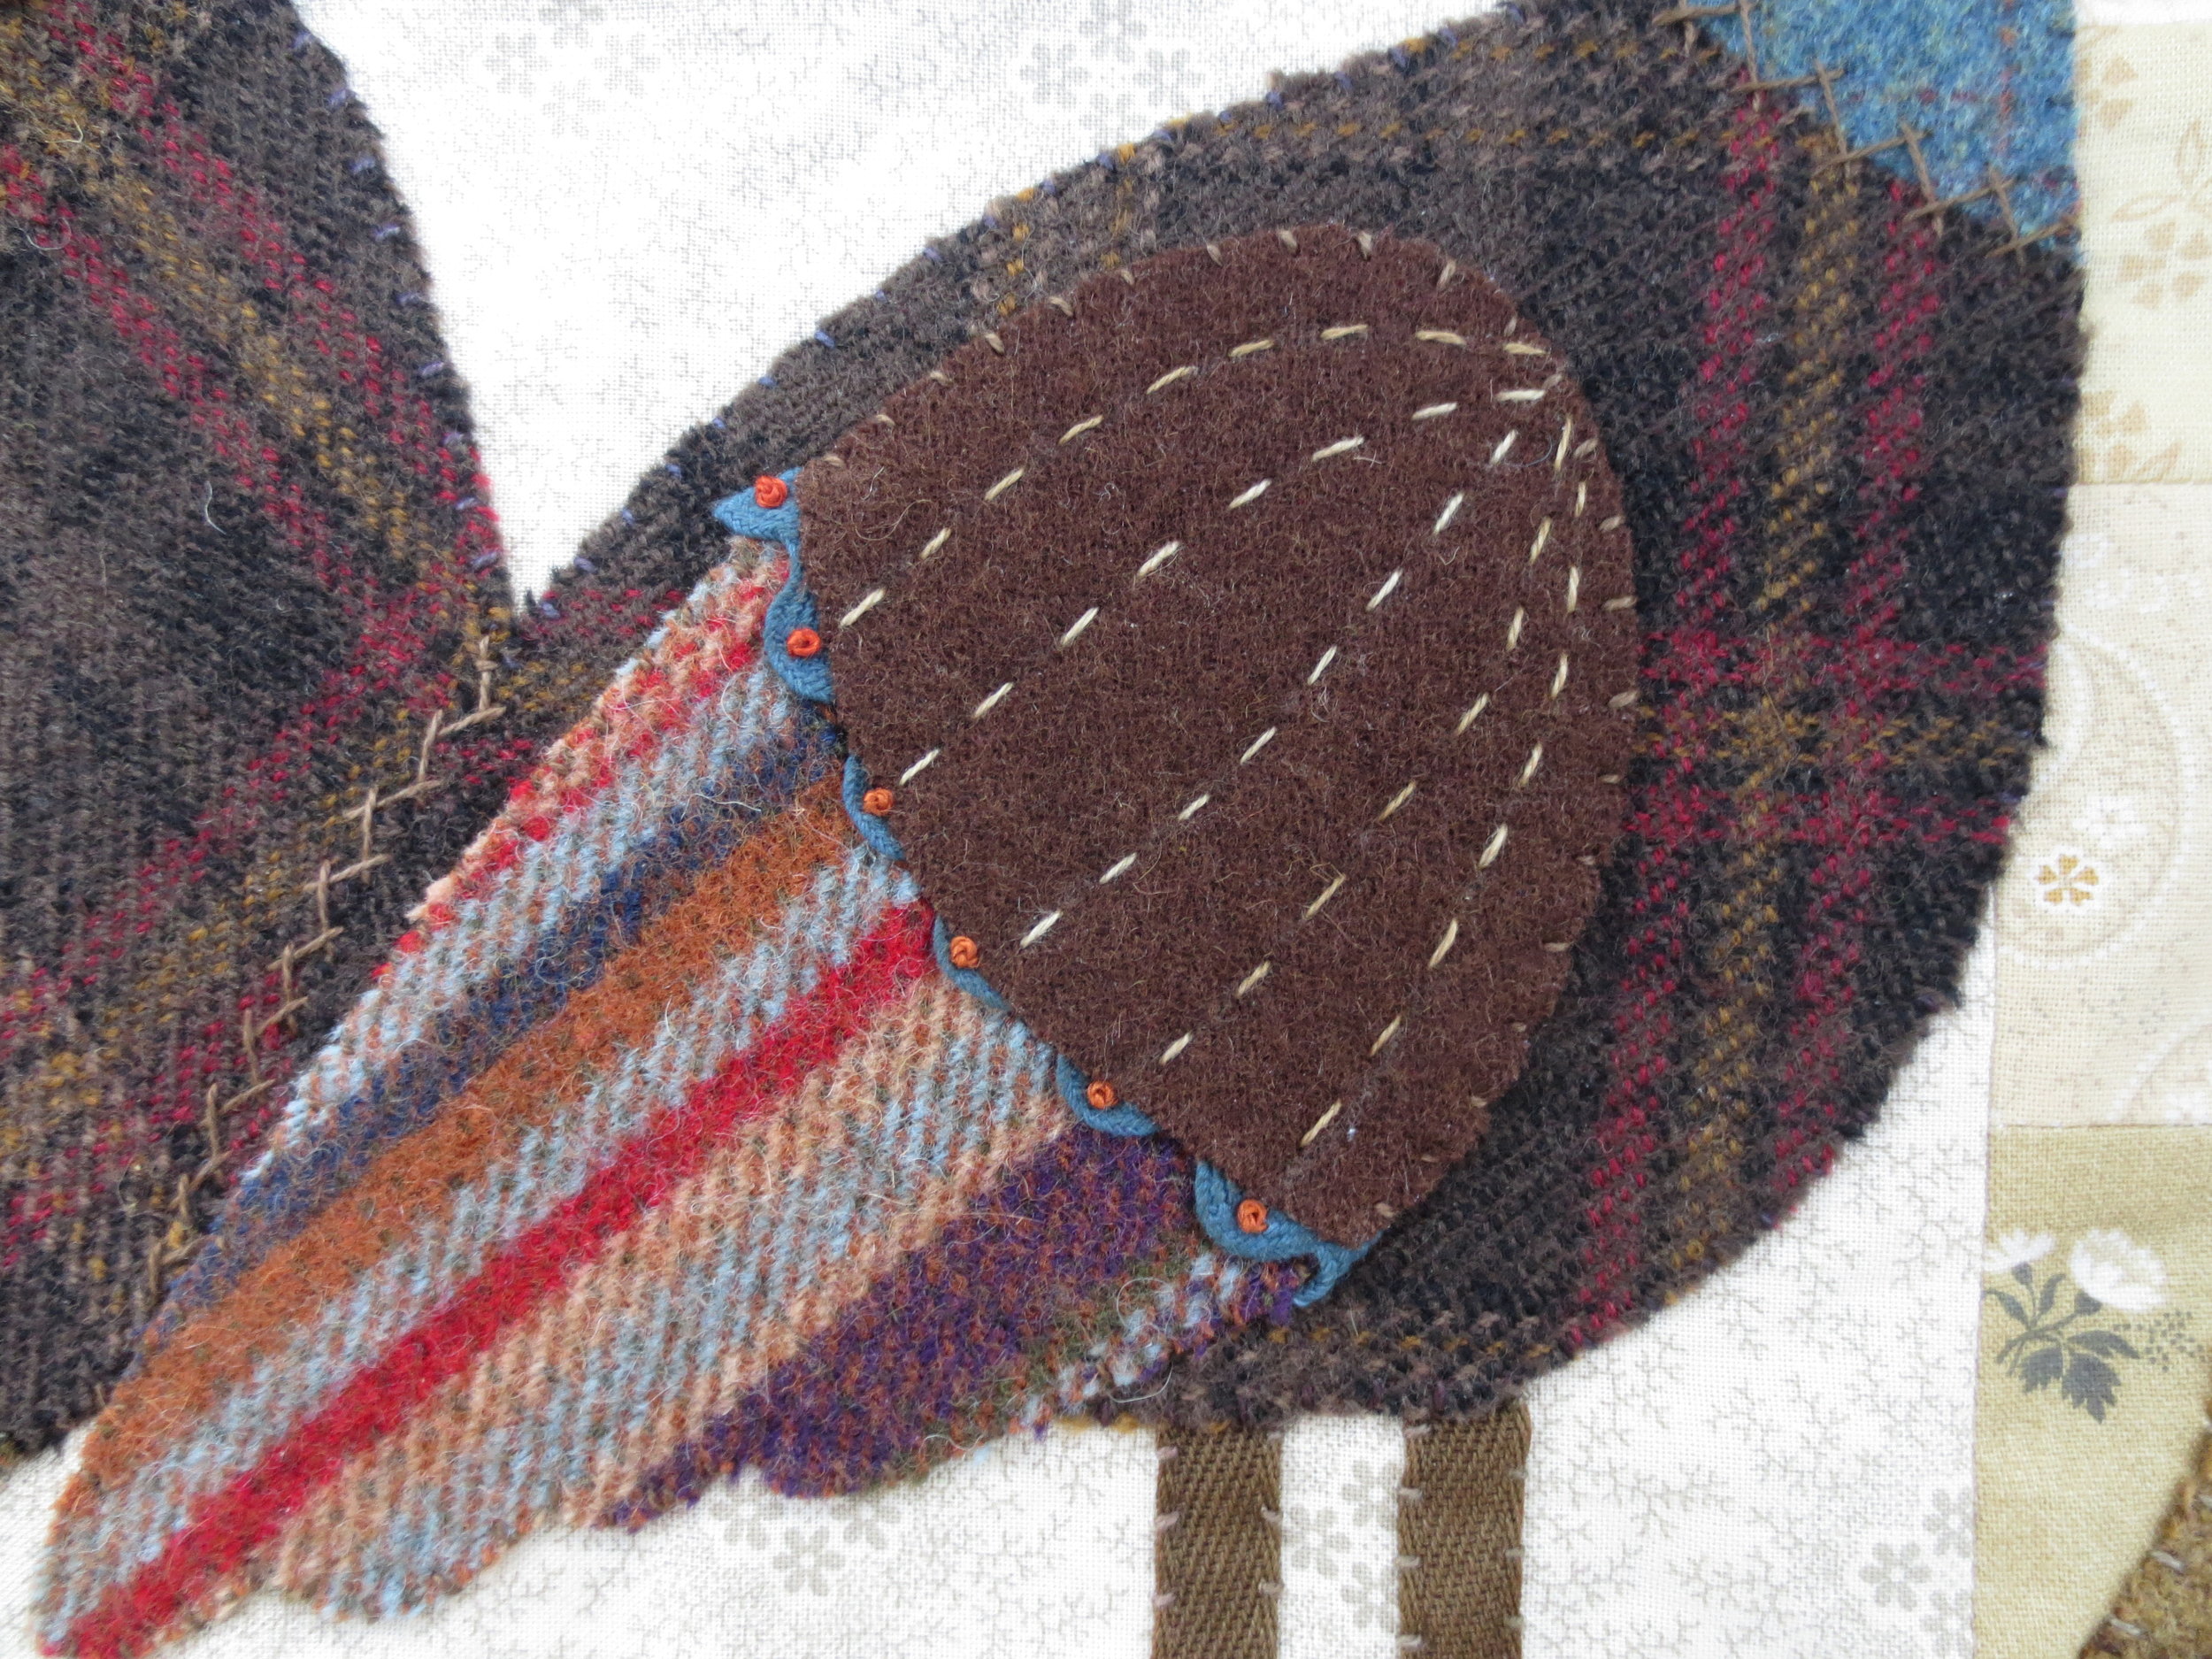
Position rick rack over the top of the wing, tucking the cut ends under the edges of the wing.
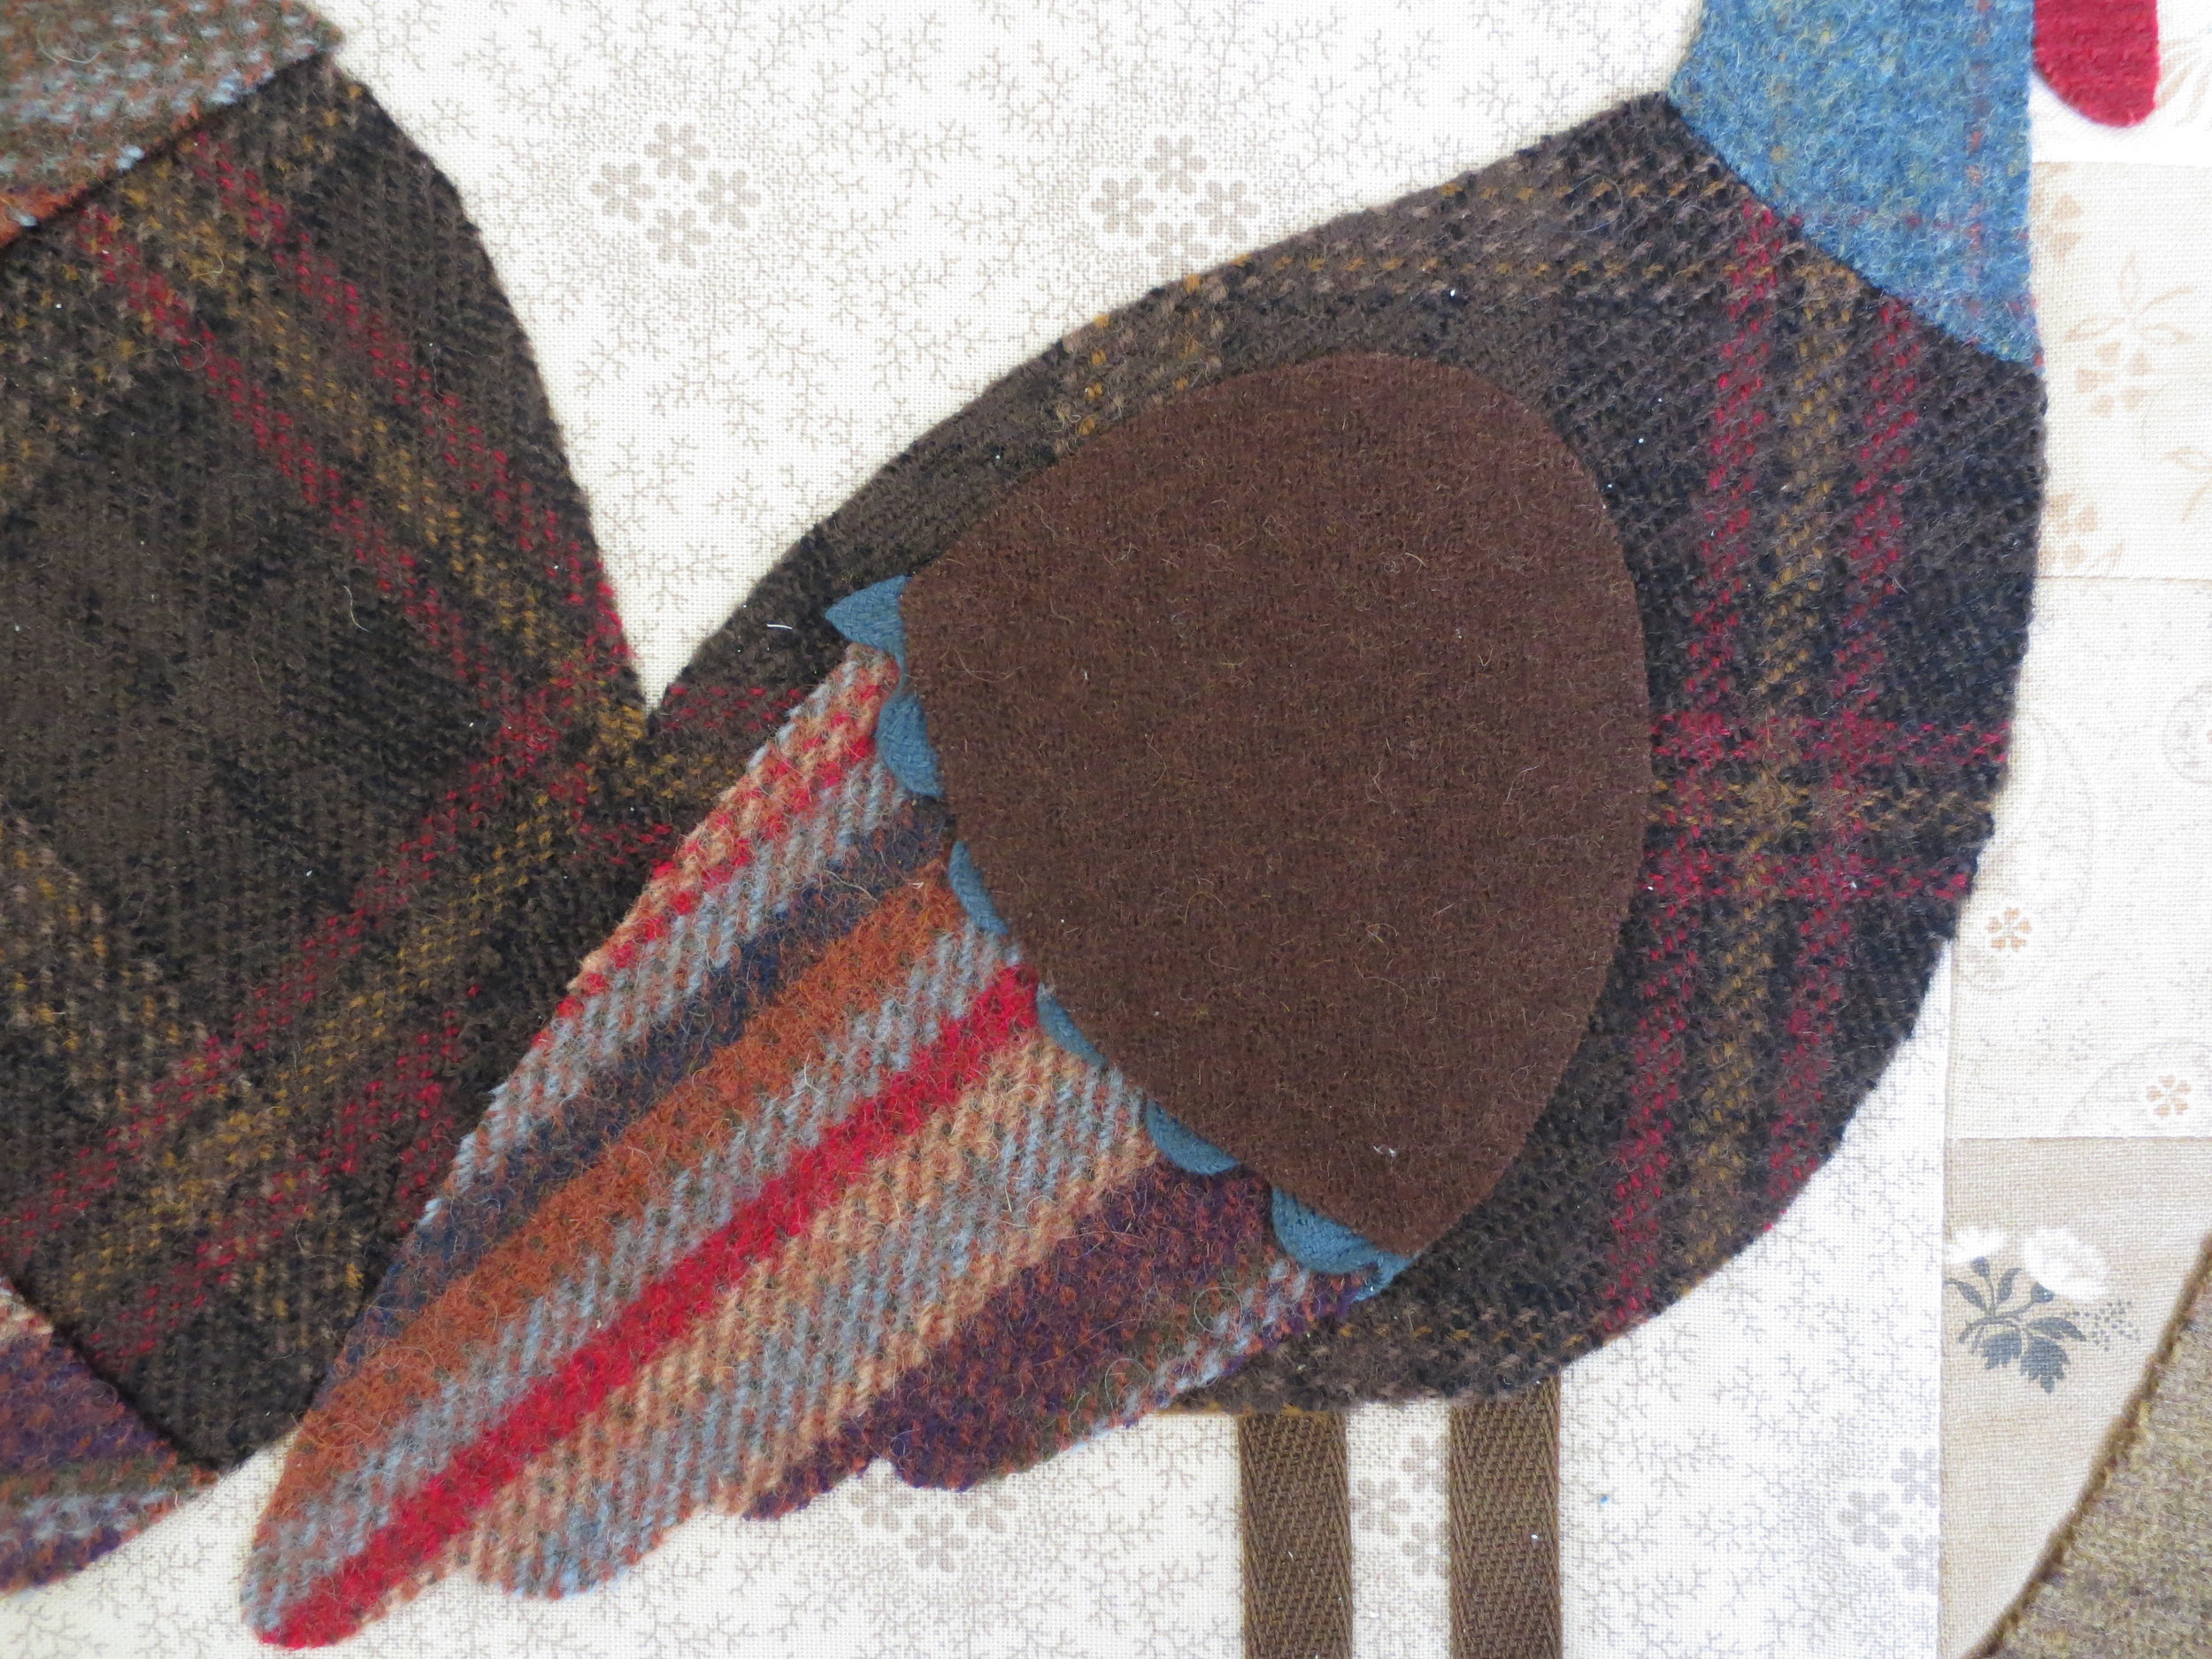
Position the wing cap over the top edge of the rick rack.
Fuse in place using steam.
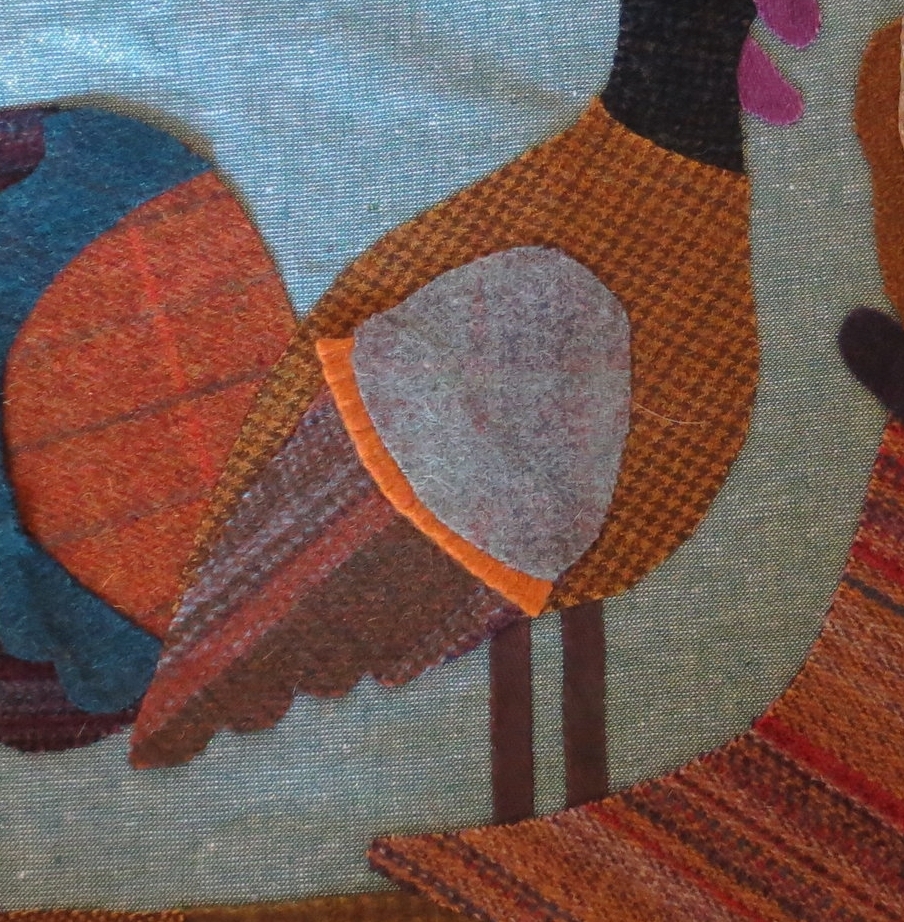
An alternative to the rick rack could be a piece of cuff from an old sweater like the one used here by my clever friend Dana. I love her color choices!
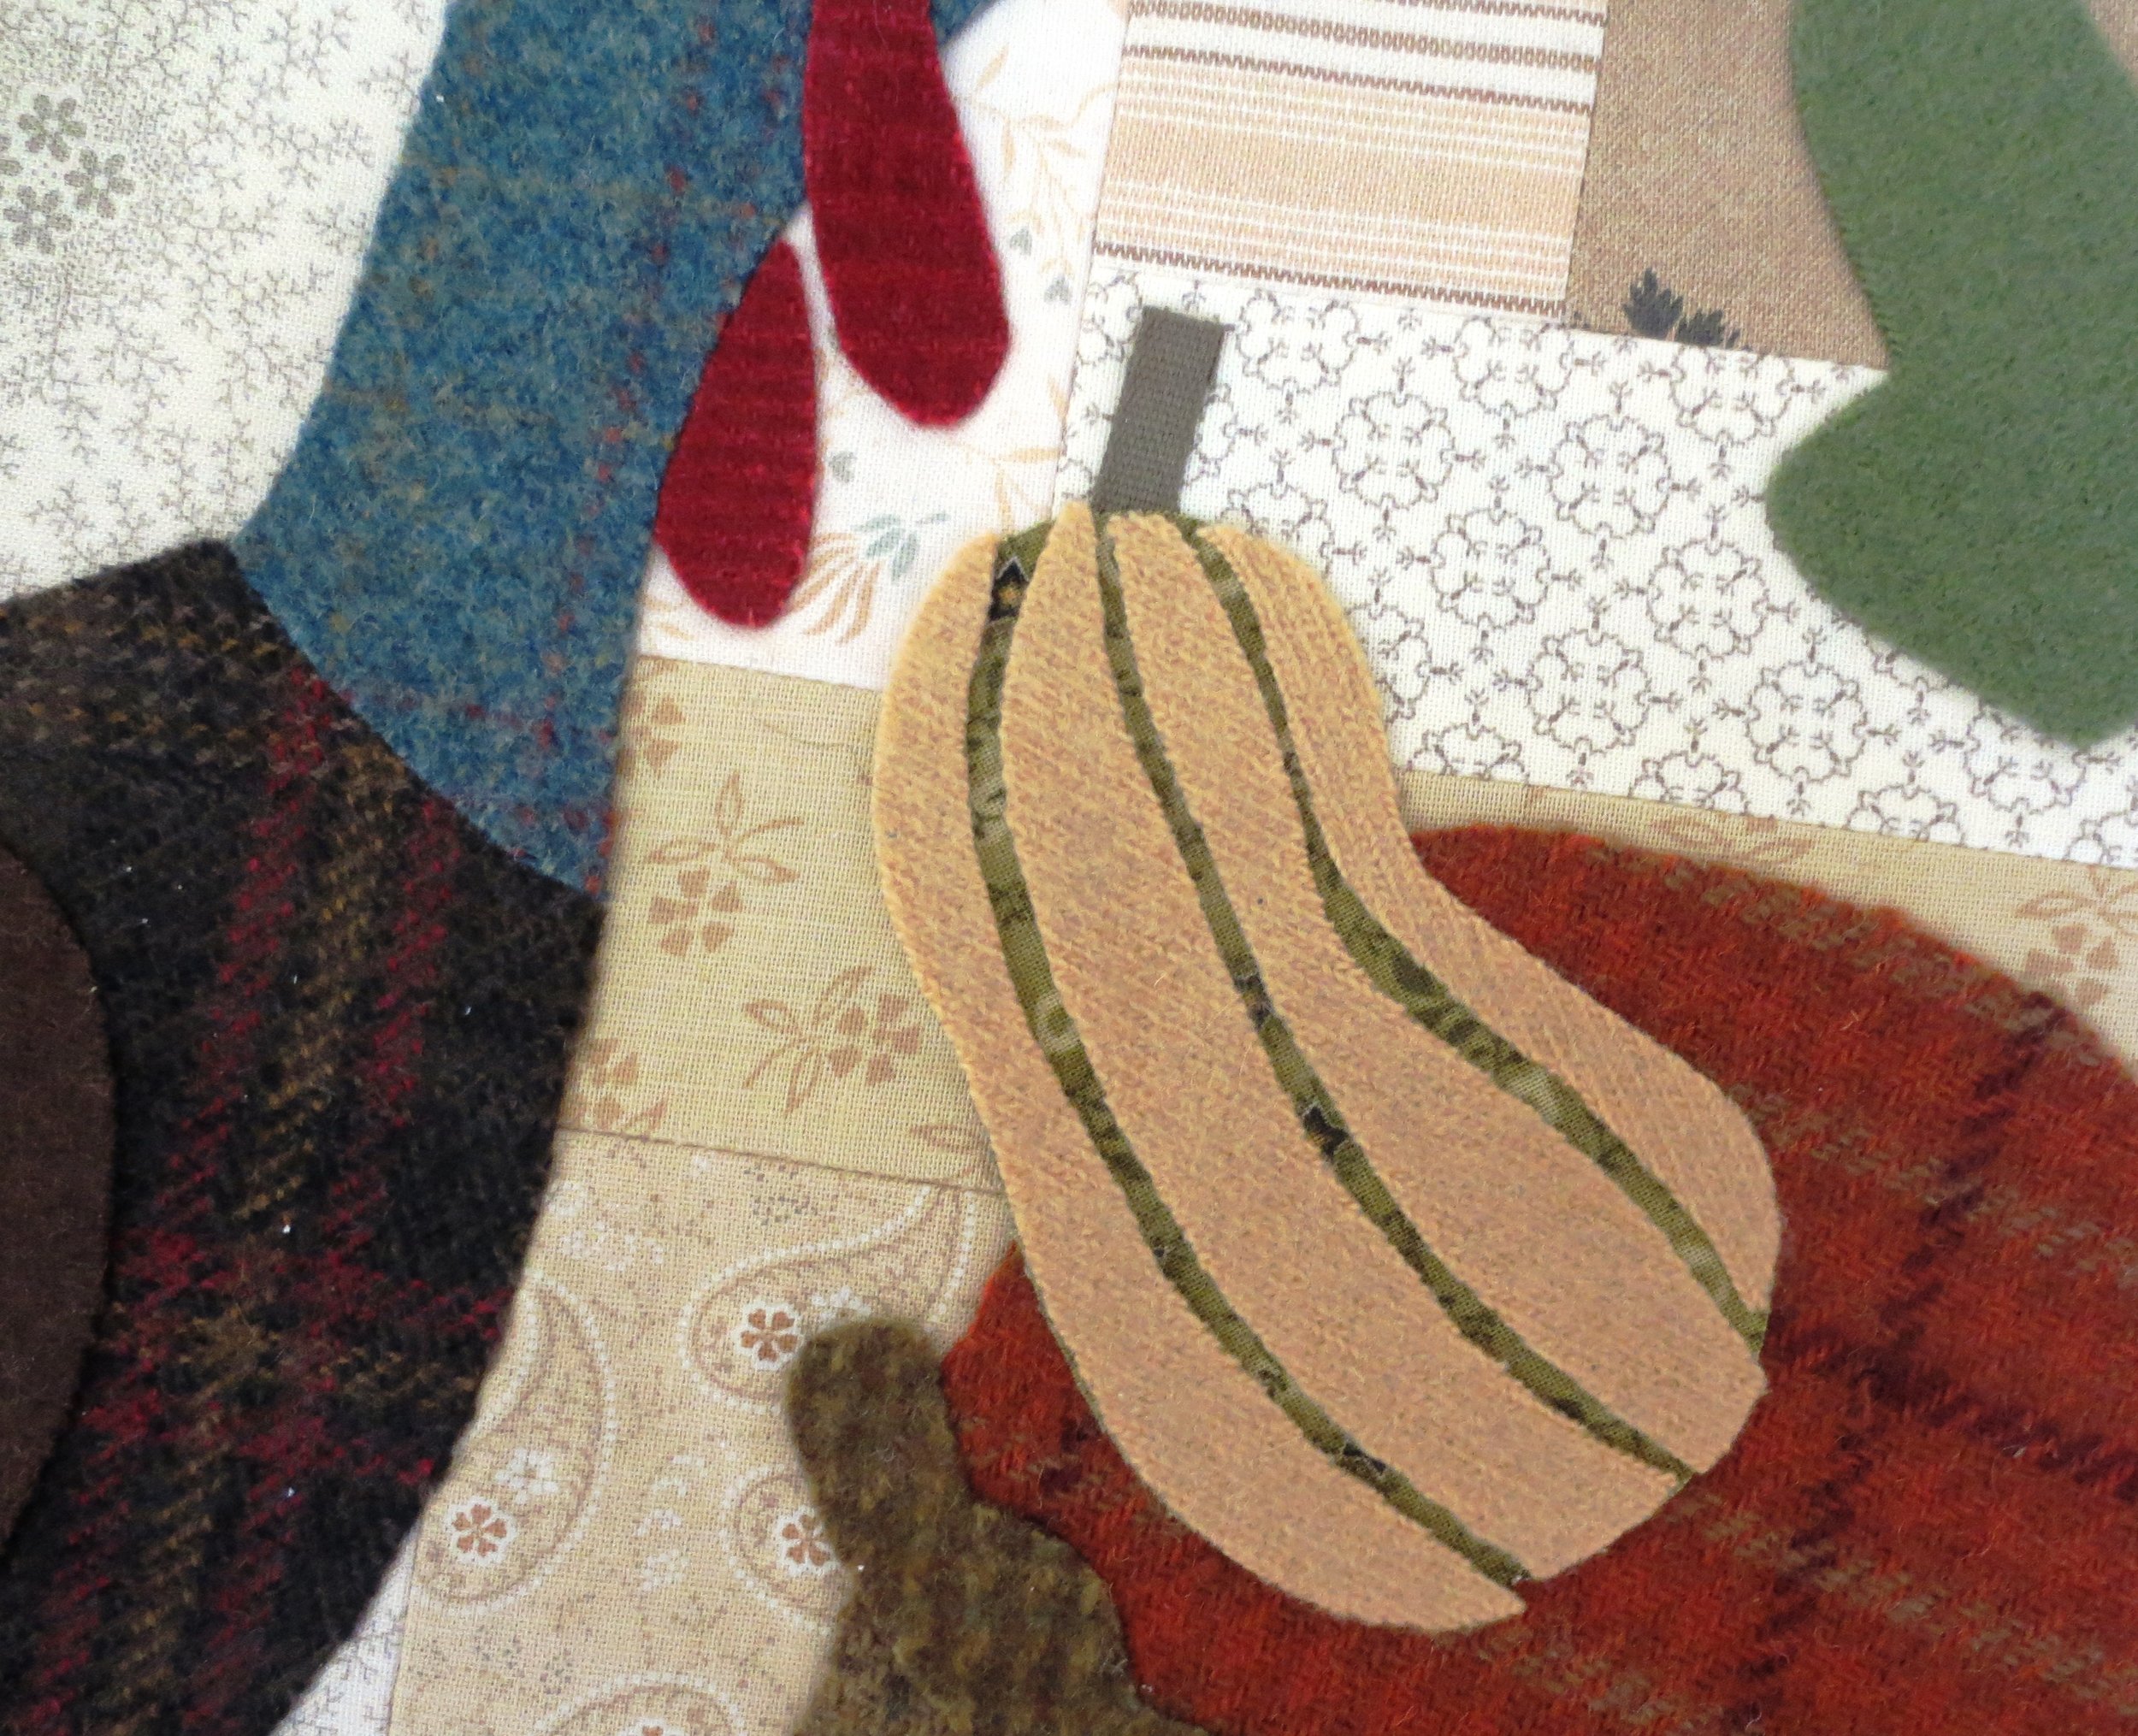
Add the delicata squash fabric base, ribbon stem (tuck the bottom end under the the top of the squash), and cornucopia ruffle. Fold the top of the ribbon stem under about 1/4” and finger press. Fuse the wool pieces with steam.
Position the top layer of delicata wool (A, B, C & D) on the fabric base. Fuse in place using steam.
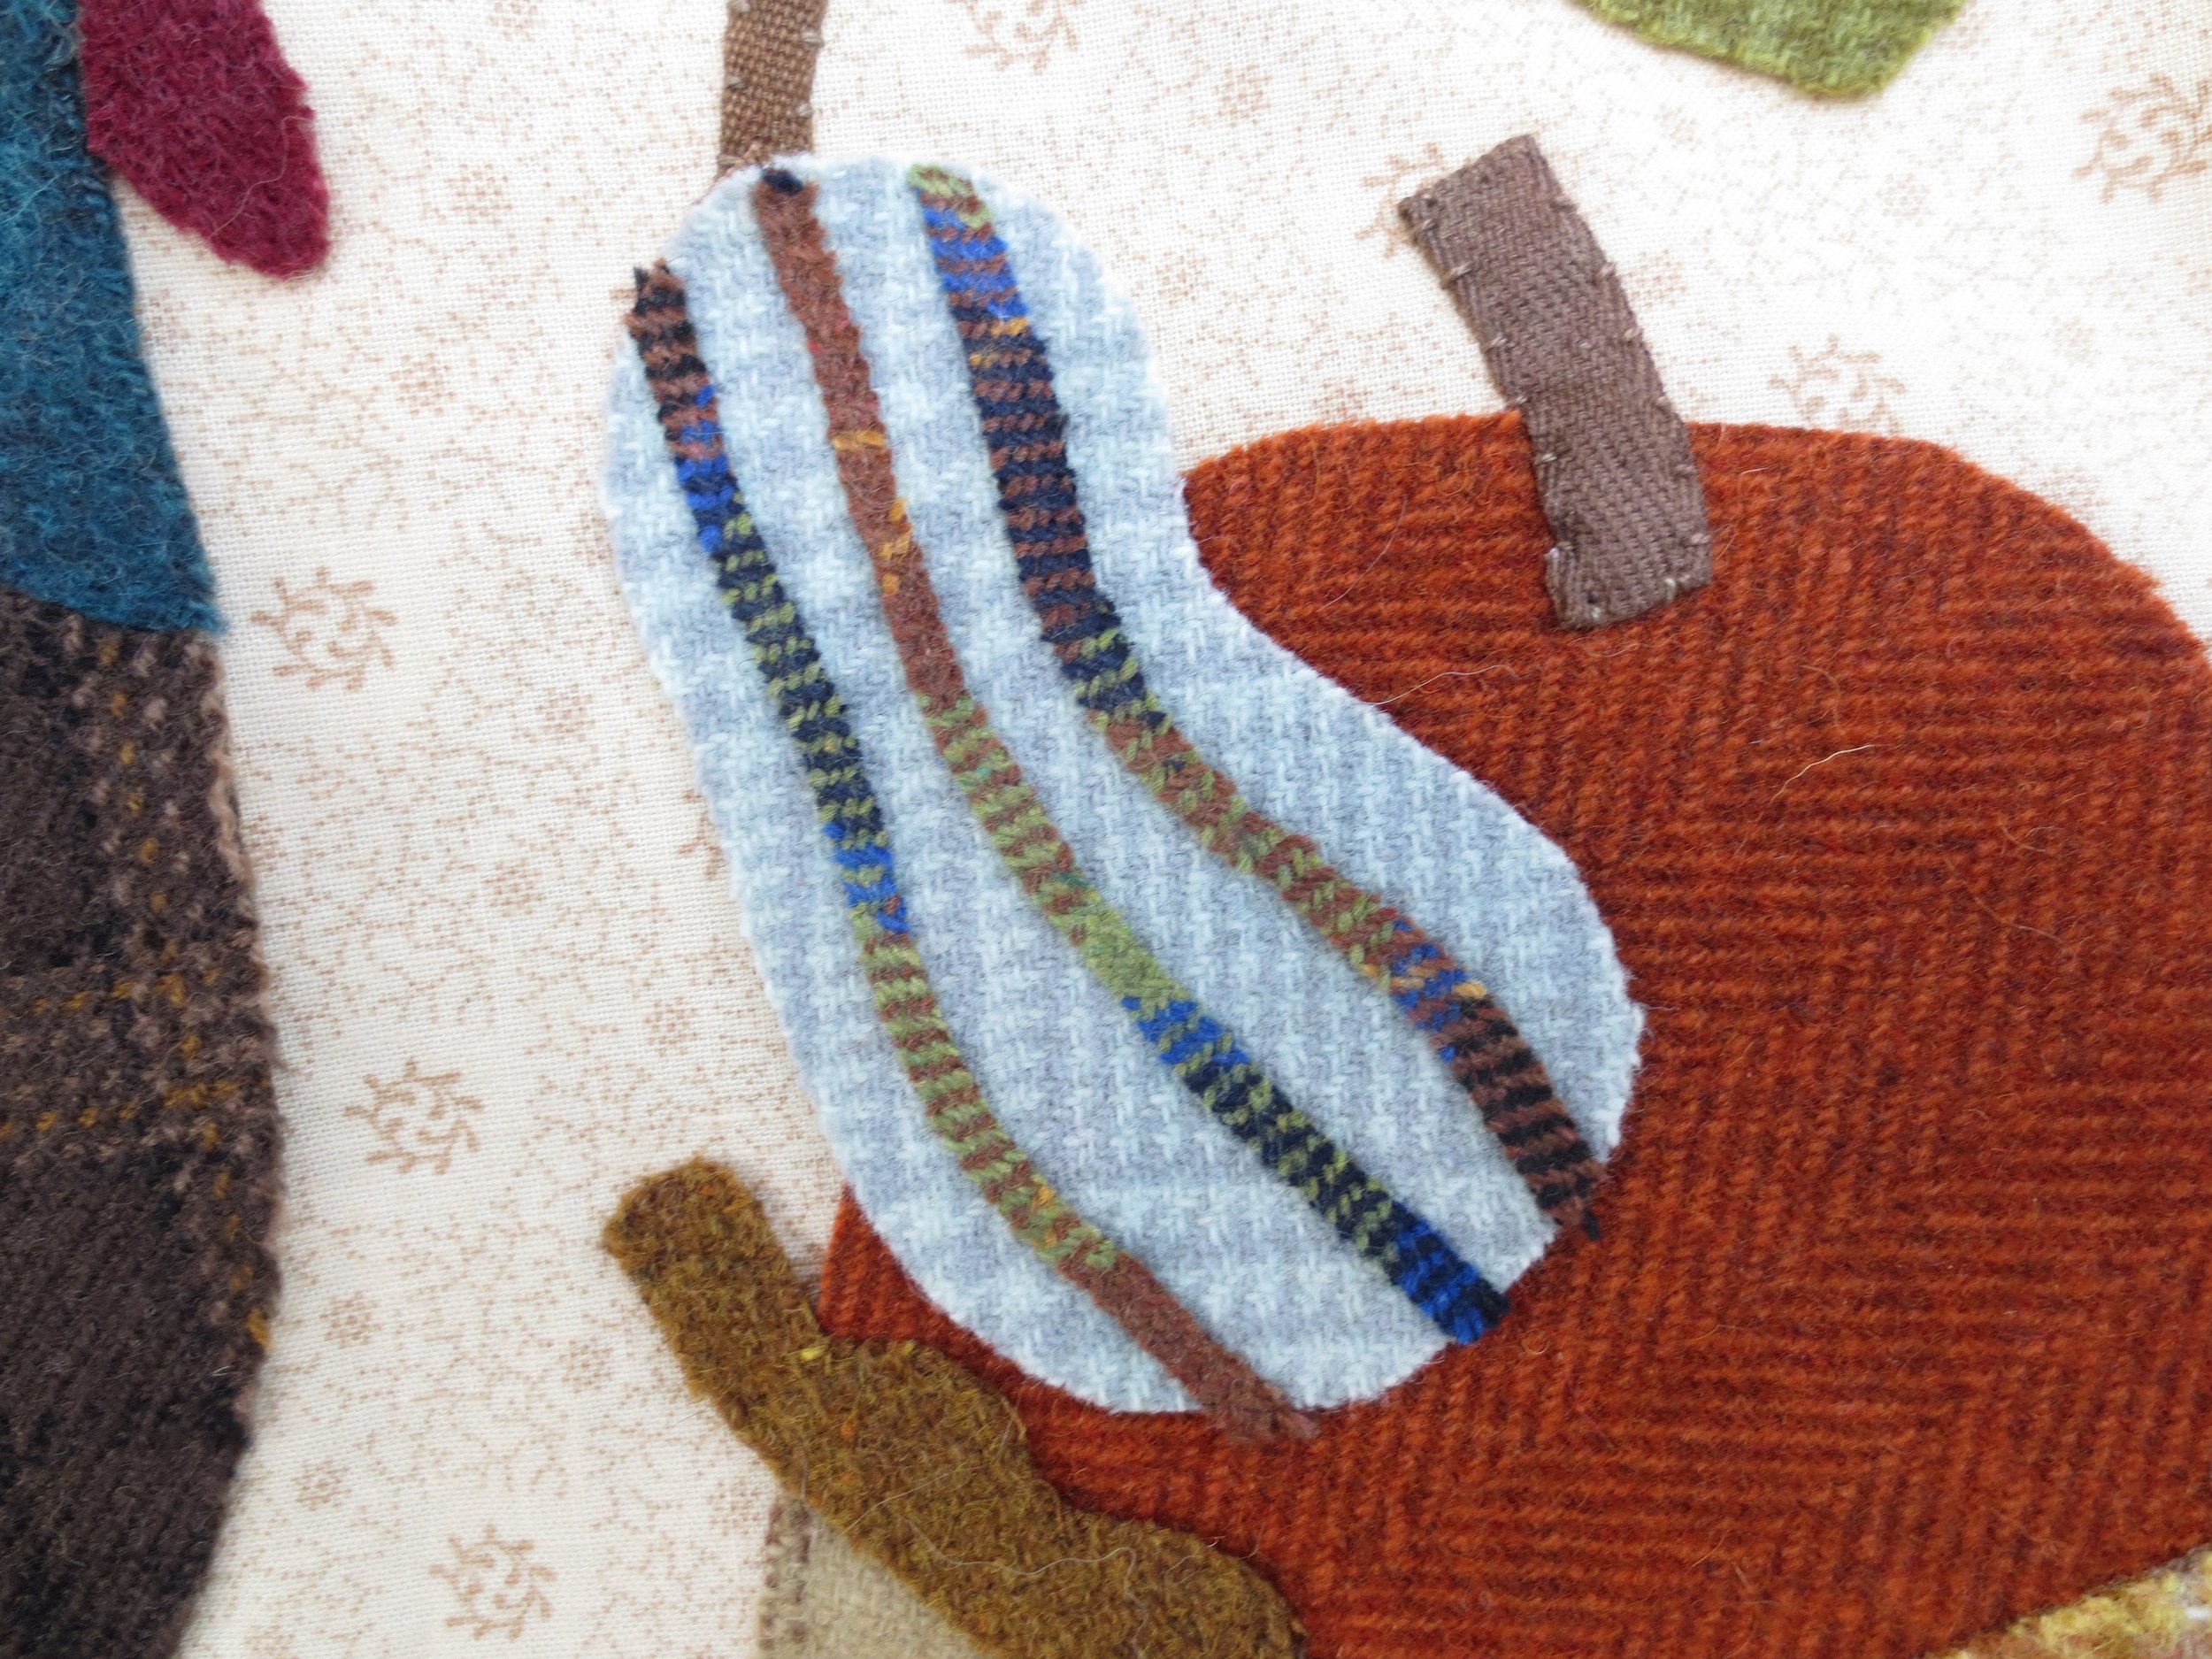
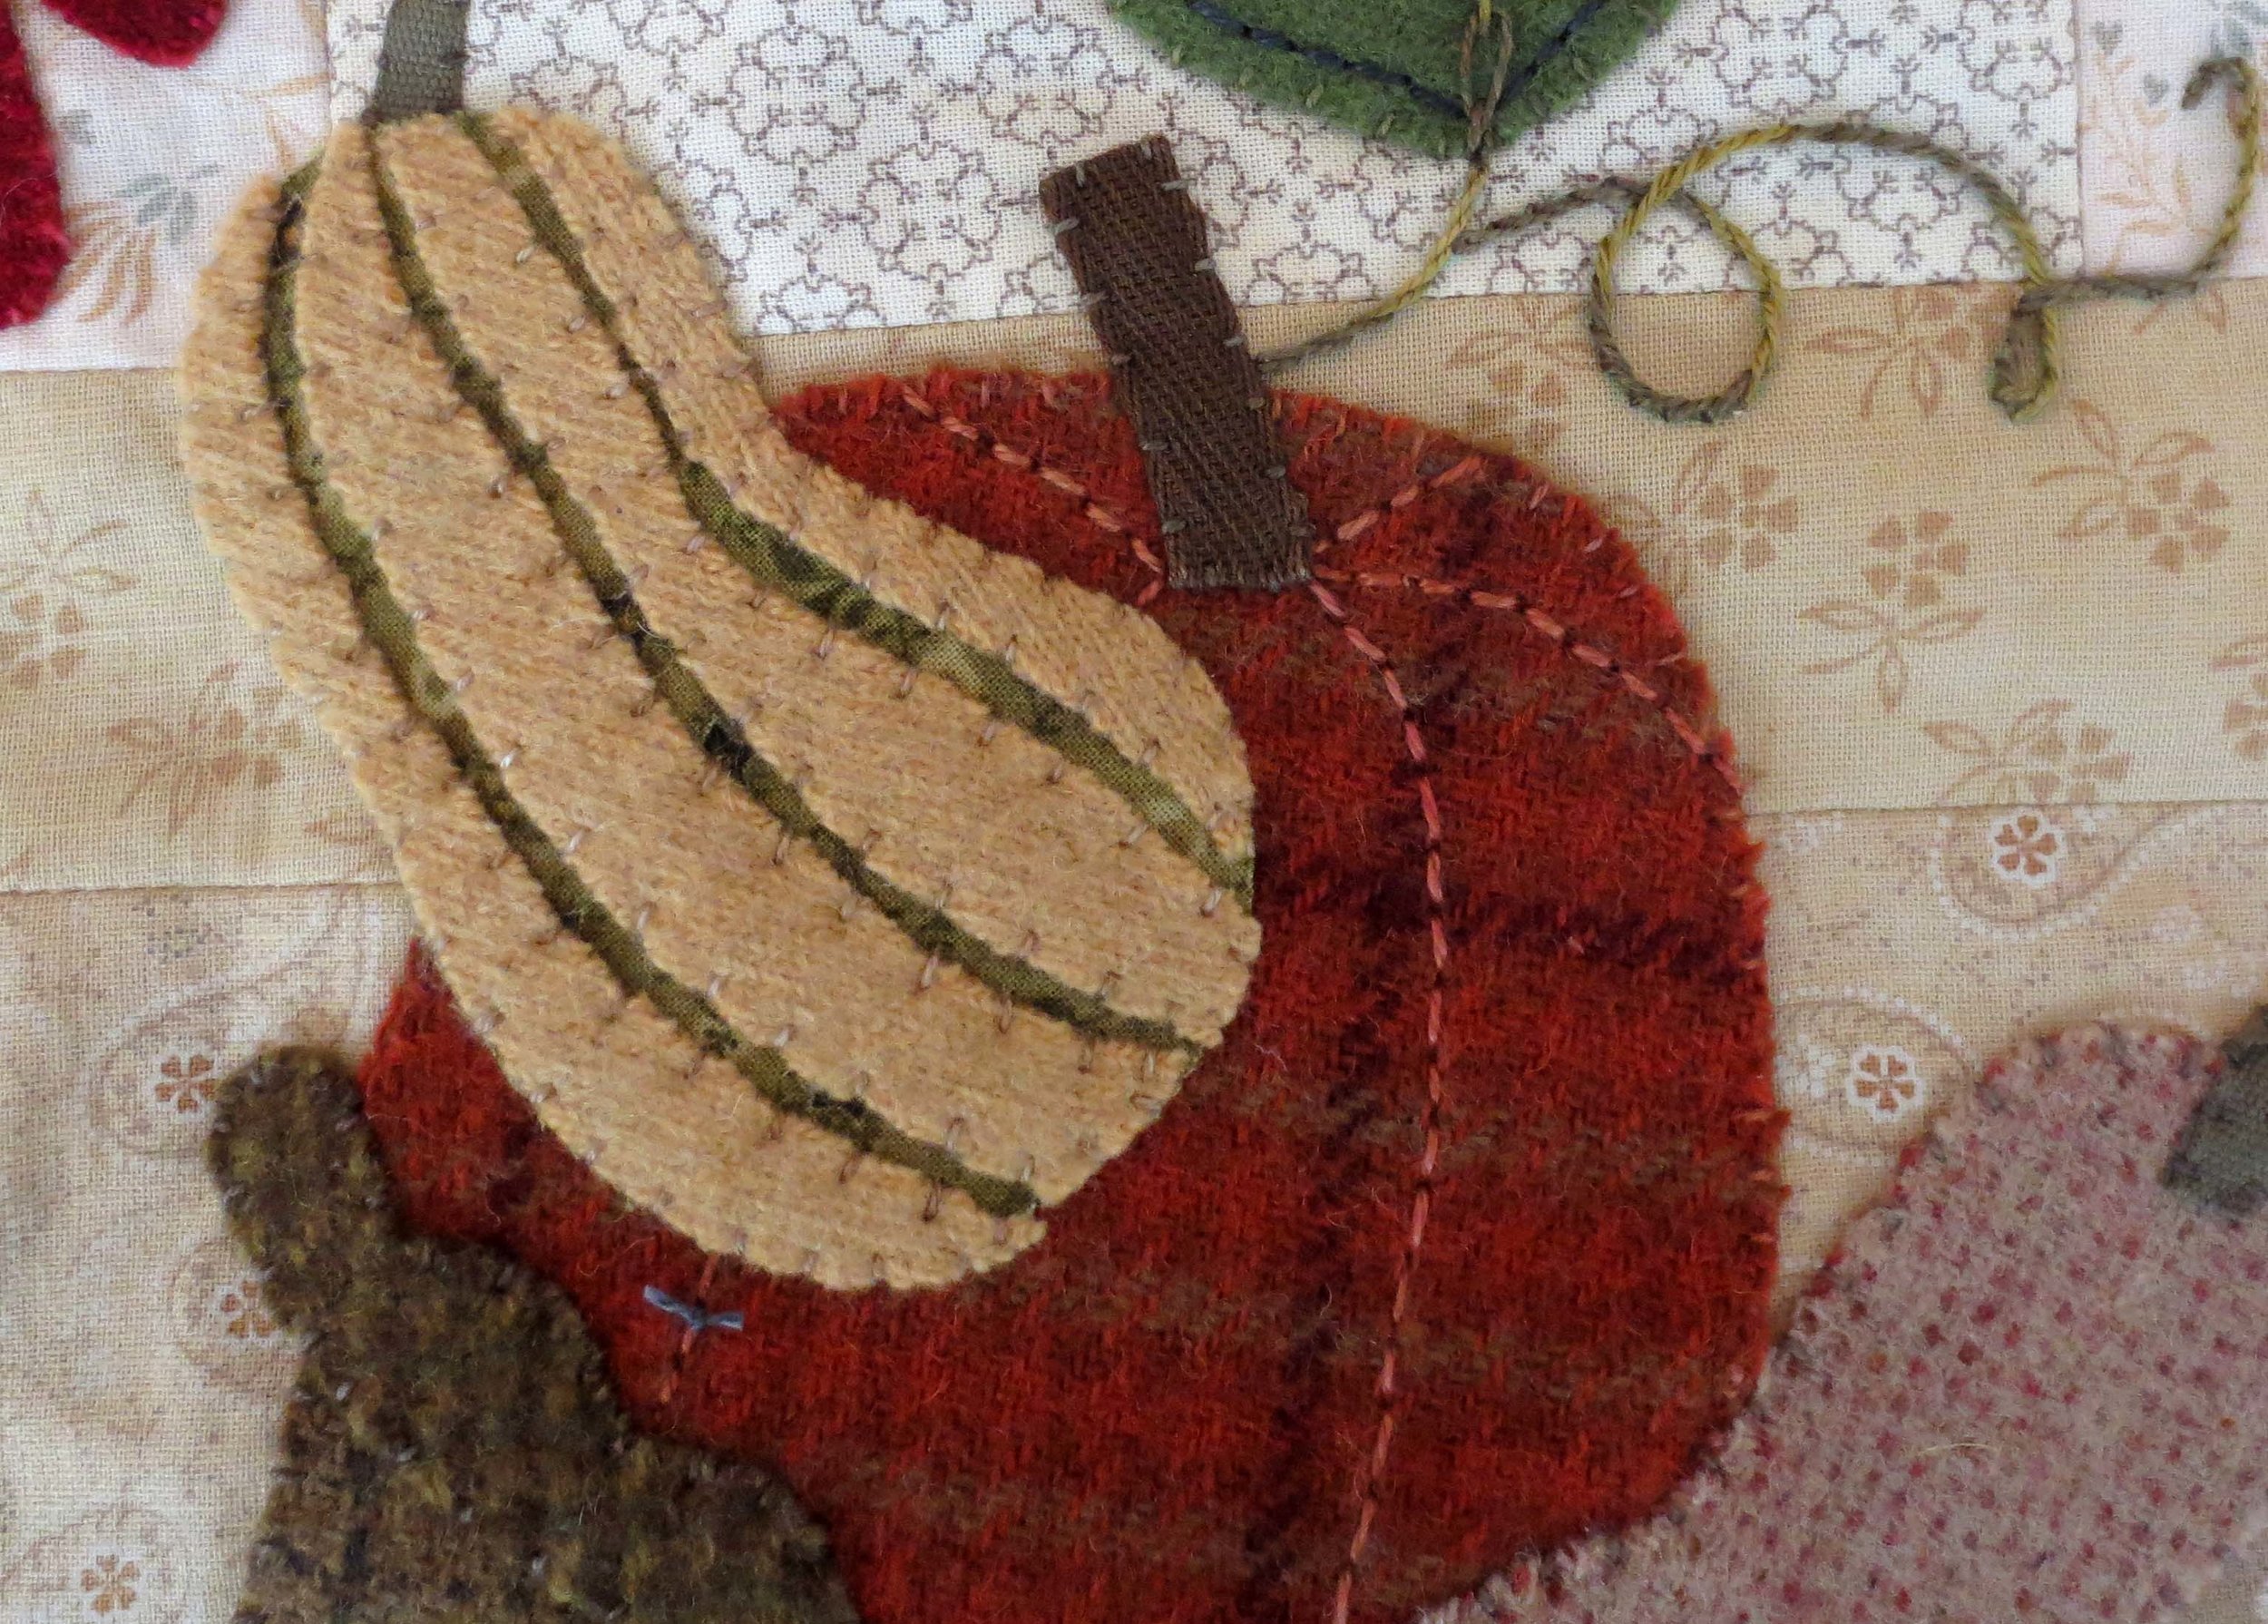
Below is an alternative design of the delicata squash. The body of the squash is wool. For the ribs of the squash I fused a 1” x 4” piece of webbing to a piece of wool and then cut it into 3/16” wide strips. The strips were arranged and fused in place with steam. They can be secured by couching using “X’s” or straight stitches.
Embroidery stitches - Most of the stitches I used are in the stitch guide. For those that are not in the guide I have added links or illustrations.
Let’s work on stitching down the areas that are joints between wool pieces first.
Note: Use a single strand of thread unless otherwise instructed.
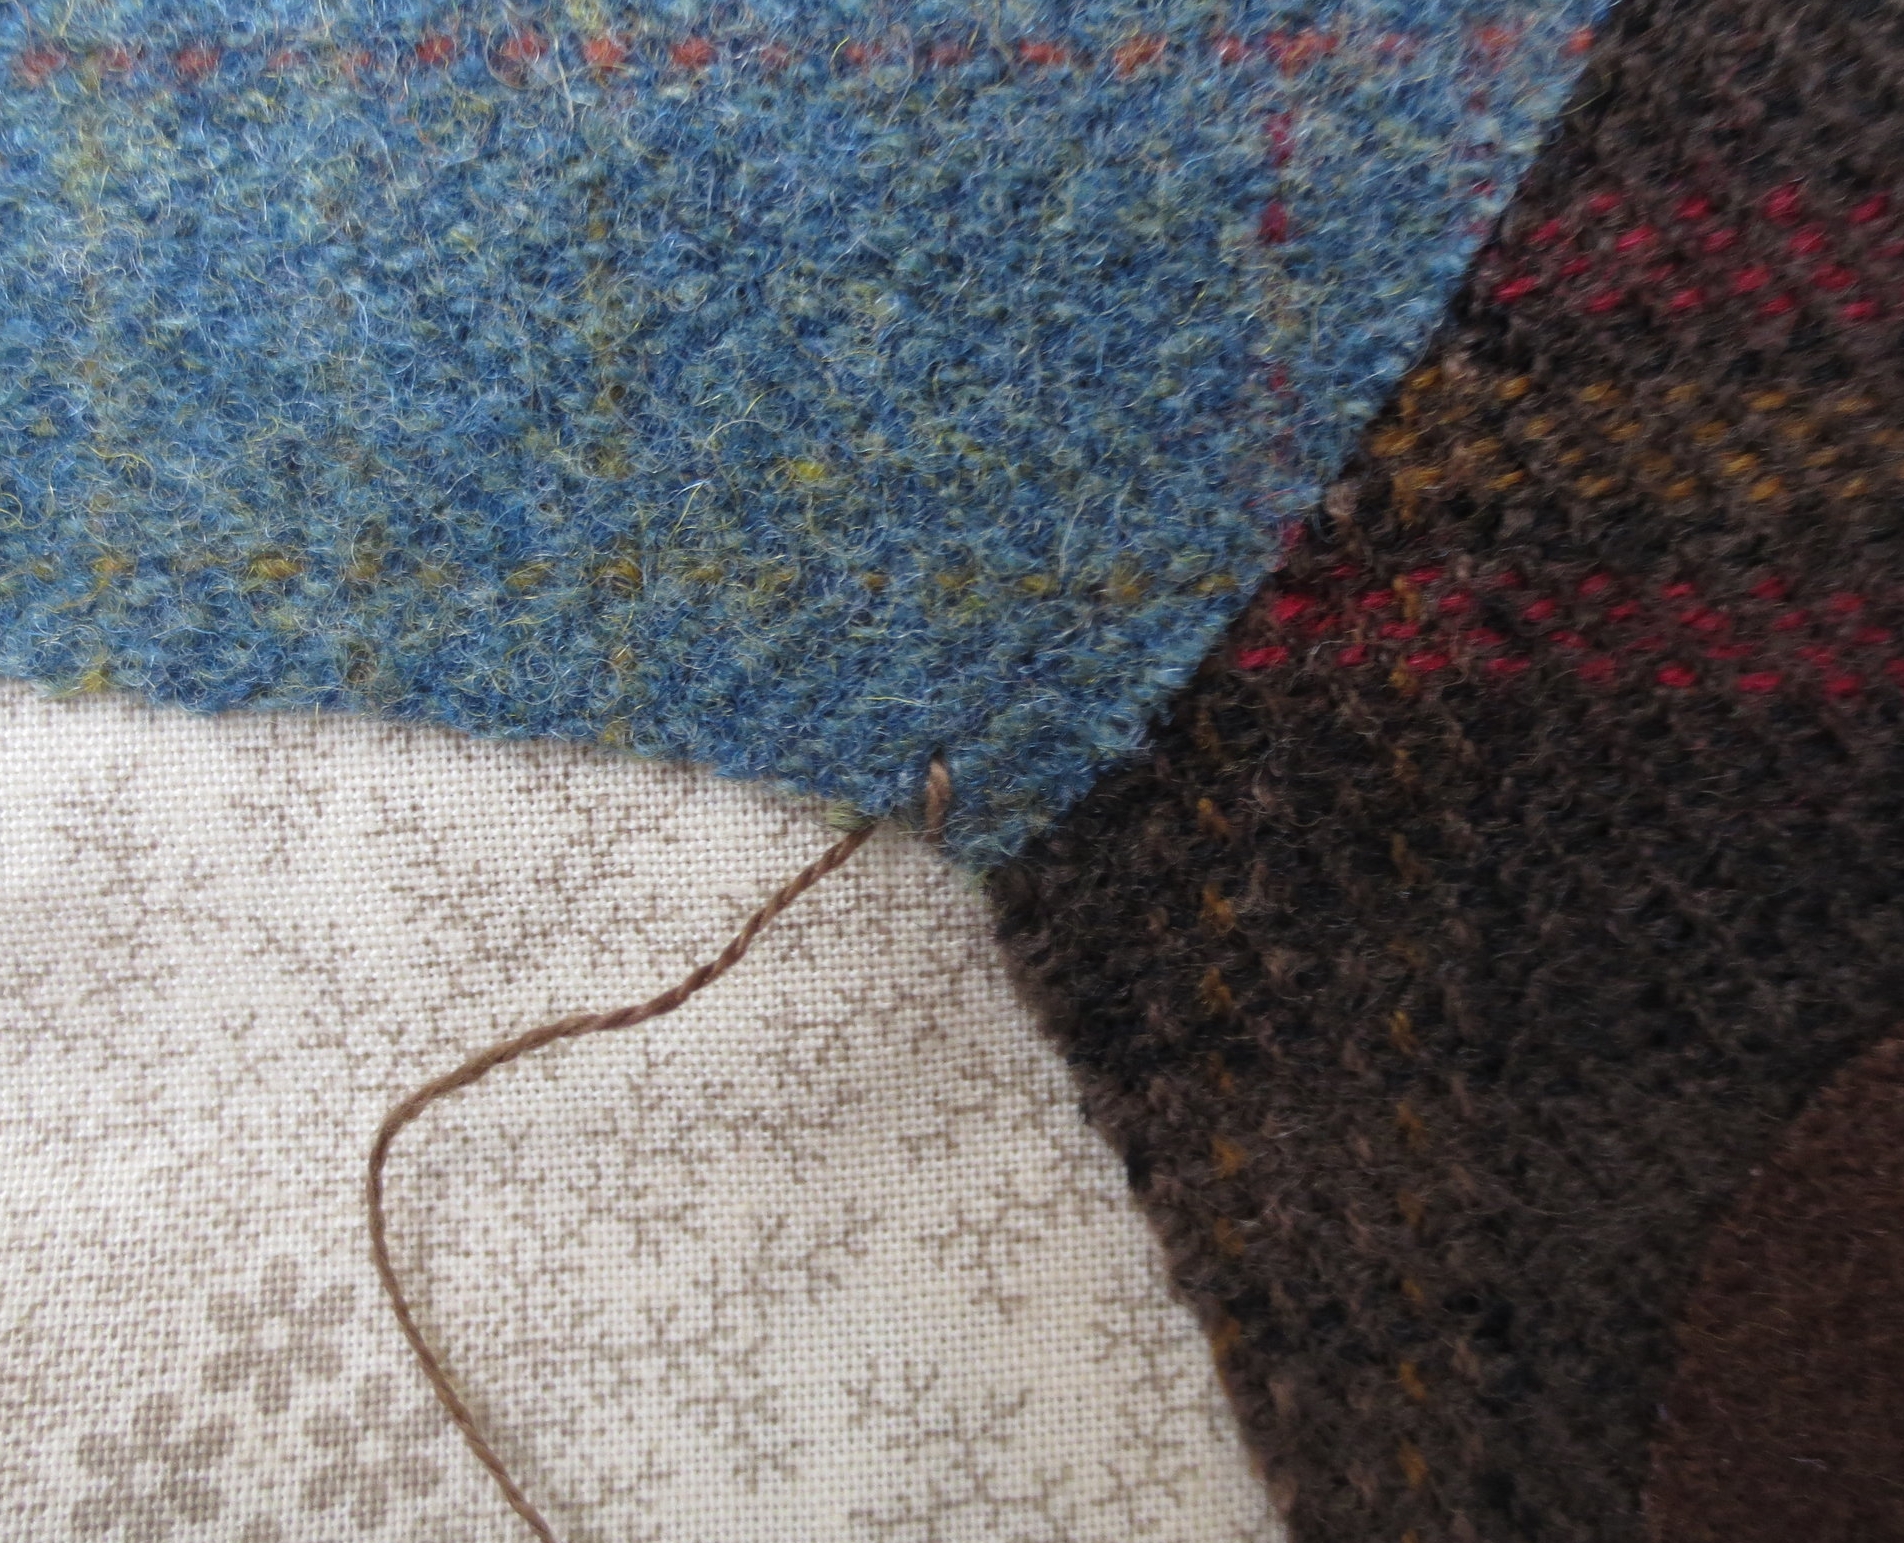
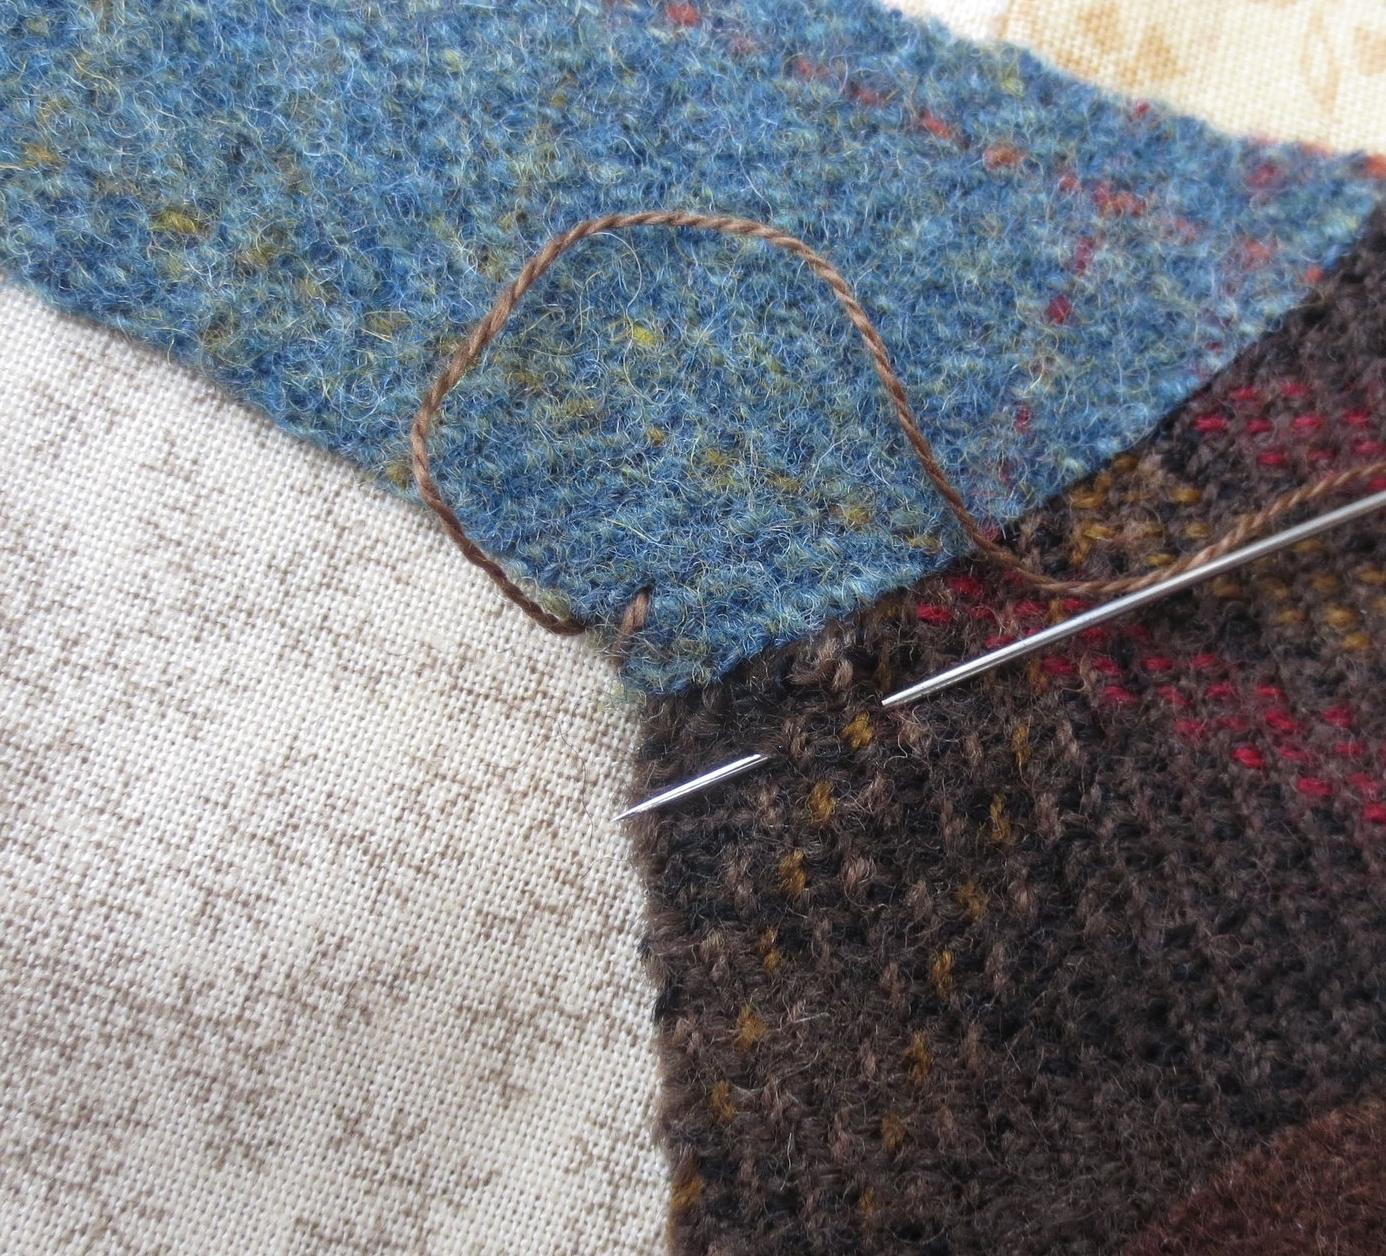
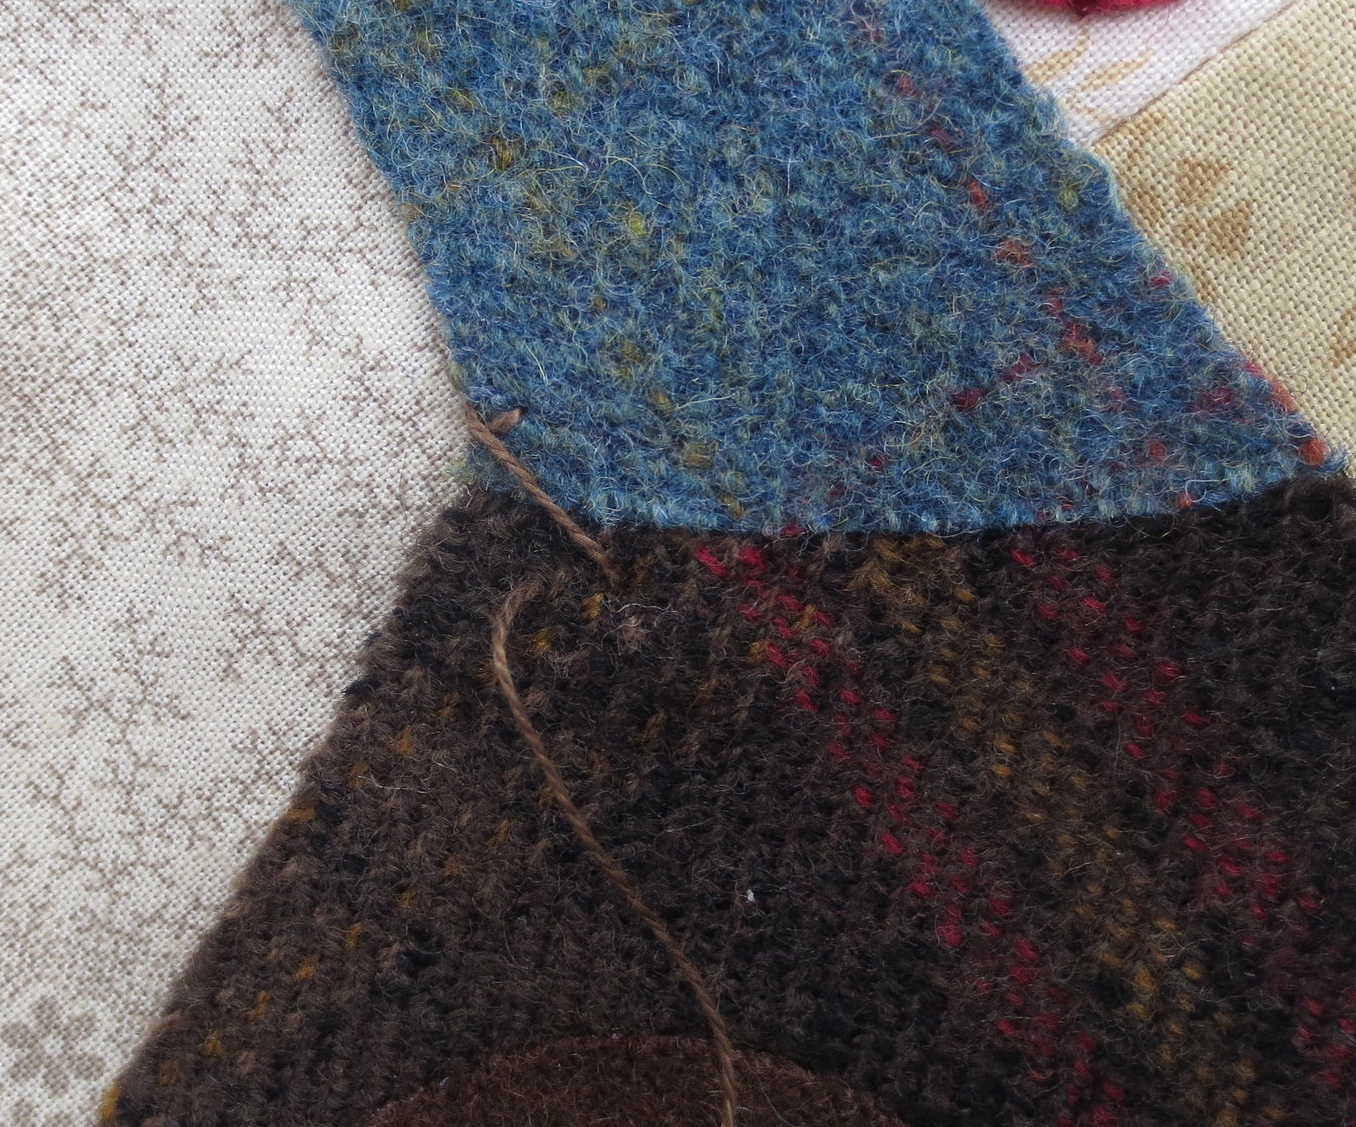
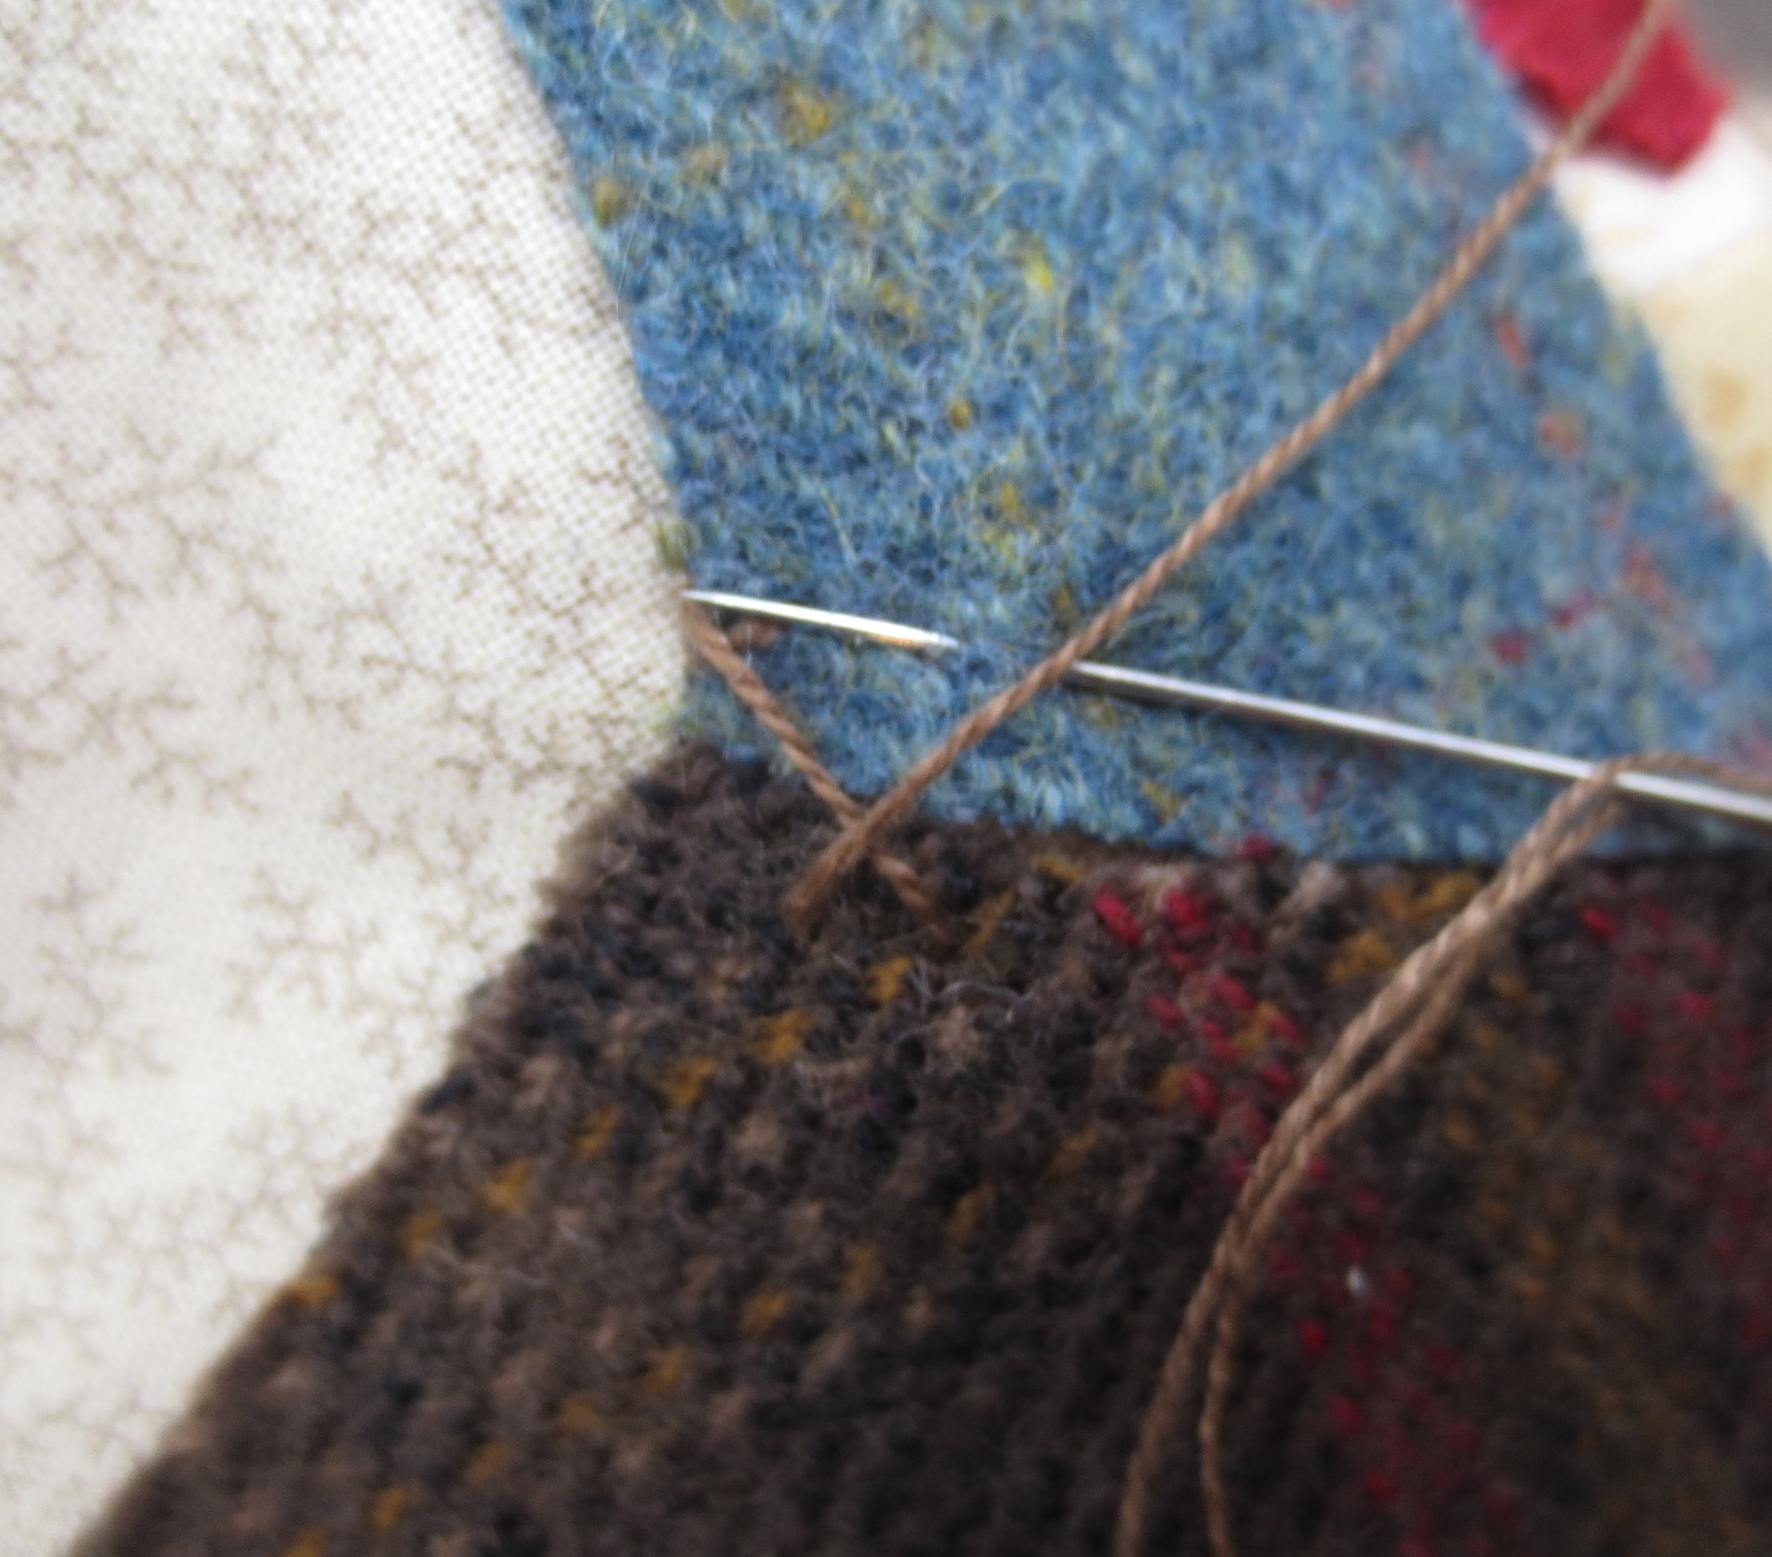
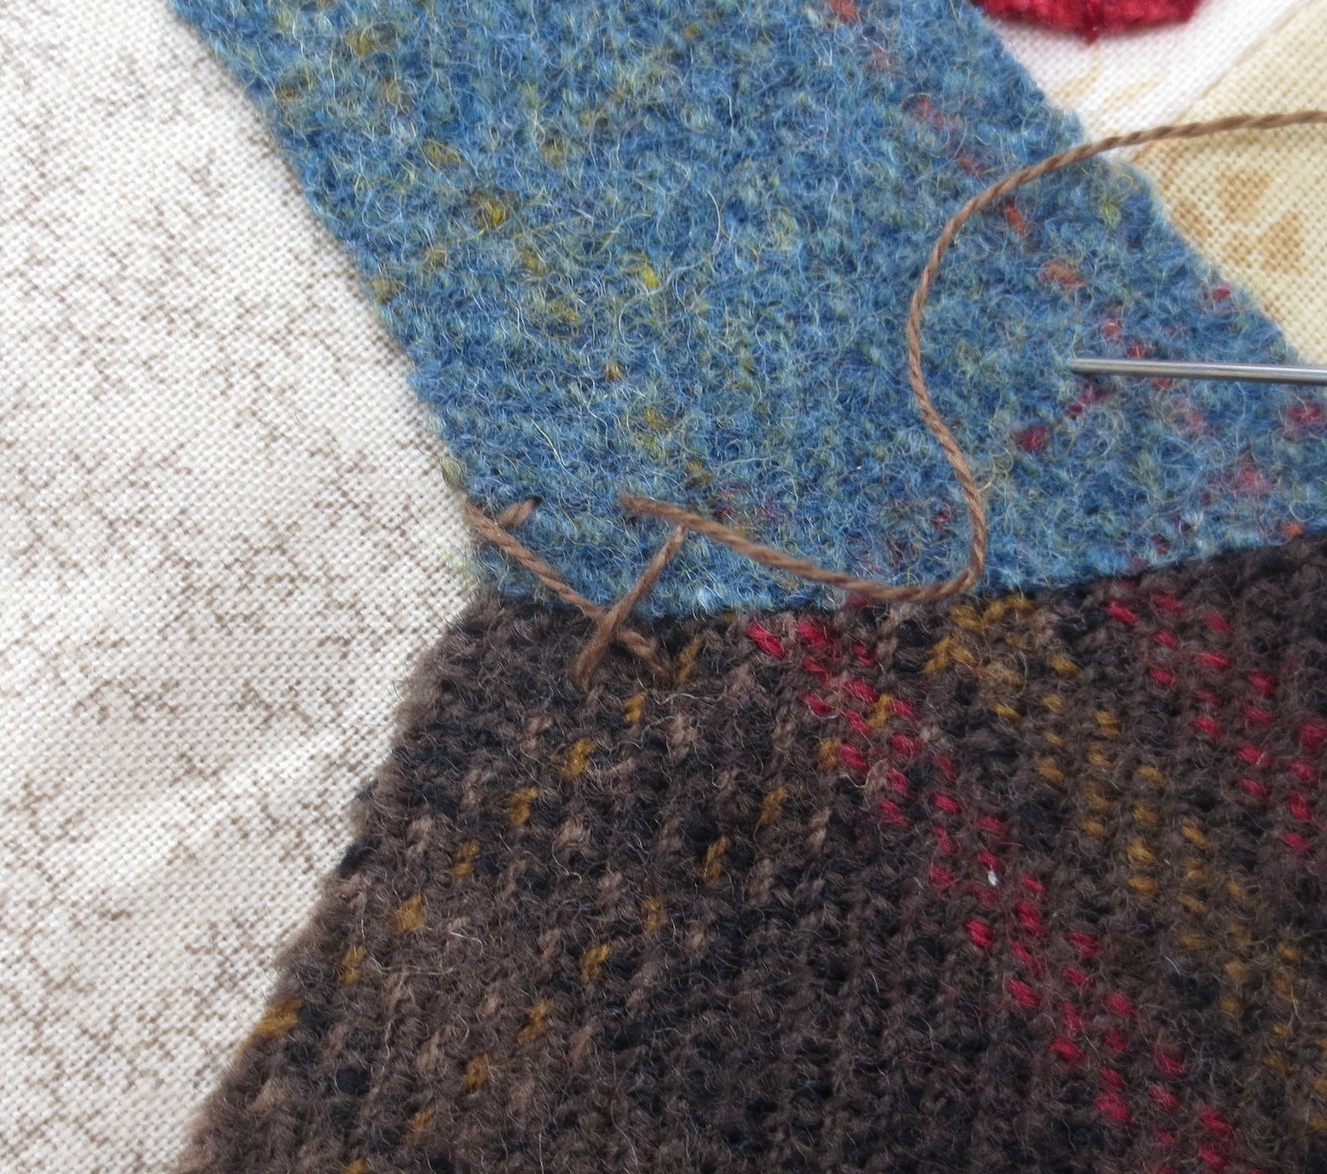
Begin with the area where the neck meets the body.
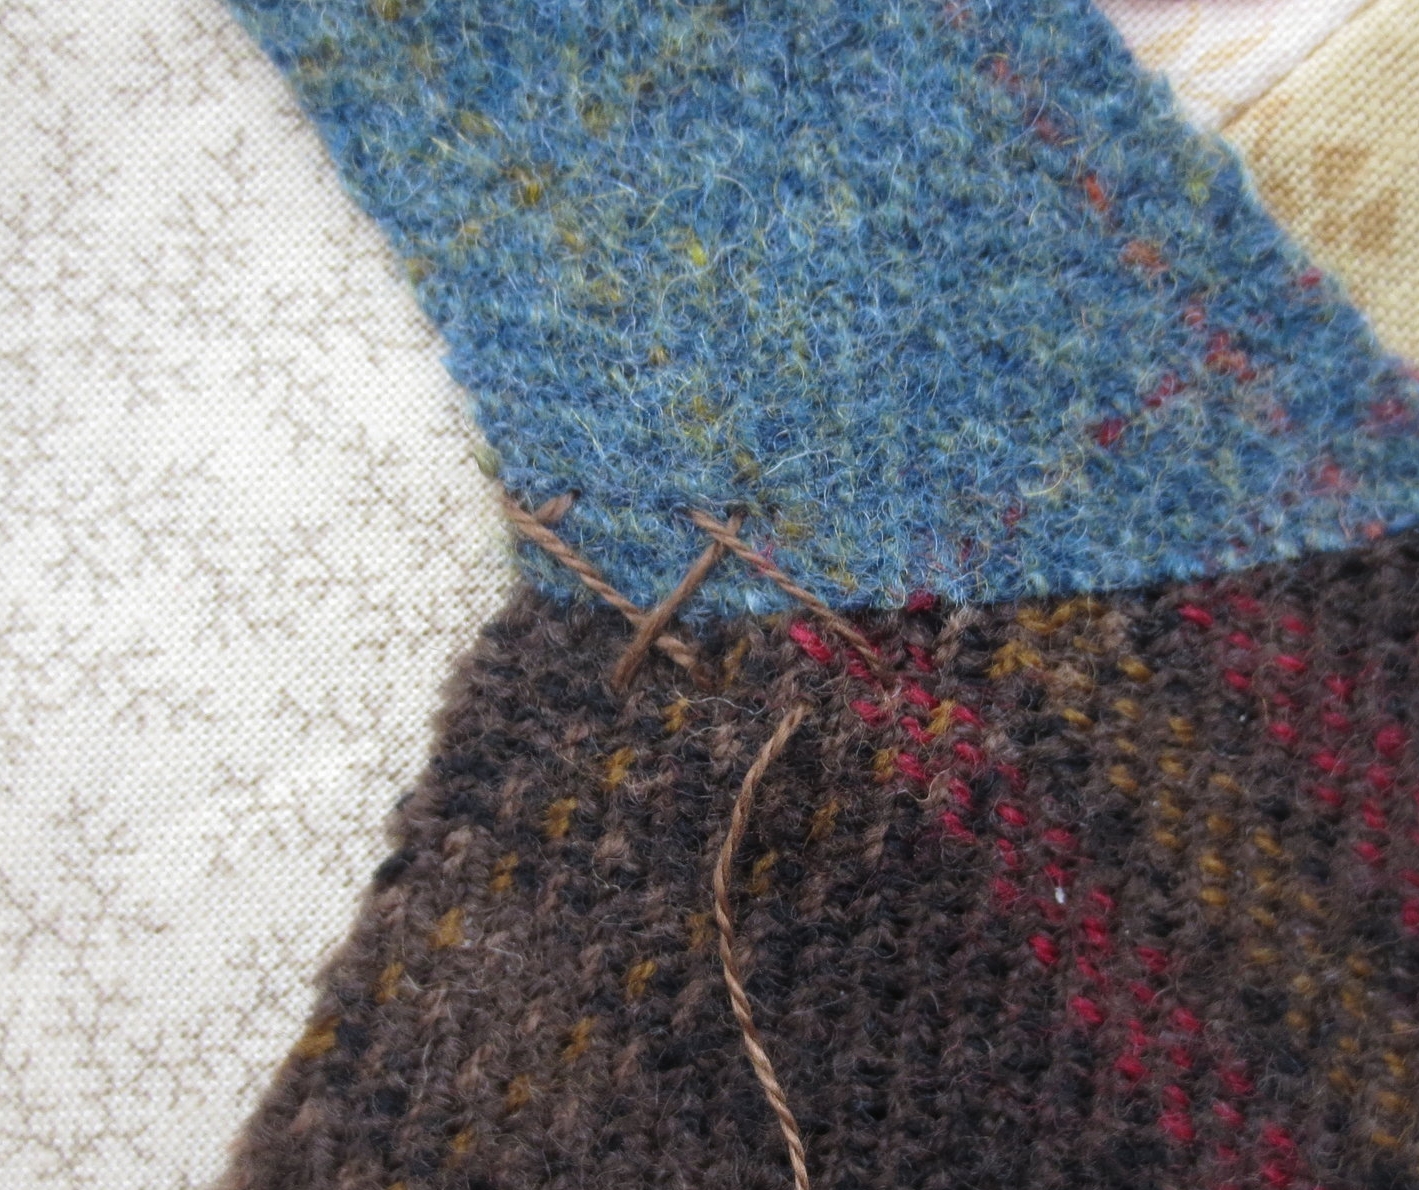
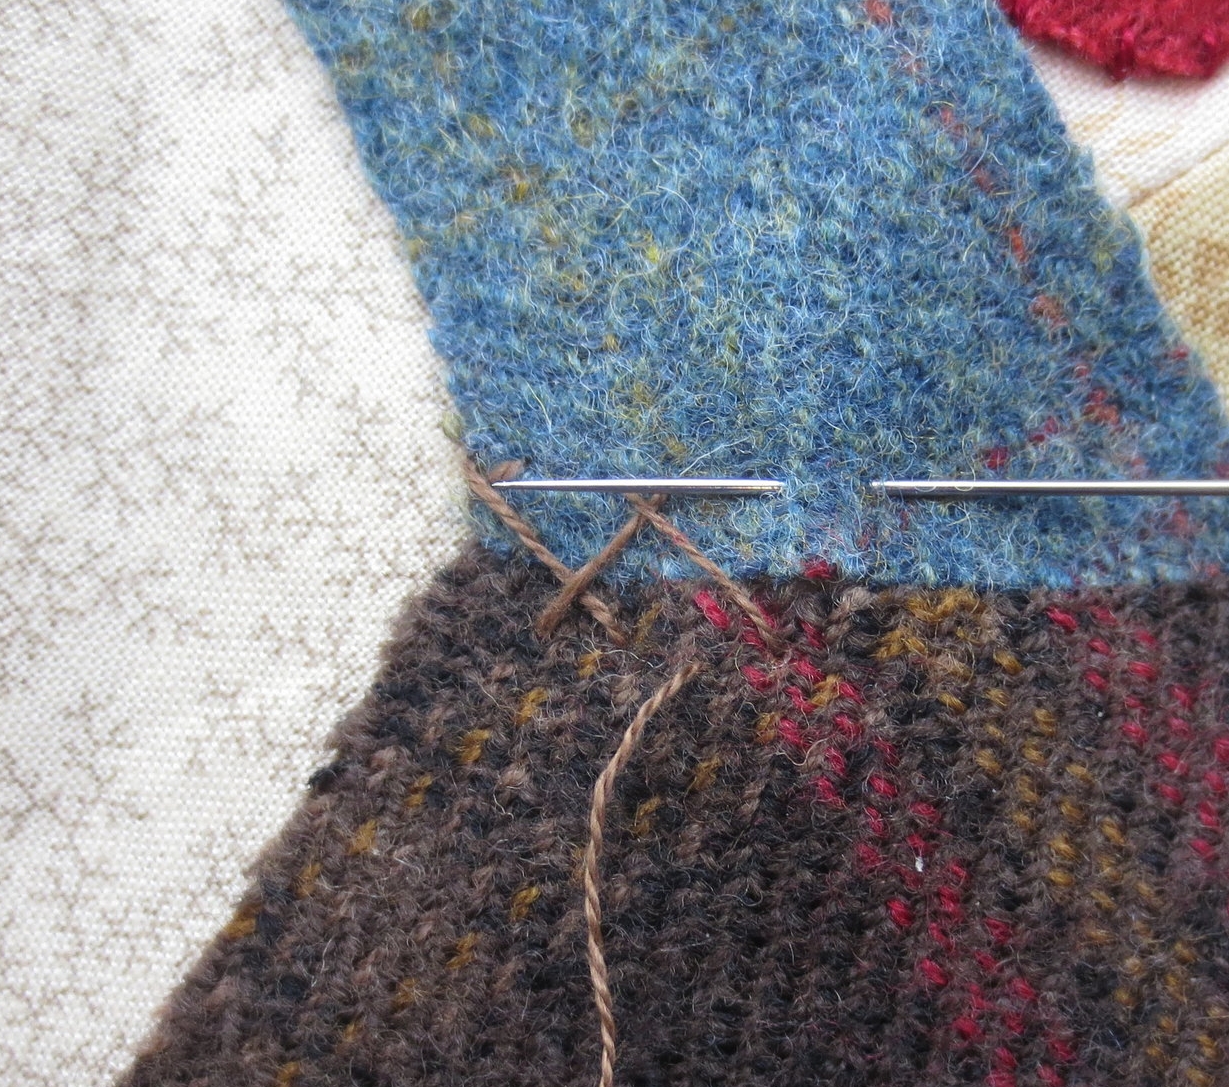
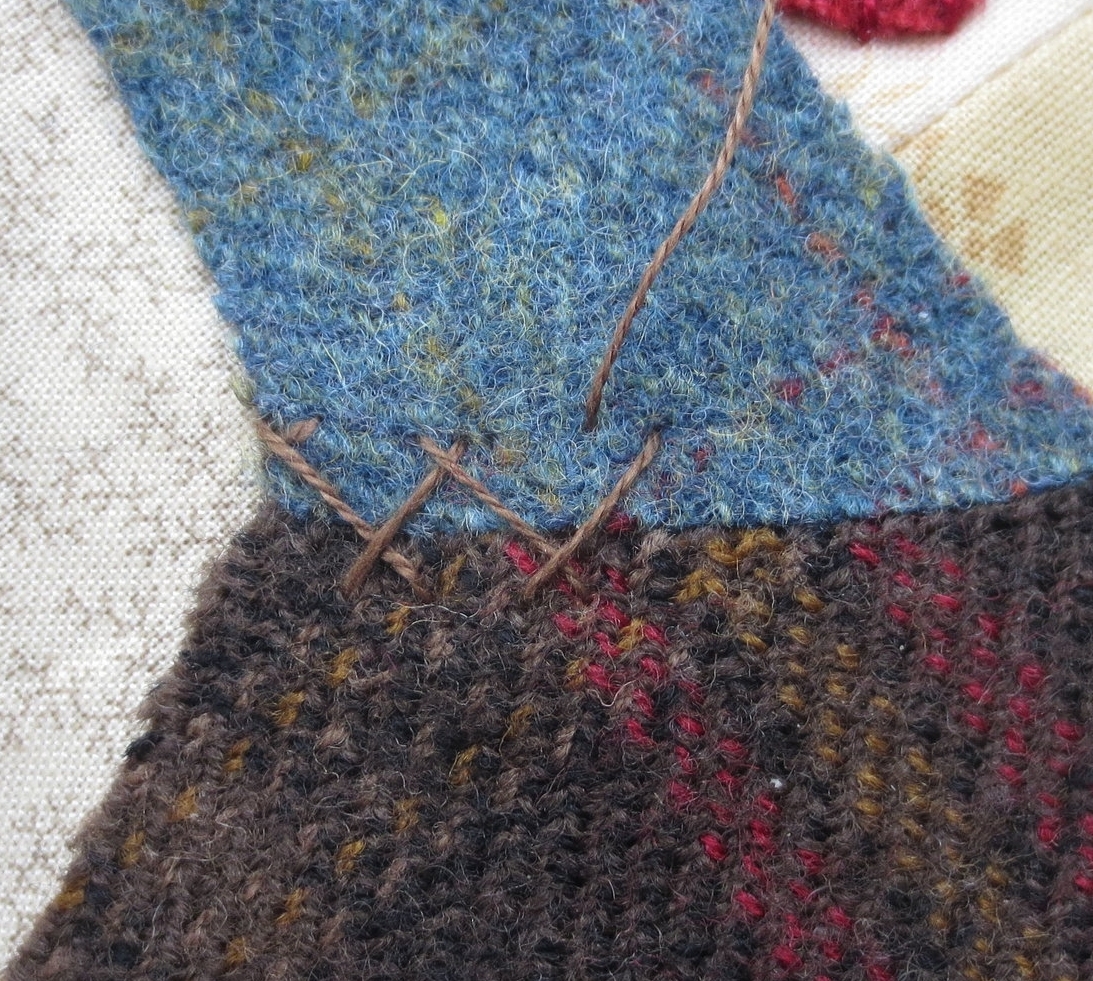
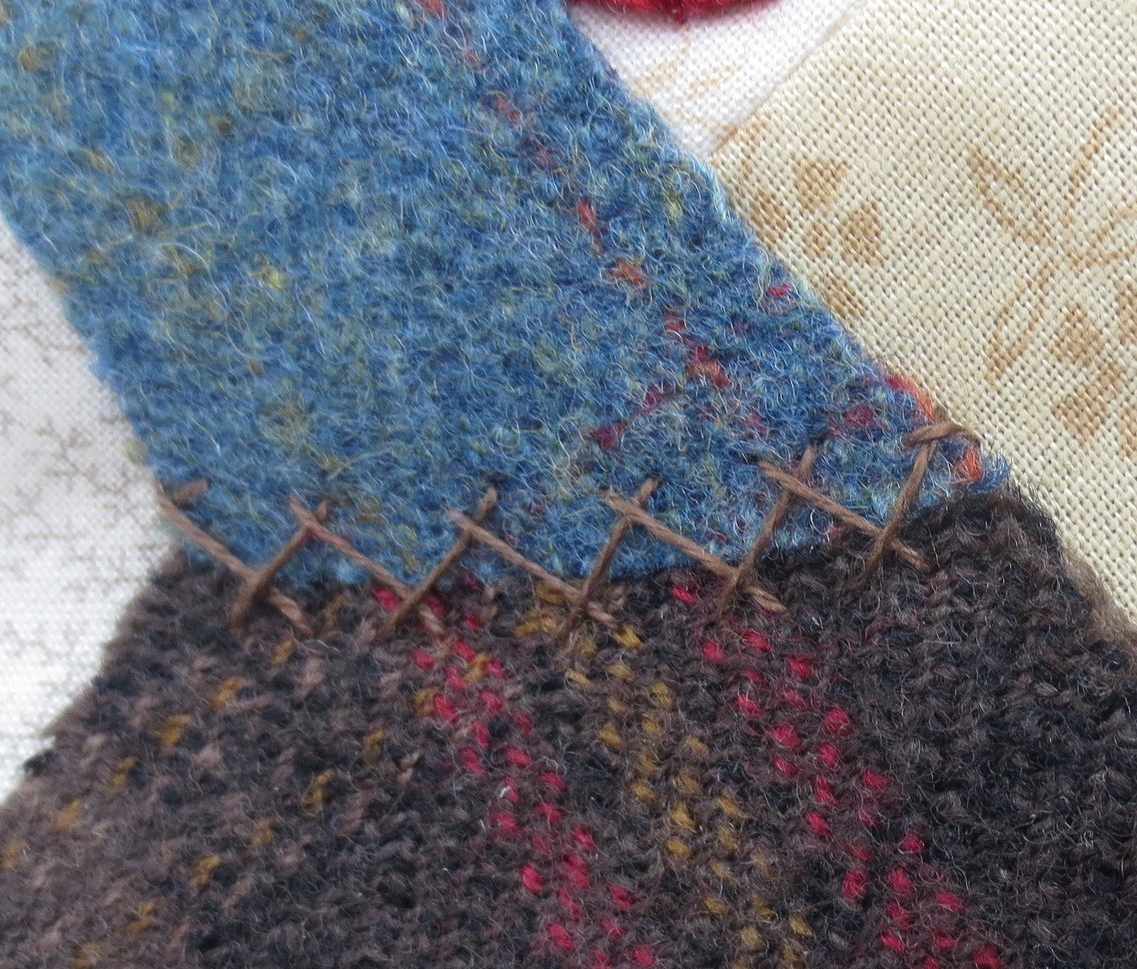
I used a Herribone stitch to secure the joints. A single strand of perle cotton, size 12, was used.
Repeat the stitch on the tail and body joint.
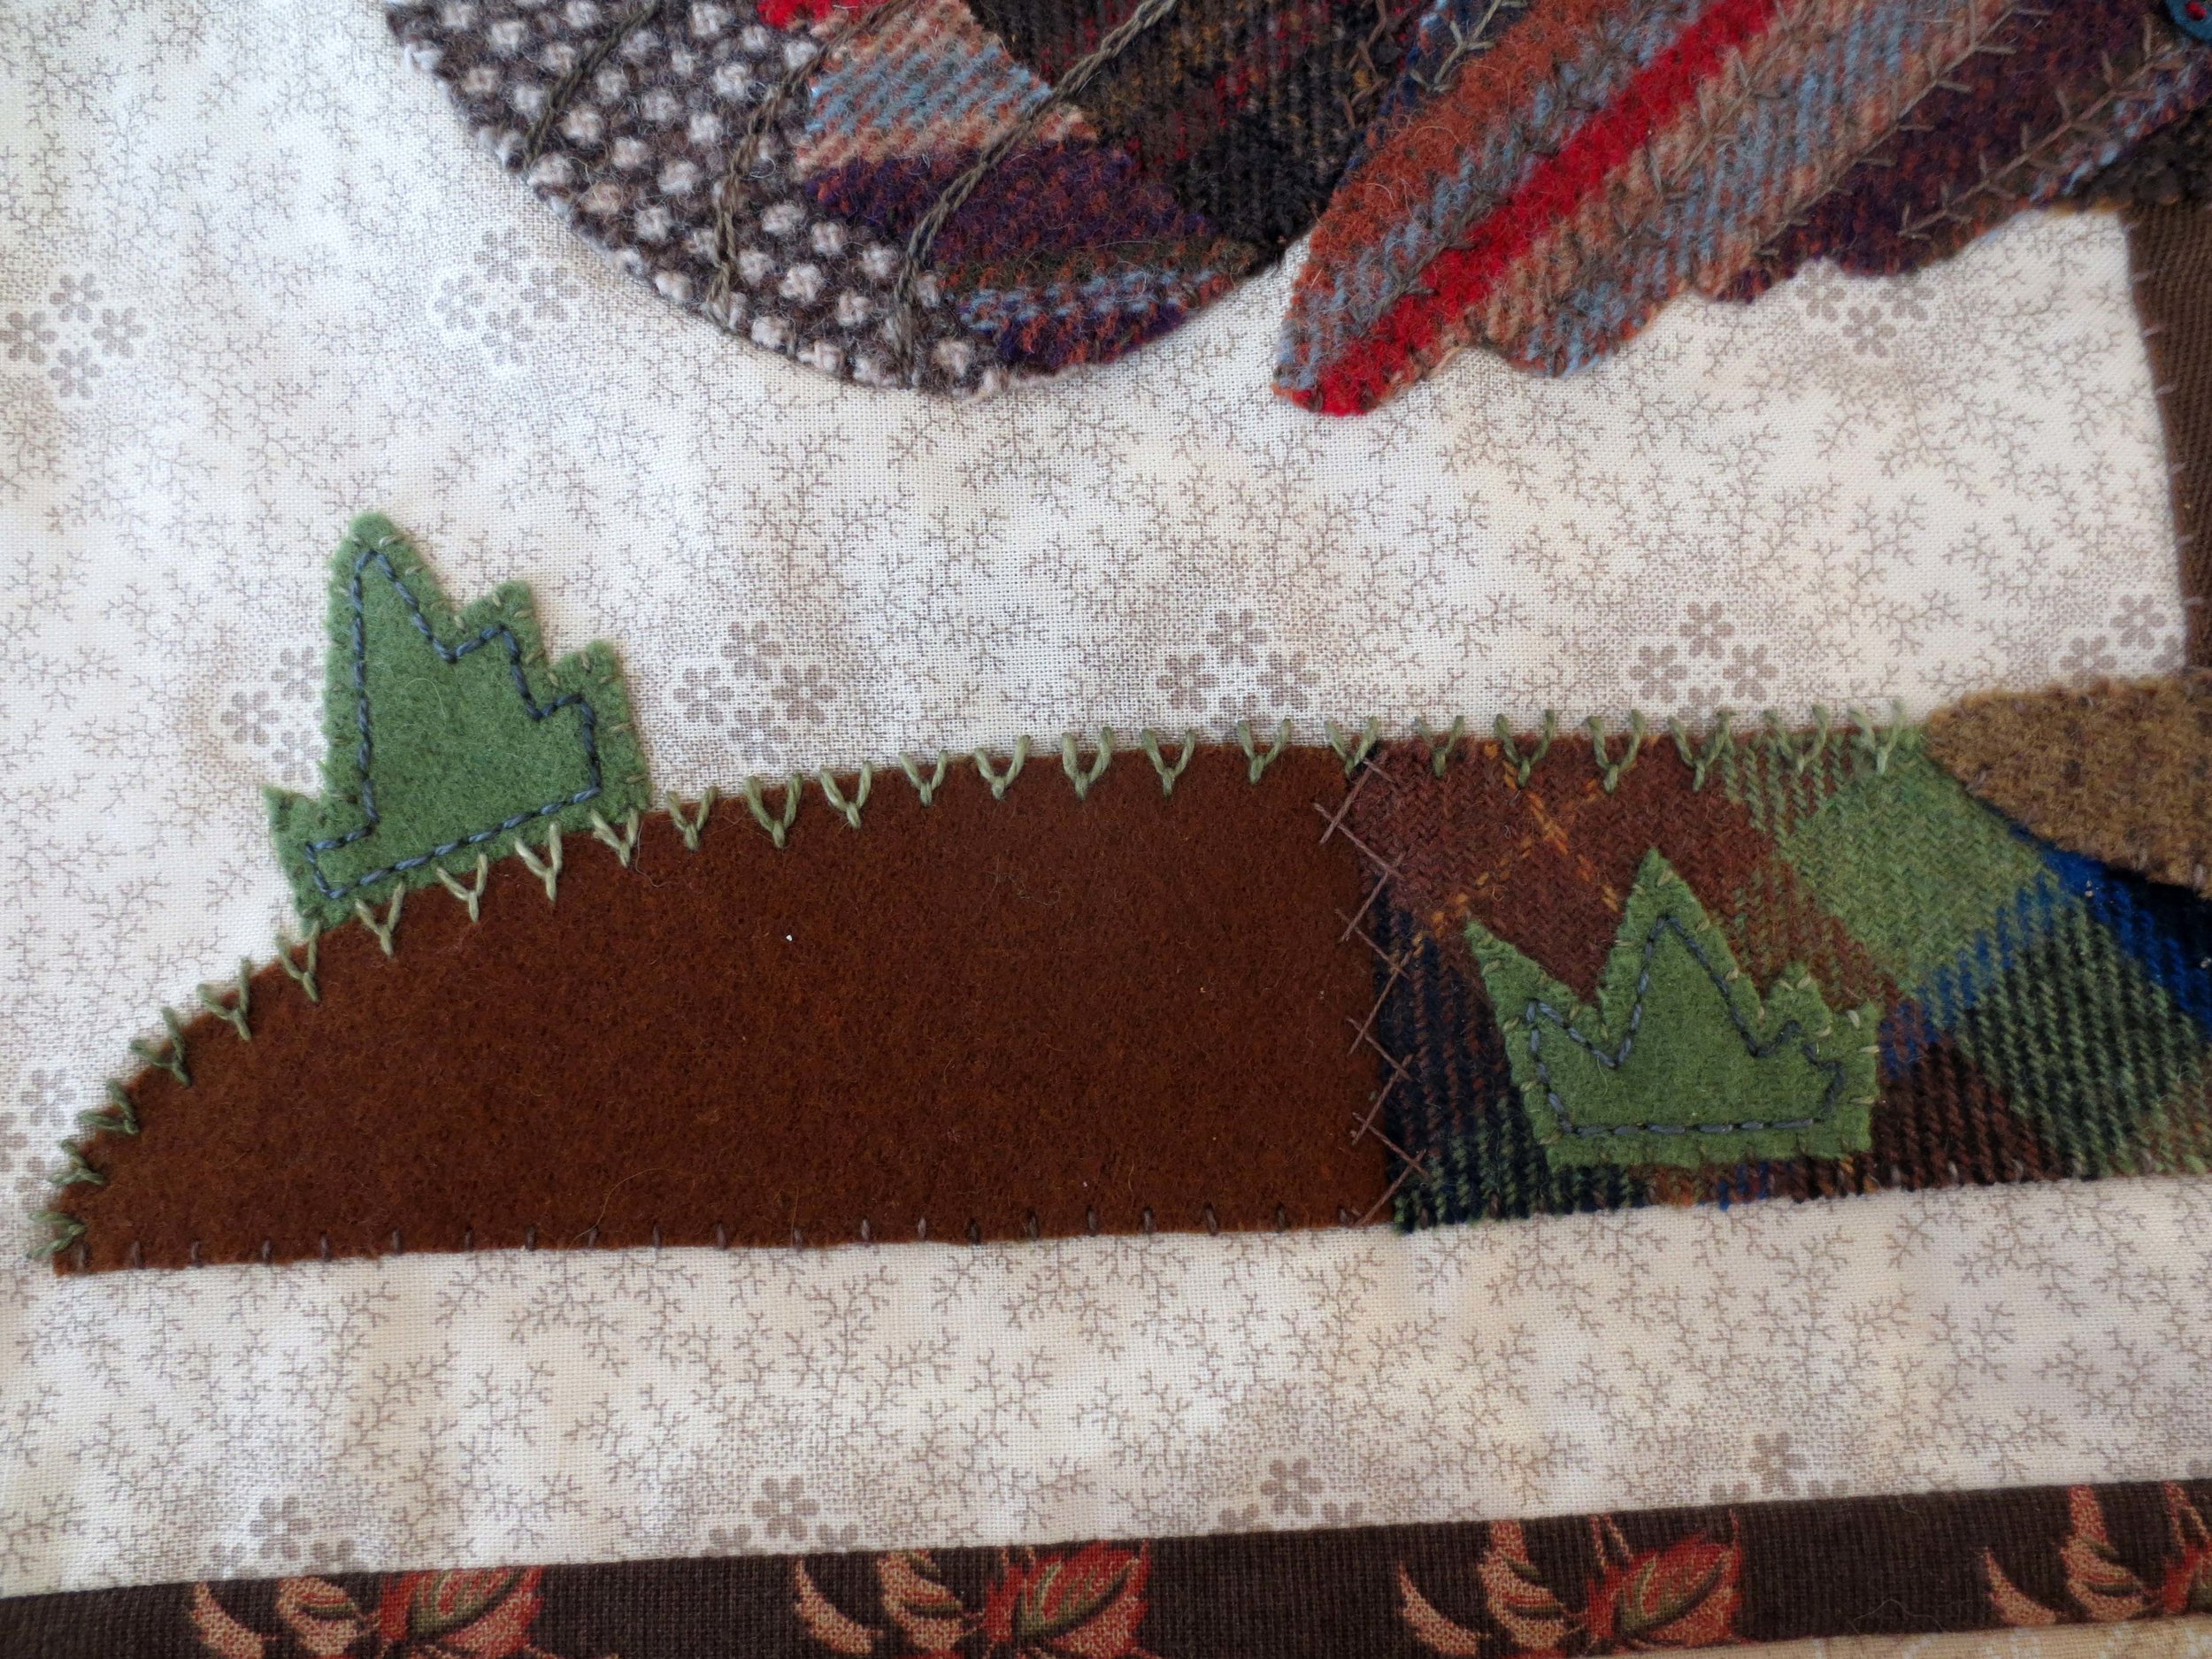
Then again on the ground joint.
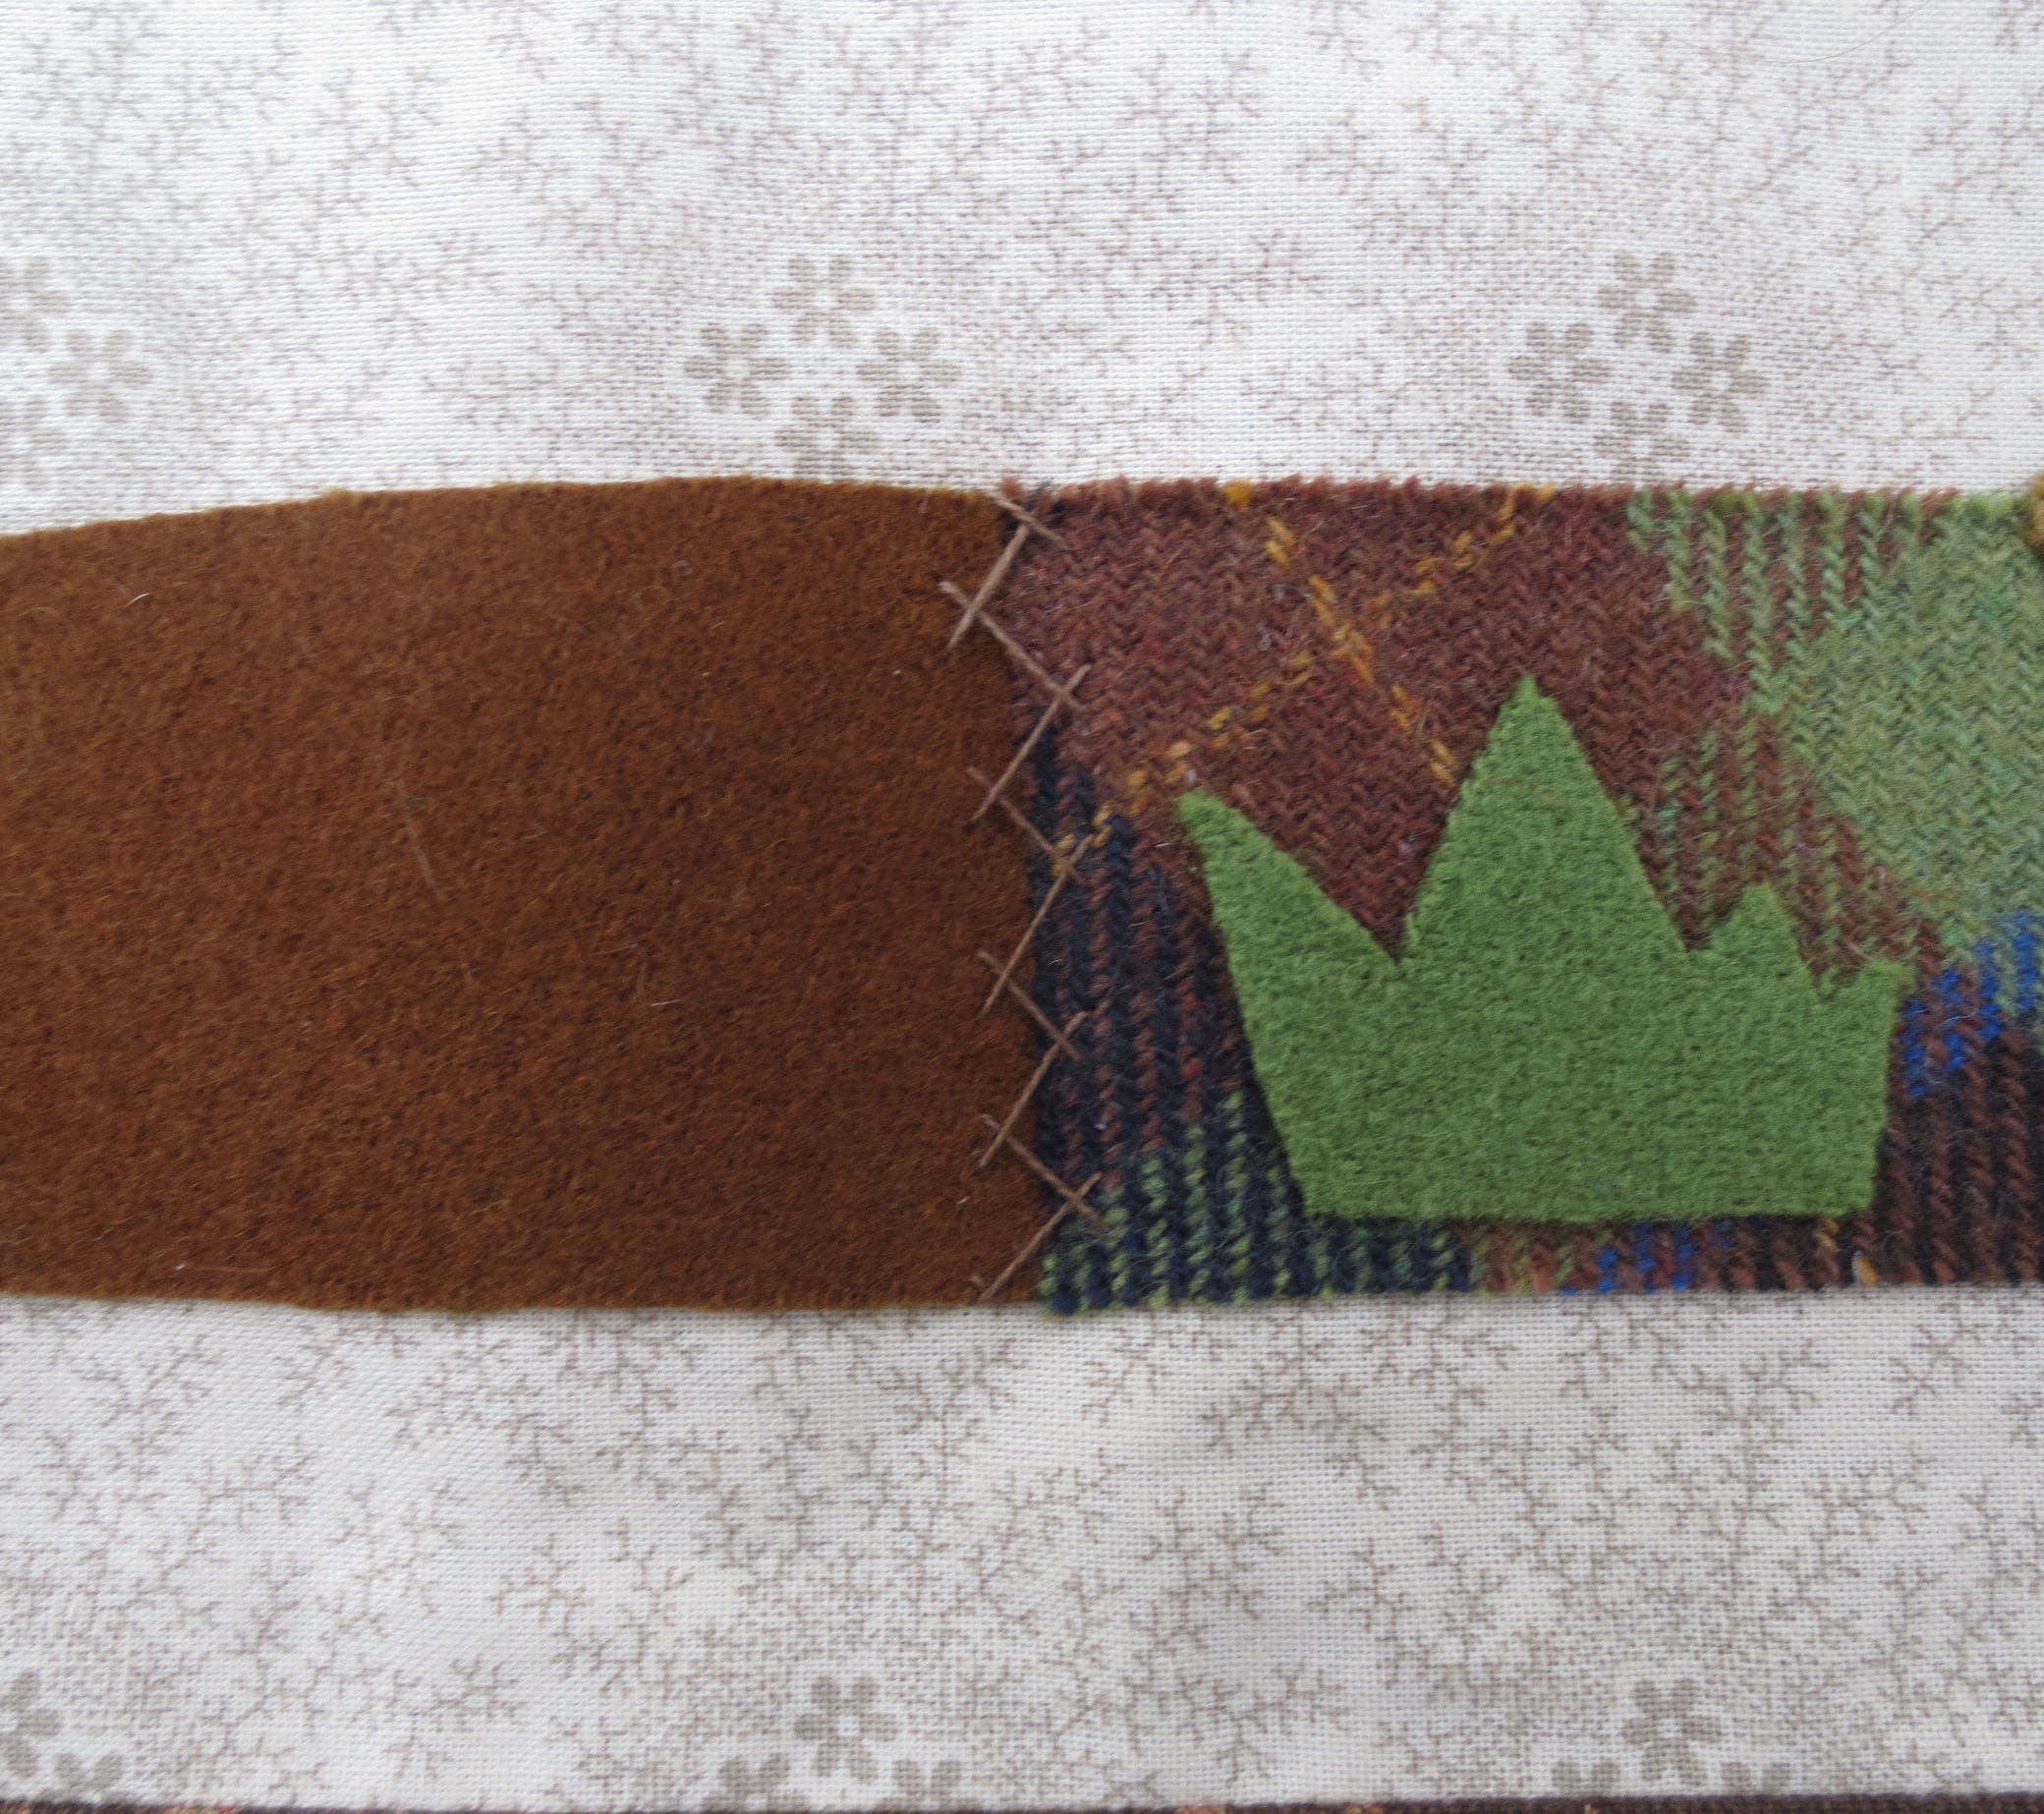
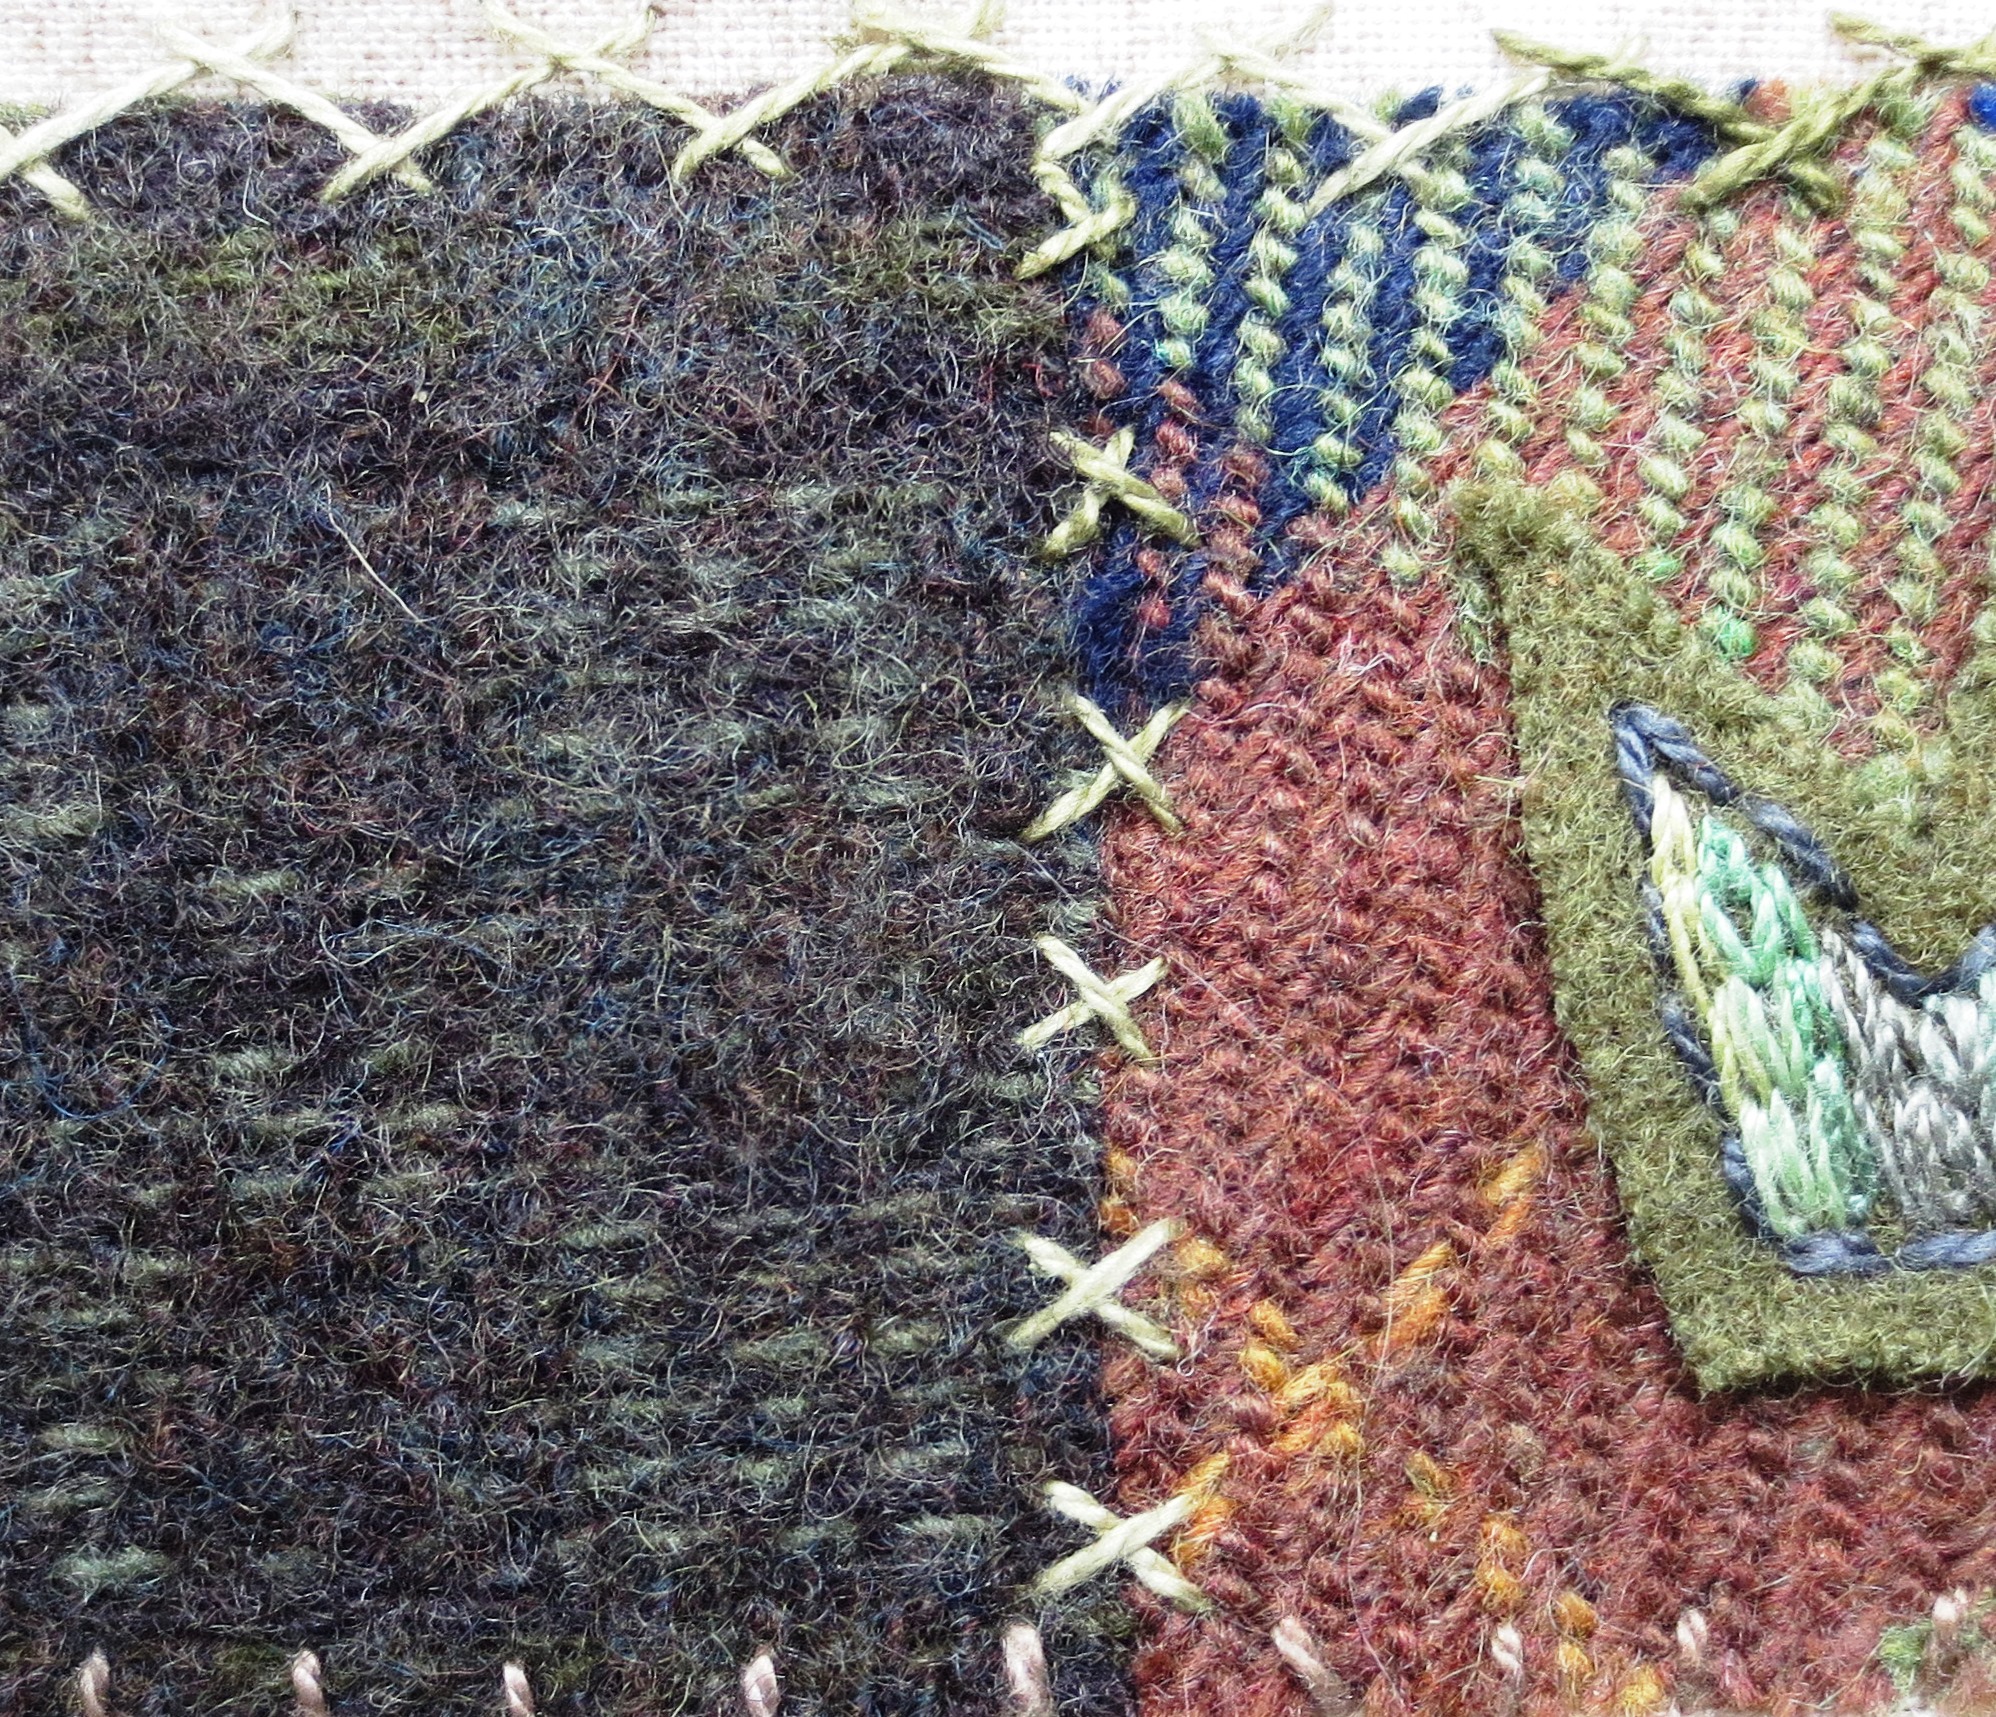
An alternative to the the herringbone stitch is a simple cross stitch.
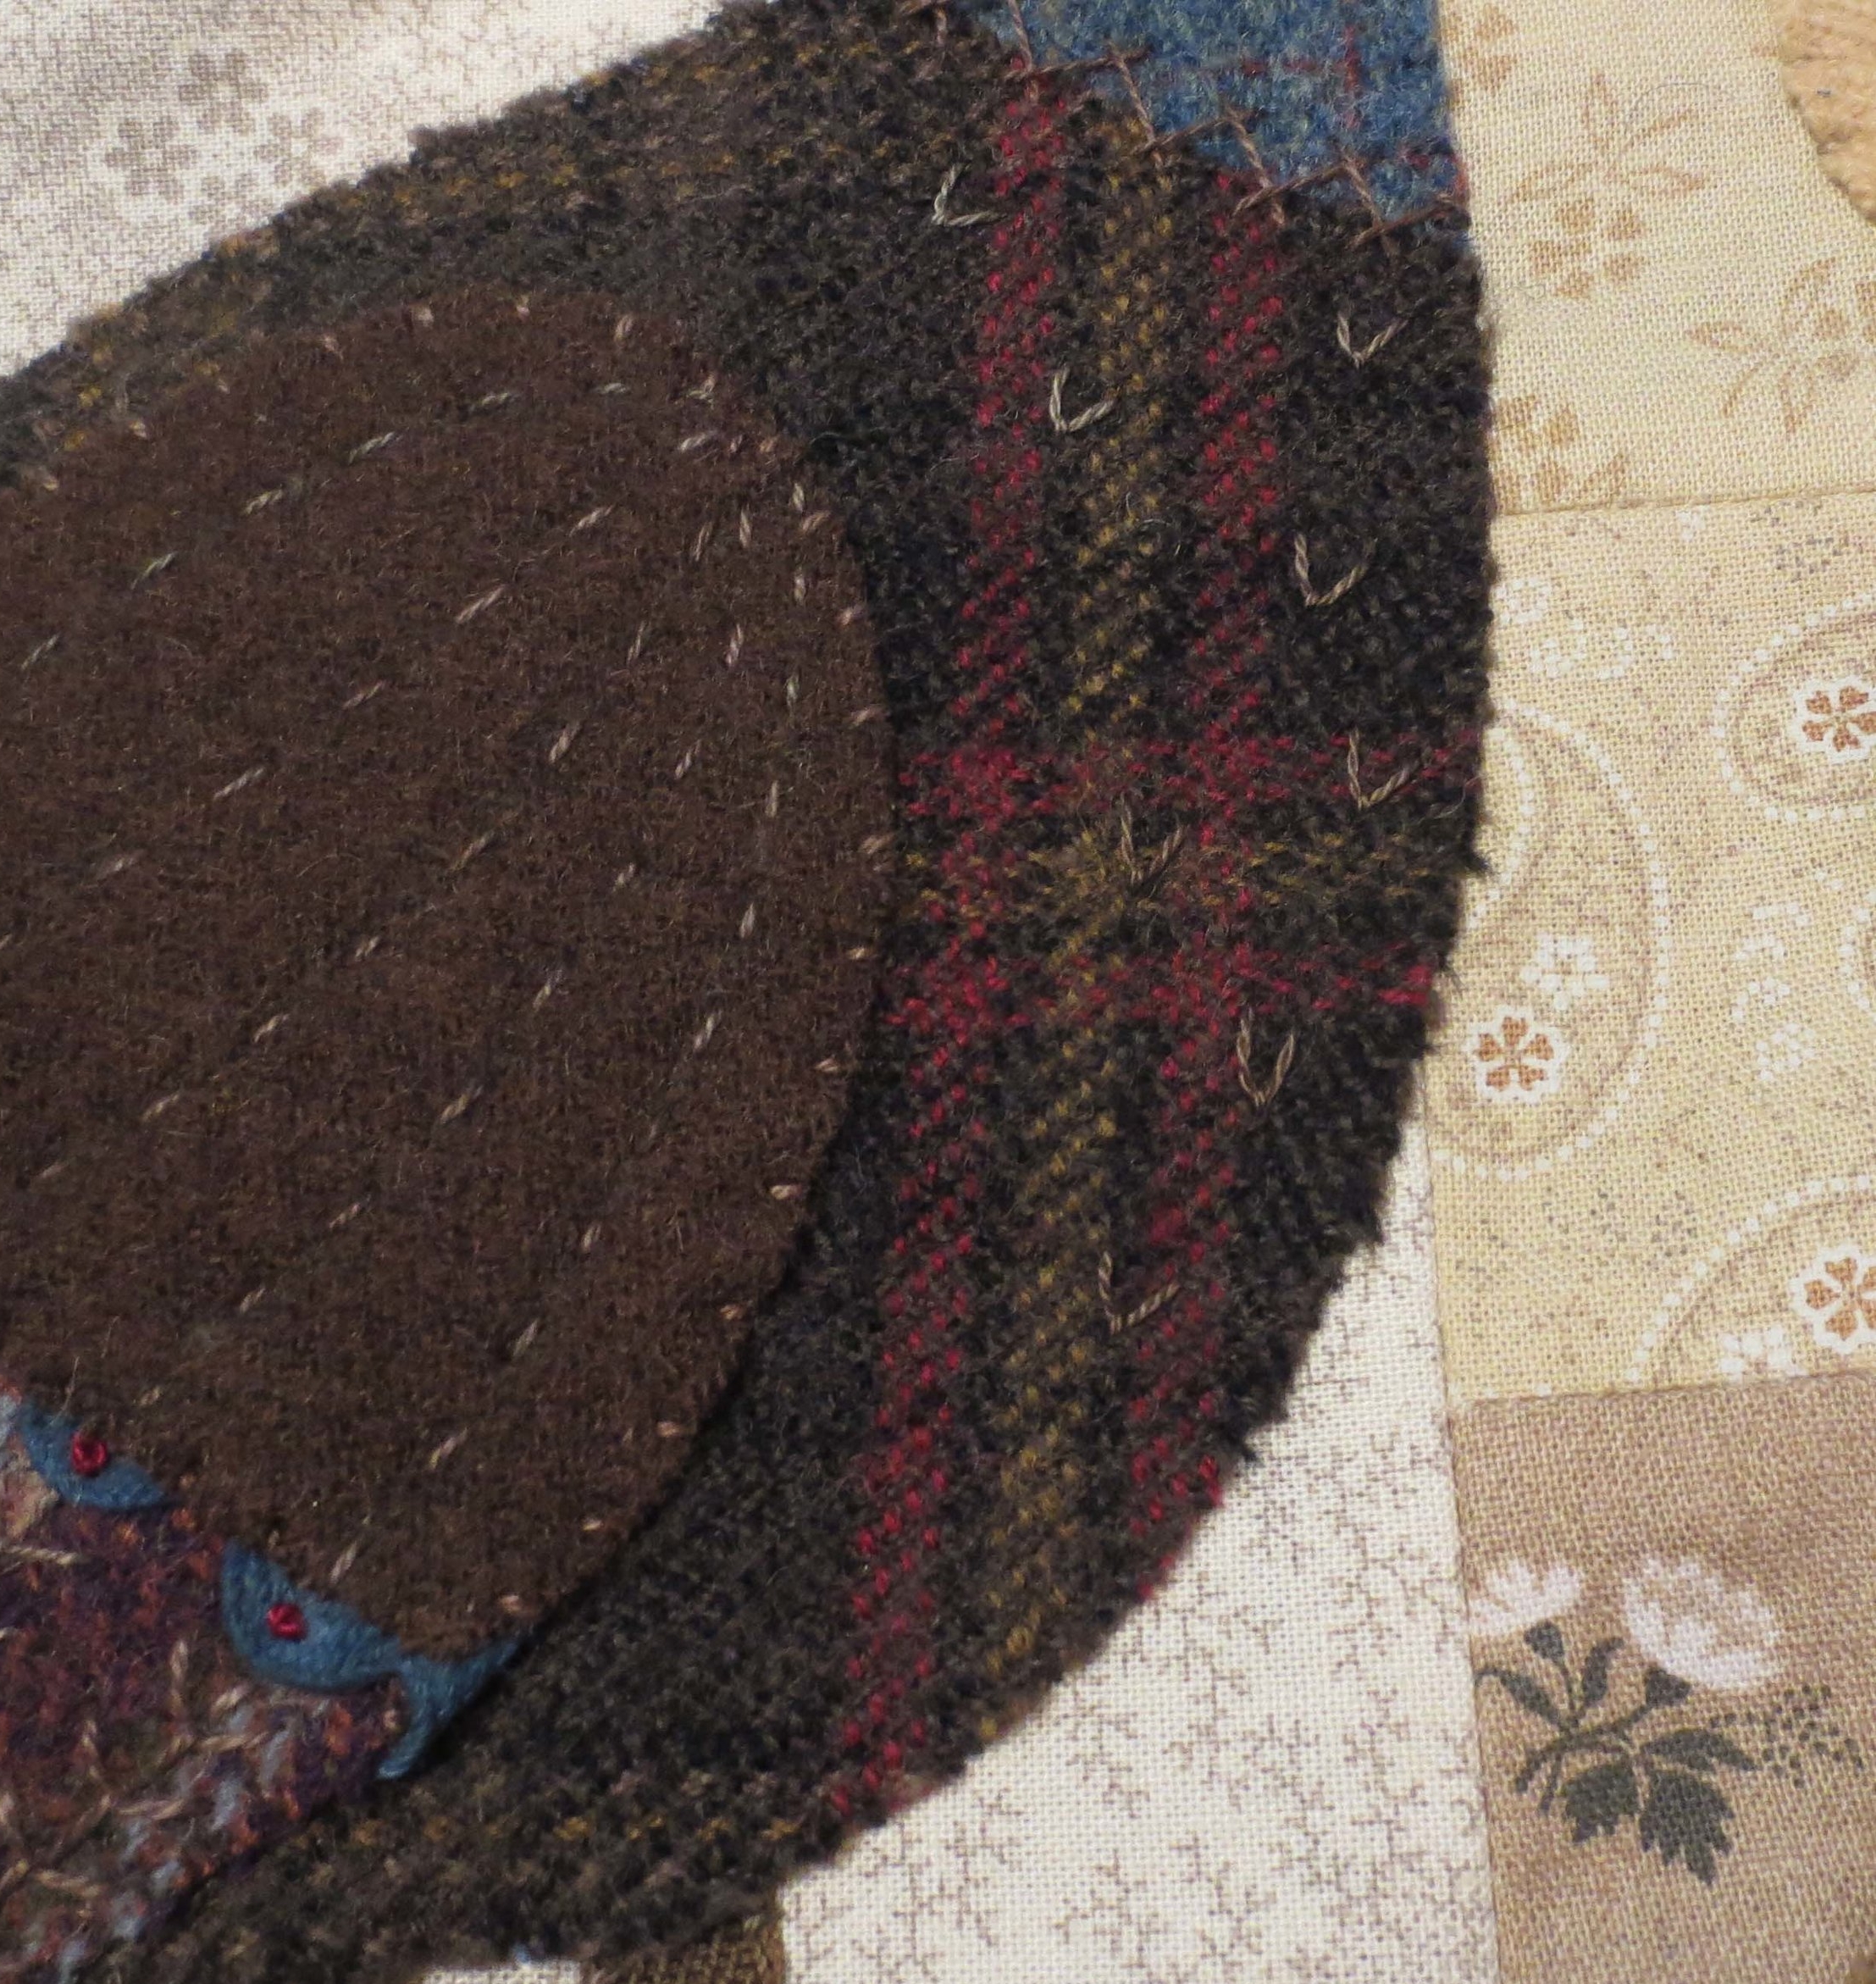
Whip stitch all the remaining pieces, except the top of the ground. Begin with the smallest piece first: berries, delicata squash ribs and stem, wattle, letters, grass, leaf, cornucopia ruffle, turkey legs, pumpkin, butternut squash, turkey head and tail embellishment, turkey wing and wing cap, turkey body and tail, and finally the bottom of the ground.
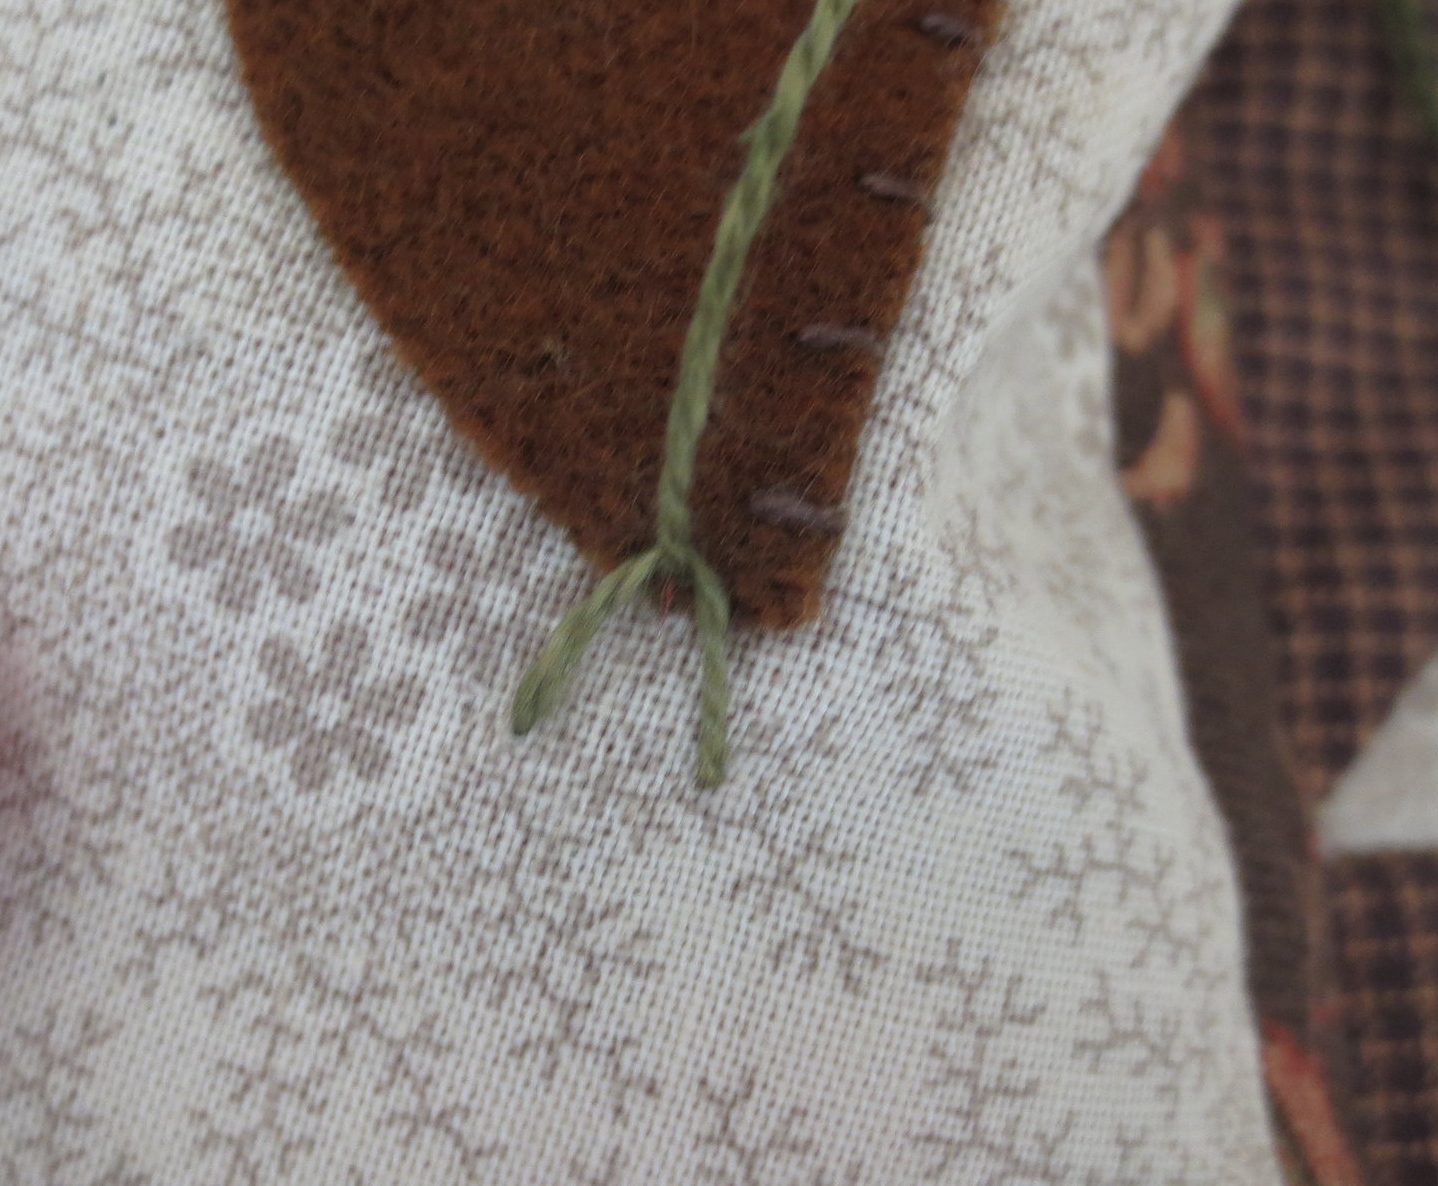
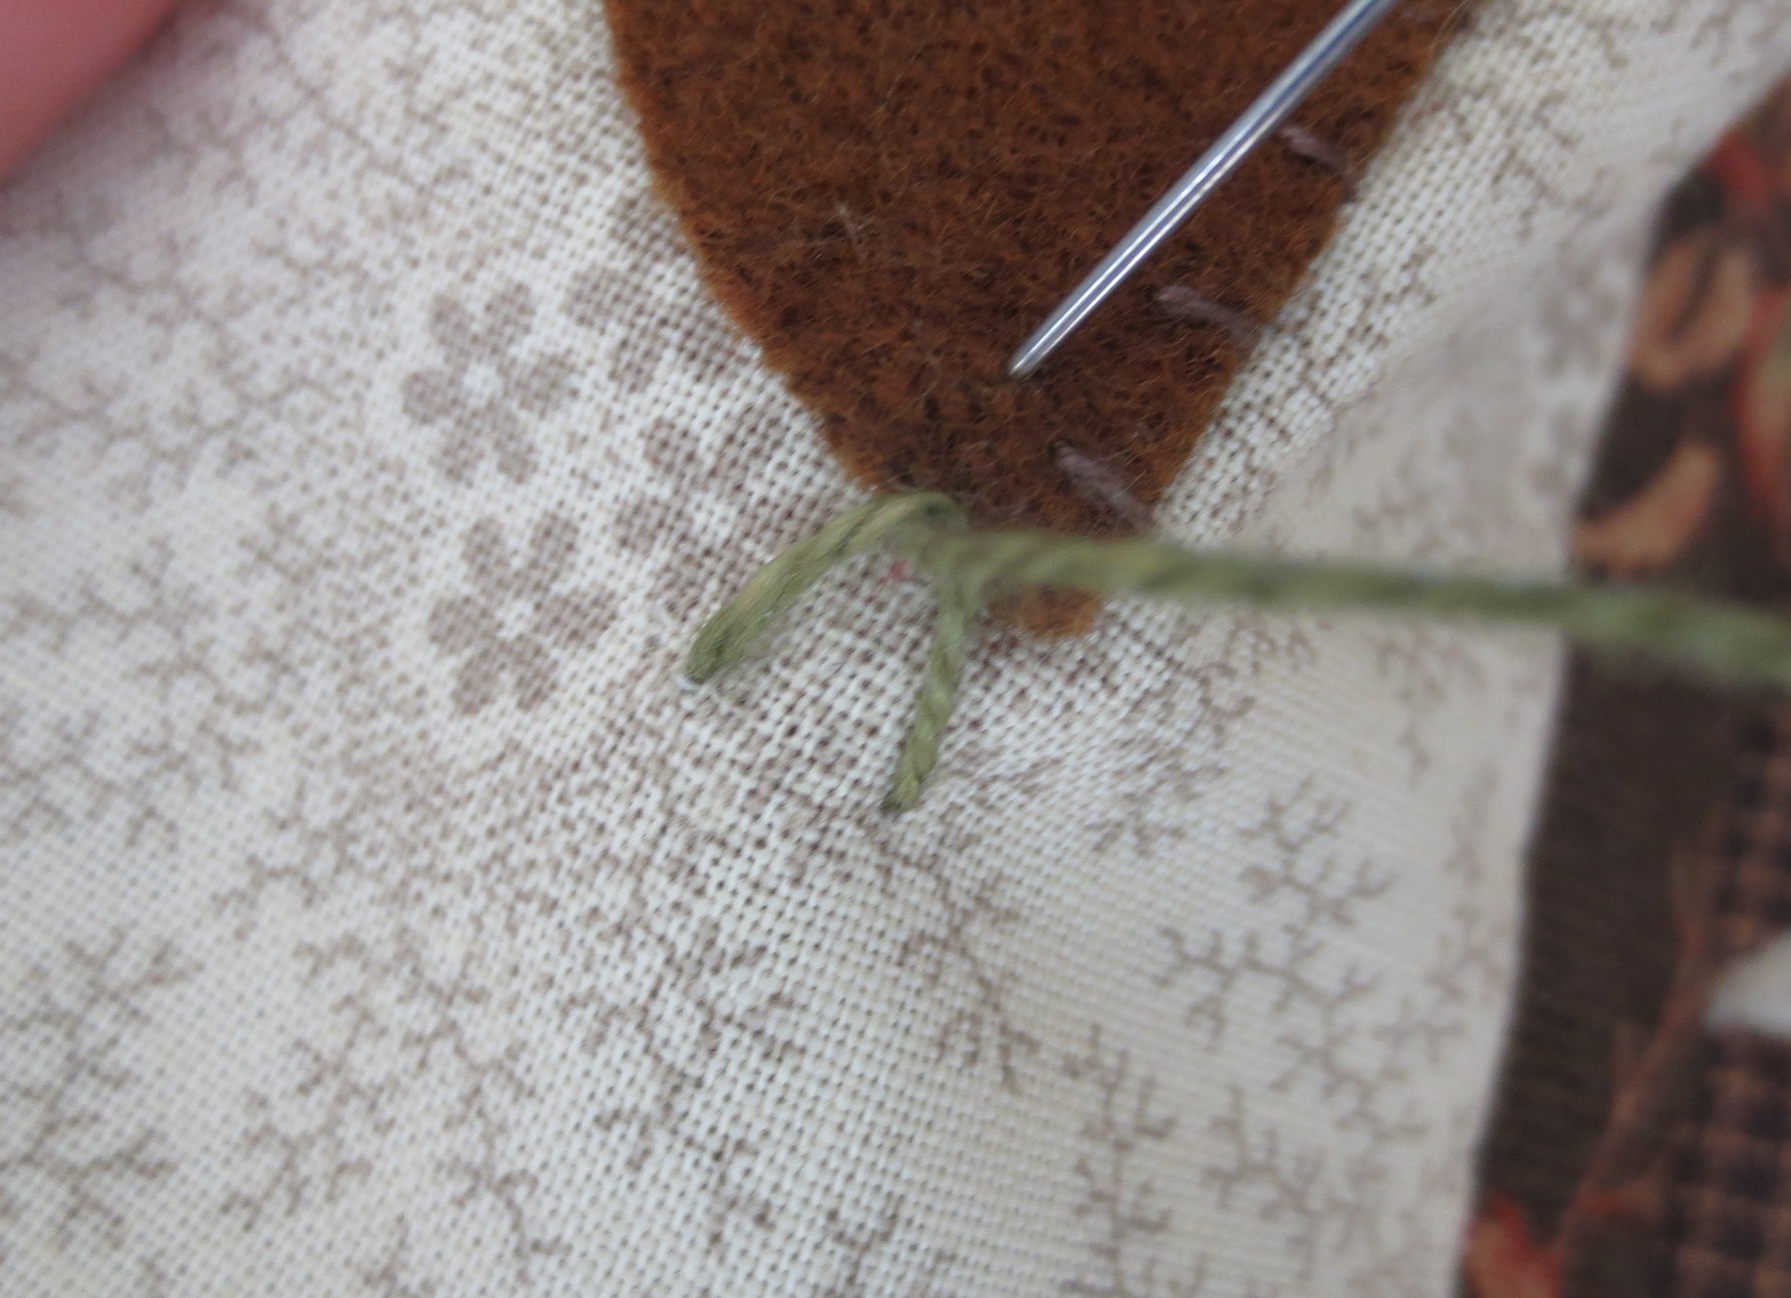
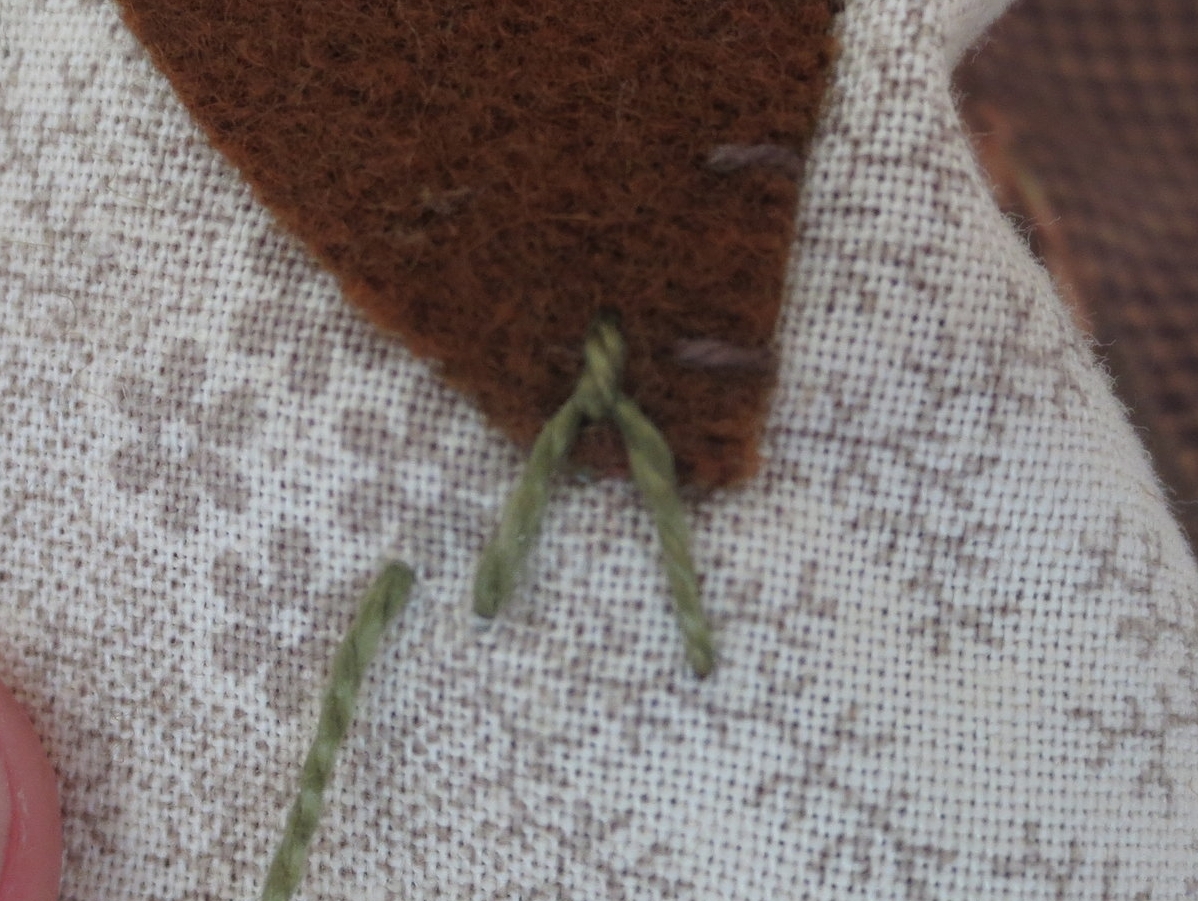
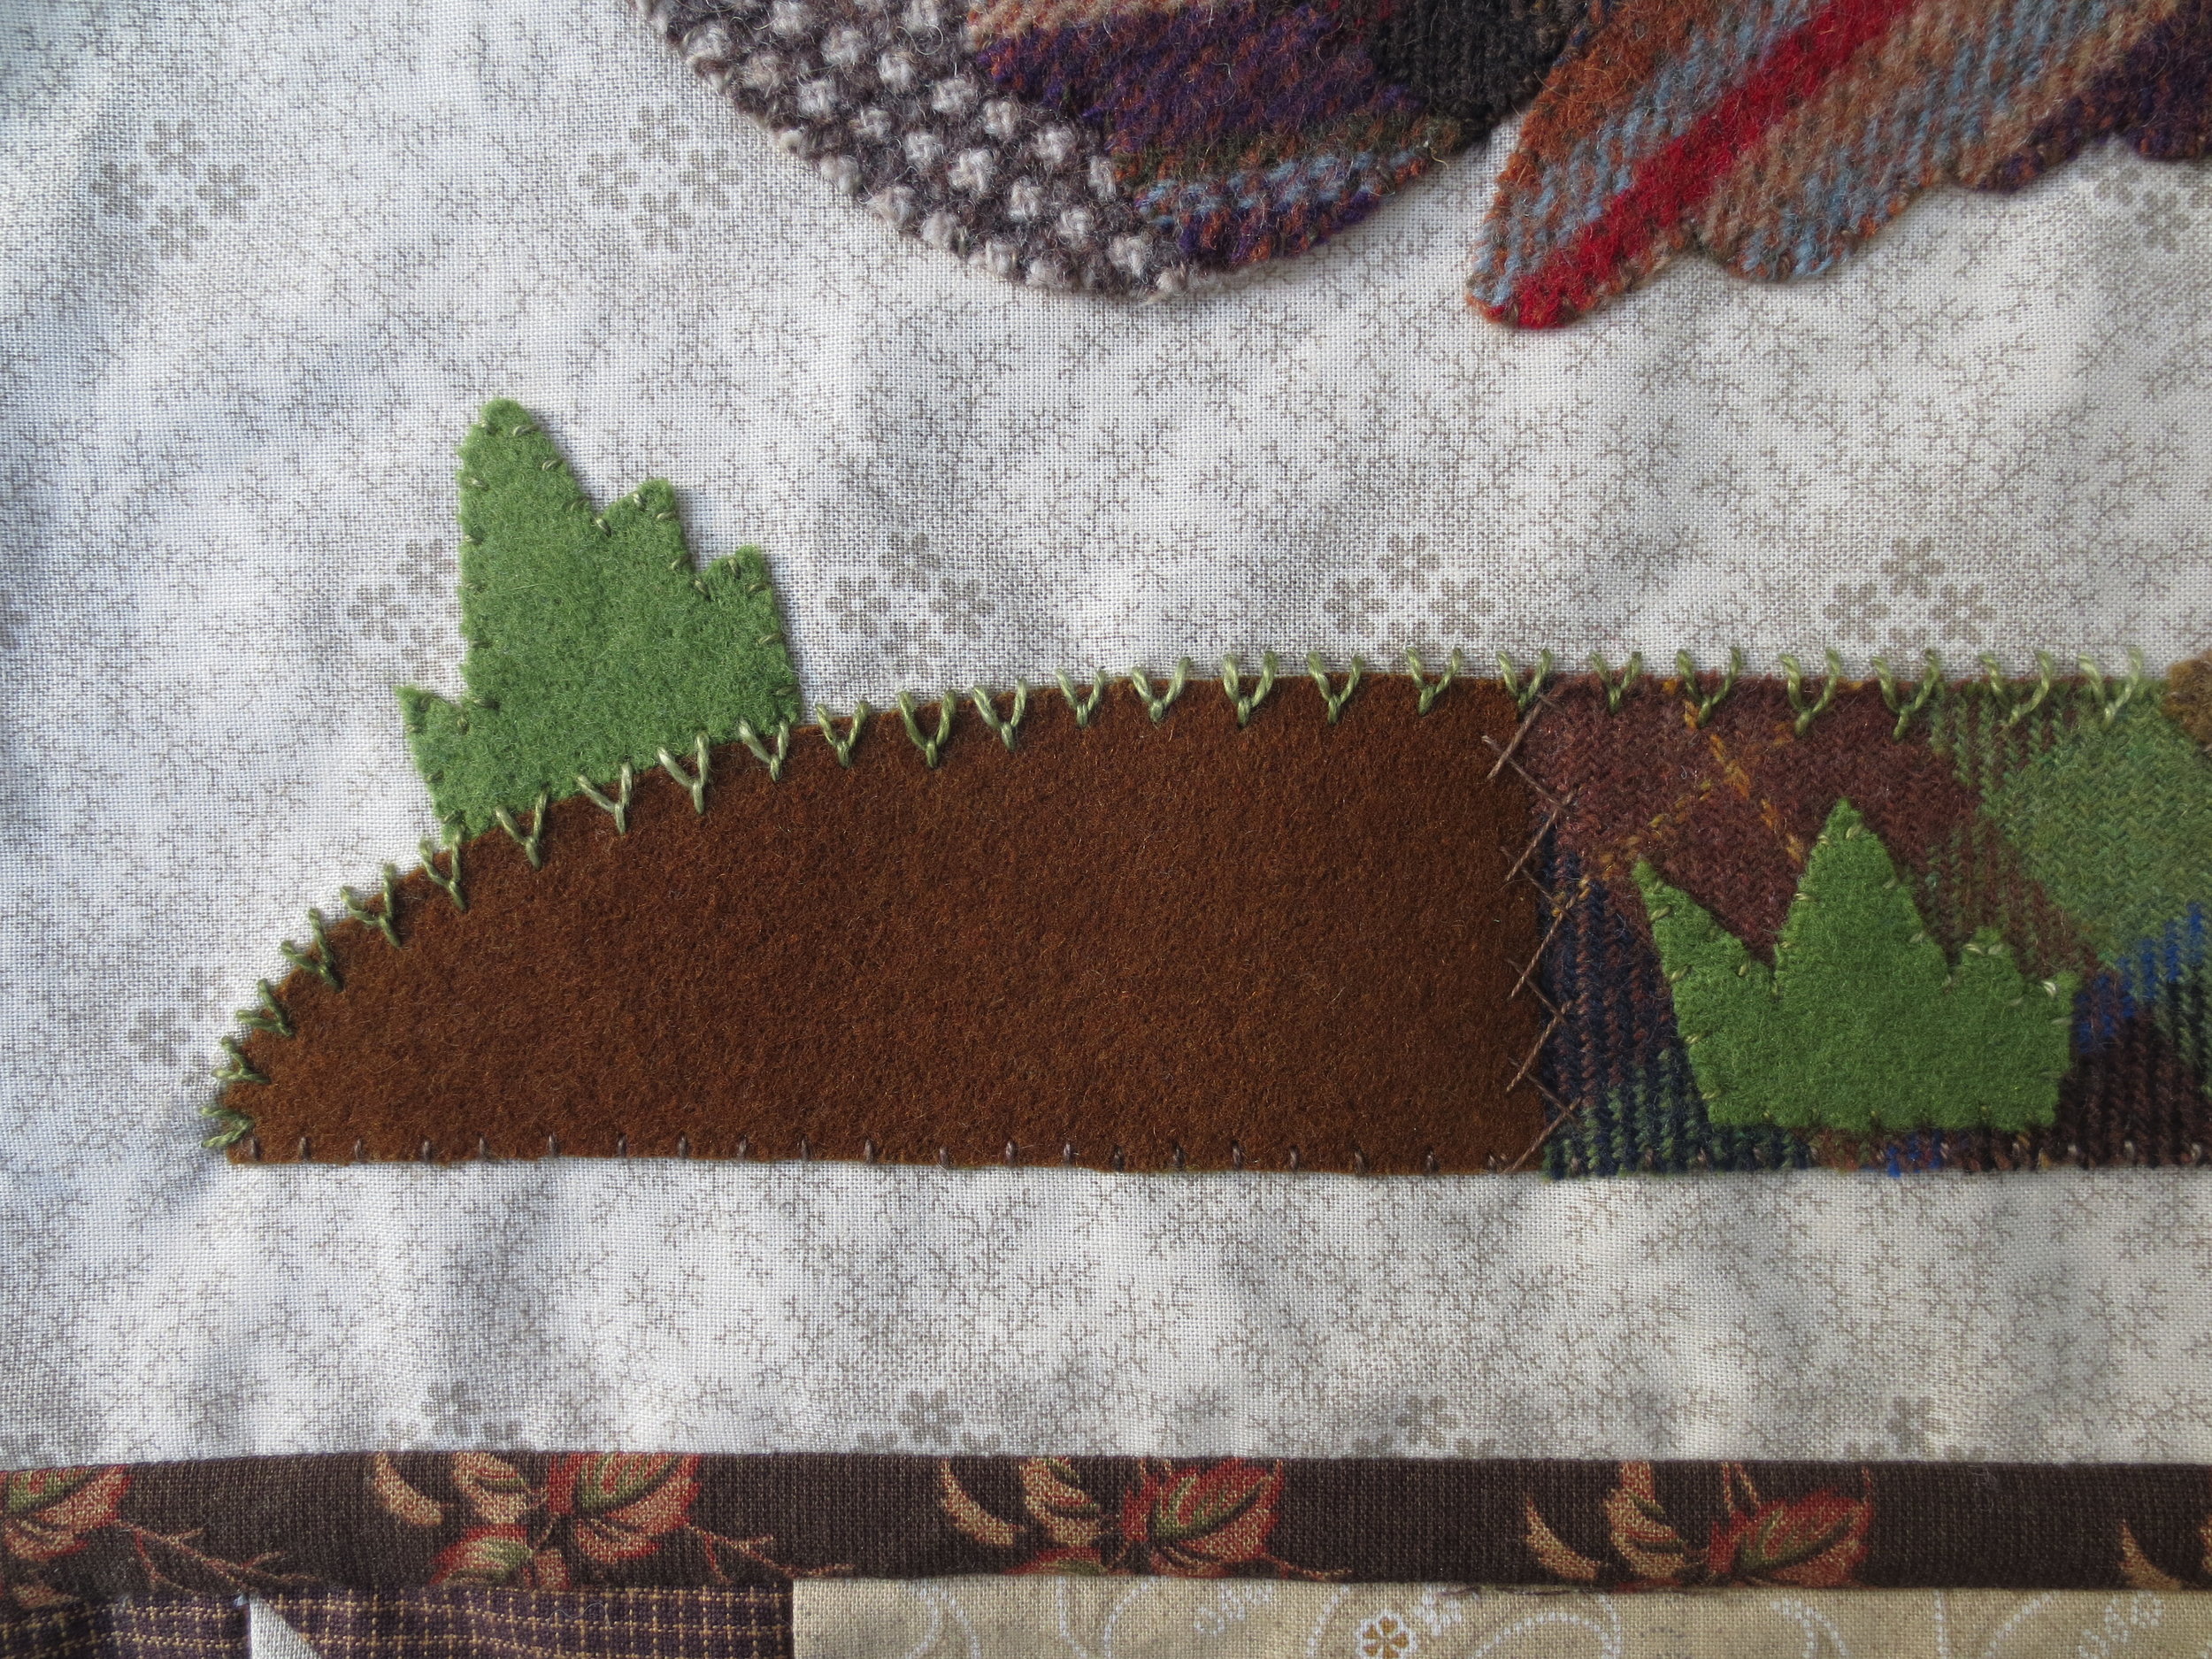
Use a fly stitch to make the grass on ground. I used a single strand of perle 8. I began on the left side making the stitches approximately 1/4” wide and 1/8” apart.
Use a chalk pencil to draw 5 lines on the wing cap (use the layout as a guide). Stitch over the lines using a running stitch.
Stitch colonial knots on the rick rack trim.
Although I didn’t illustrate it here, I did go back and whip stitch the bottom of the wing cap.
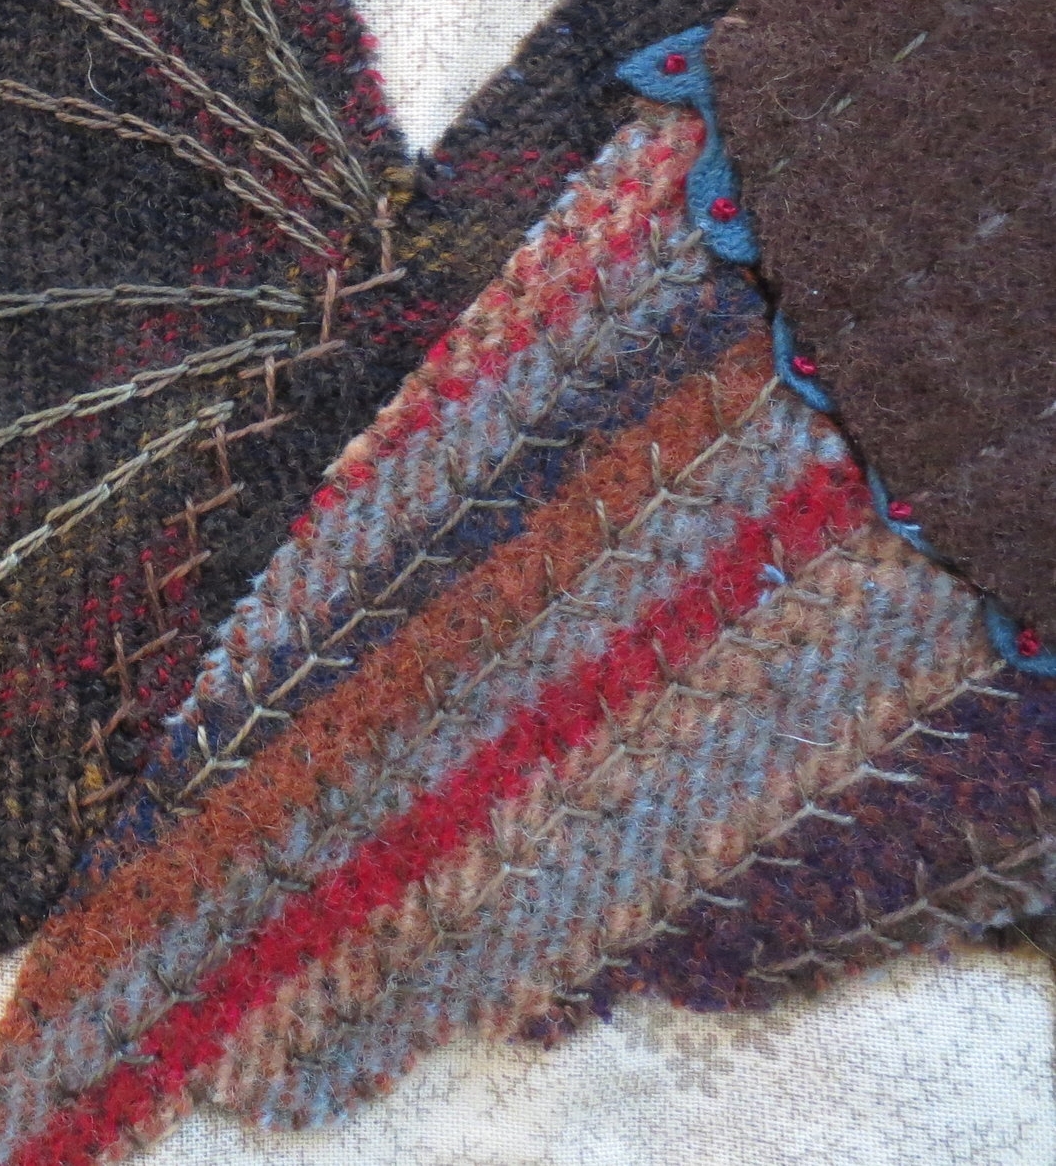
Draw 5 guide lines on the wing extending from each lobe of the rick rack. I didn’t draw lines because my wing has stripes that I used as rough guide lines.
Stitch over the lines with a closed fly stitch using perle cotton, size 12.
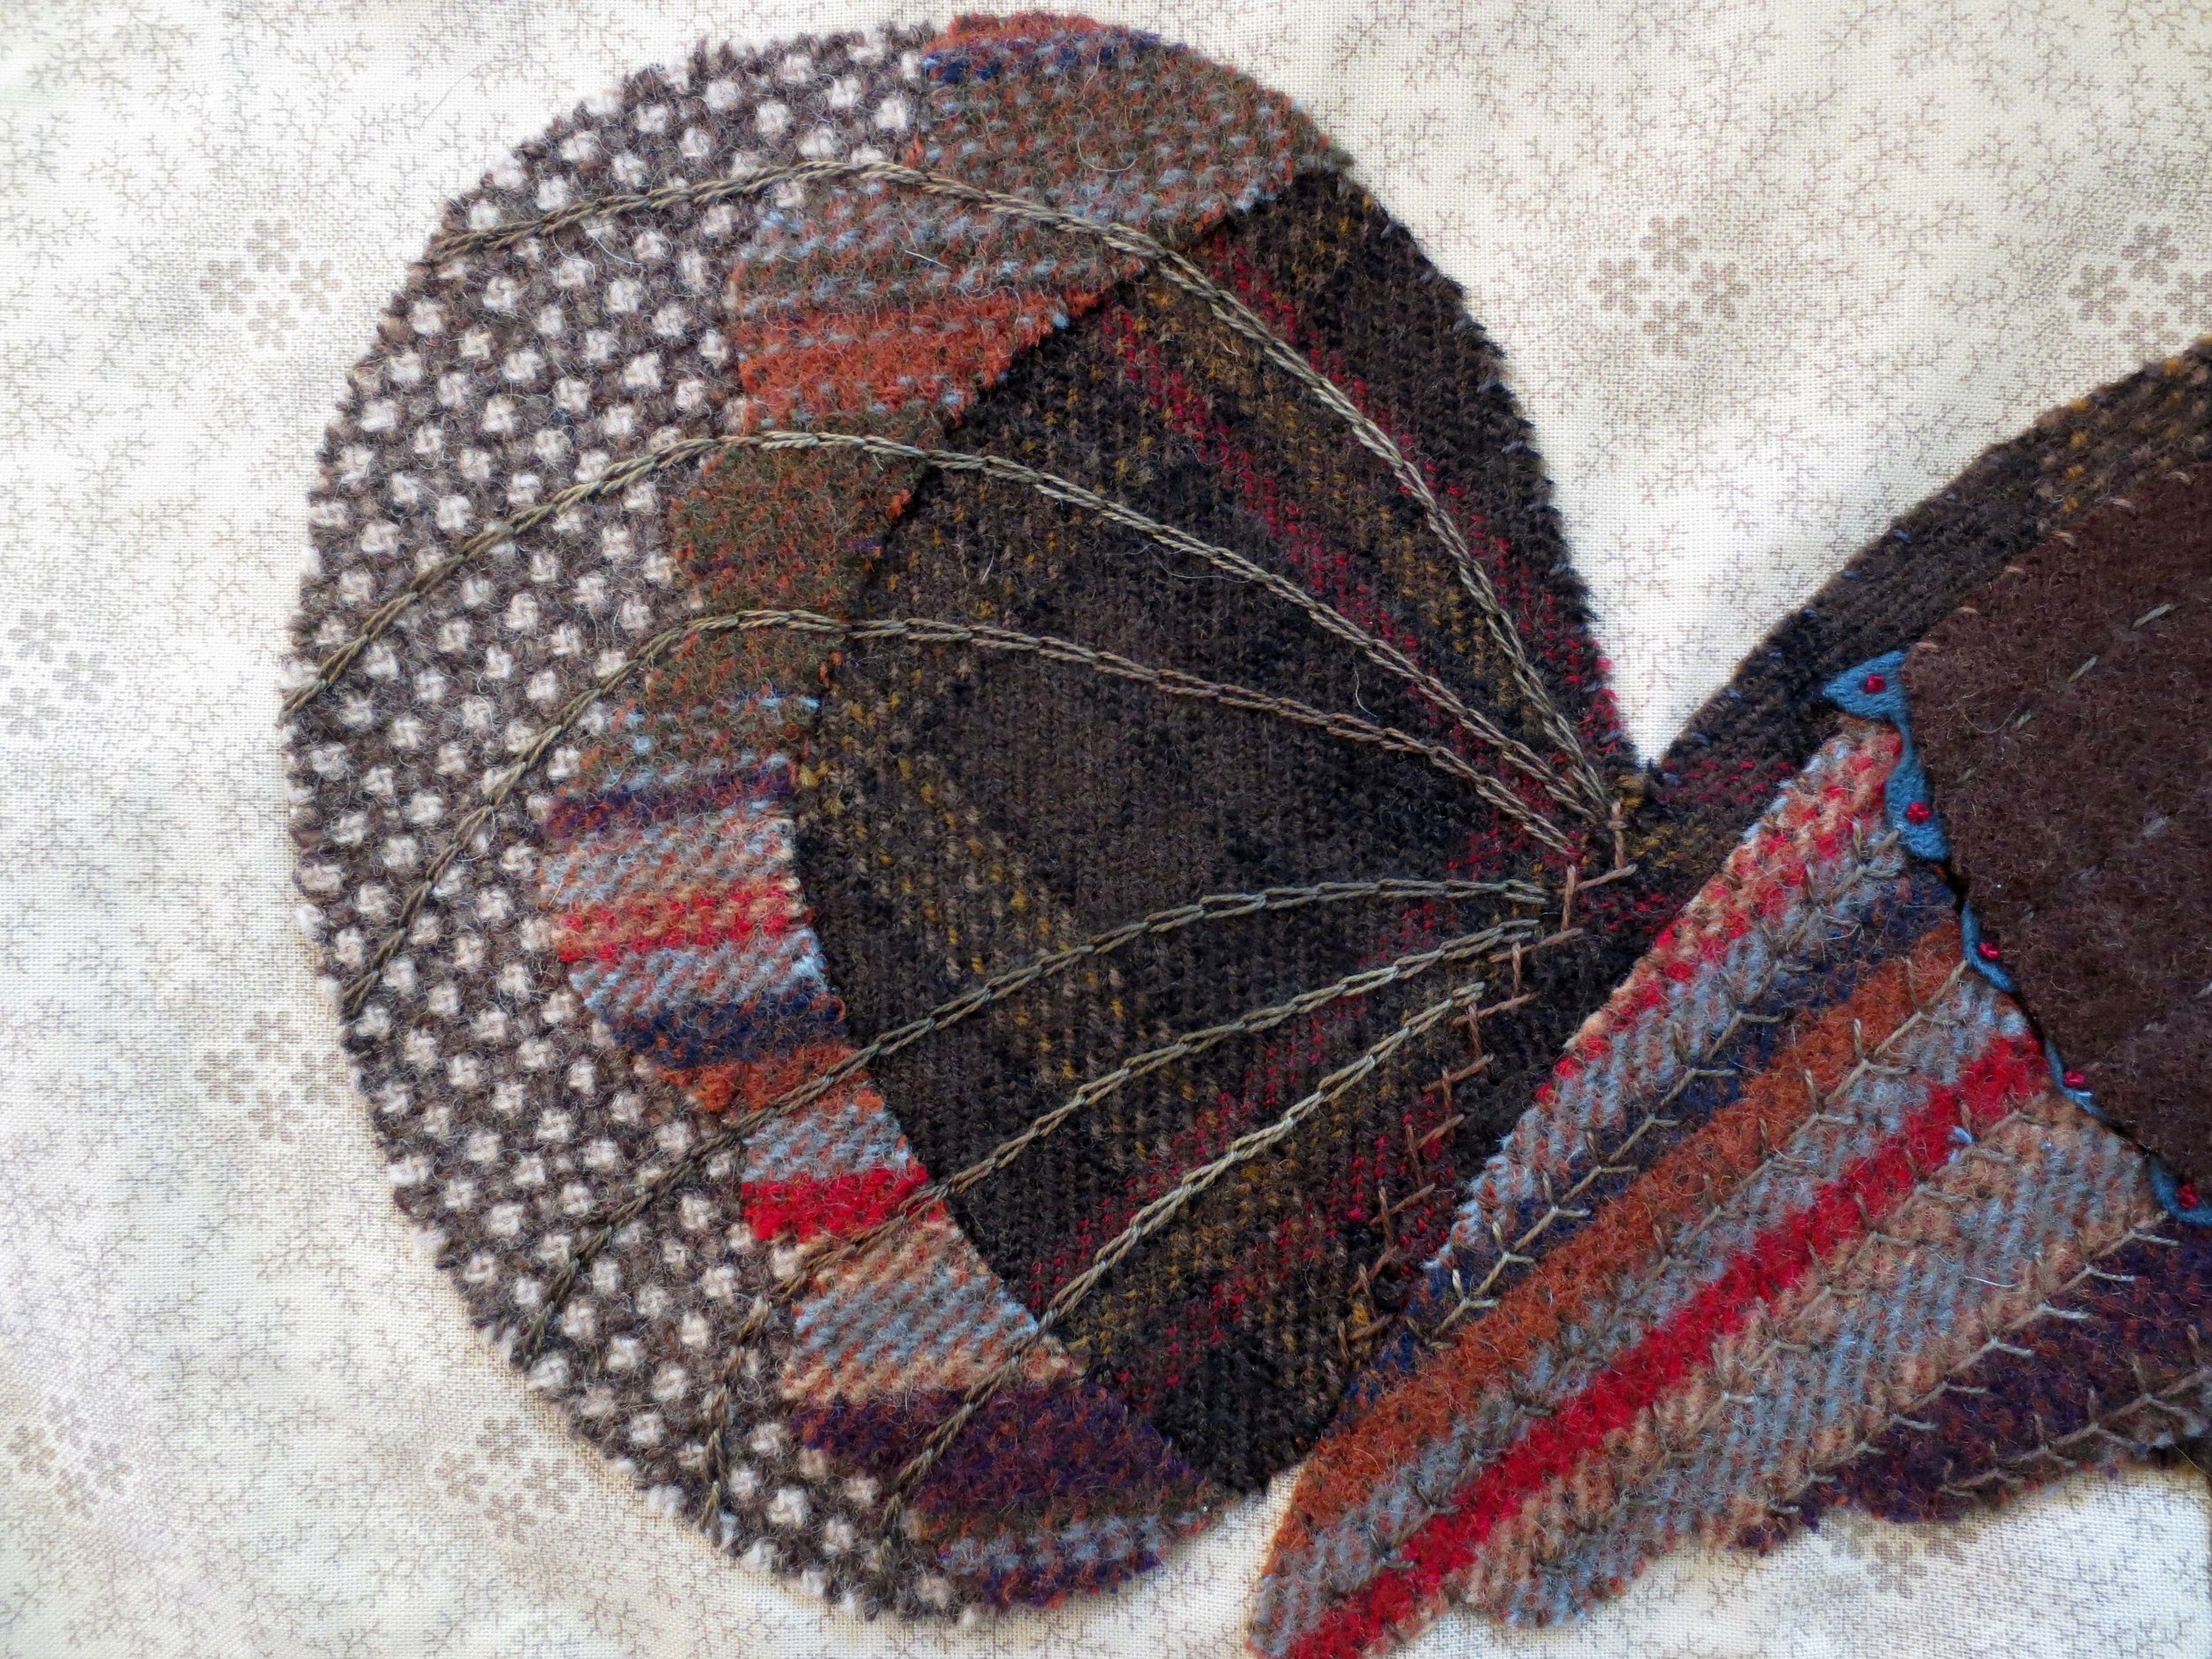
Draw chalk guide lines on the tail using the layout as a guide.
Stitch a chain stitch over the guide lines using perle cotton, size 12. I used a variagated olive brown.
Stitch several fly stitches on the chest of the turkey using perle cotton, size 12. I used the same olive brown that I used to chain stitch the tail. Use the layout as a guide for placement.
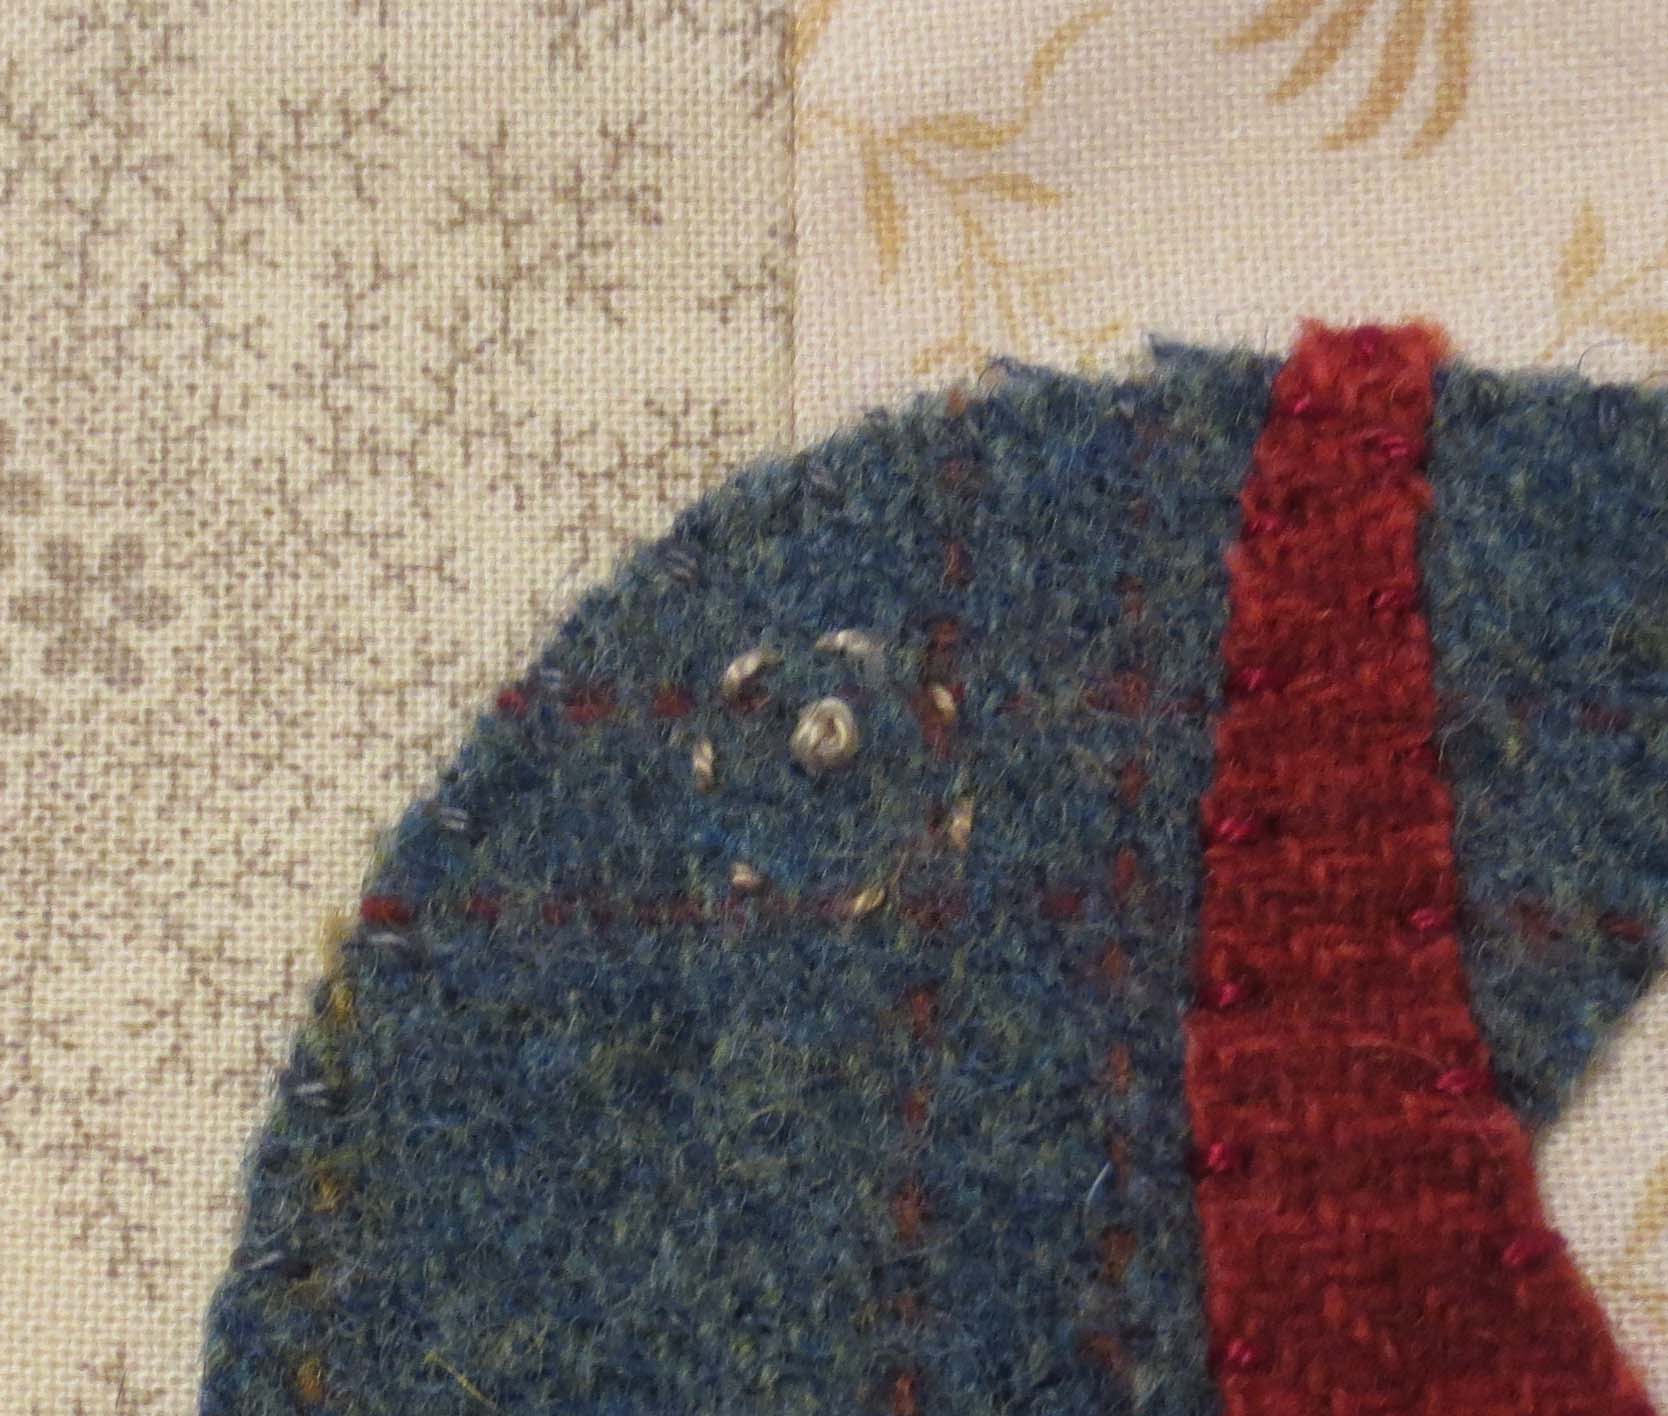
Draw a 3/8” diameter circle on the turkey head (Use the layout for placement). Stitch a running stitch with perle cotton, size 12 over the chalk line.
Stitch a single colonial knot in the center of the circle.
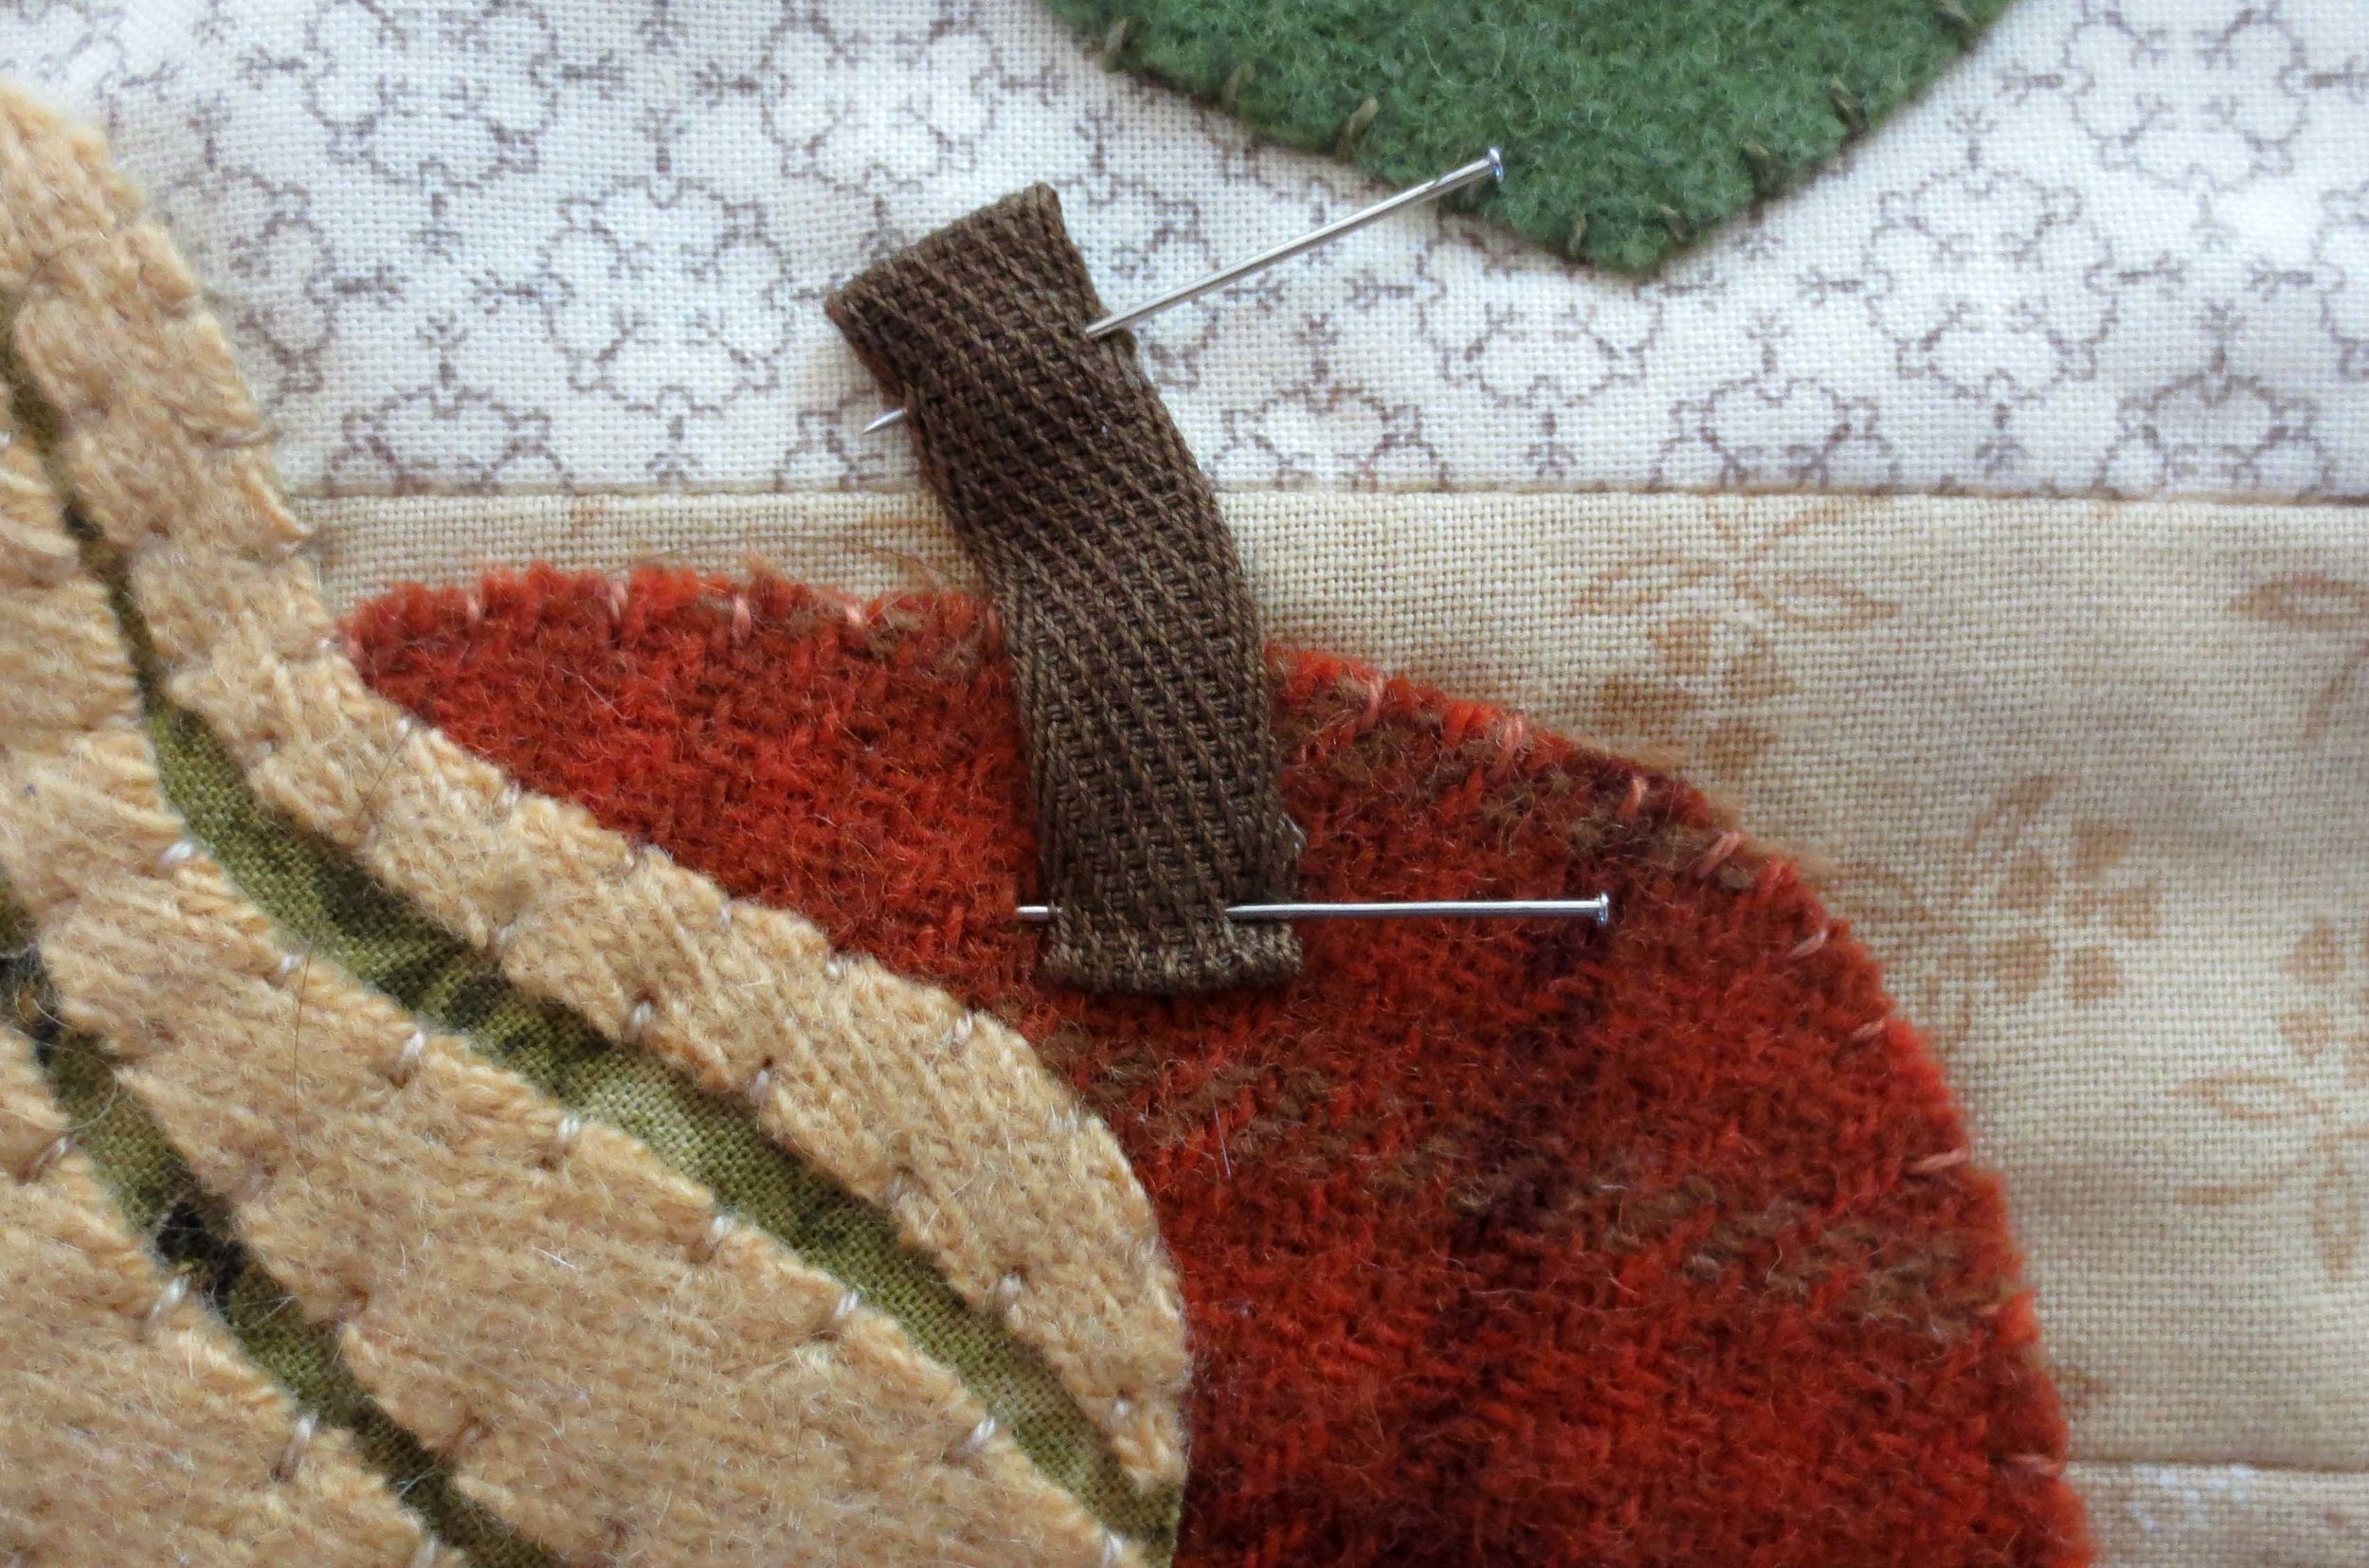
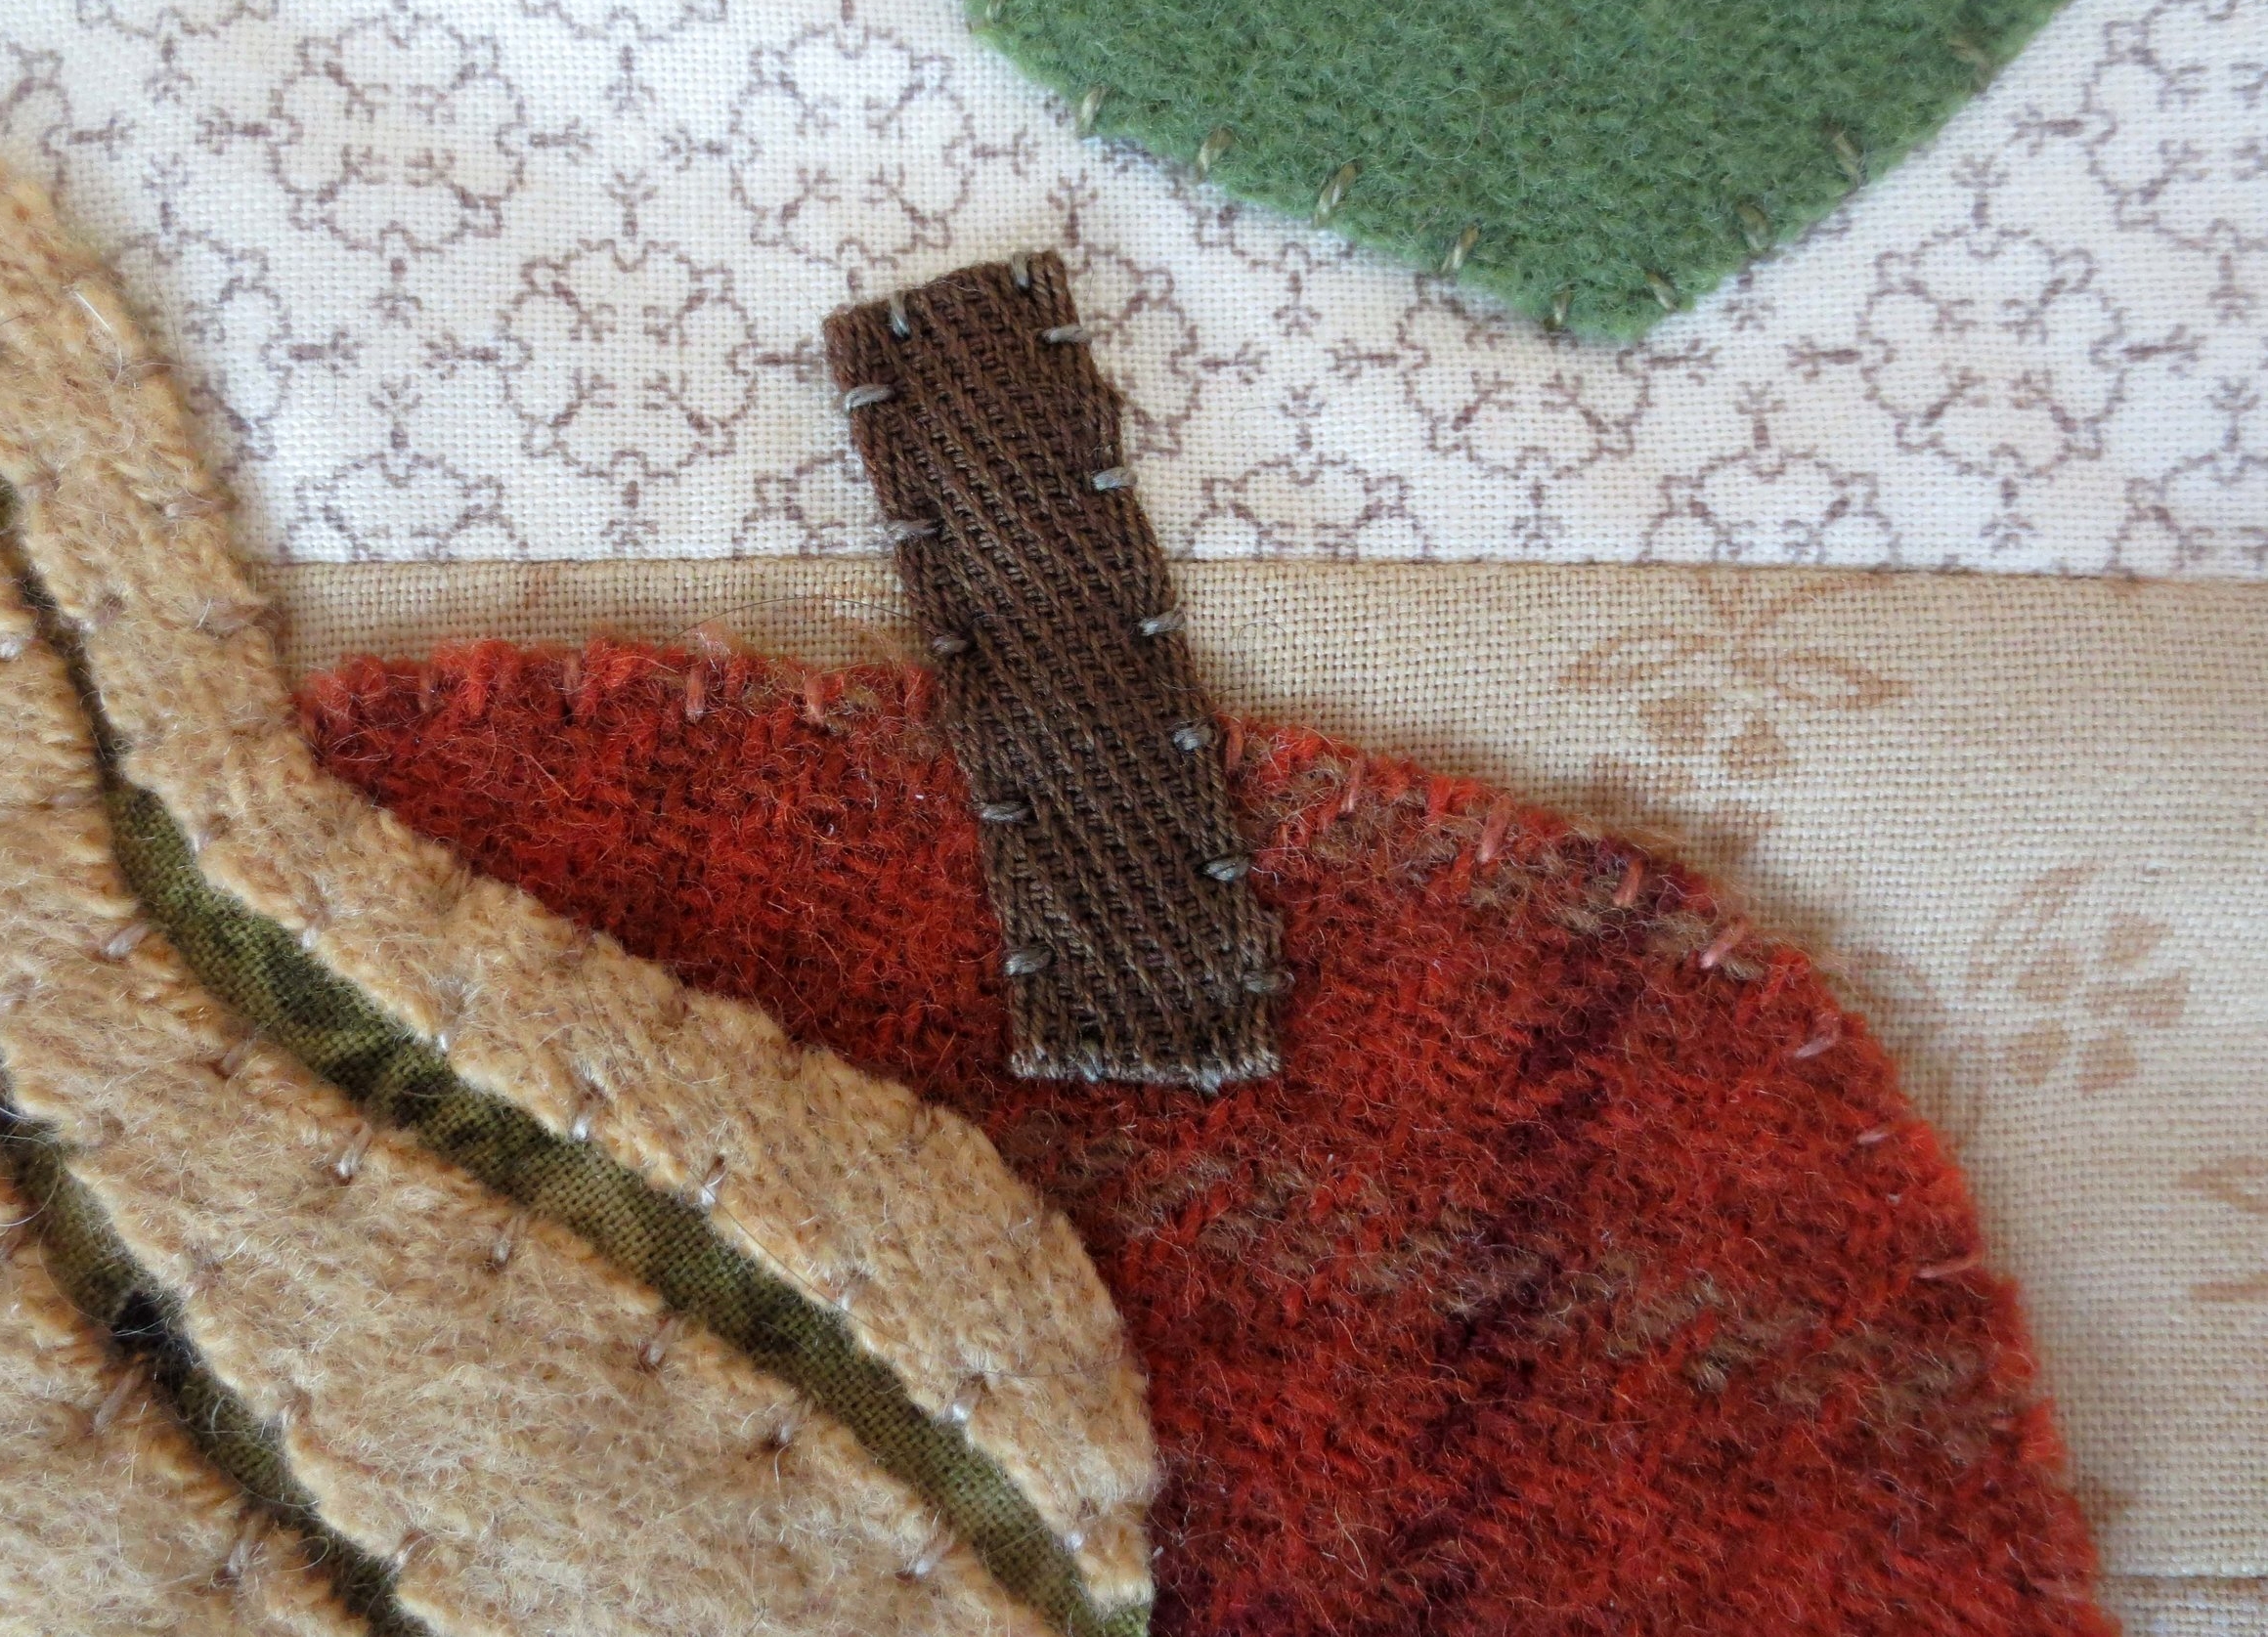
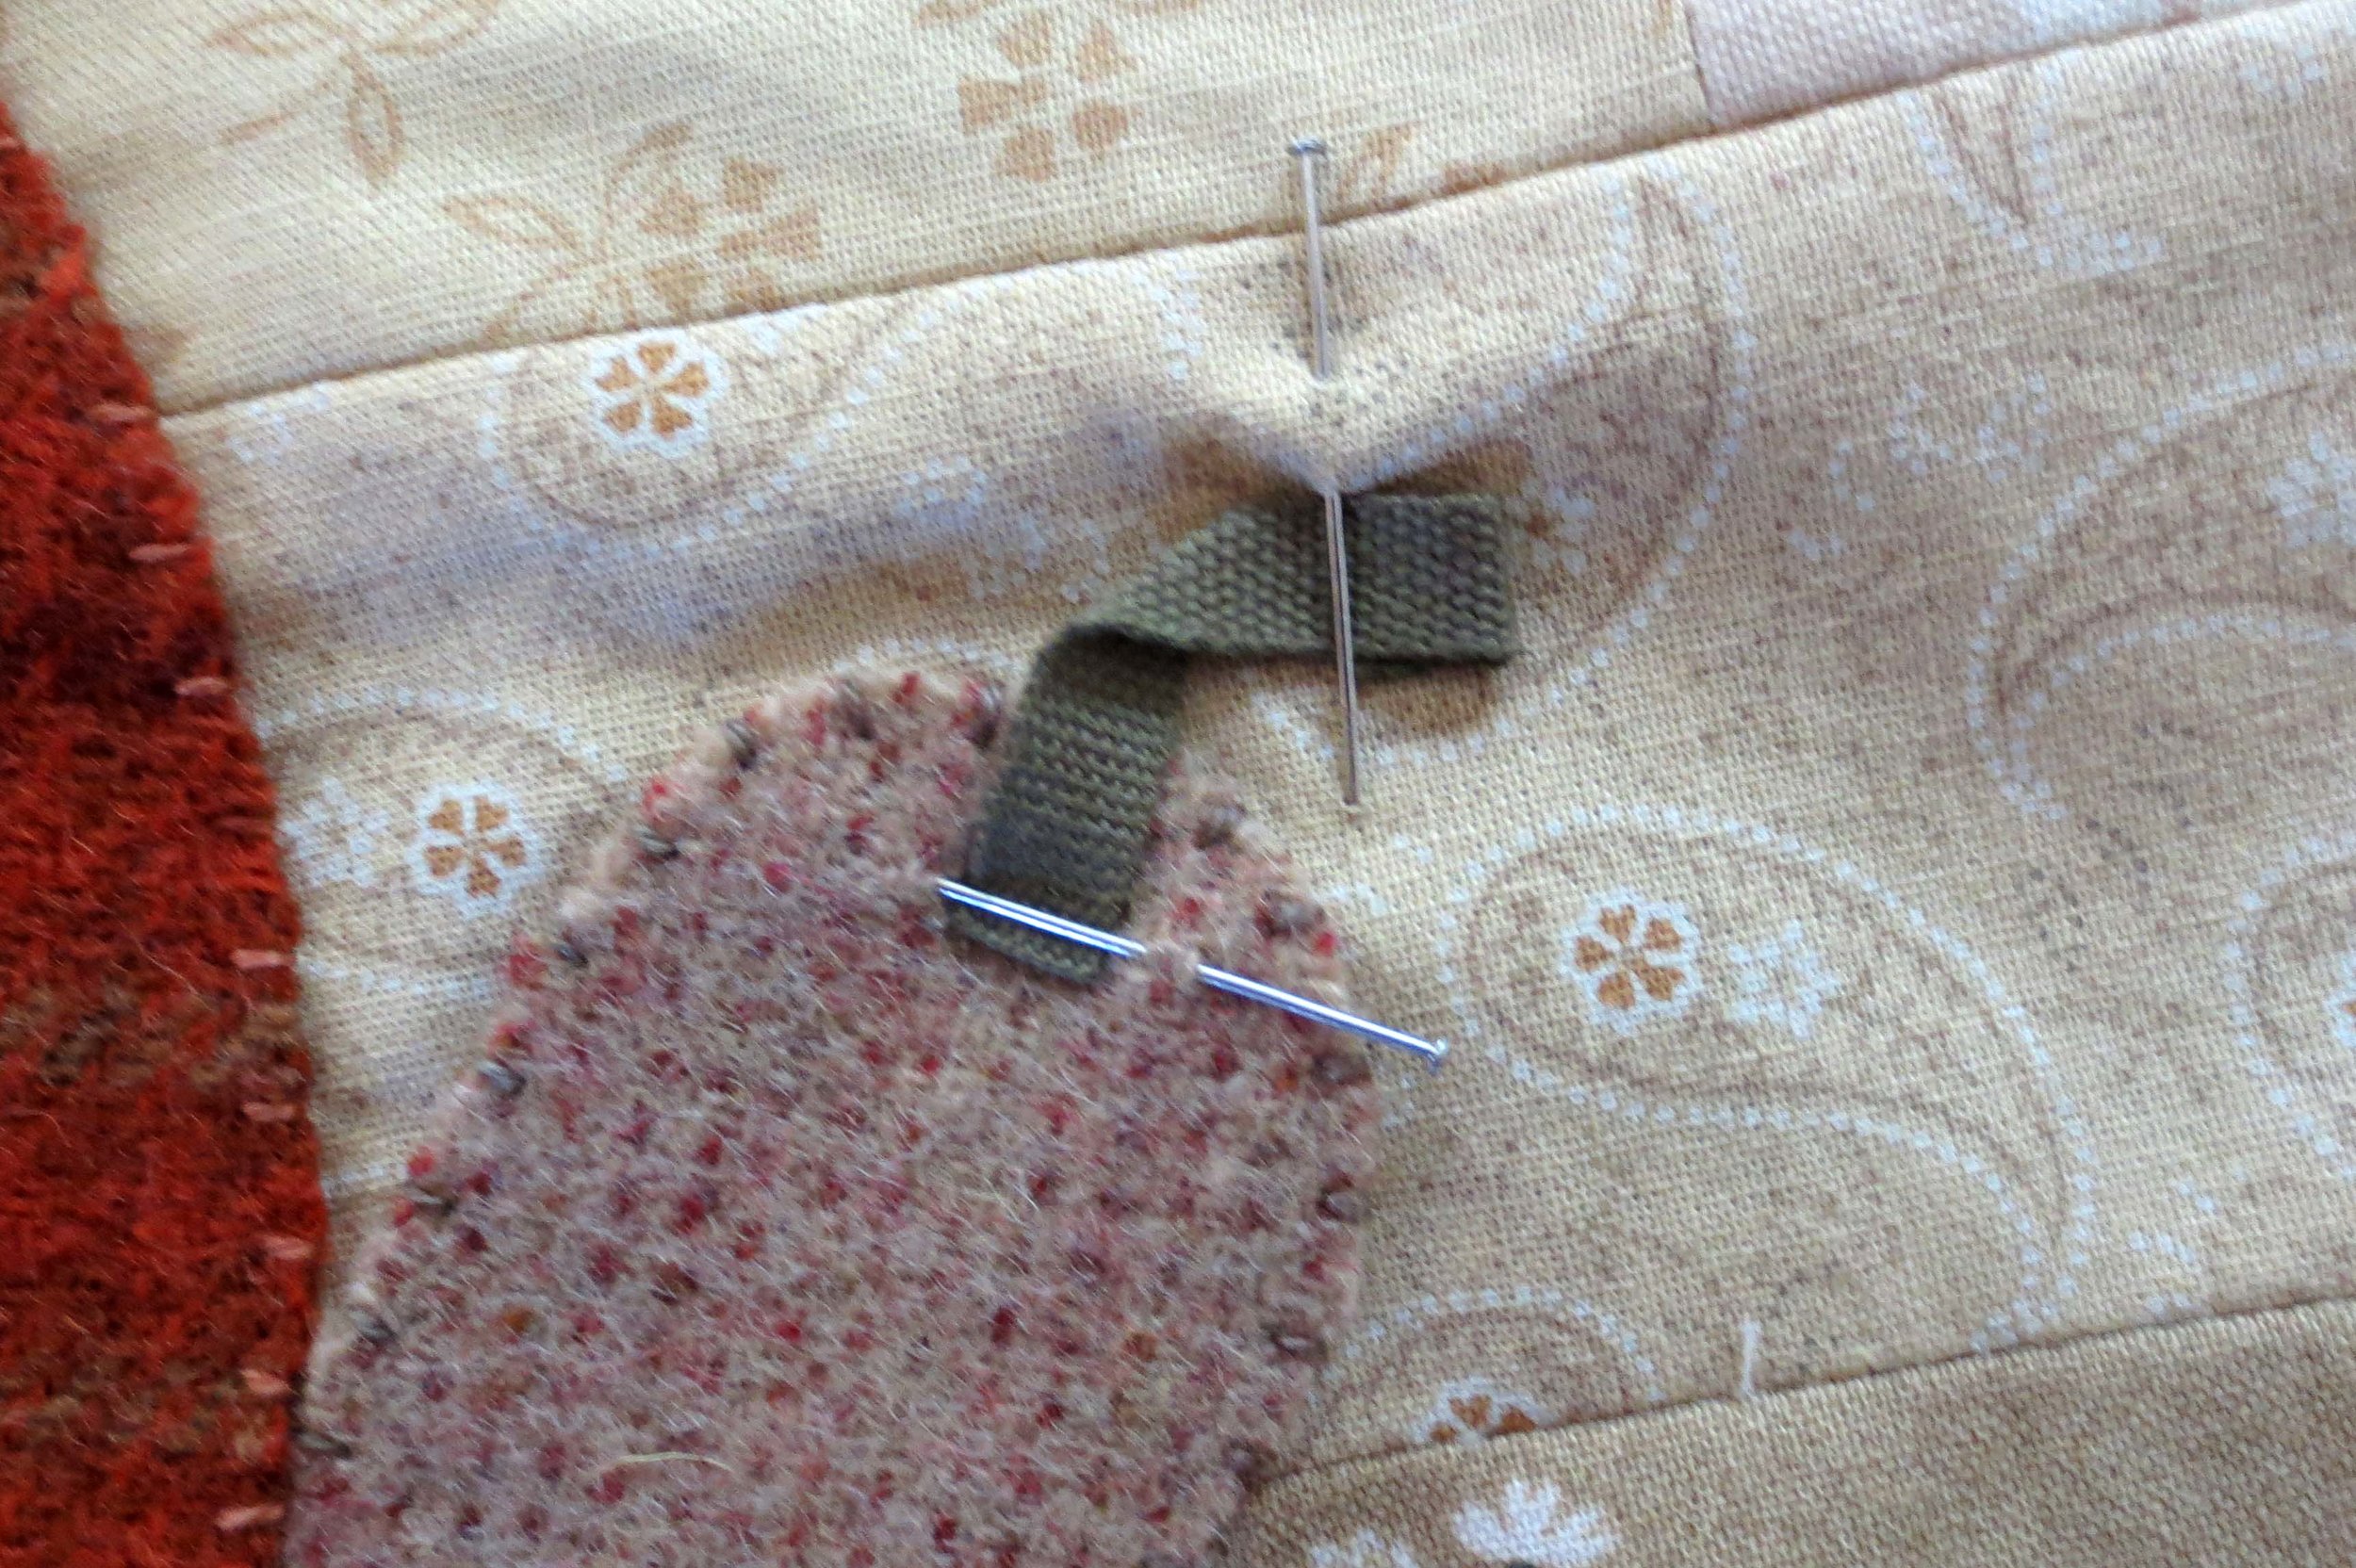
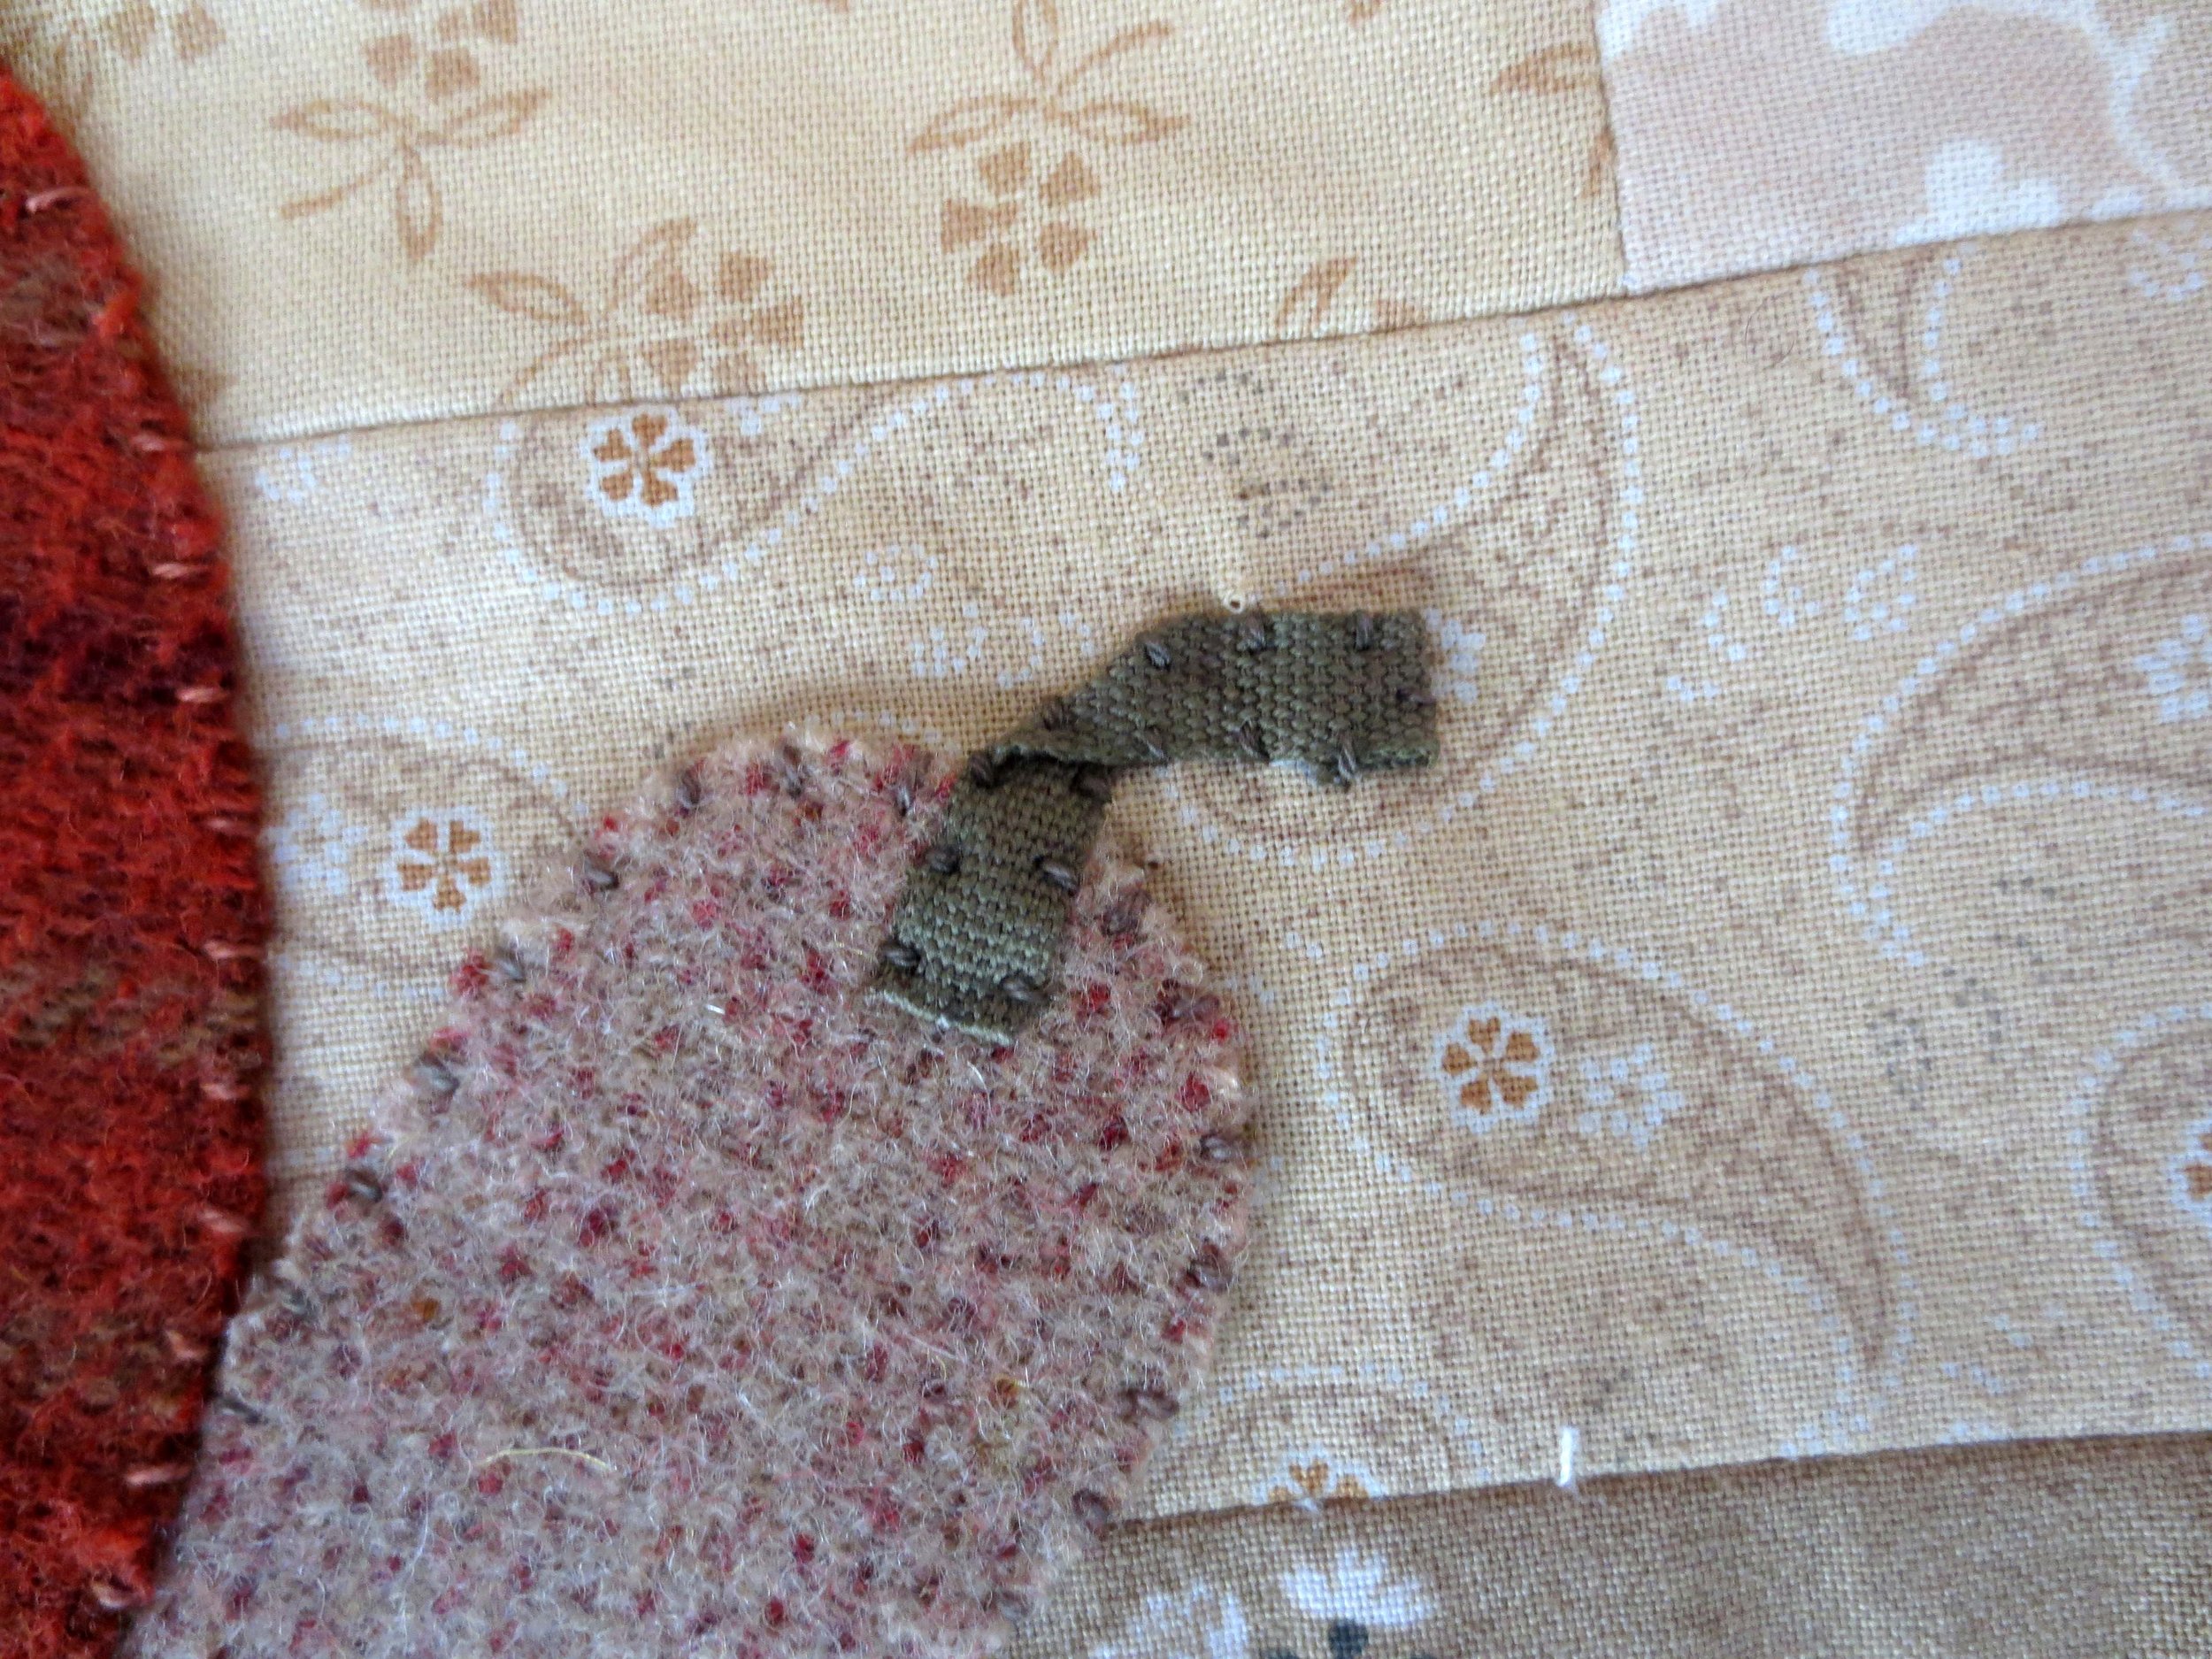
Pin the stems on the pumpkin and butternut squash, folding the cut ends under about 1/4”. Use the layout for placement.
Whip stitch with matching colored thread.
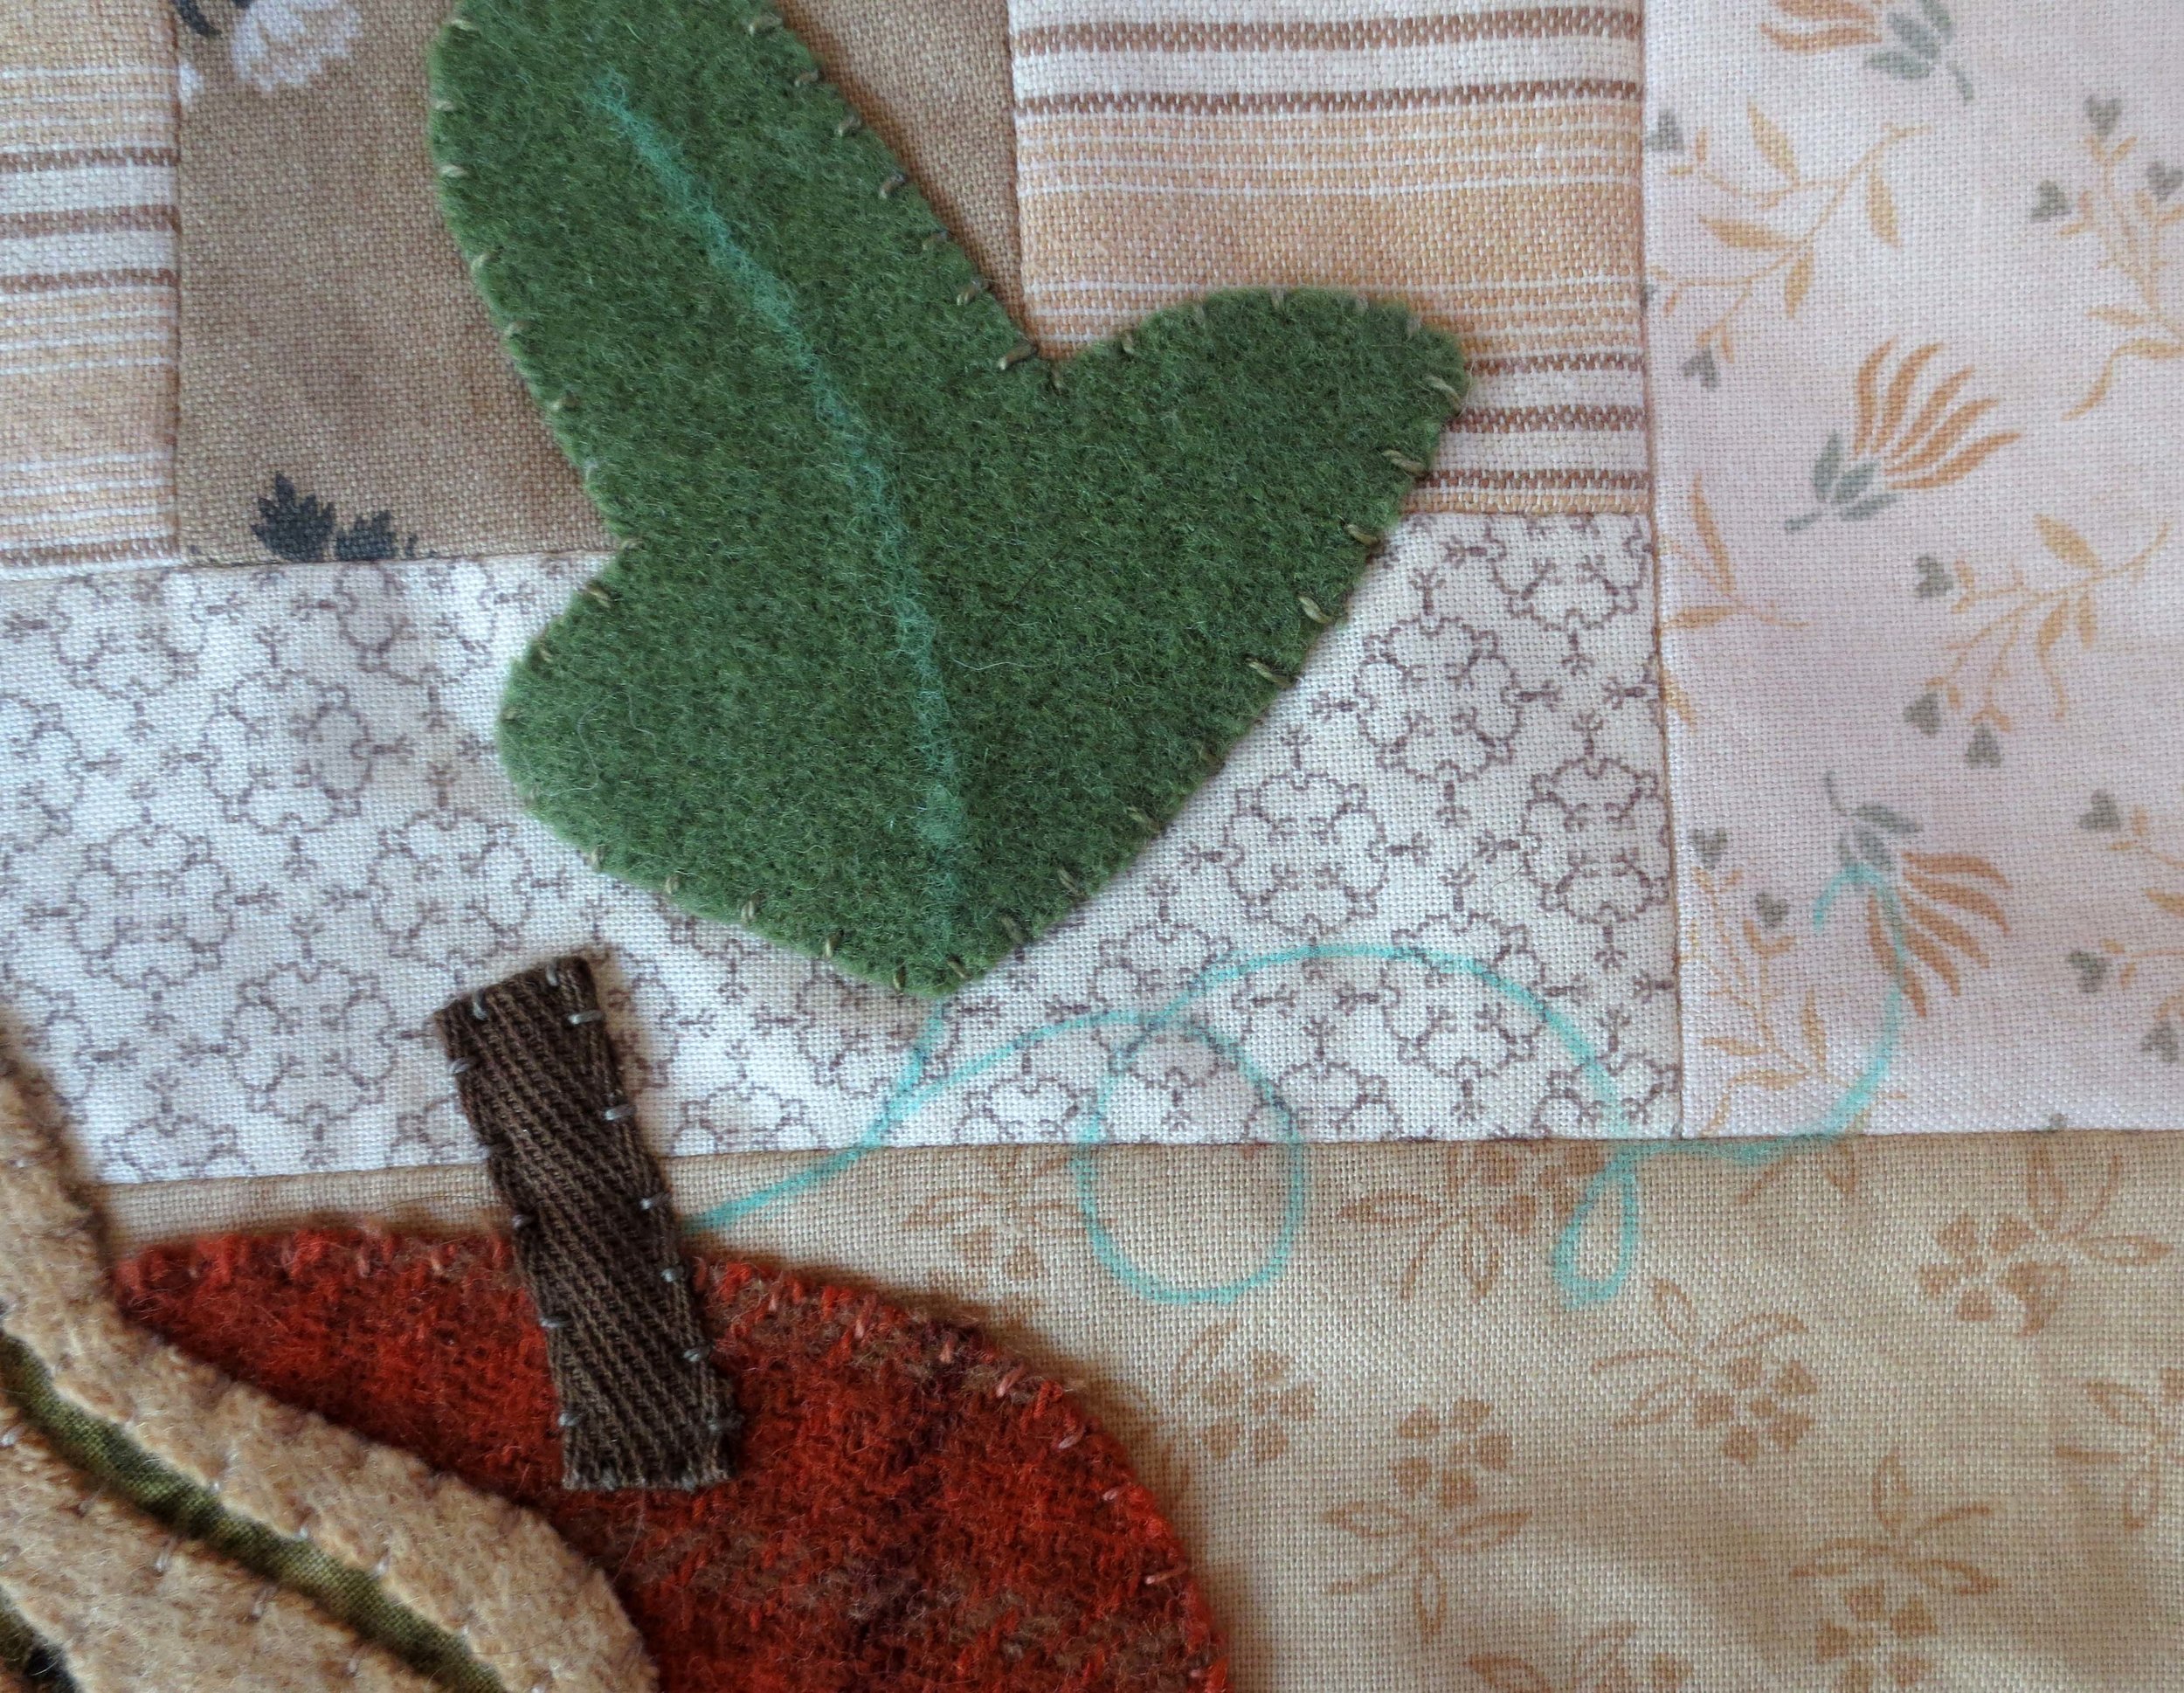
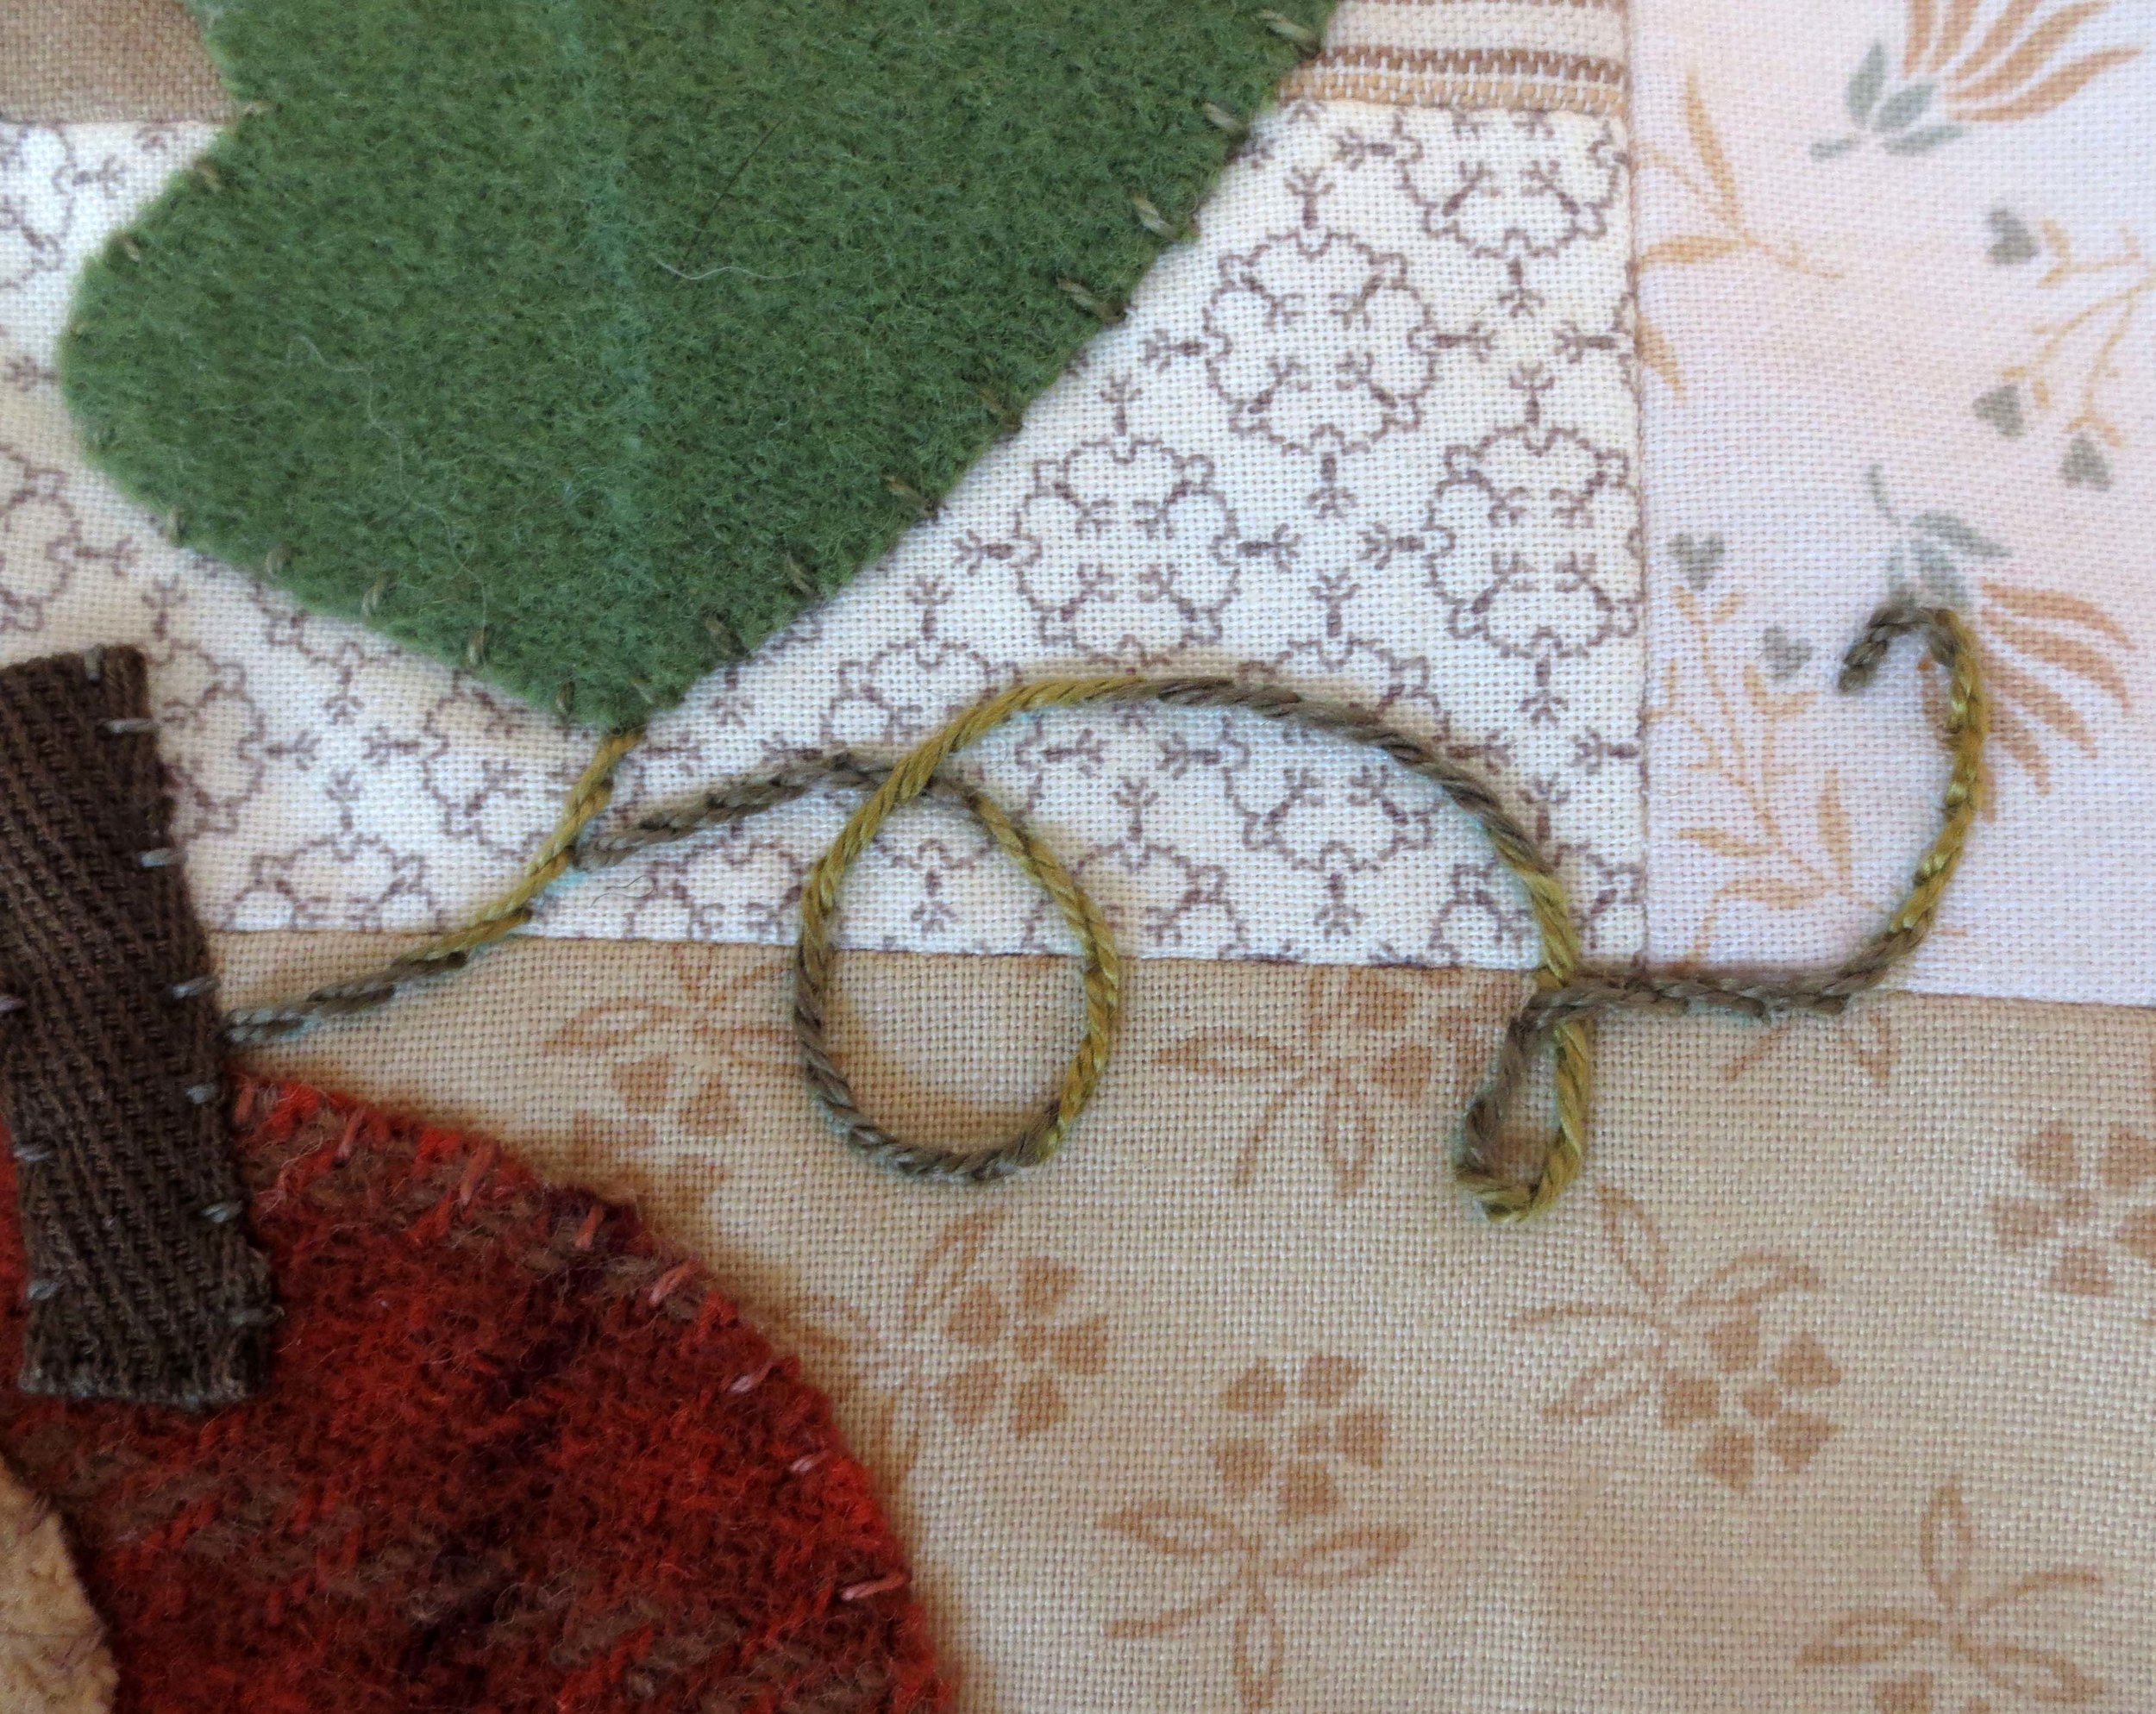
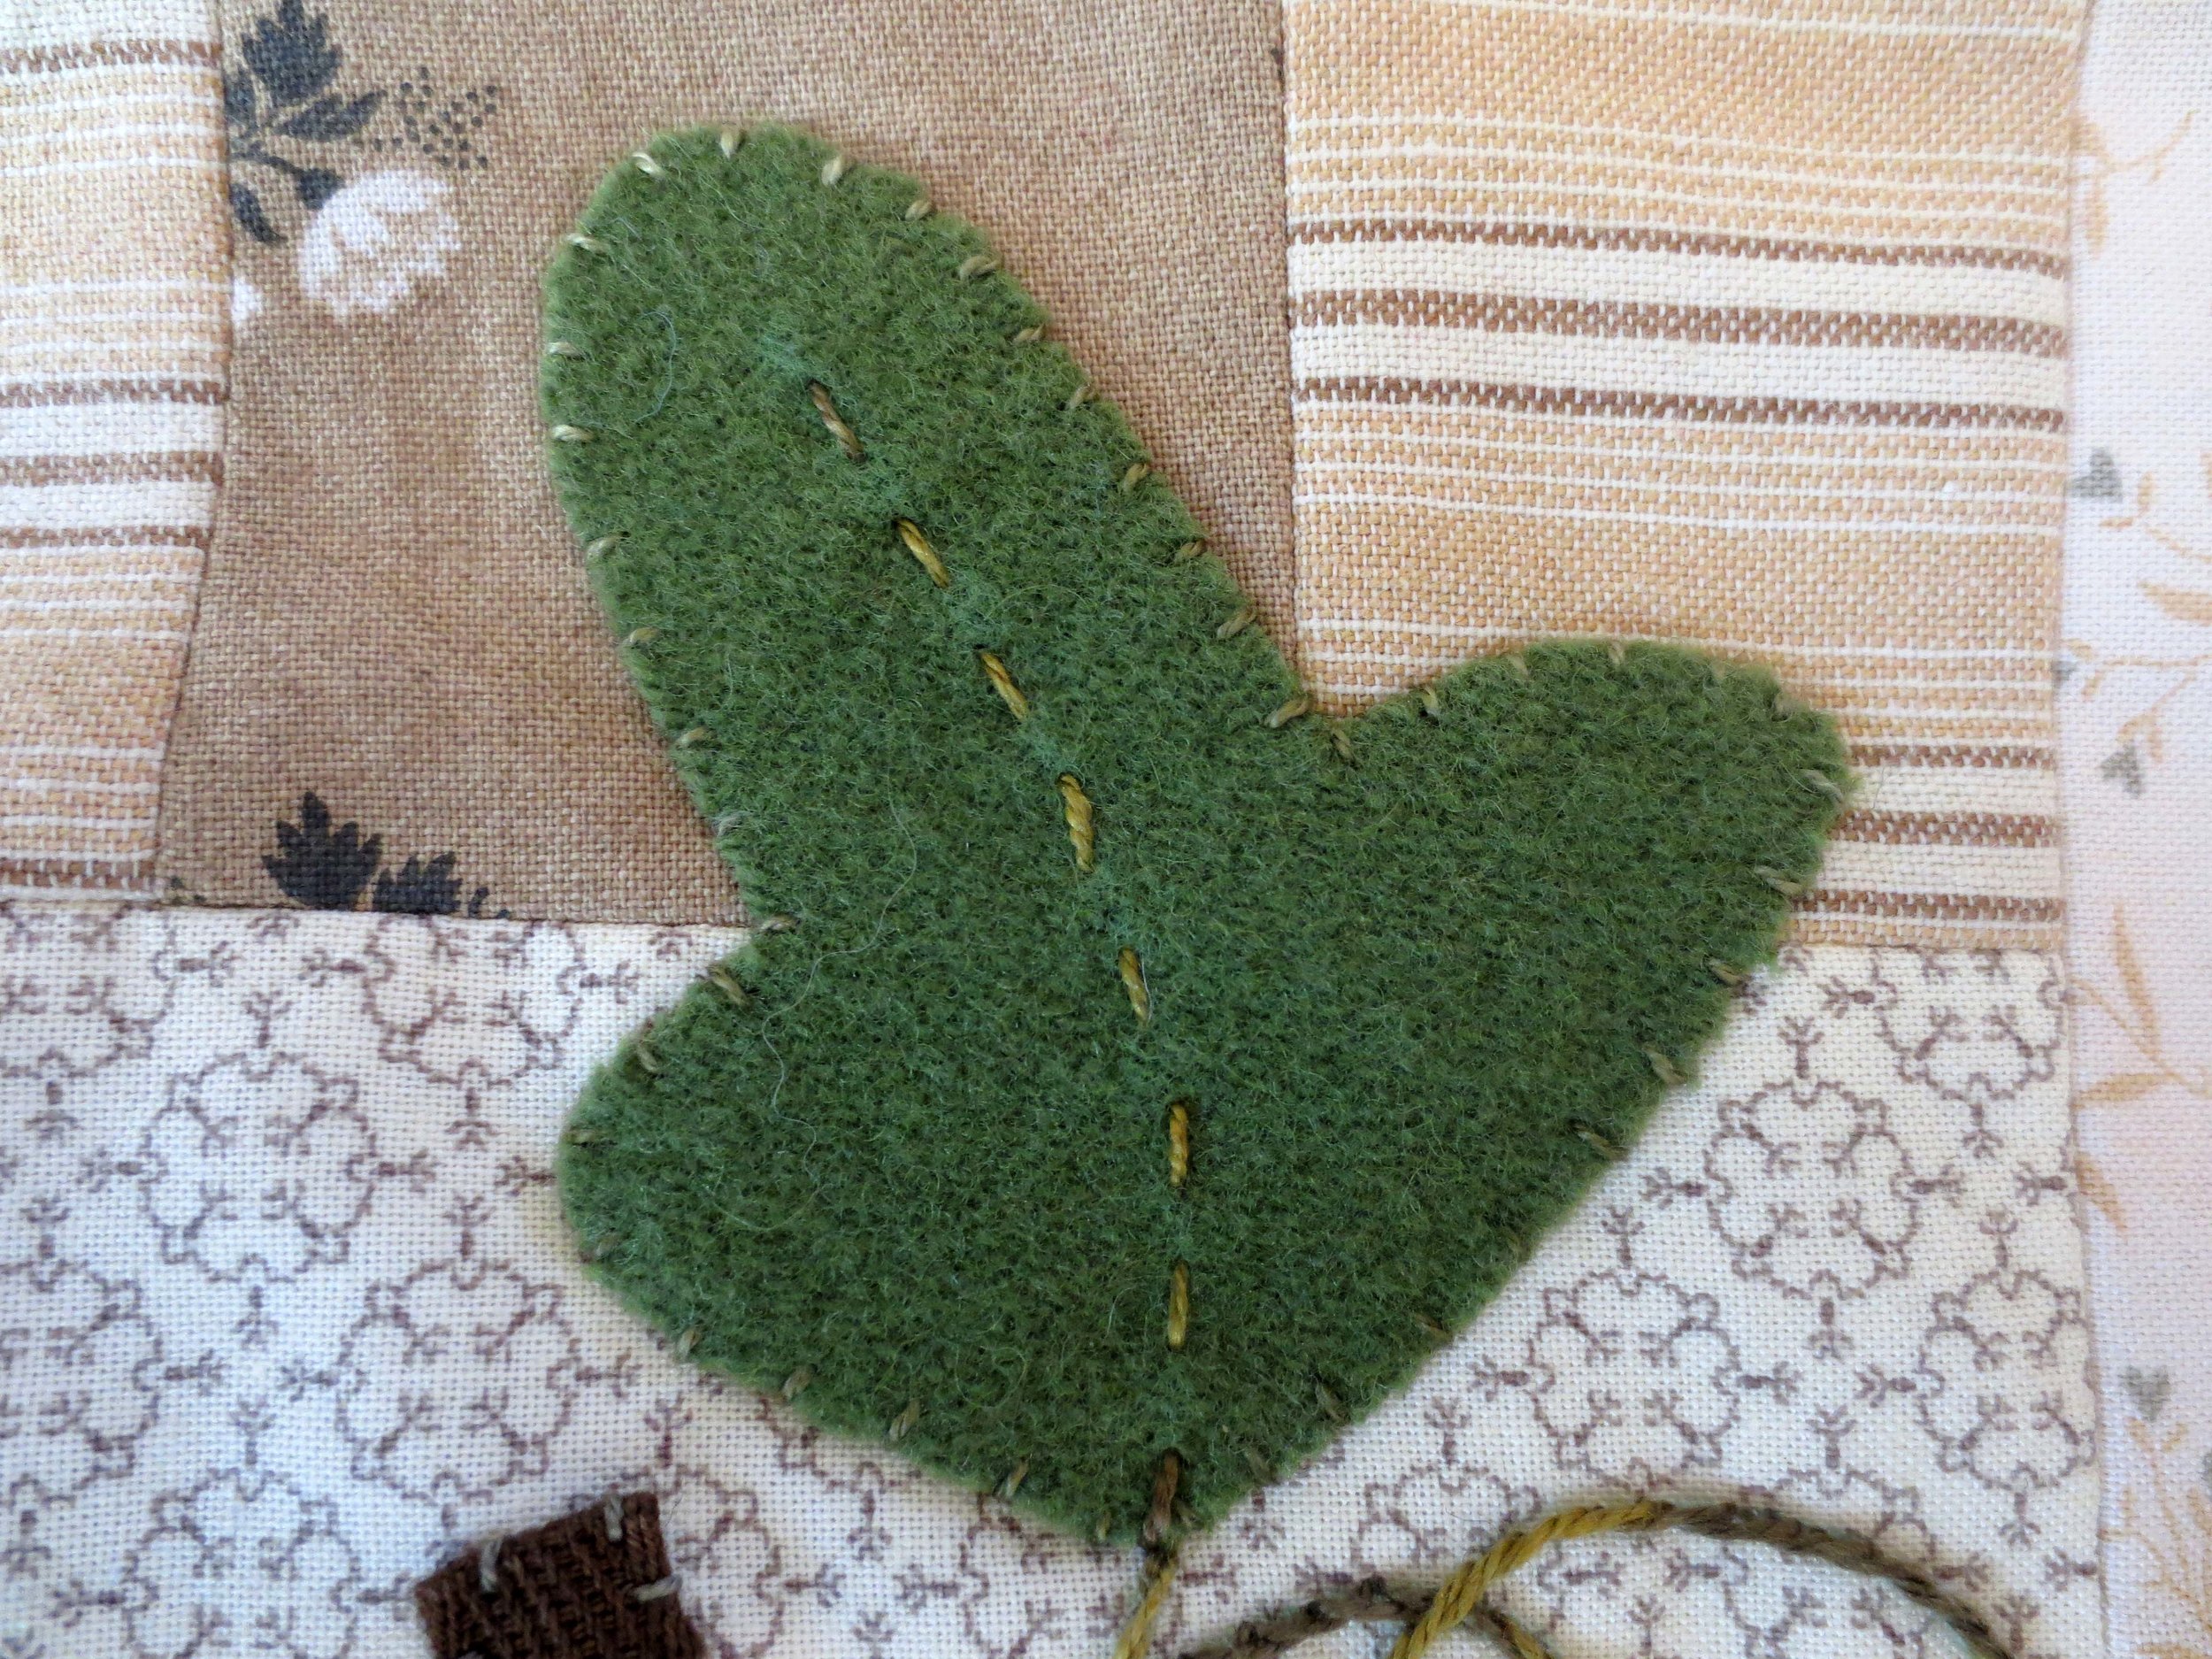
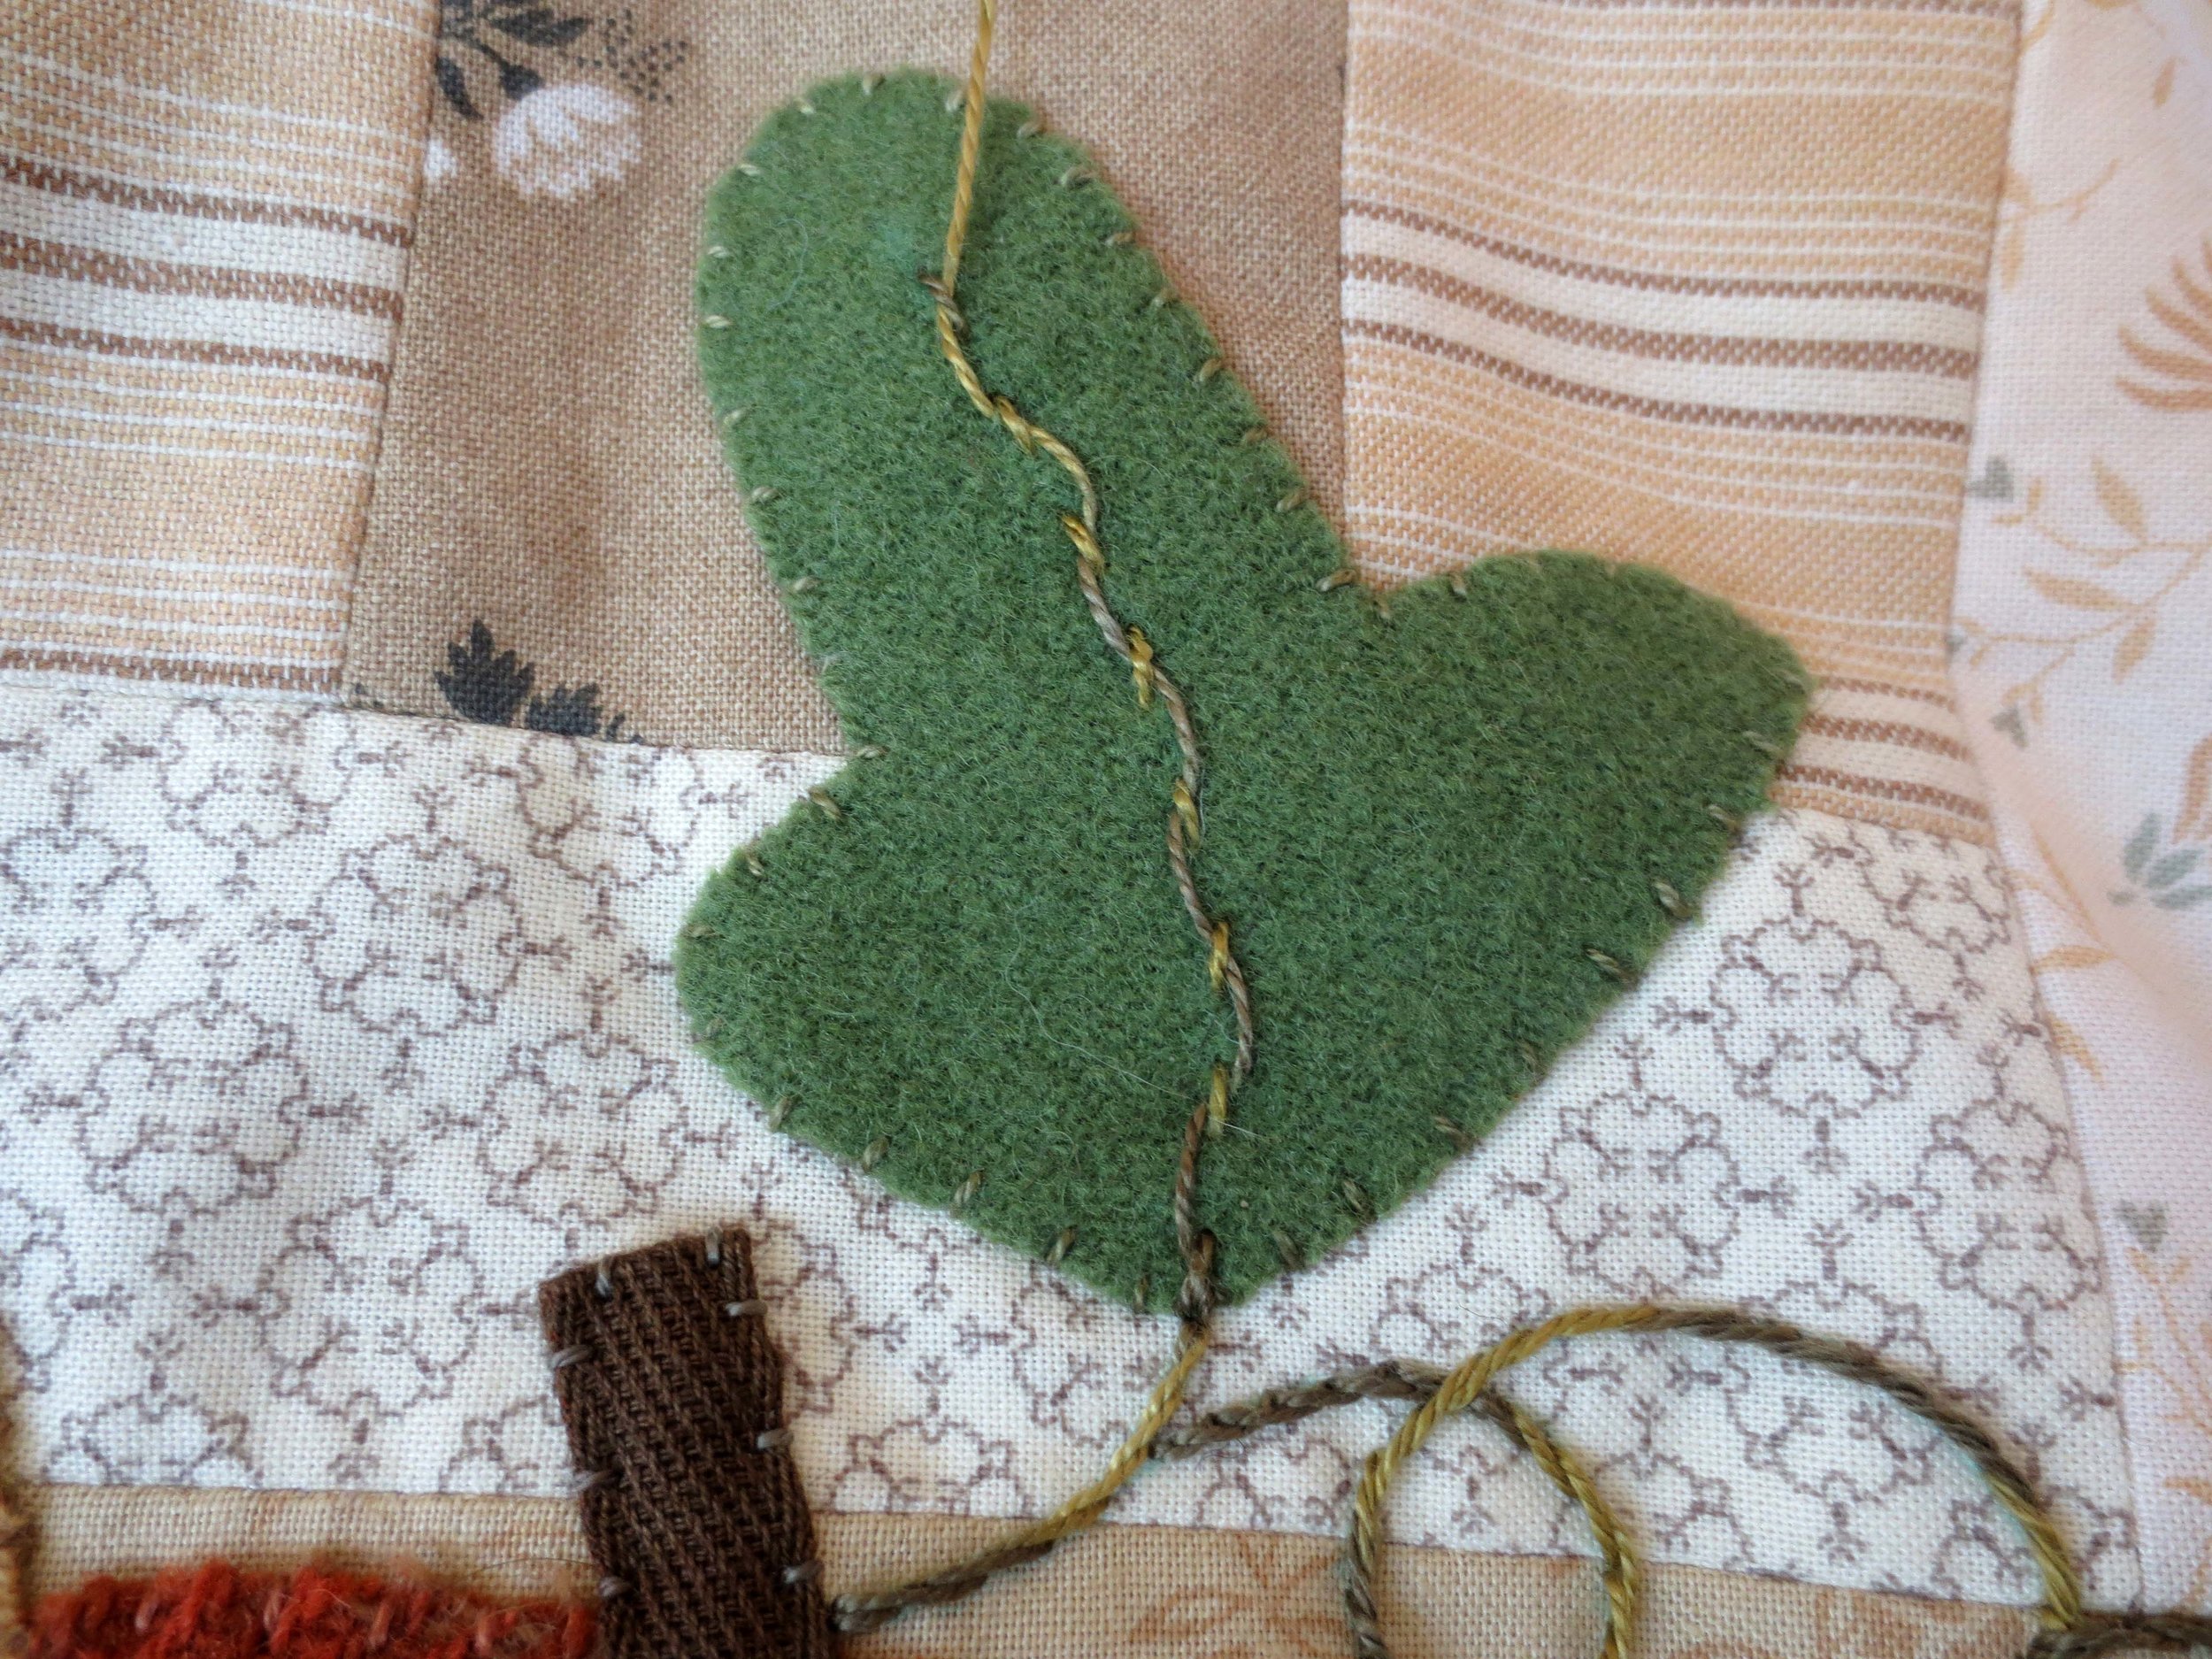
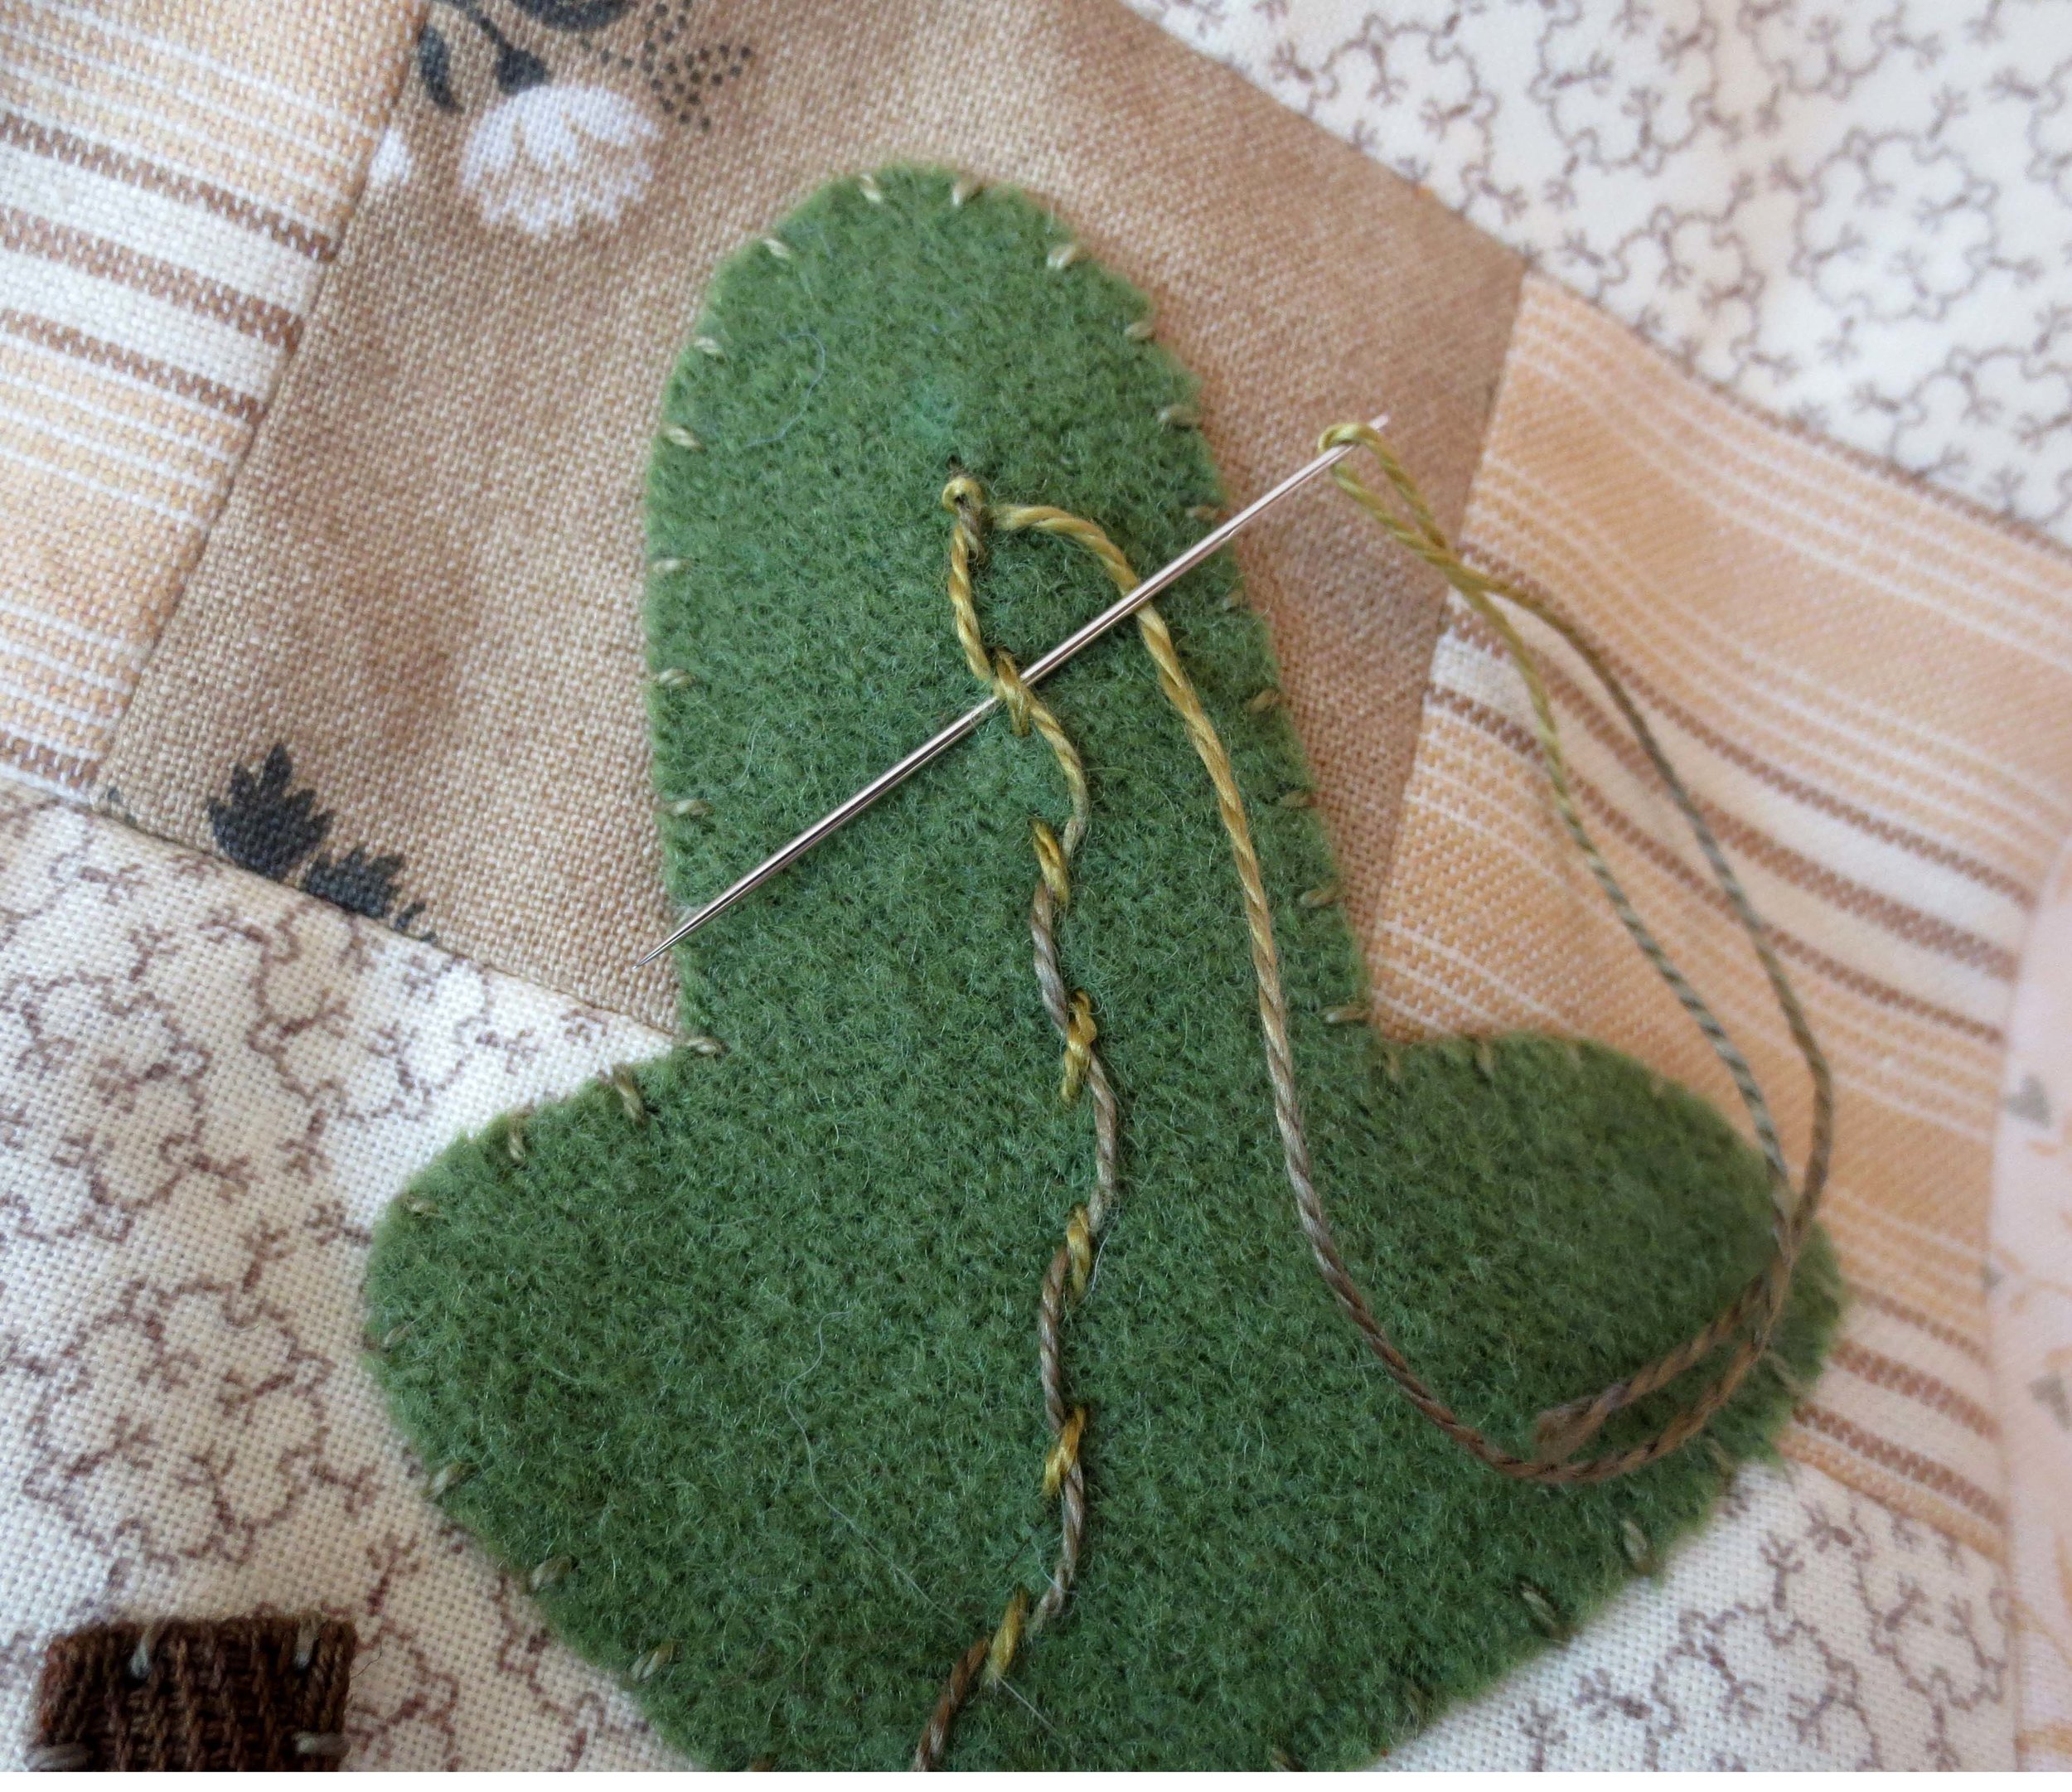
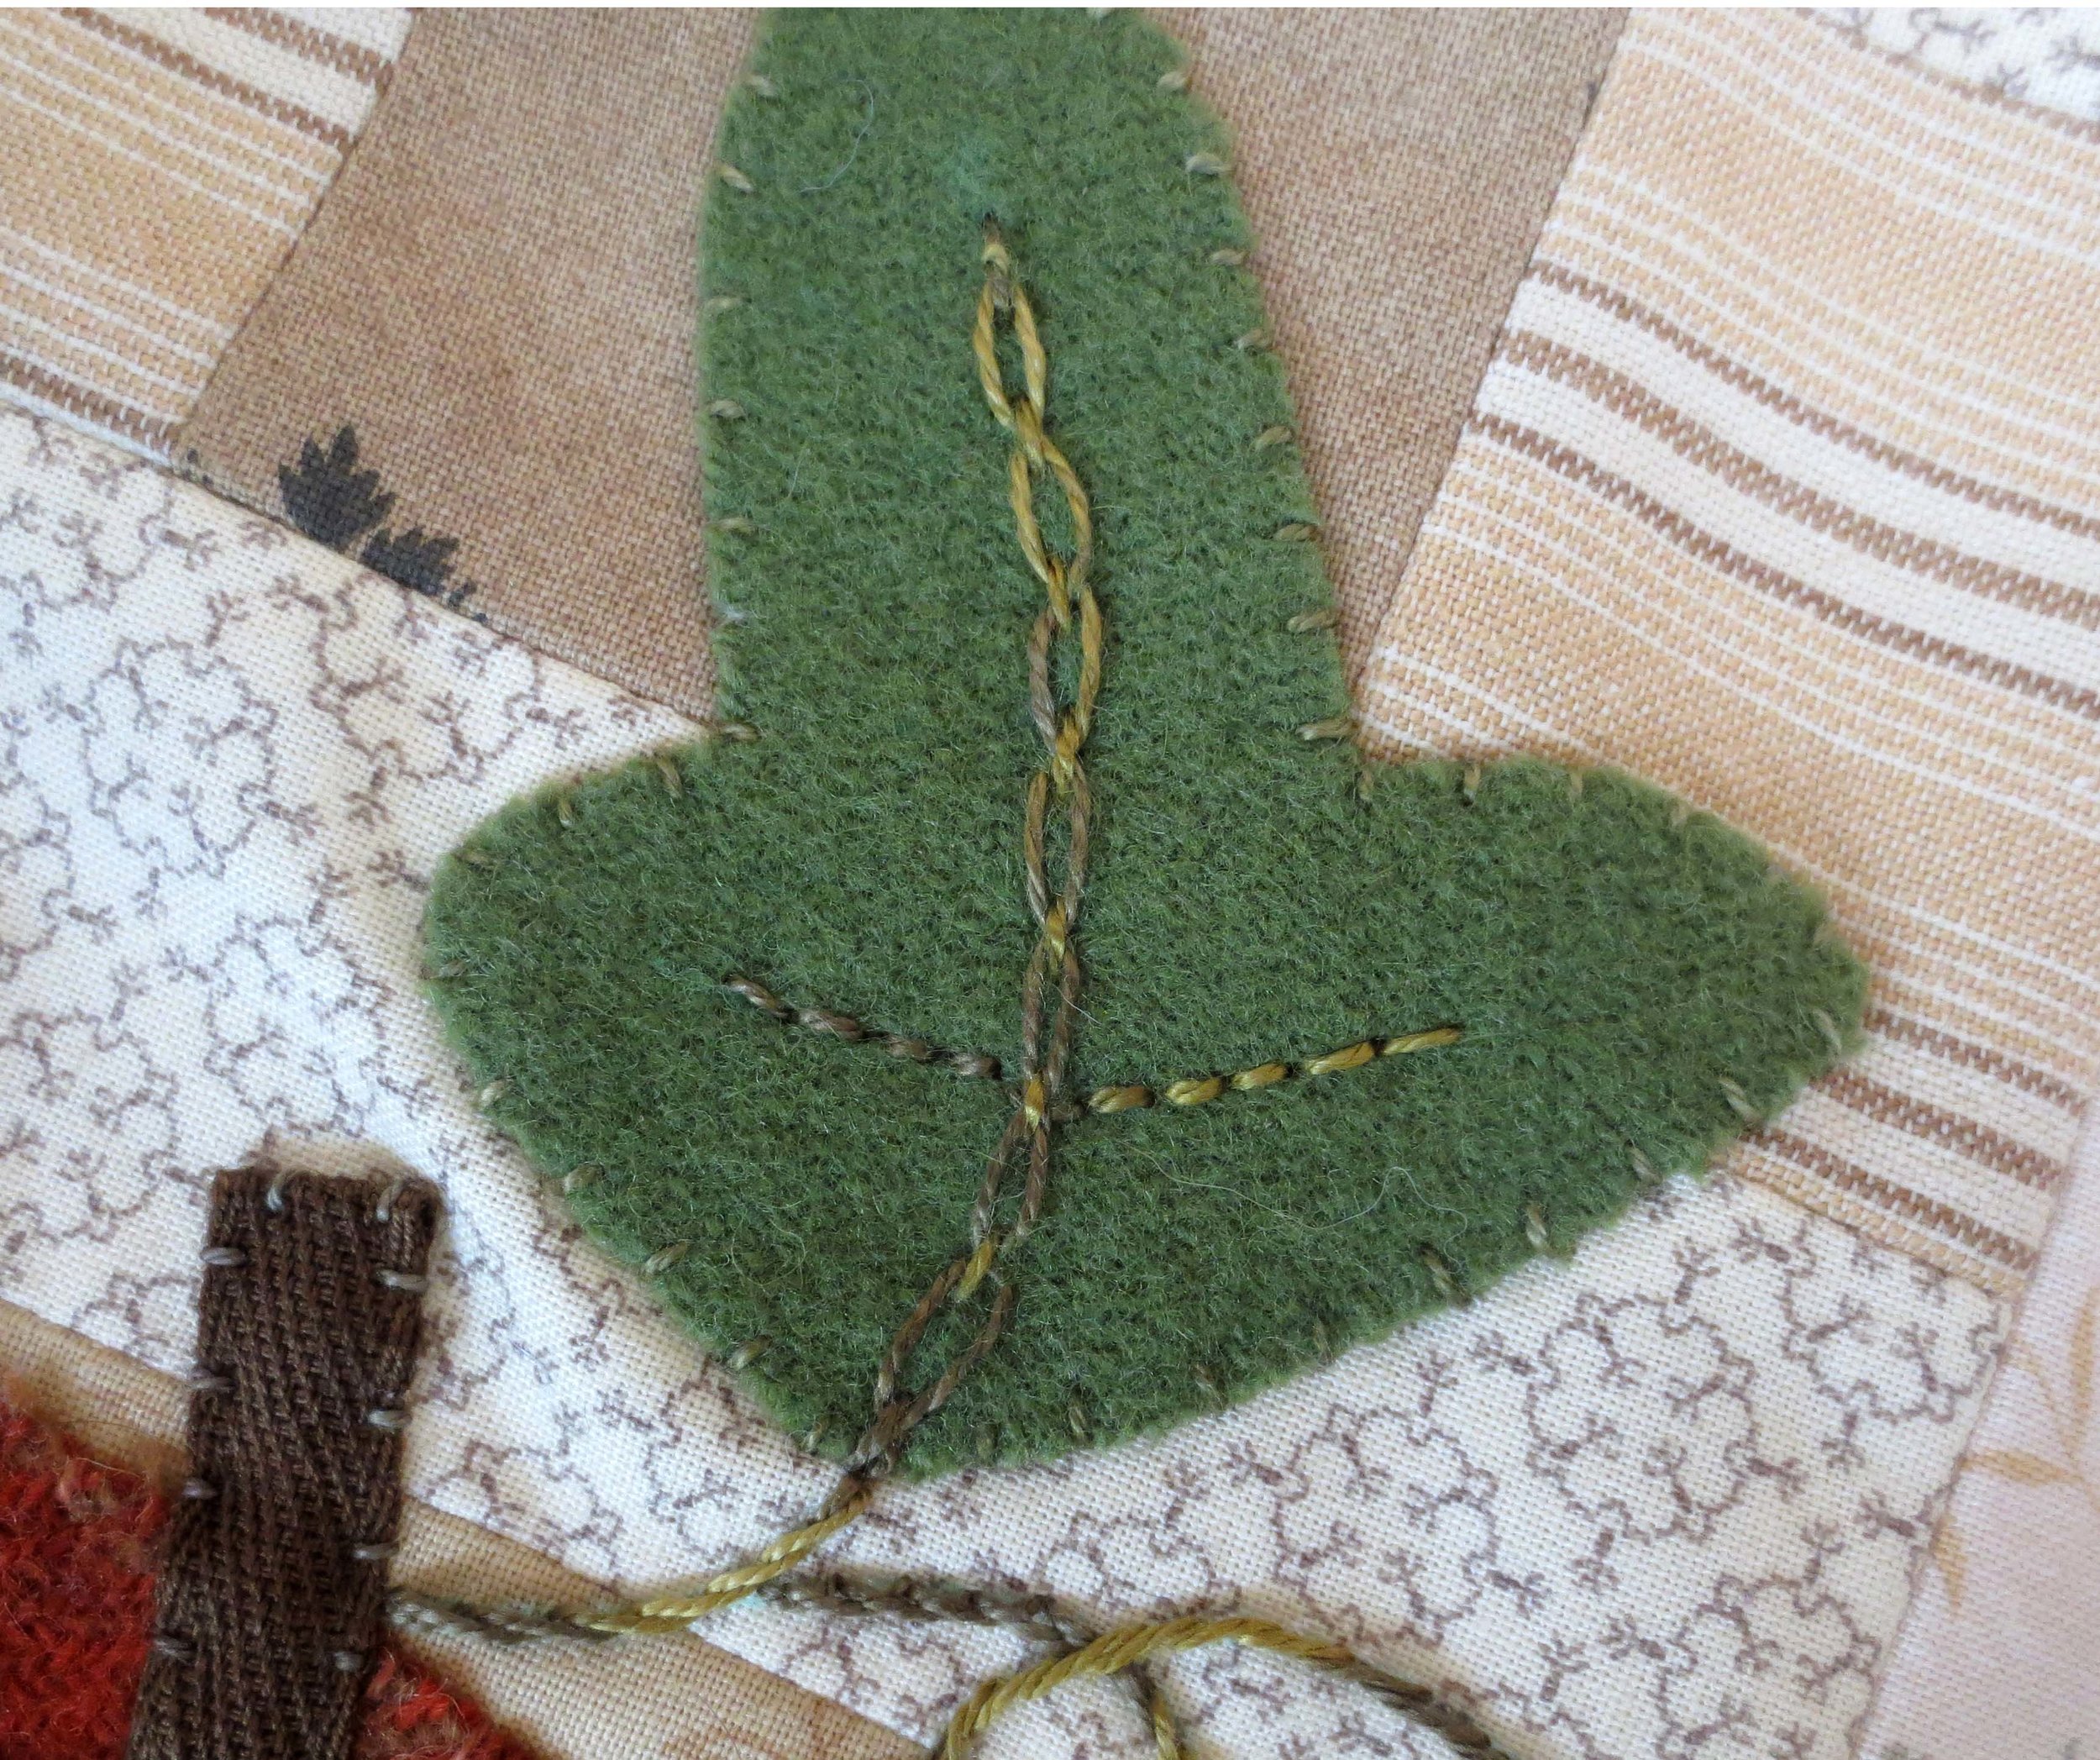
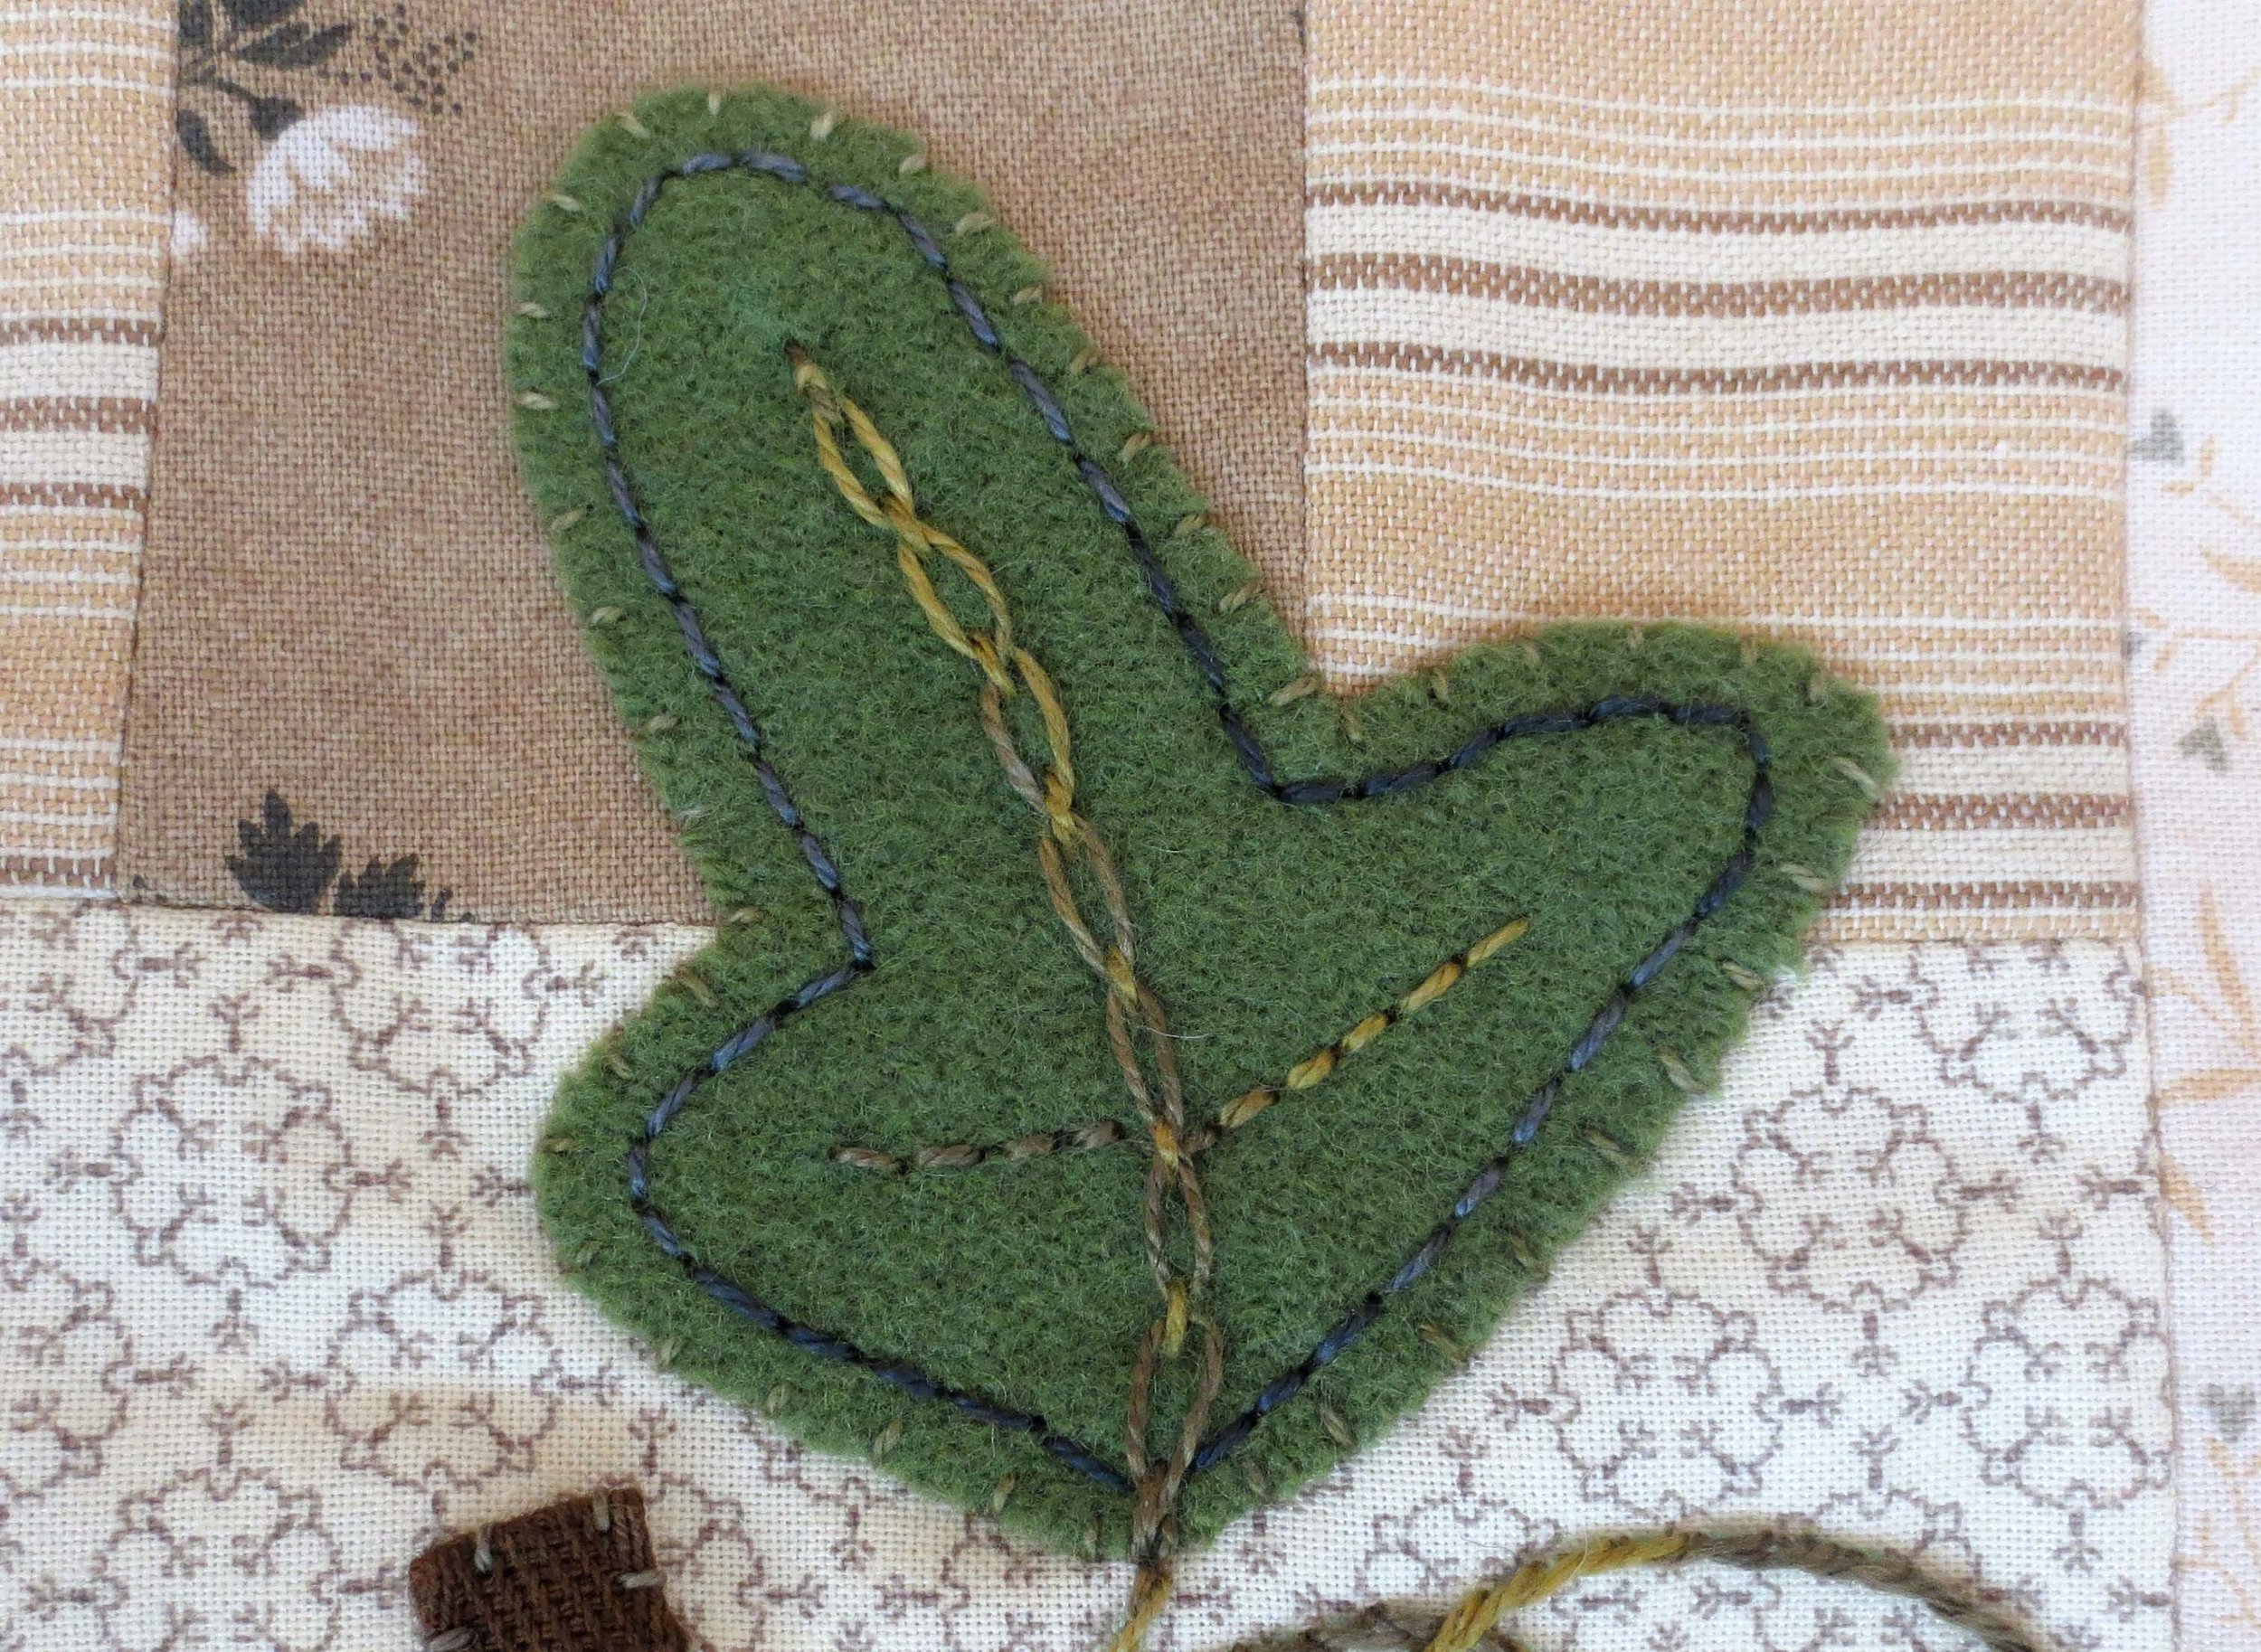
Draw the leaf vein and pumpkin tendril with a chalk pencil.
Use perle cotton, size 8 to stem stitch over the tendril line.
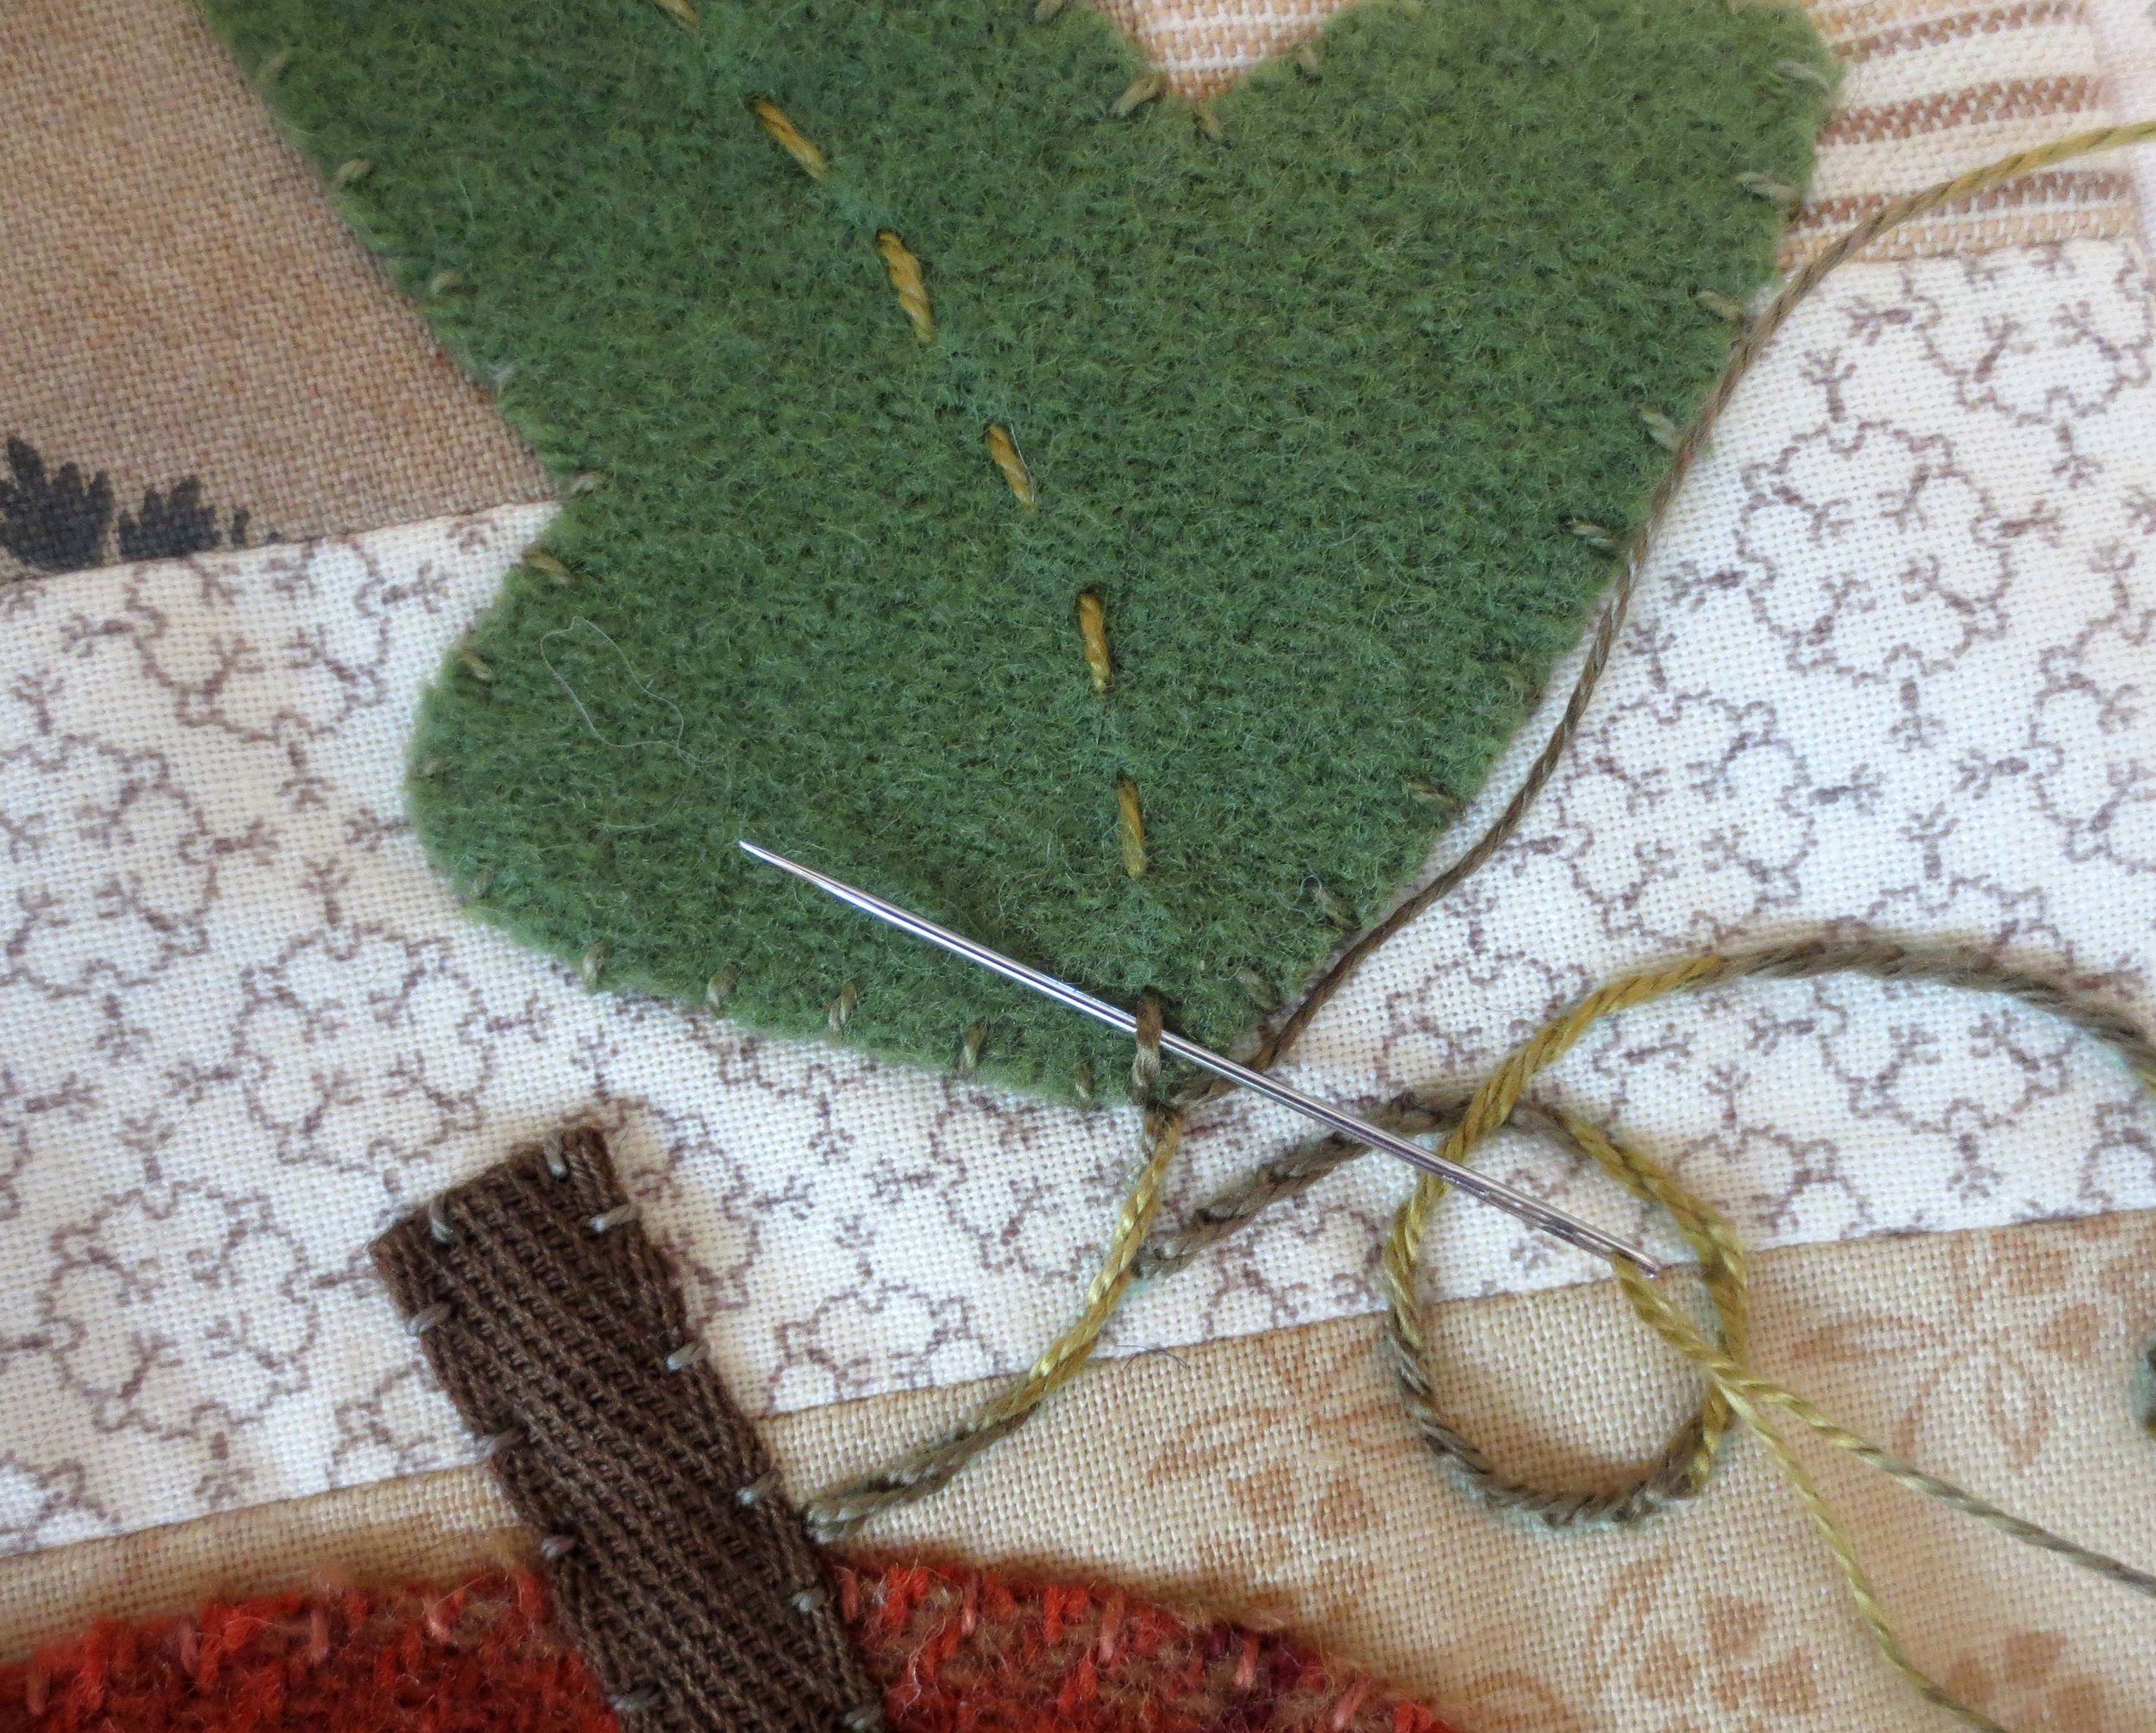
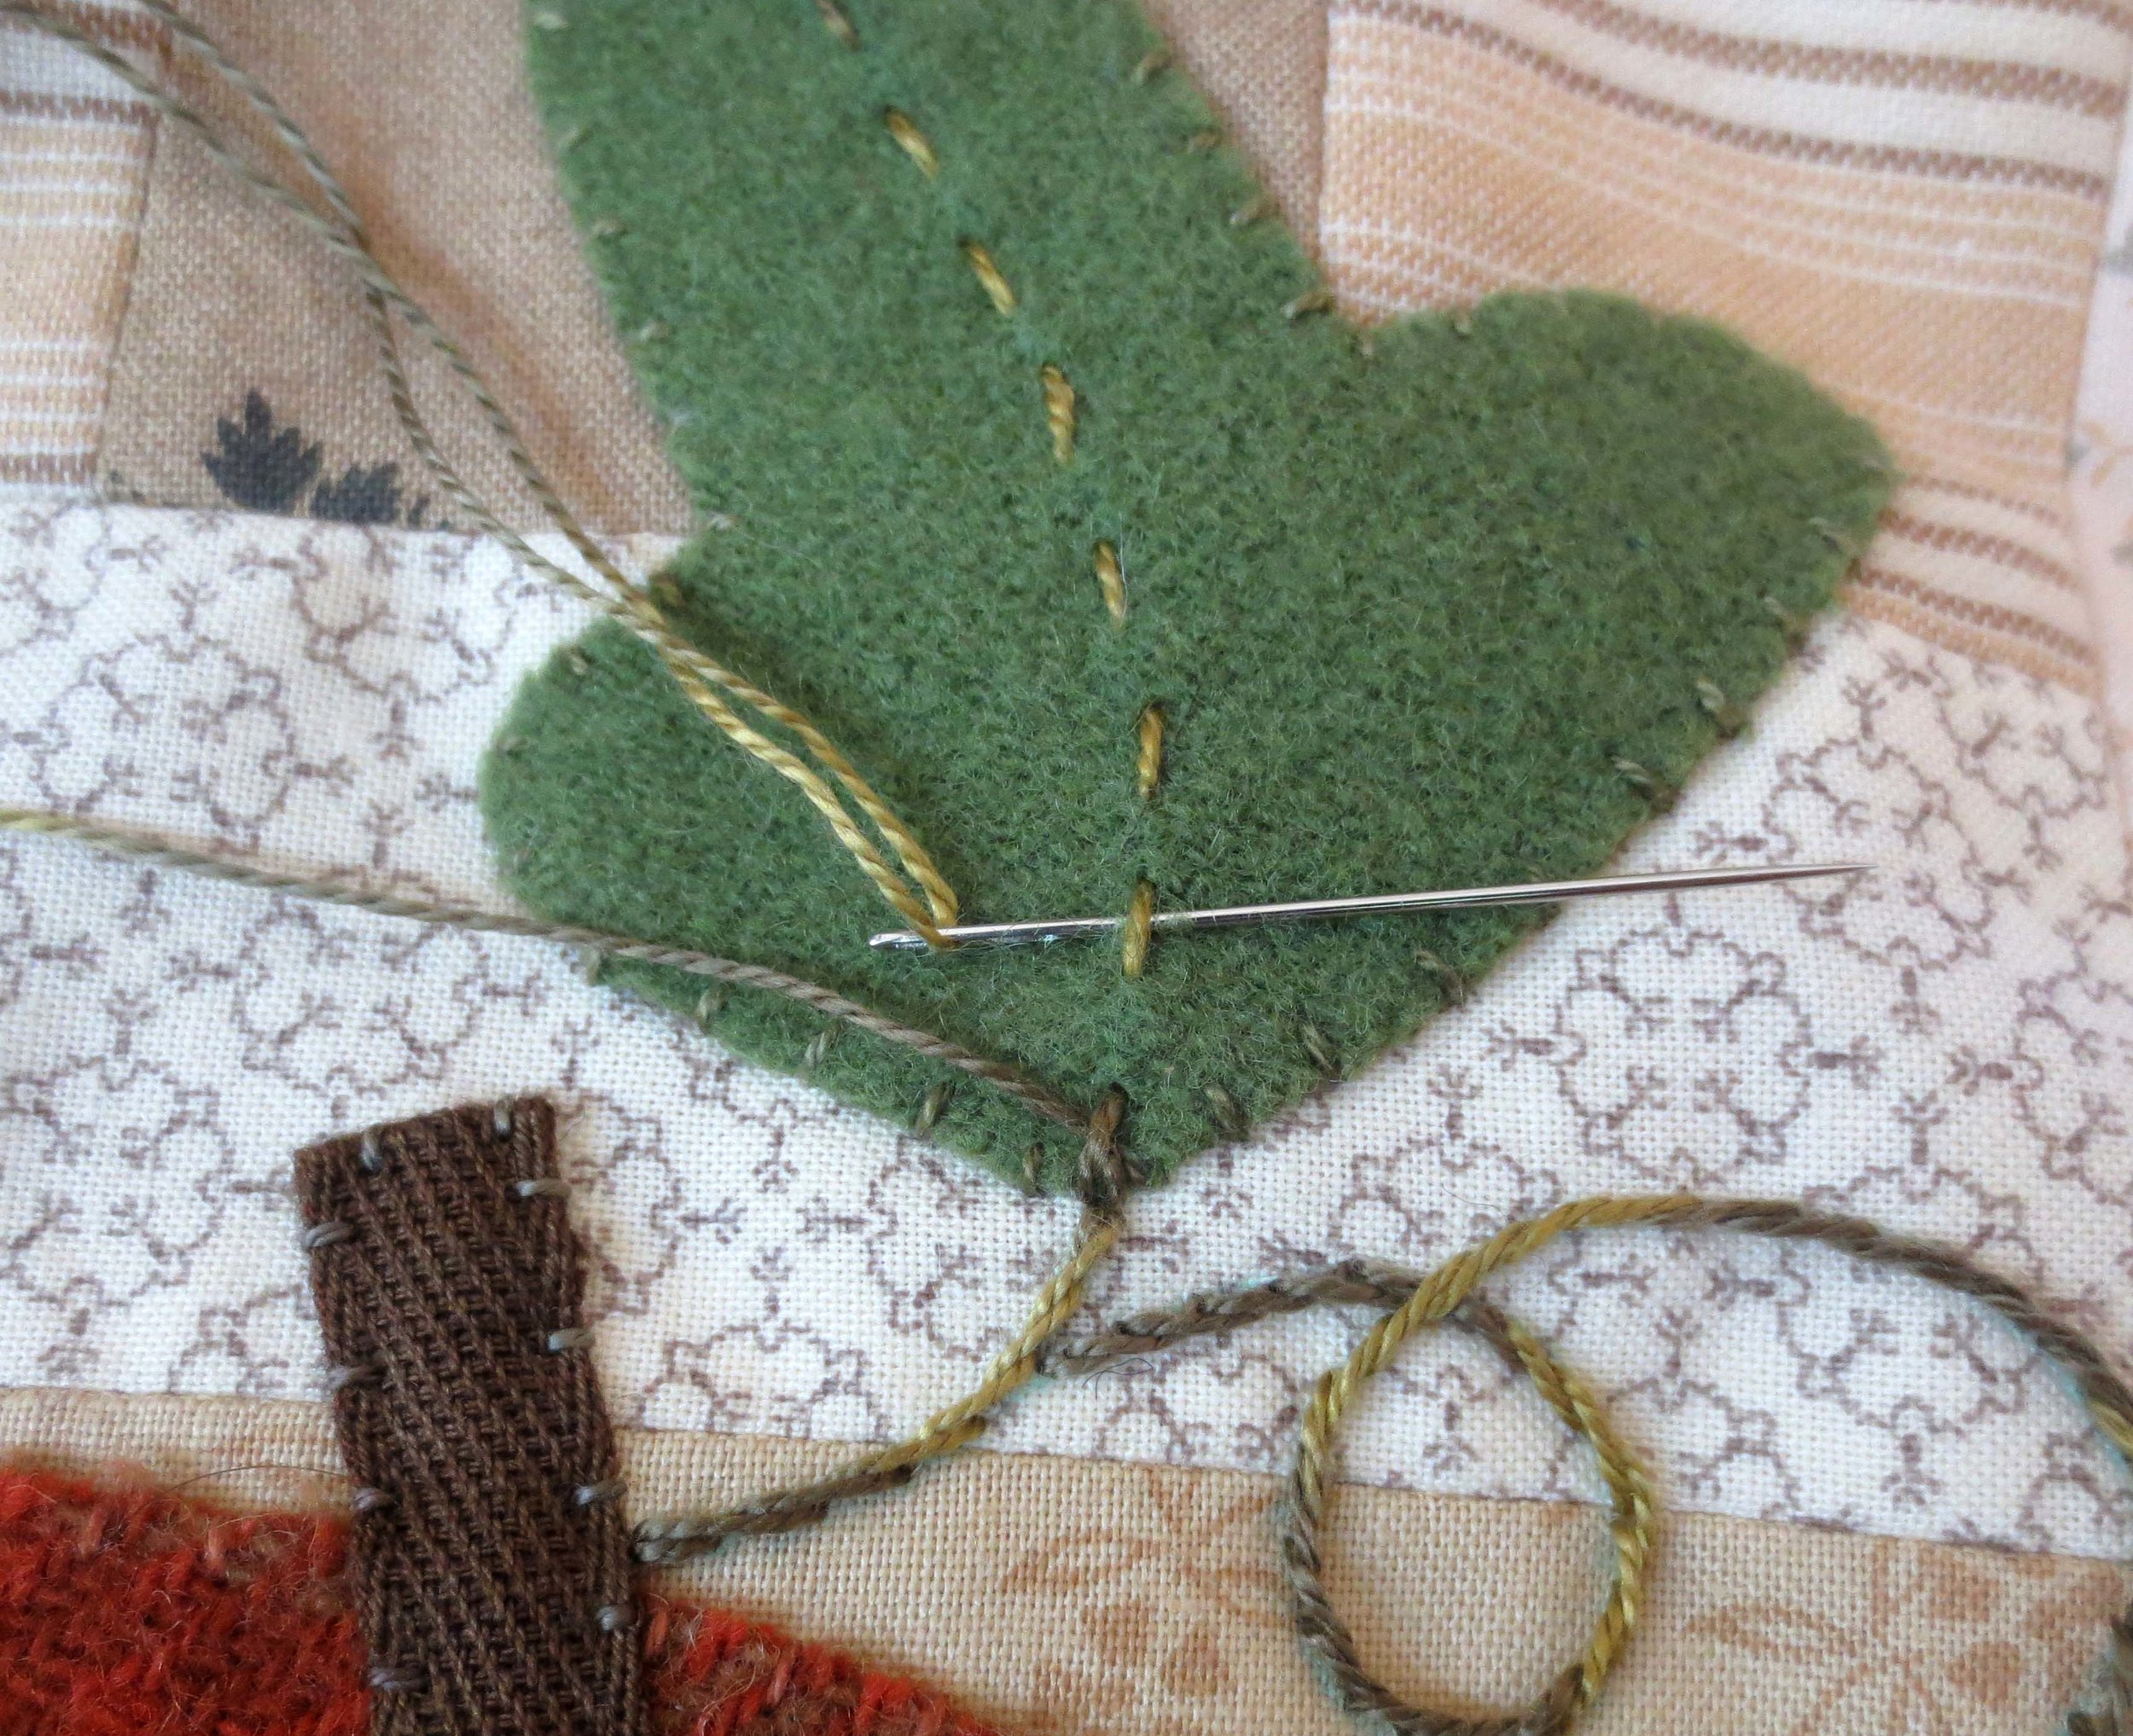
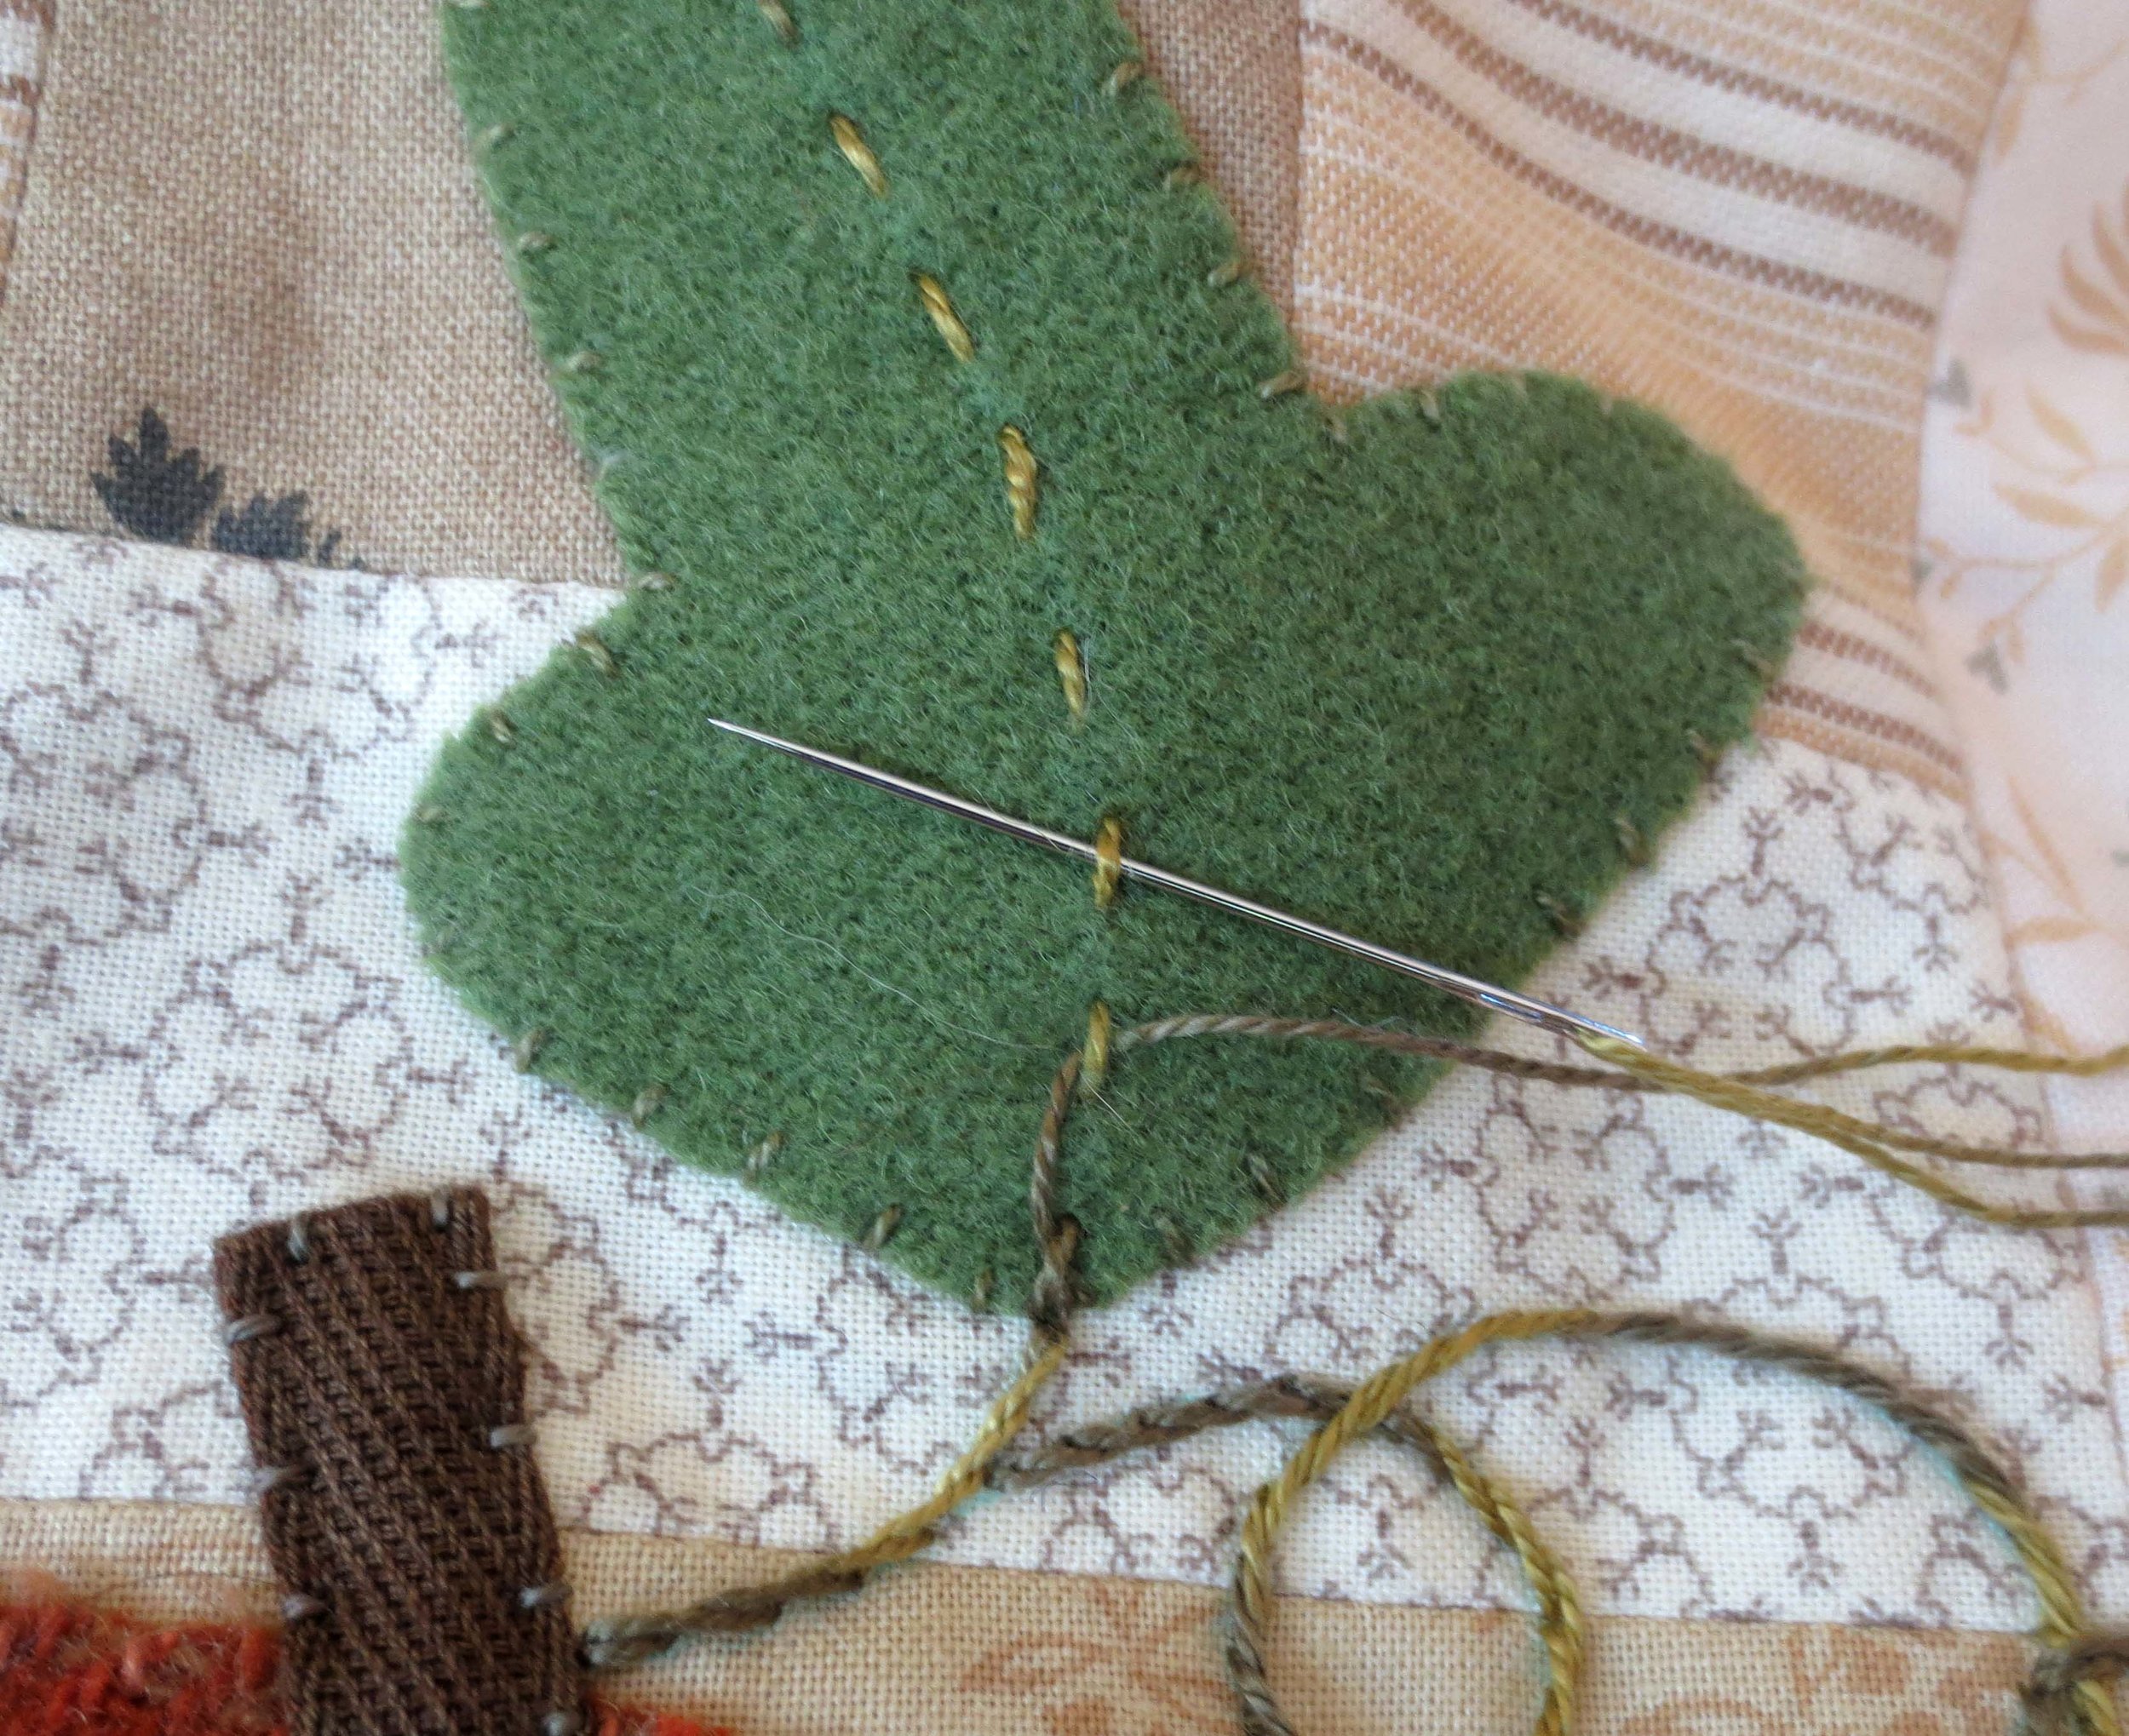
Stitch over the vein line with a running stitch using the same size 8 thread.
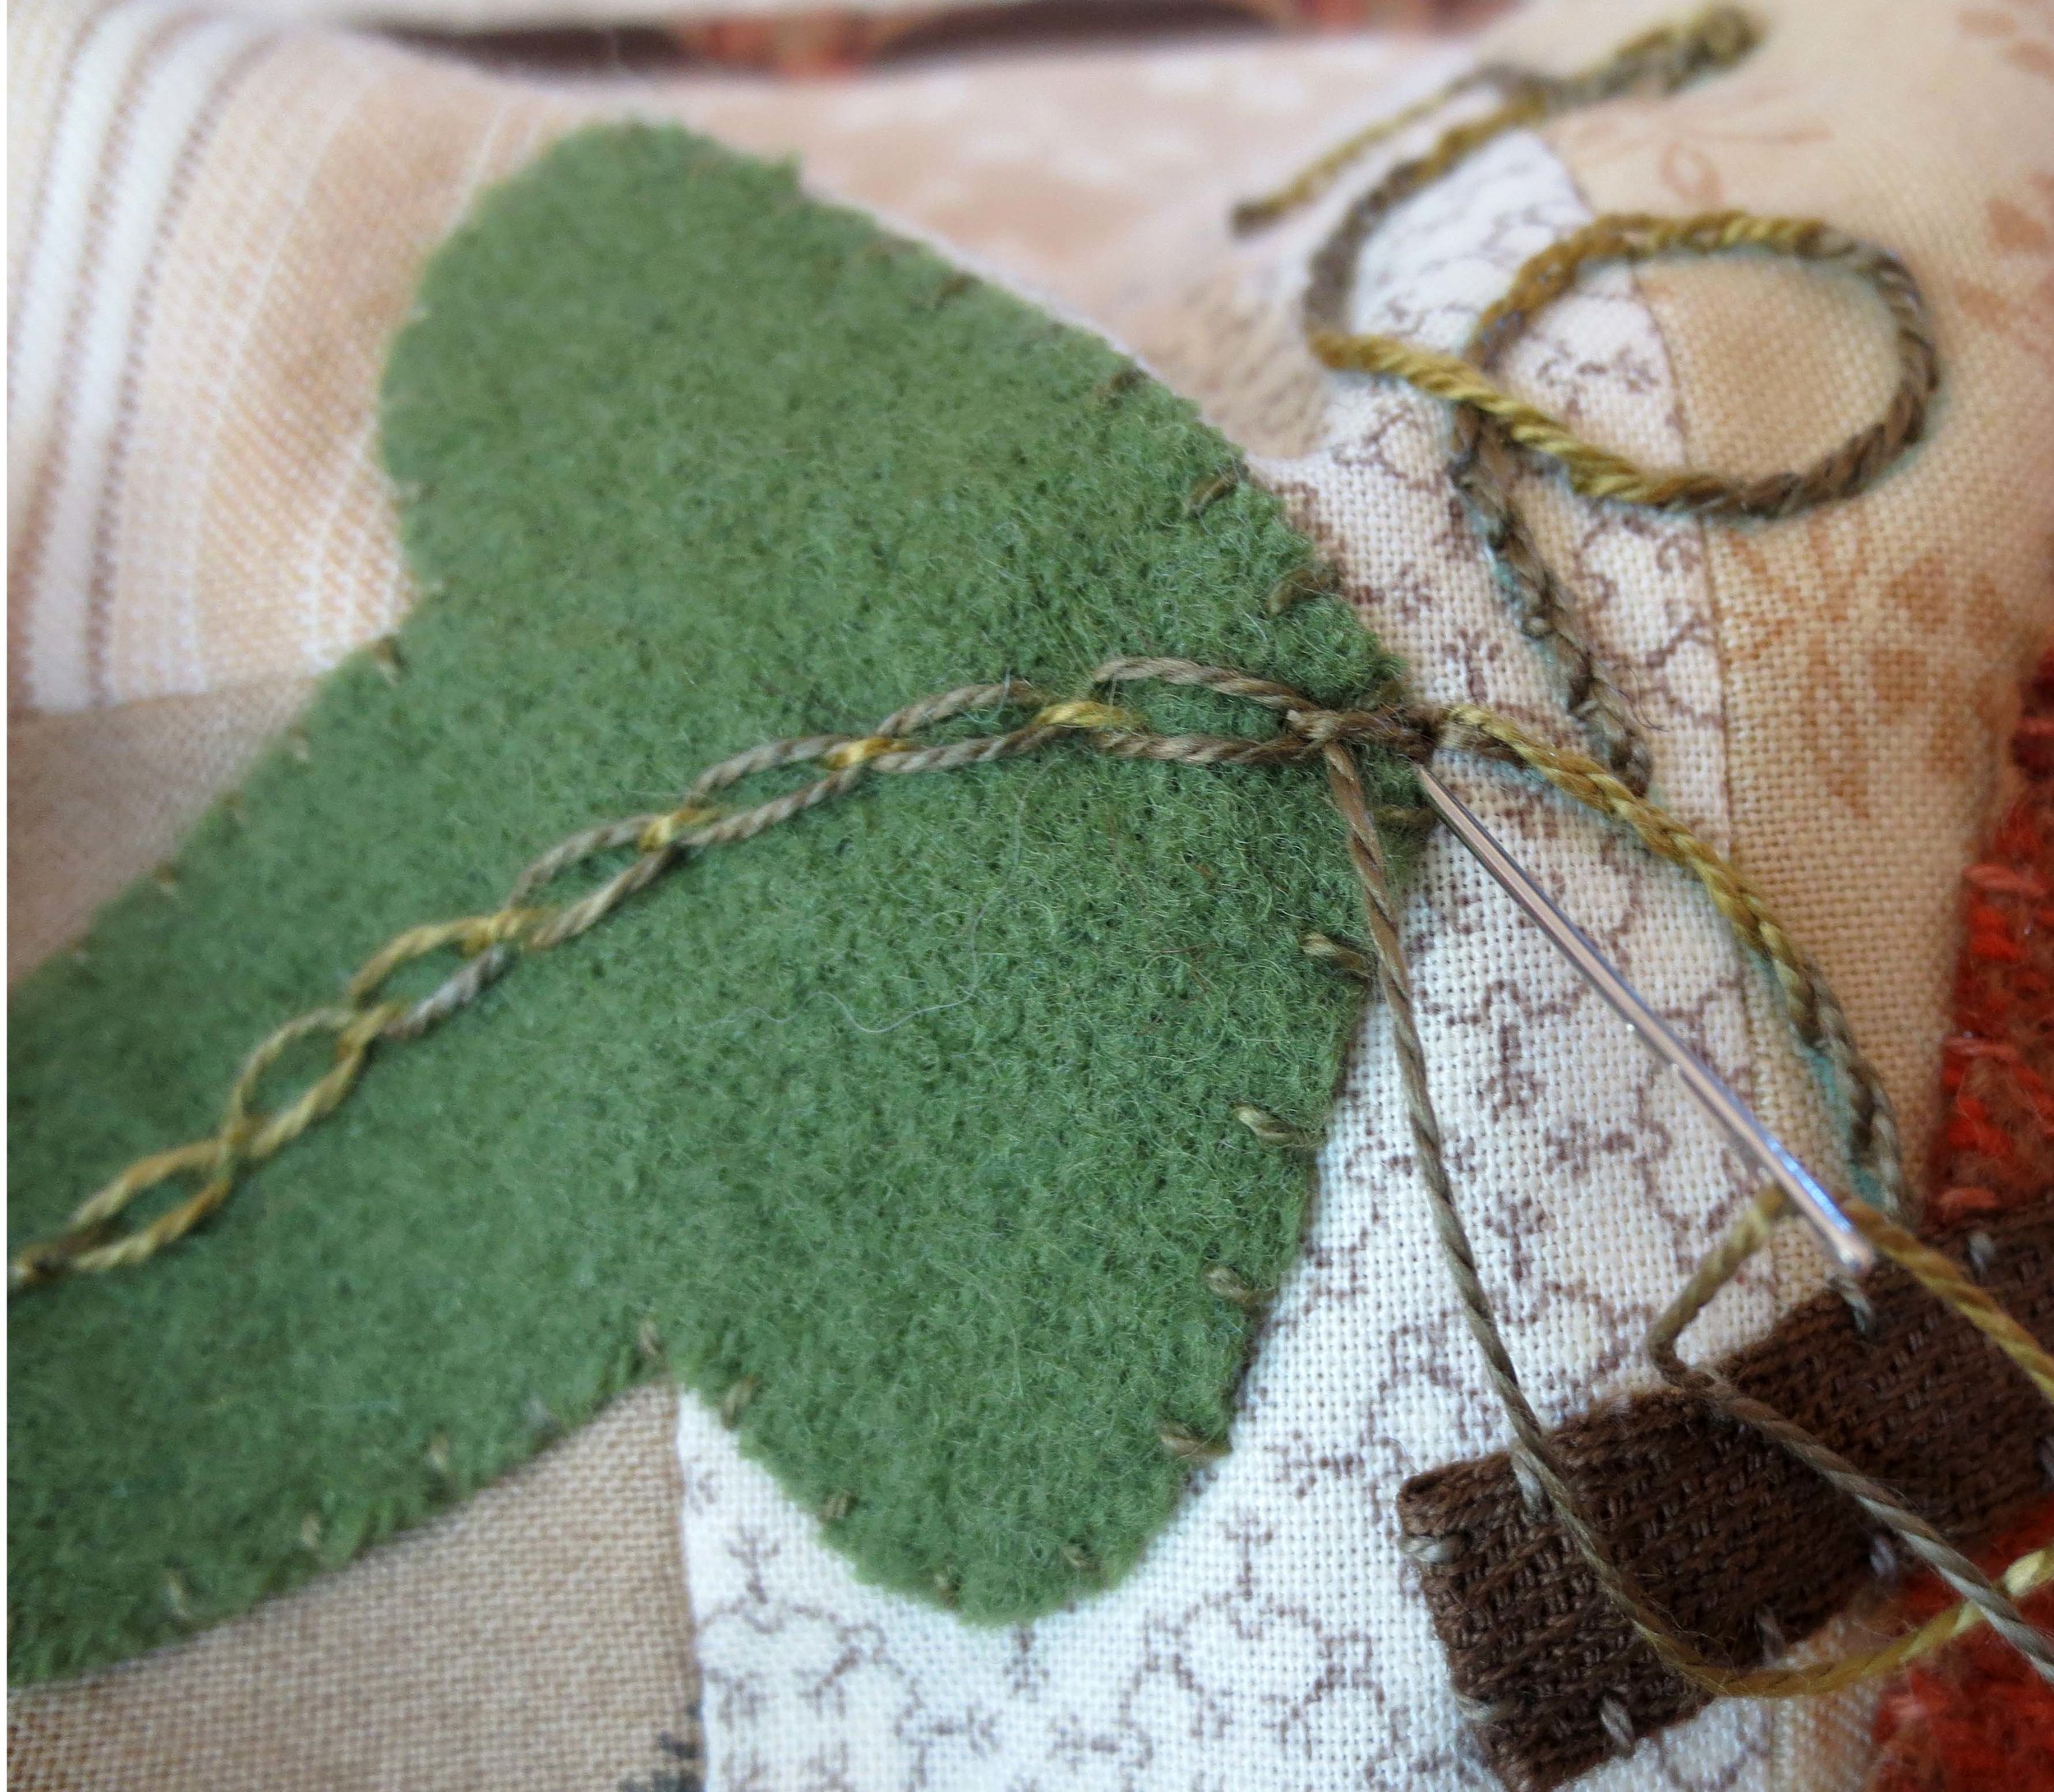
Bring the thread up at the base of the leaf and weave the thread through the running stitches.
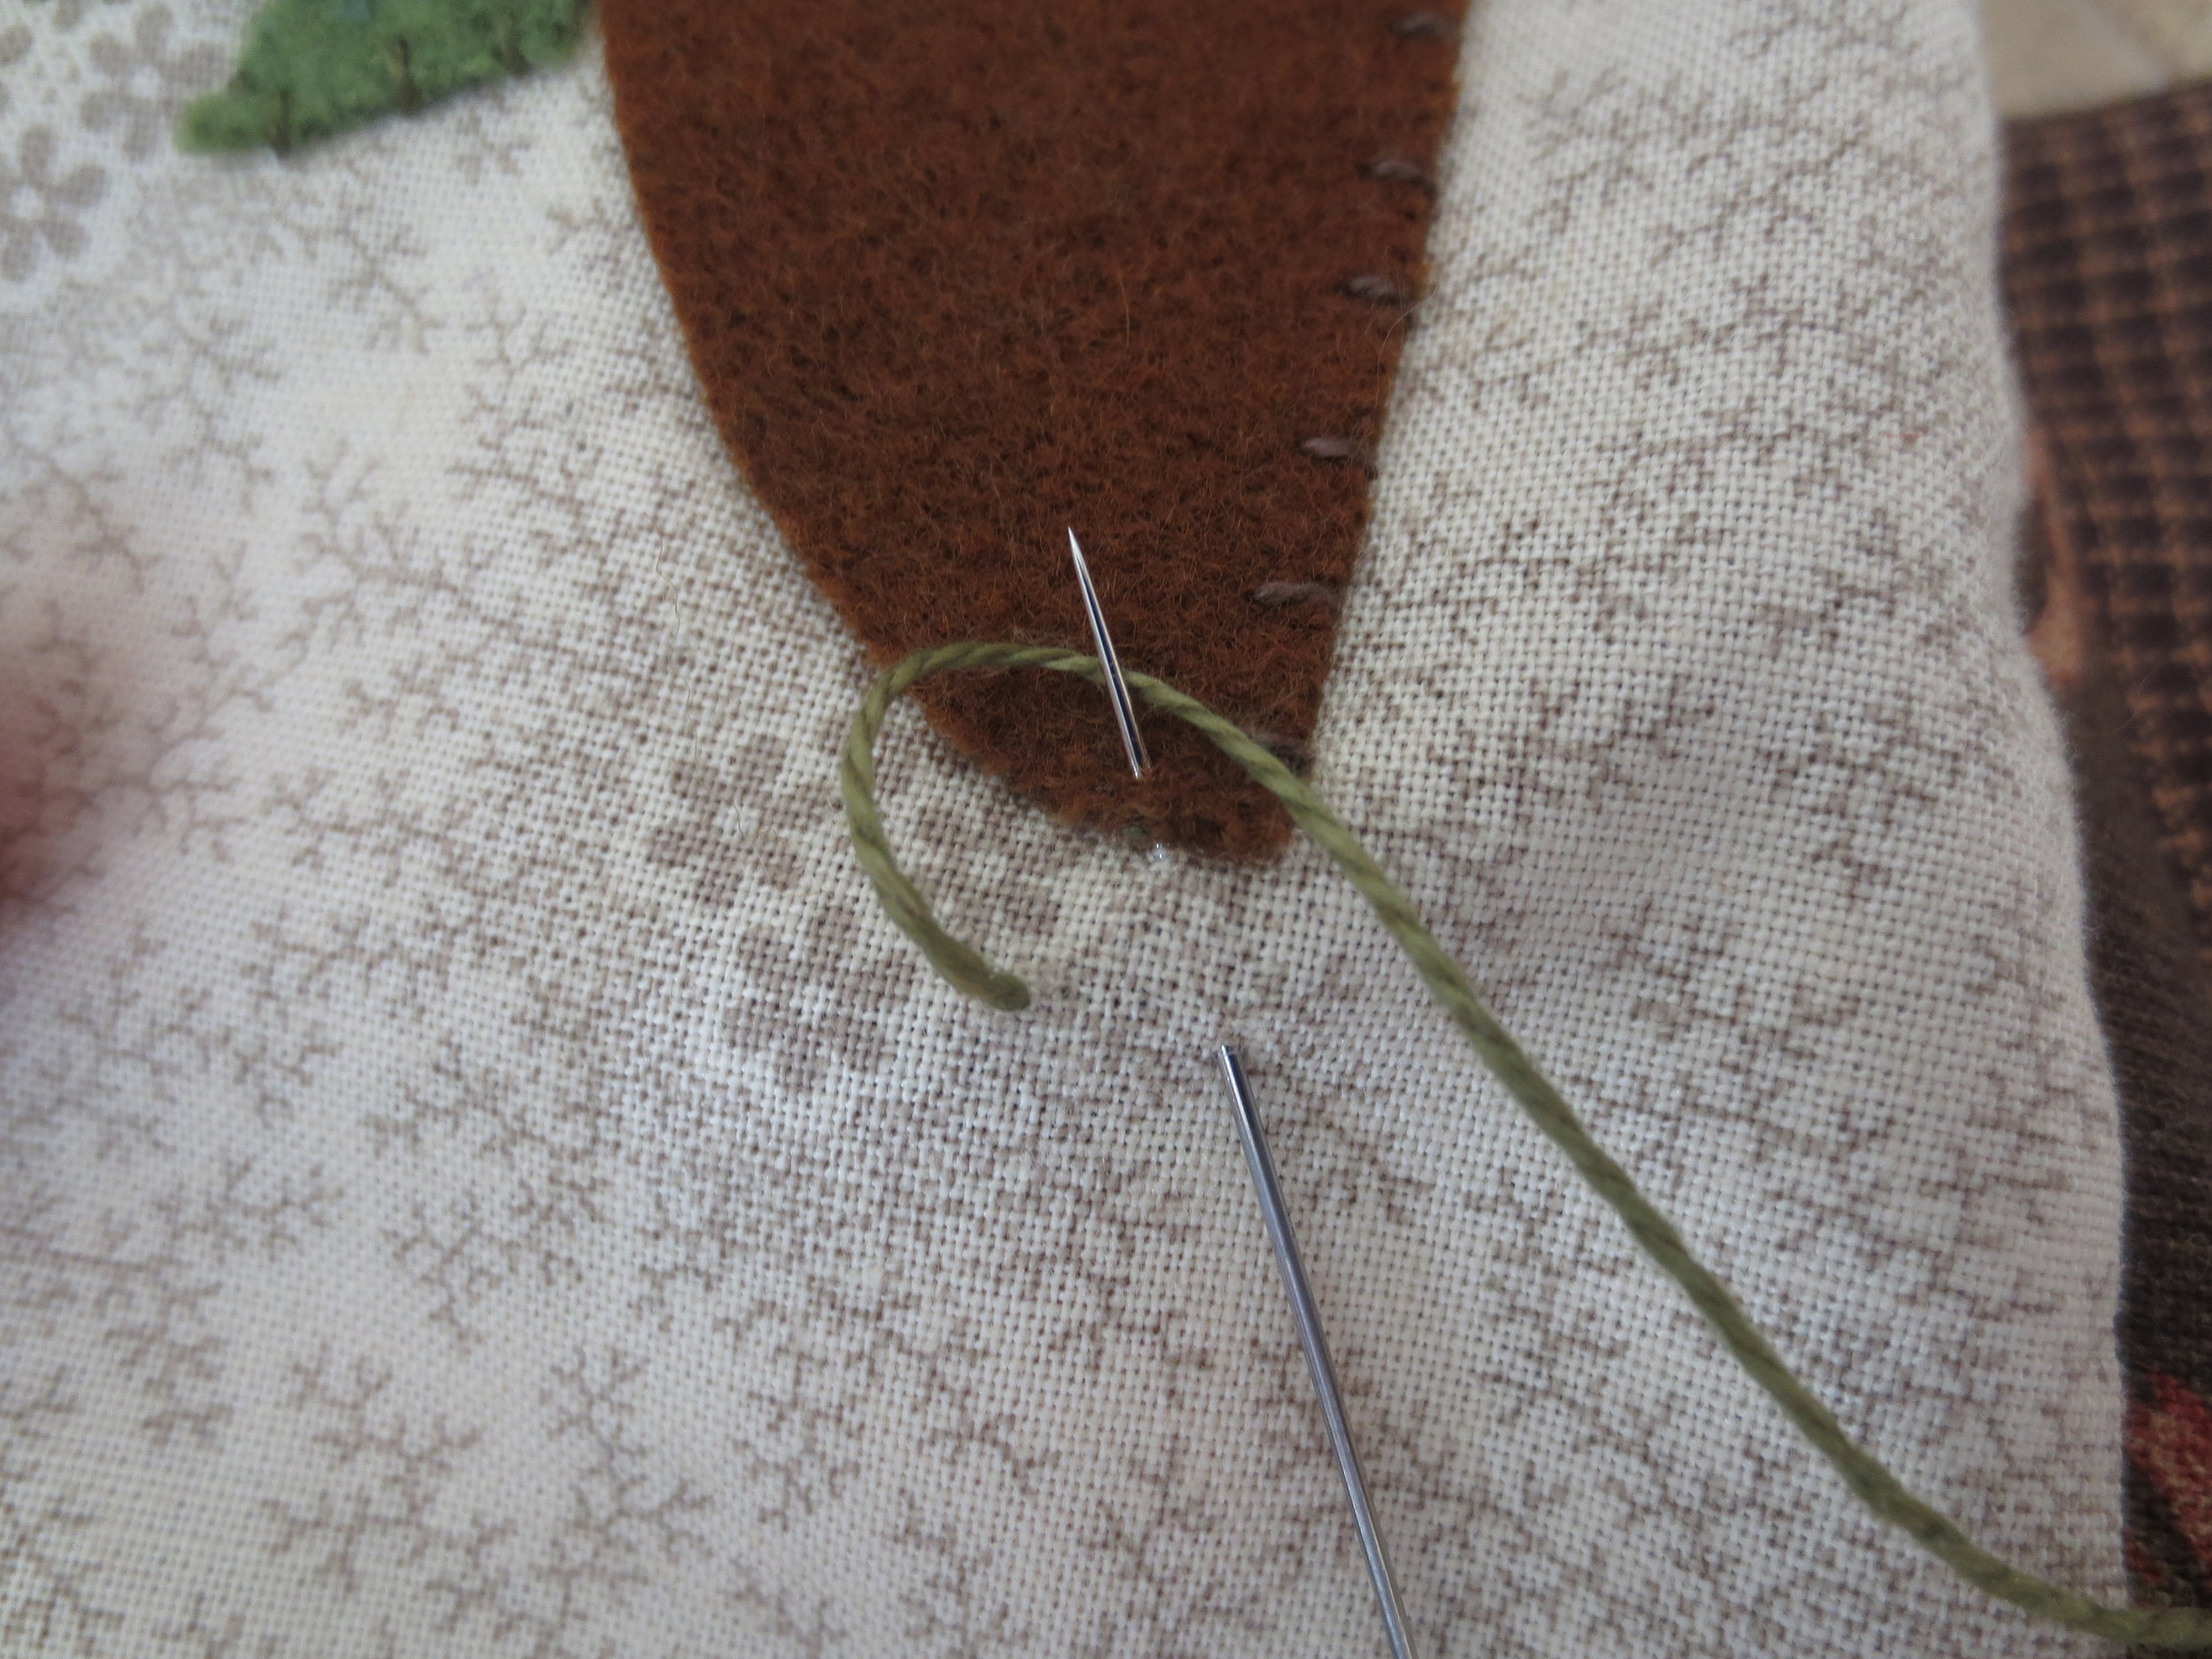
After threading the last stitch, anchor it by inserting the needle into the base of the leaf, pulling the thread through to the back and knotting it.
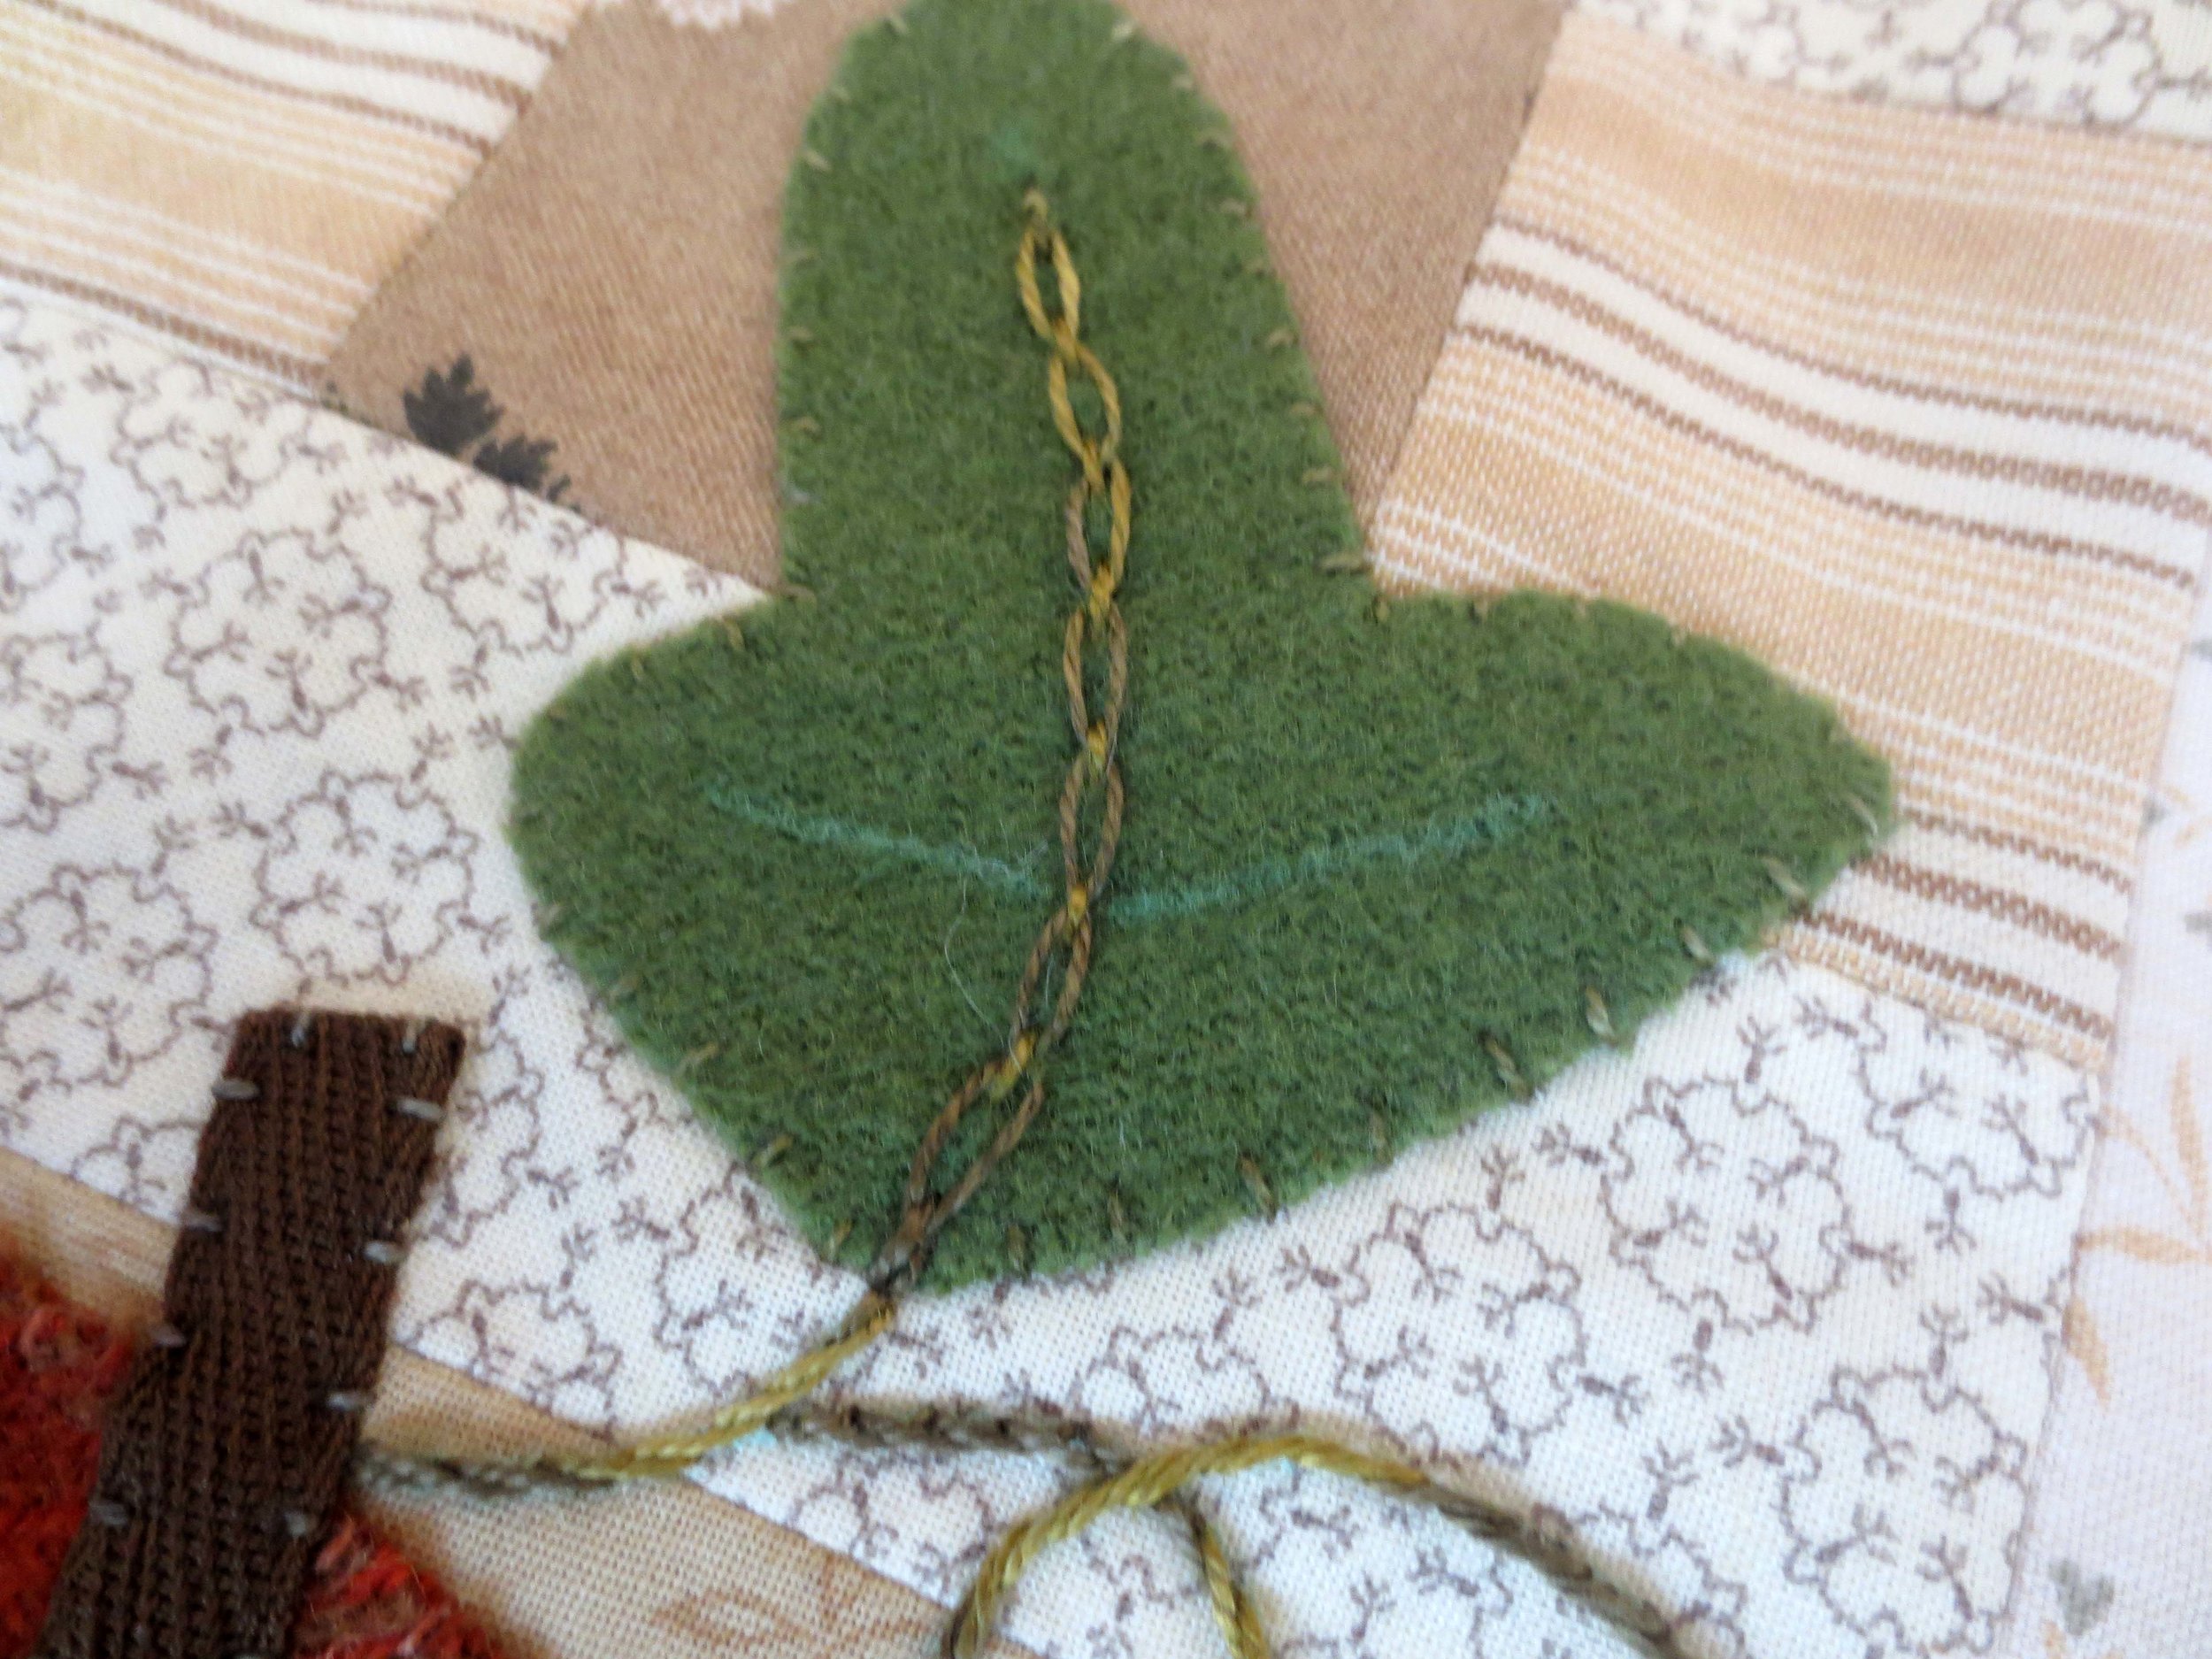
Draw the two side veins with a chalk pencil.
Back stitch over the line with the same thread used for the central vein.
Back stitch an outline around the leaf using a perle cotton, size 8 thread. I used a variegated blue green on mine.
Outline the two grass pieces also.
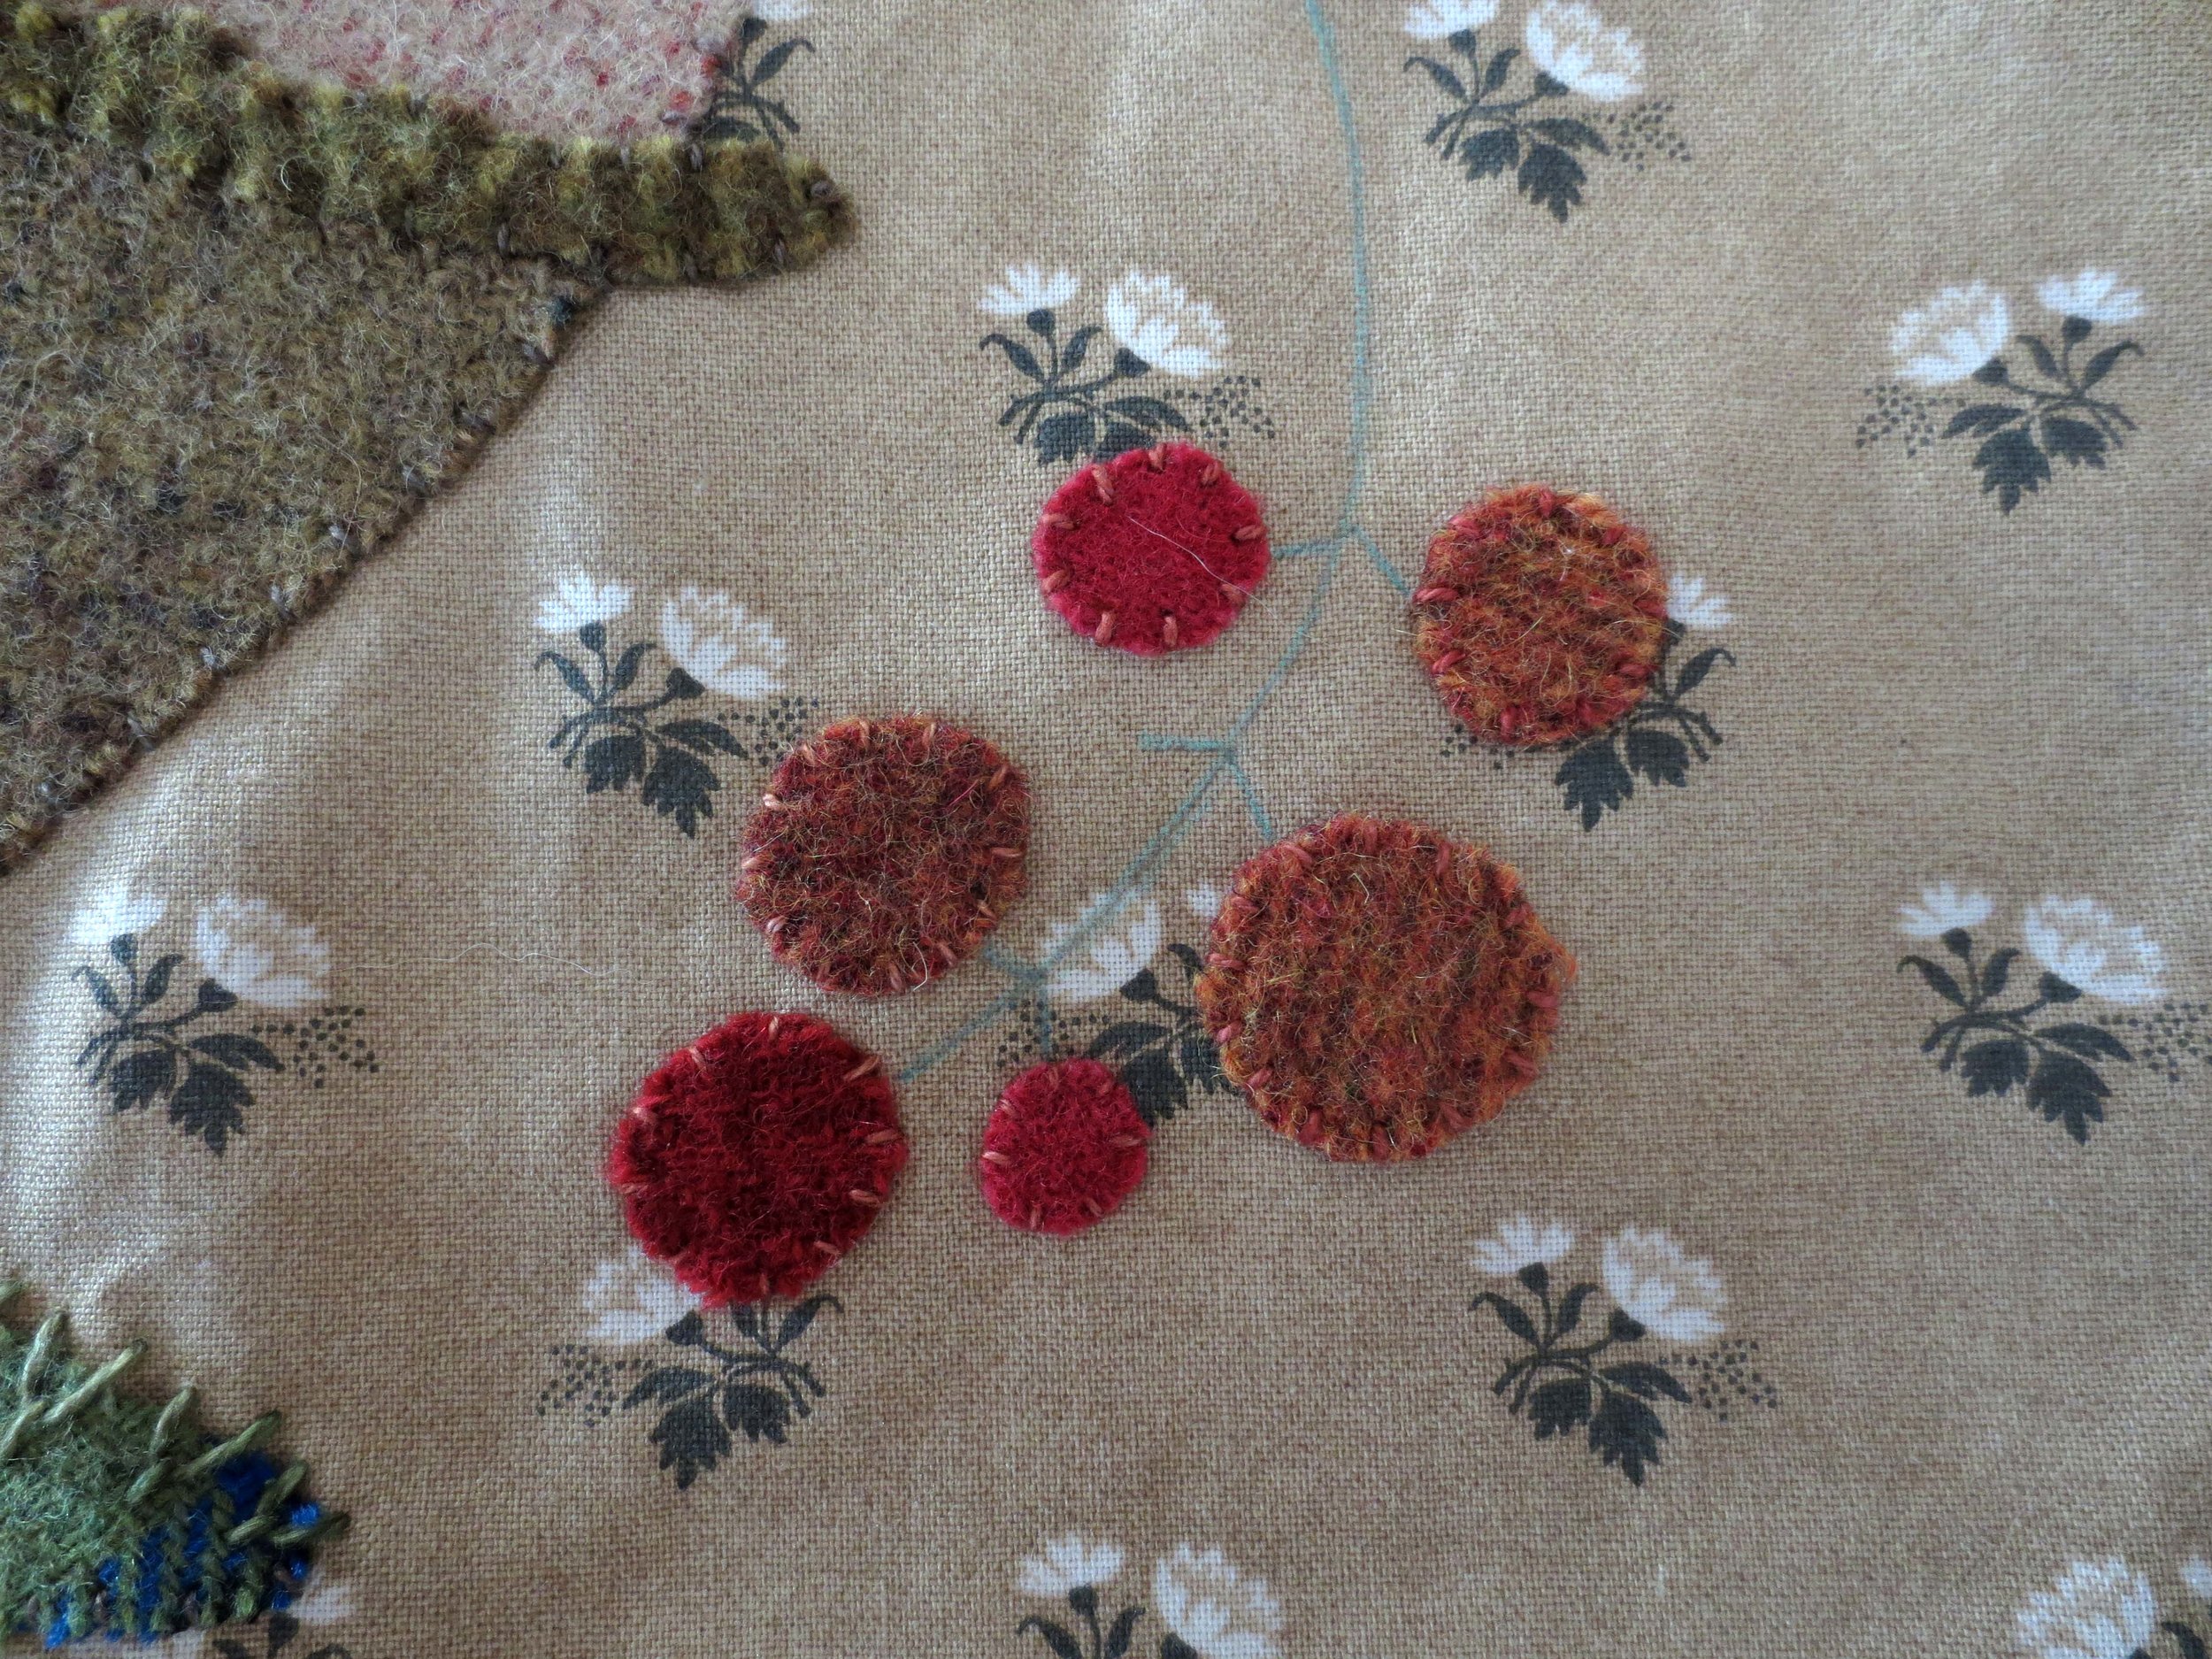
Draw the stem of the berries with a chalk pencil. If you have a light box you can trace the stem using the pattern on page 2.
Stem stitch over the center stem using perle cotton, size 8. Use the same thread to make straight stitch side branches.
Use perle cotton, size 12 to make lazy daisy stitches on the berries (see the layout for placement).
Use a chalk pencil to draw the ribs of pumpkin.
Backstitch over the lines with perle cotton, size 8. I used a color lighter than the pumpkin.
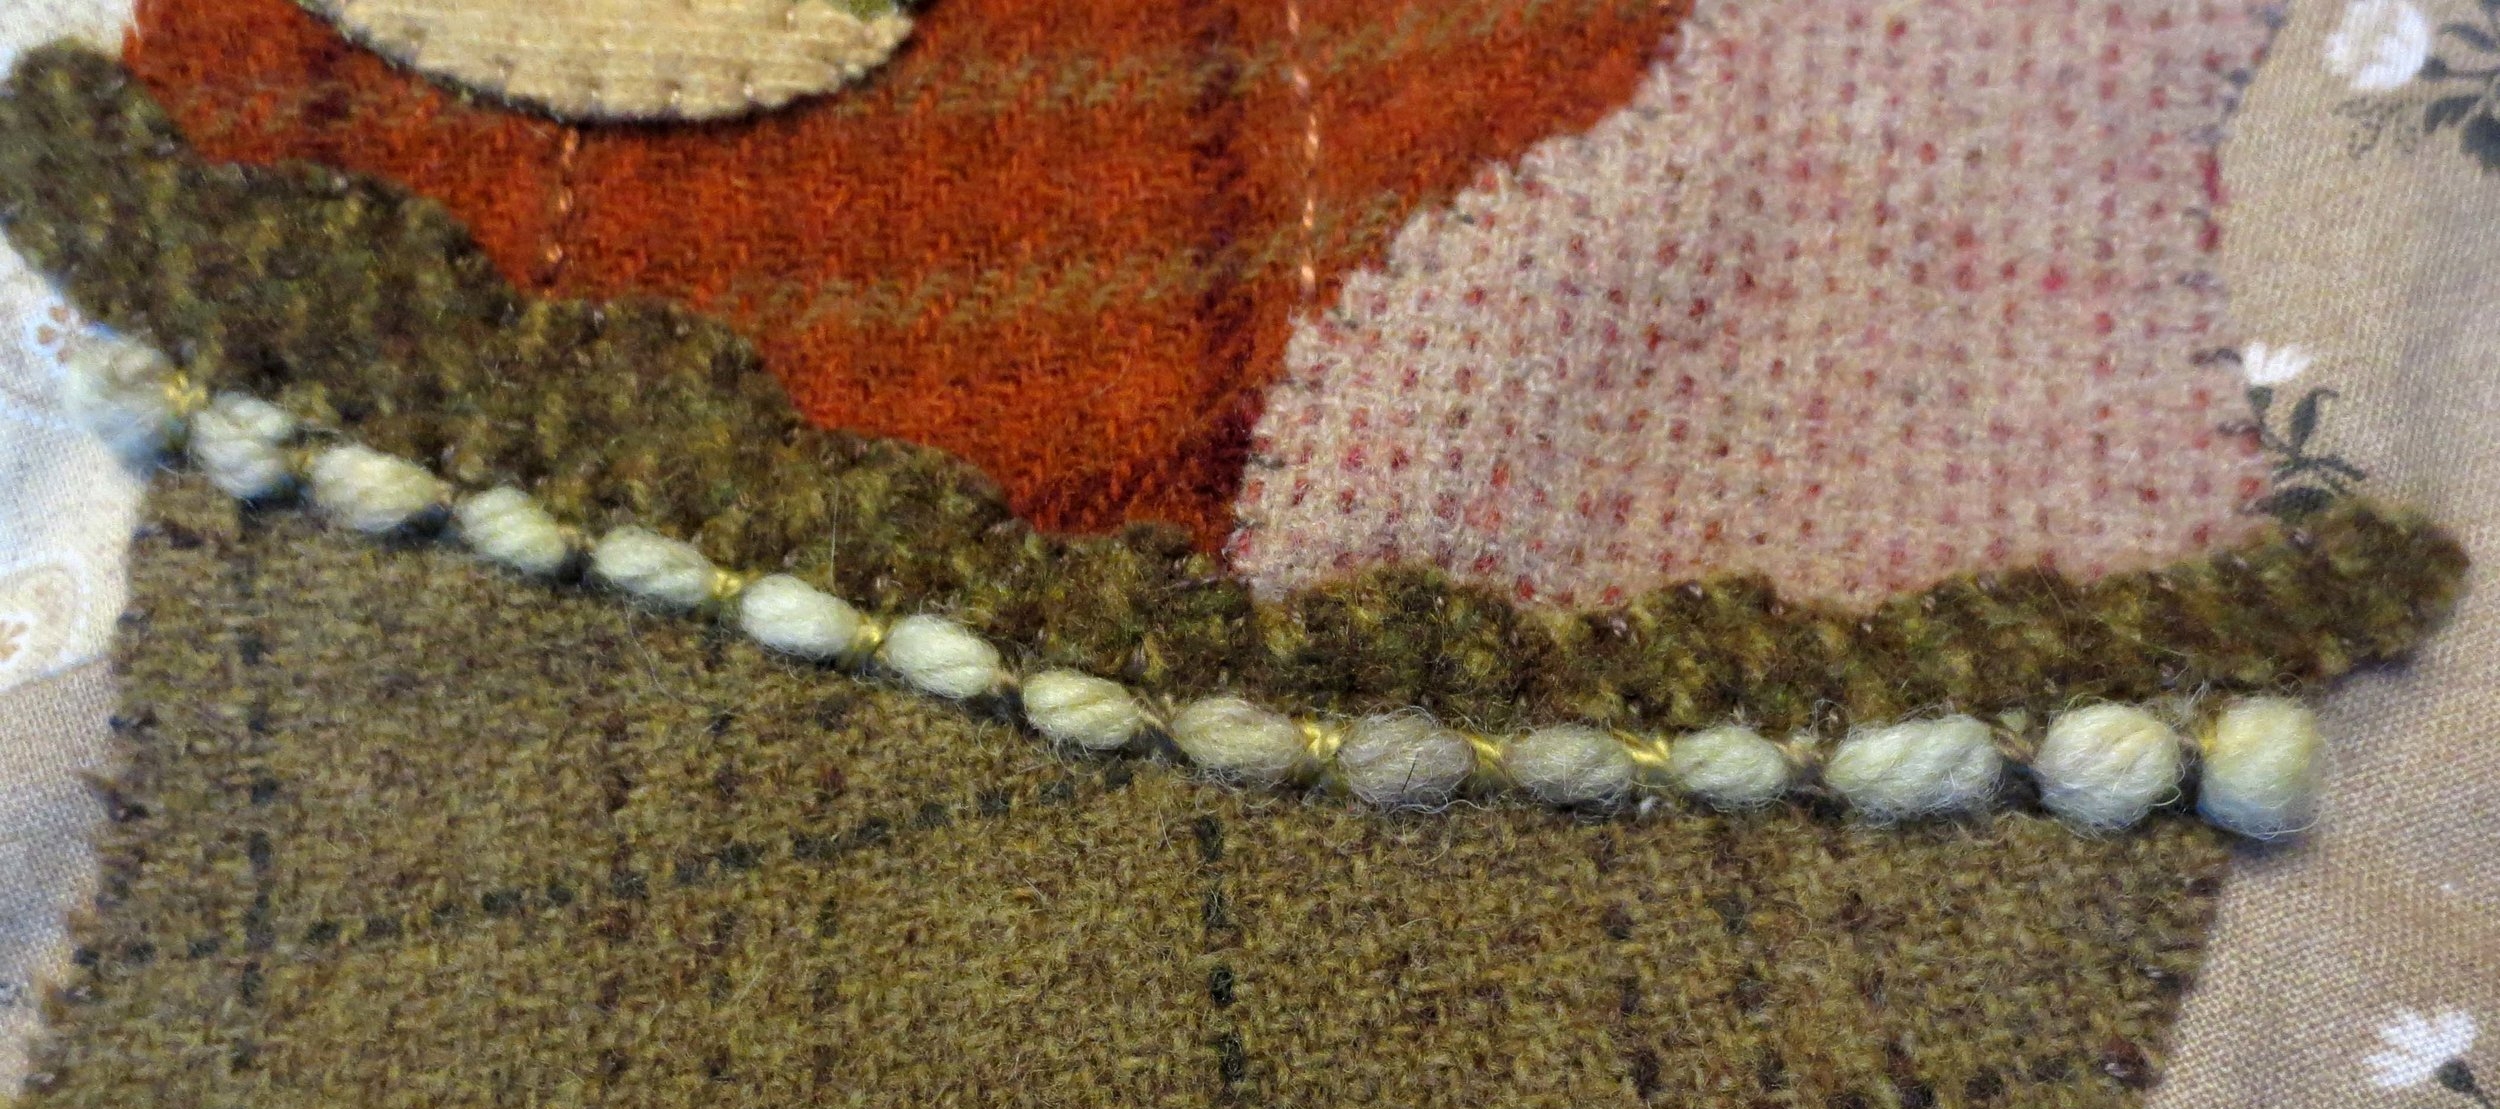
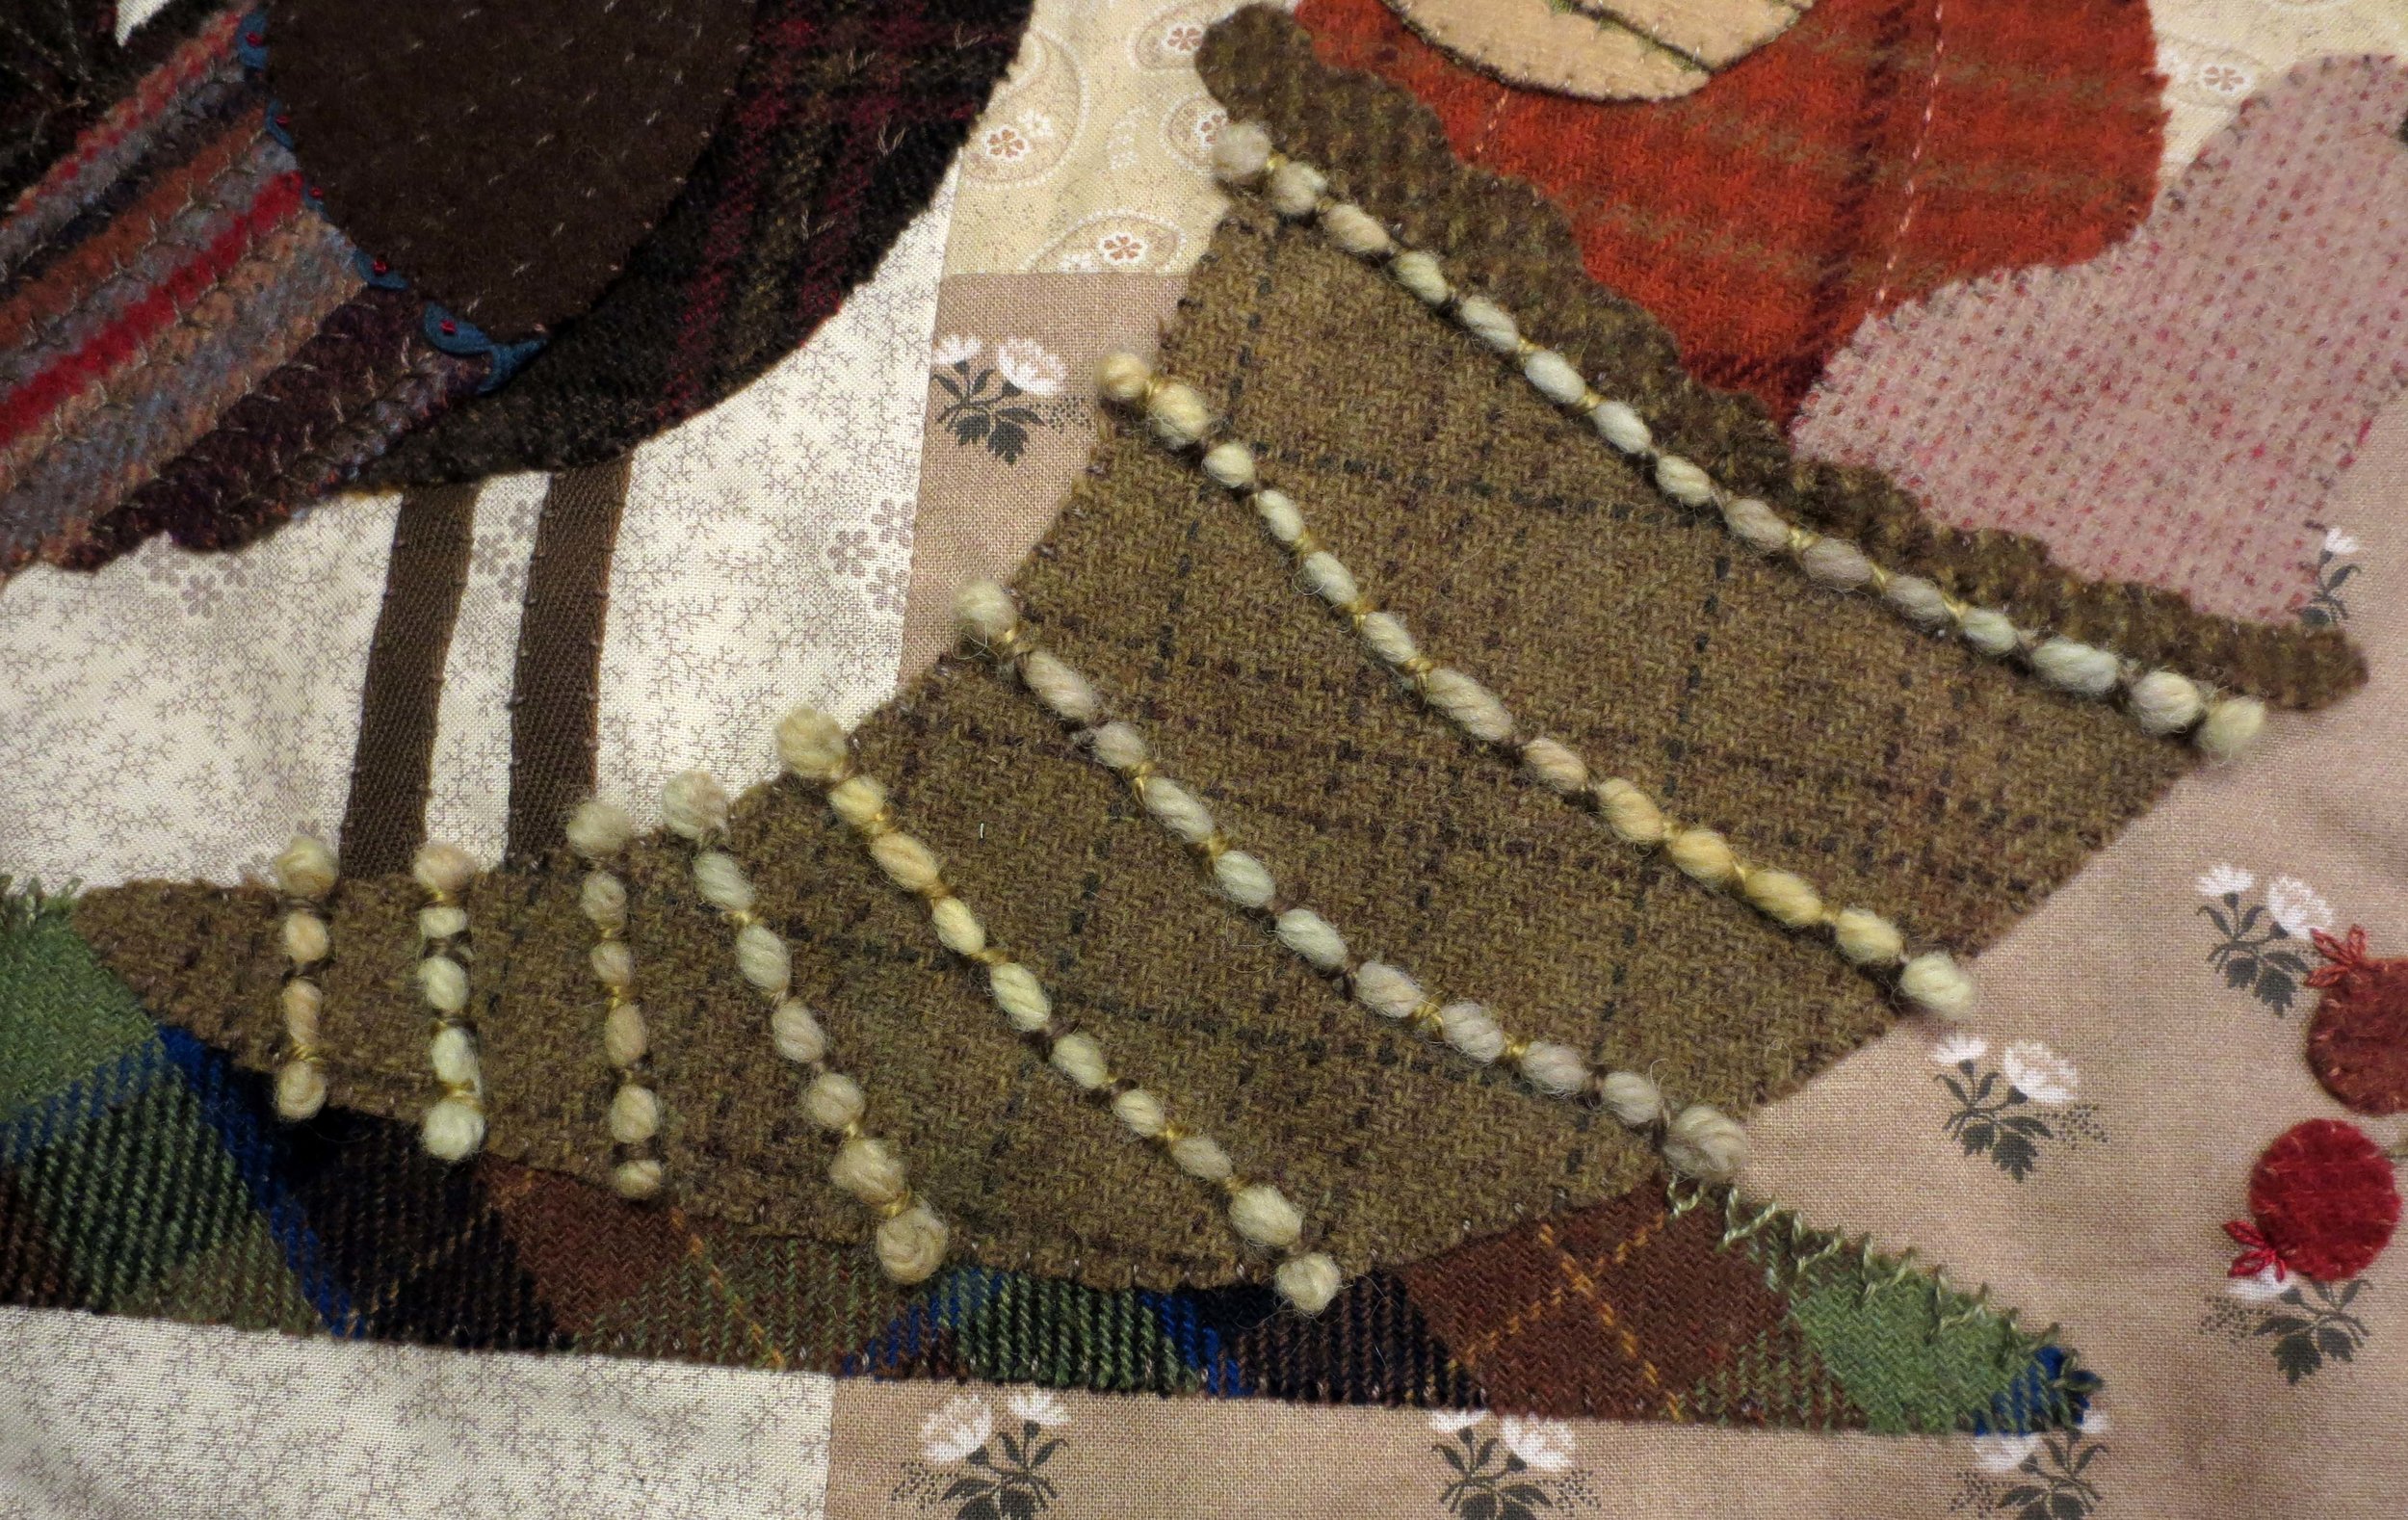
Cornucopia embellishment
I used this beautiful hand-dyed chunky wool to make the couched embellishment.
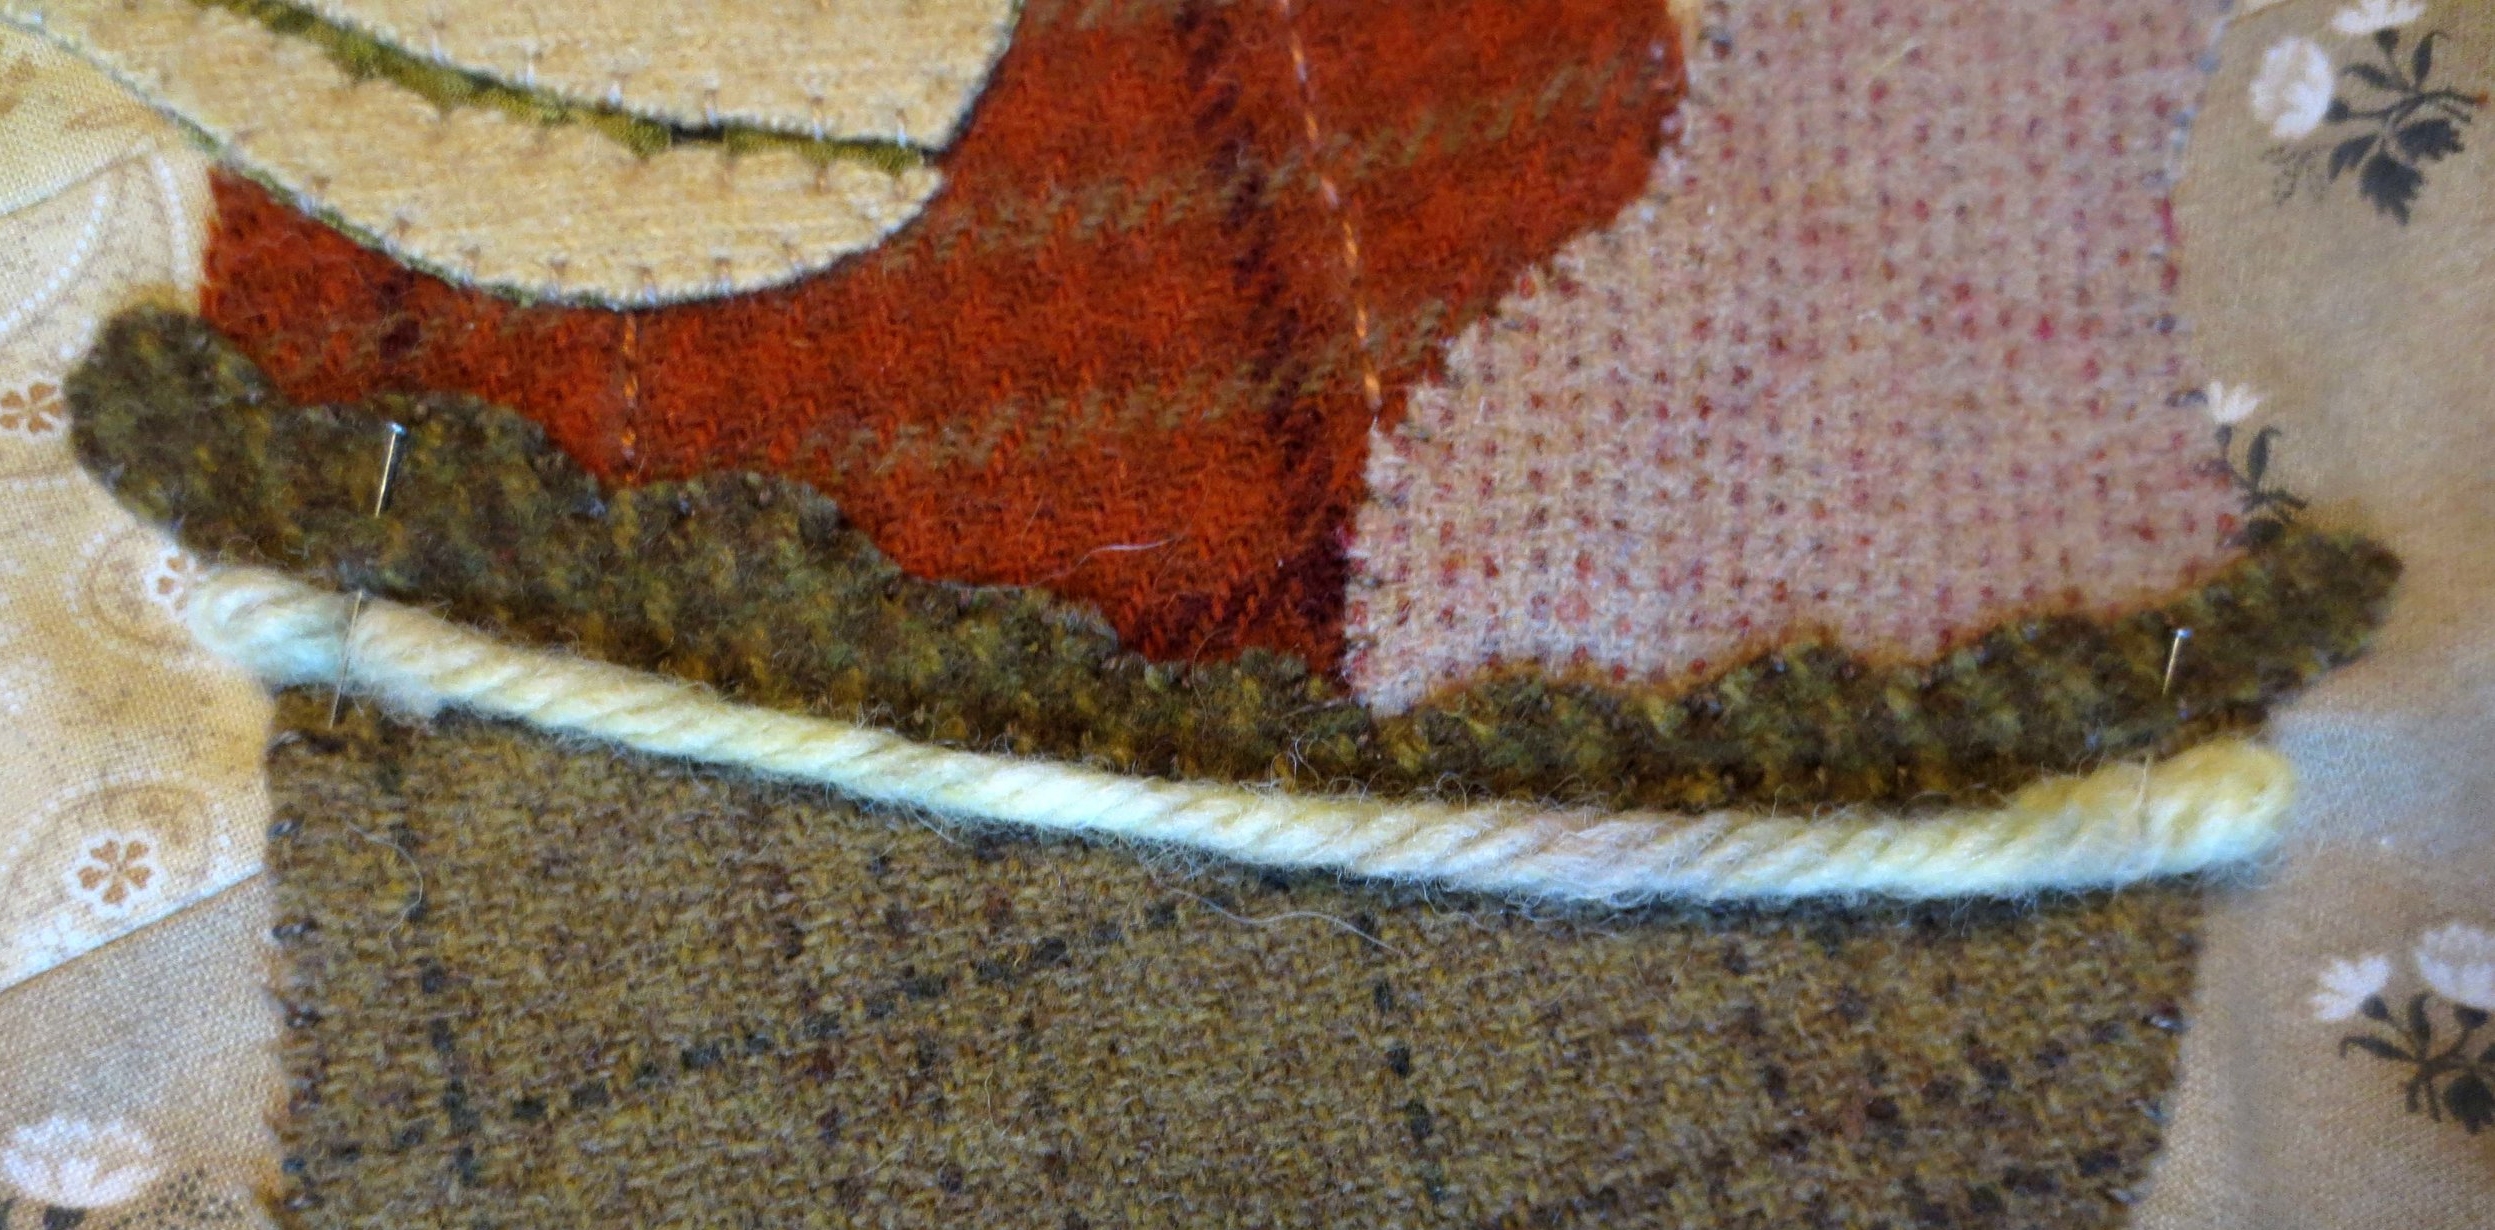
Lay the yarn on the pattern and cut each of the eight pieces 1” longer than the pattern.
Lay out each of the yarn pieces on the cornucopia. Tuck each end under approximately 1/2” so that they are even with the sides of the cornucopia. Pin in place.
Use perle cotton, size 5 to couch the yarn with small “X’s” every 1/2”.
Give Thanks Aplenty
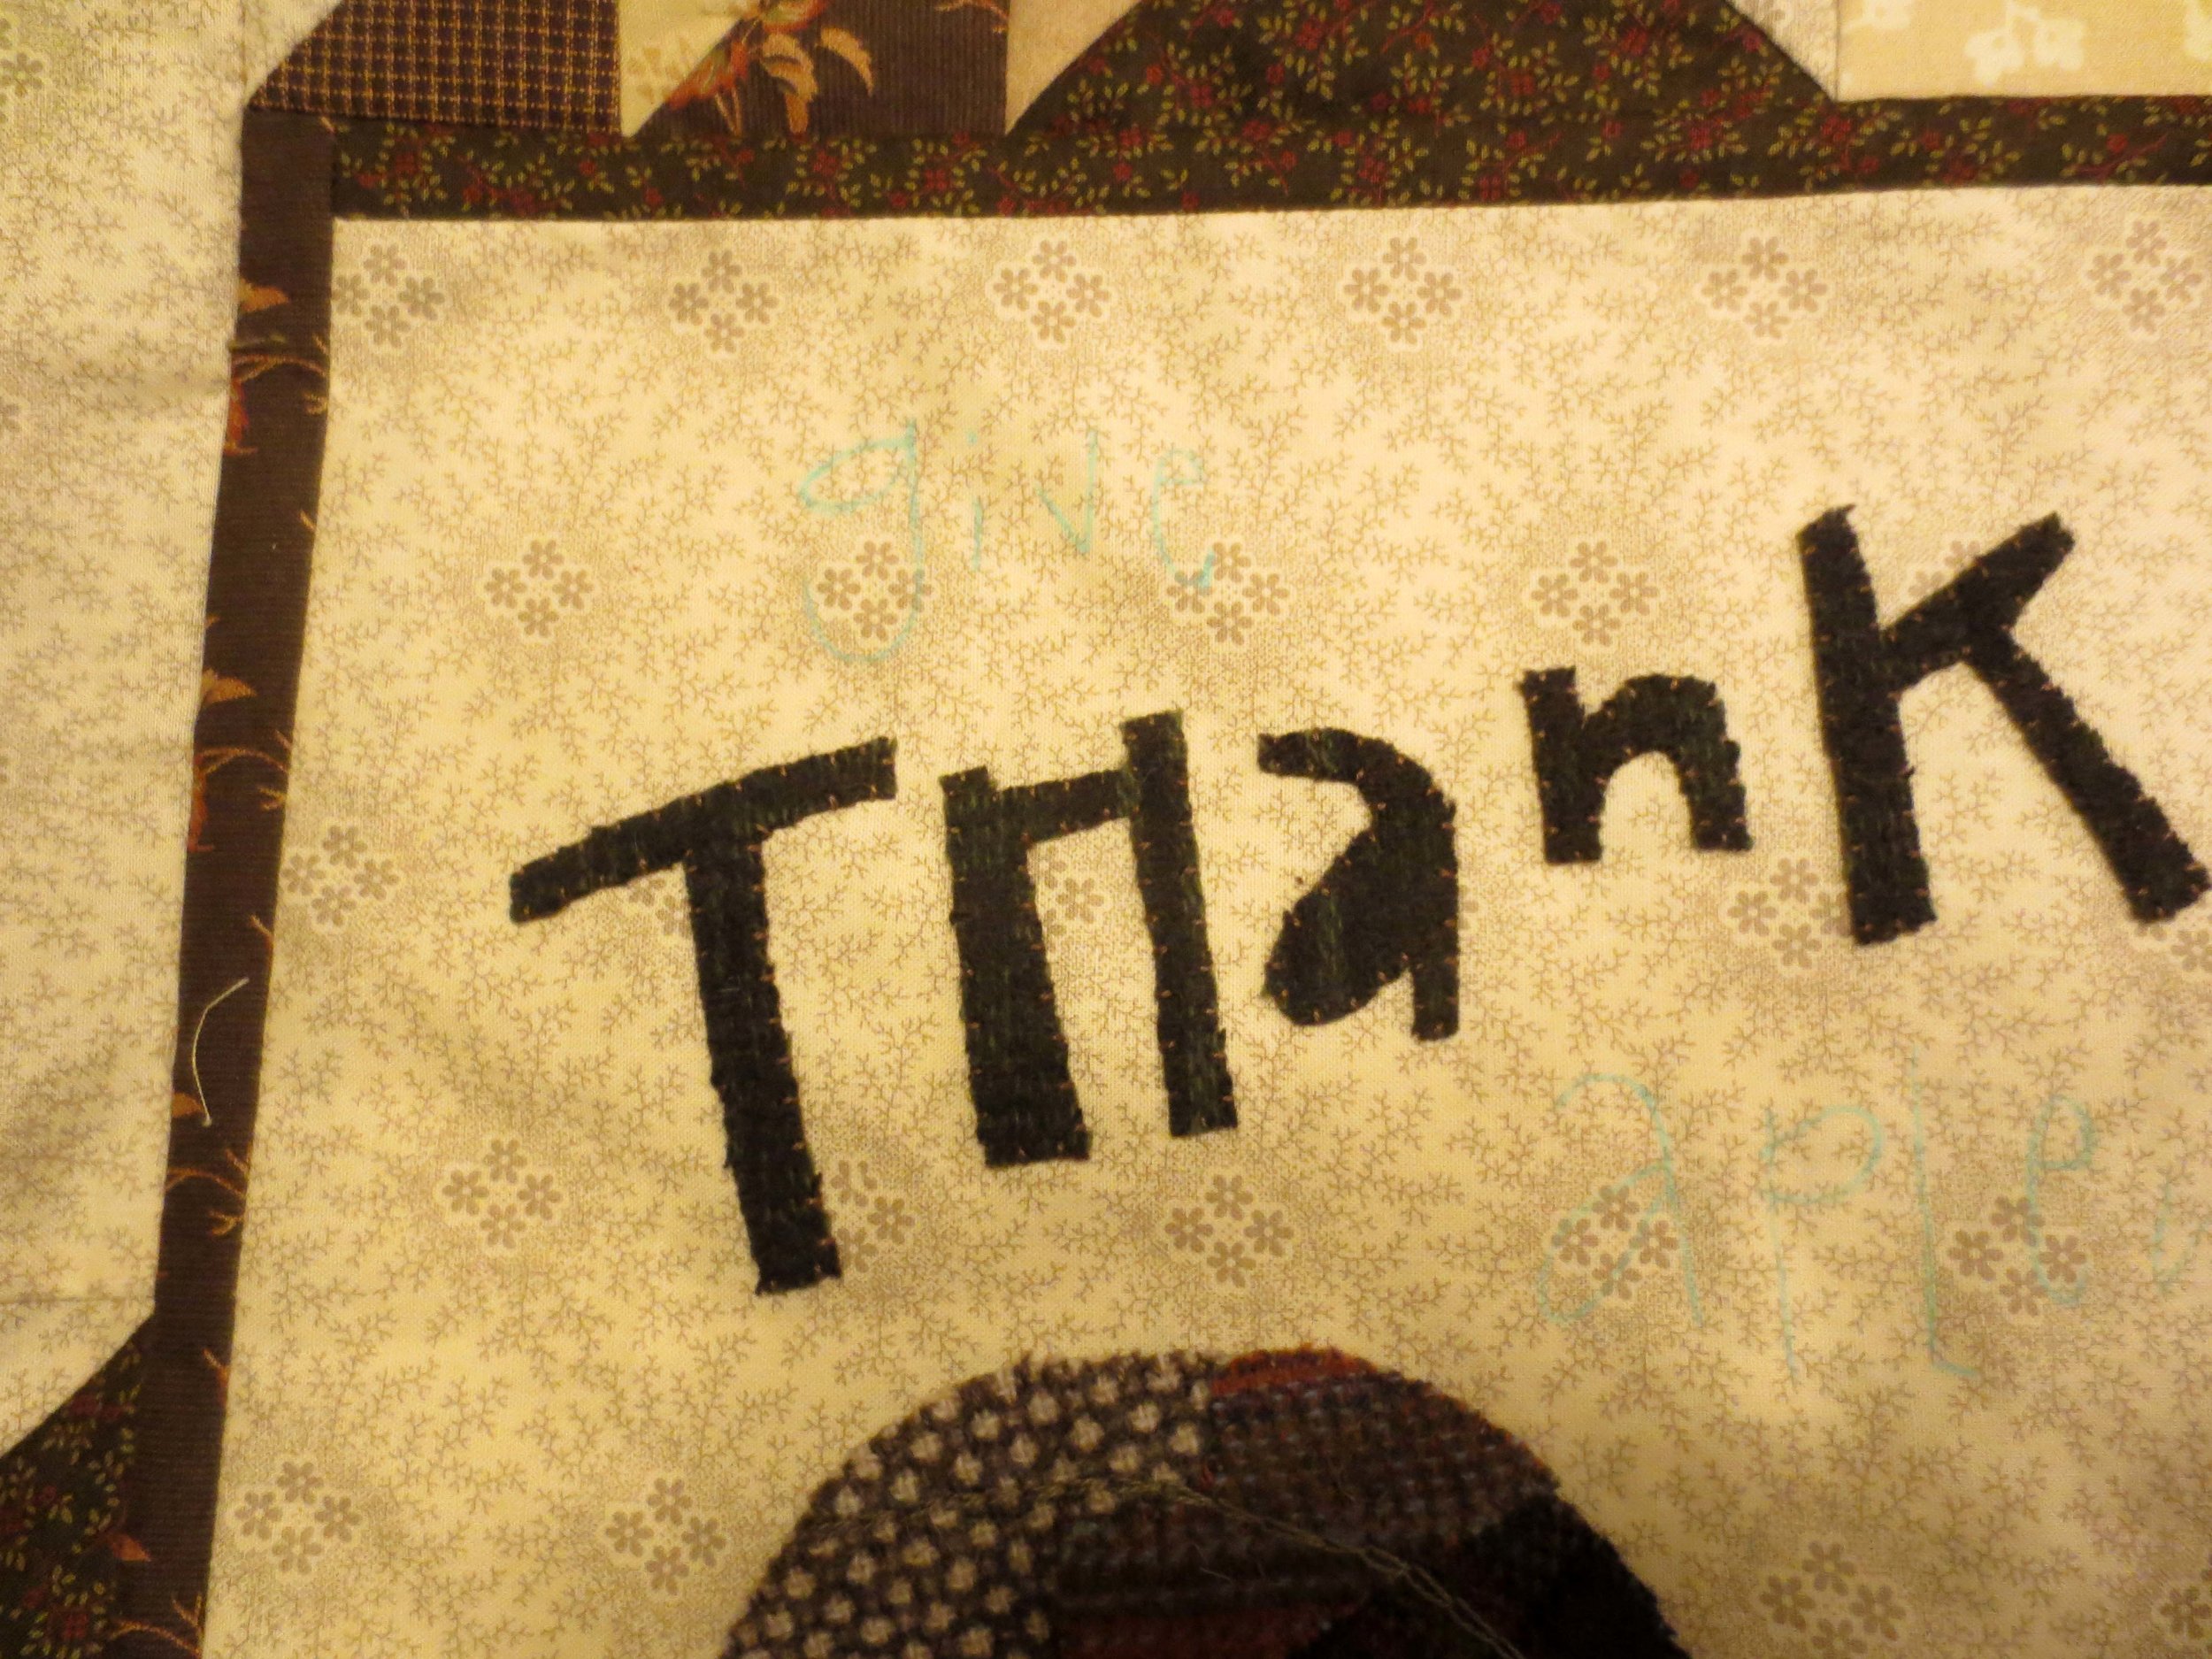
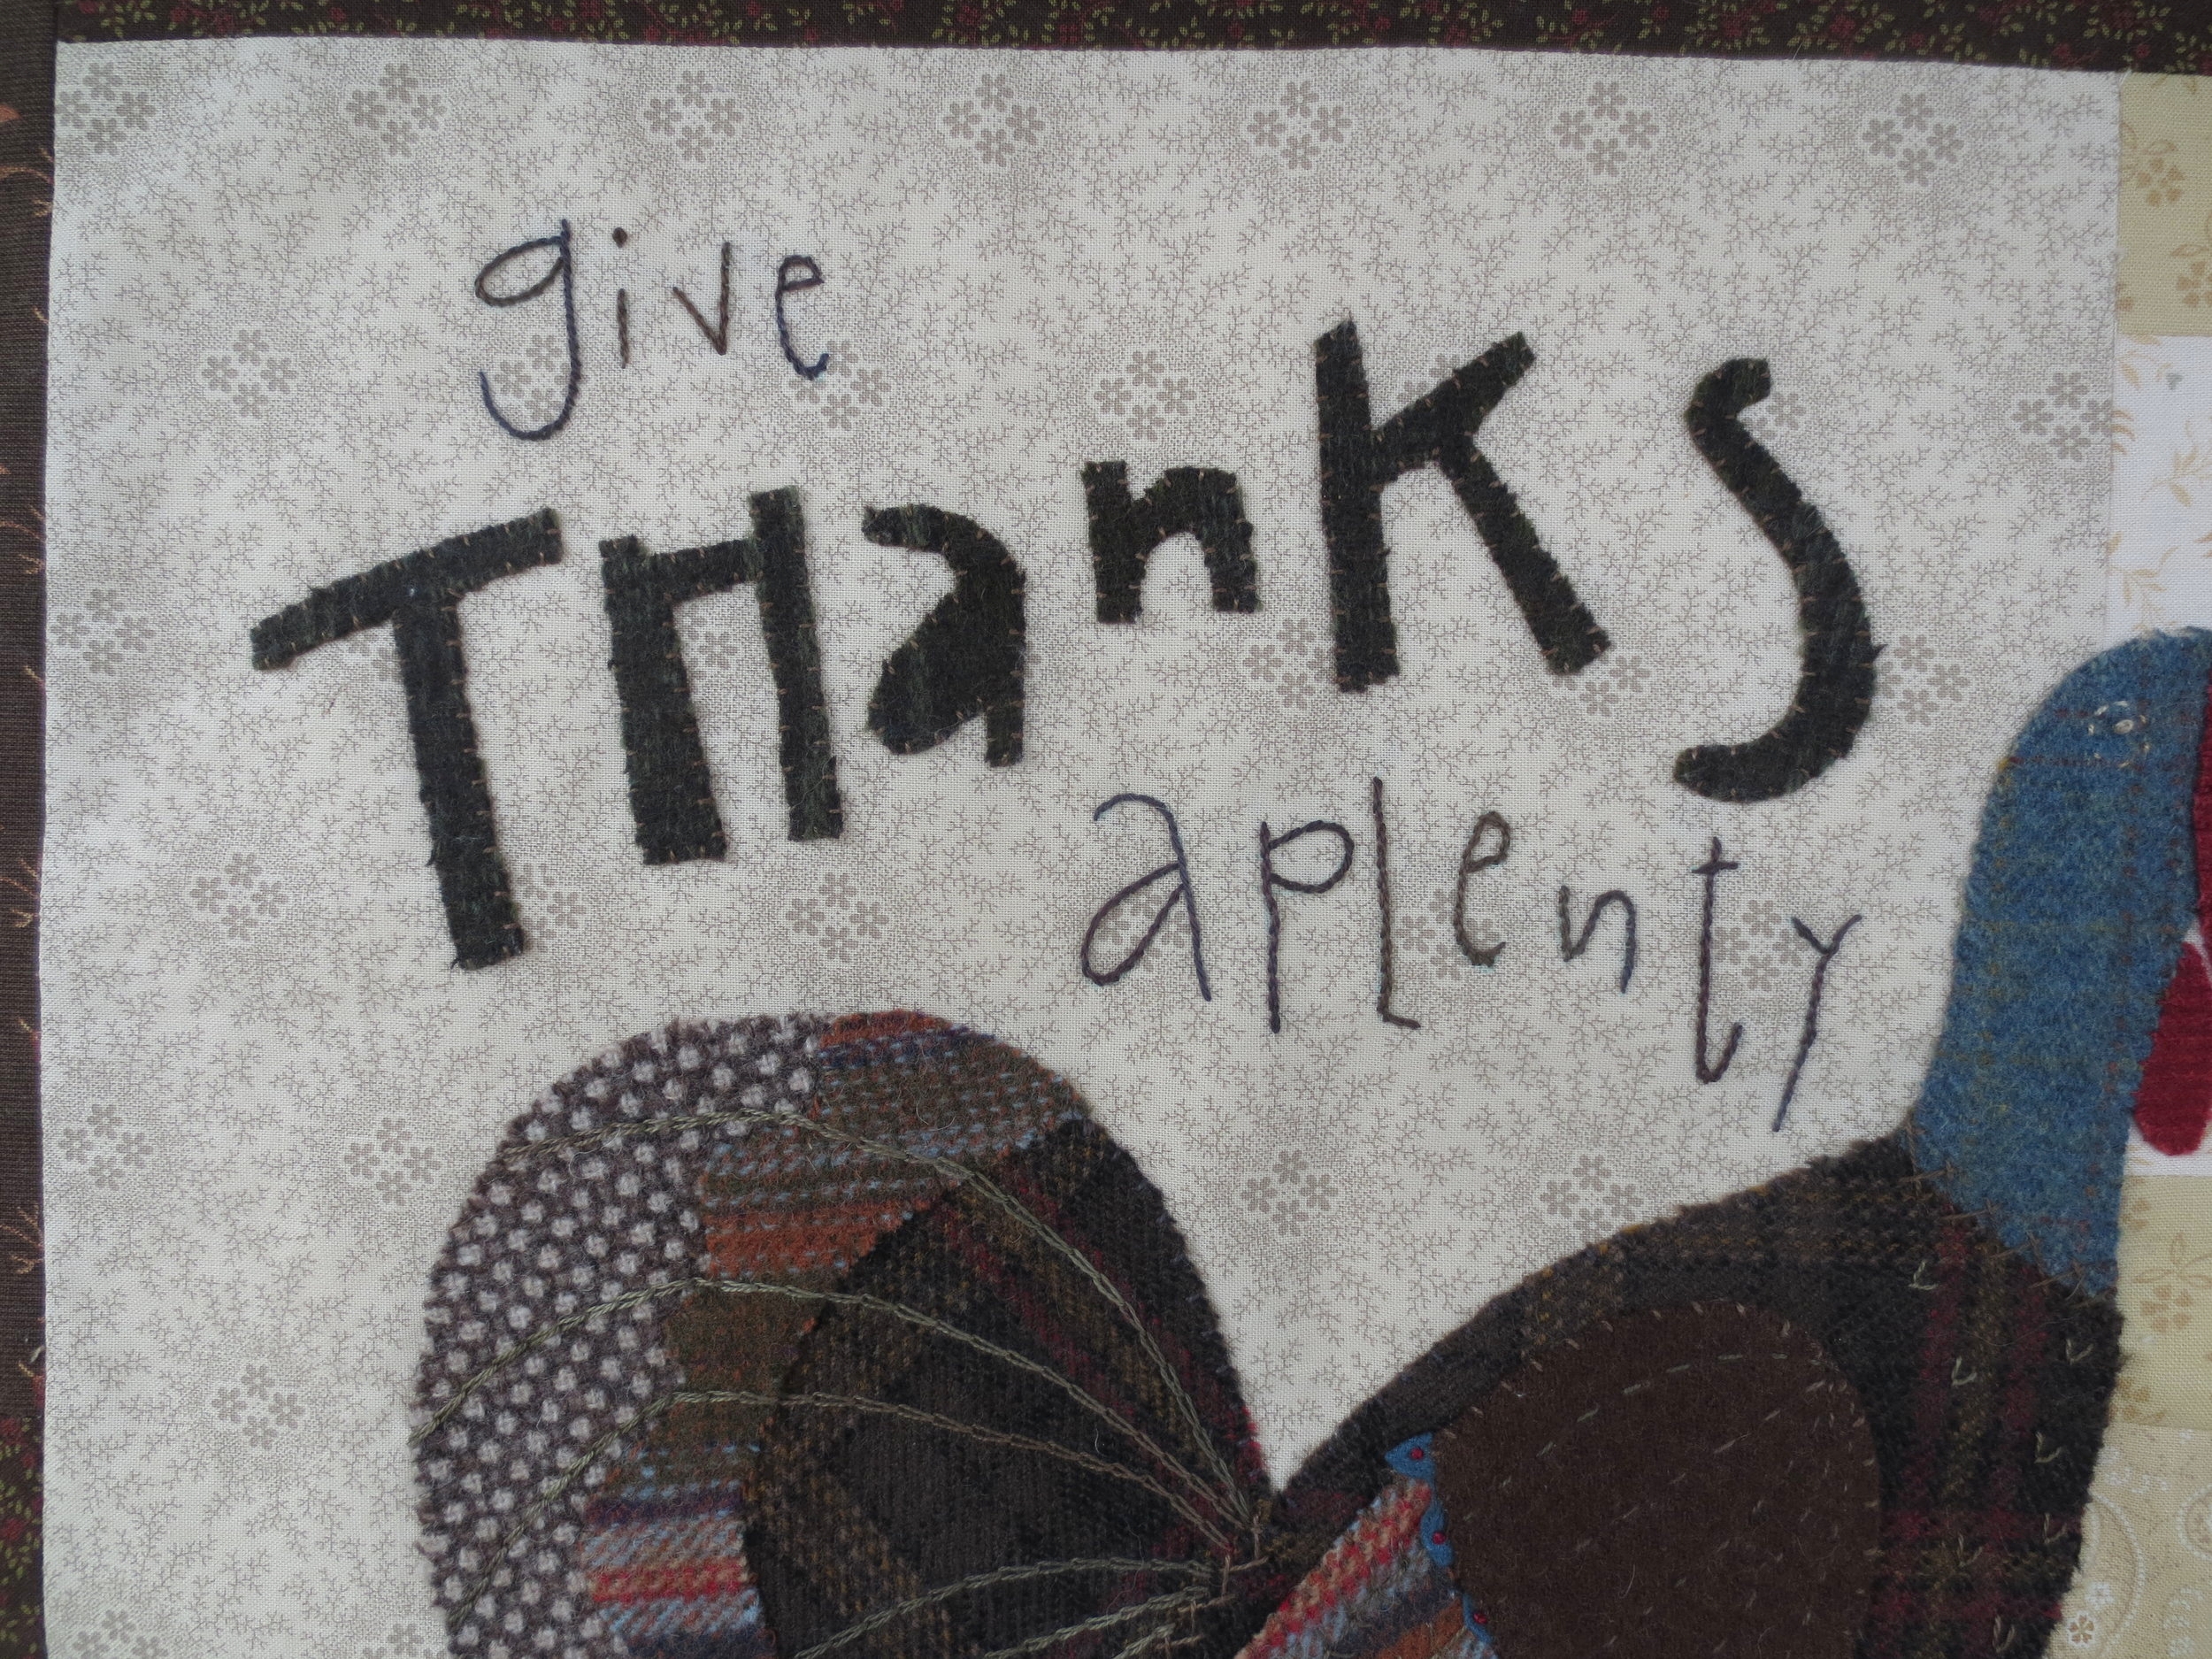
Use a chalk pencil to draw the words “Give” and “Aplenty”. Use a light box to trace the words from page 3 of the pattern.
Stem stitch over the lines with perle cotton, size 8.
Almost done!
13. Final Assembly
Cut a piece of backing fabric 25” x 31”.
Cut a piece of batting fabric 25” x 31”.
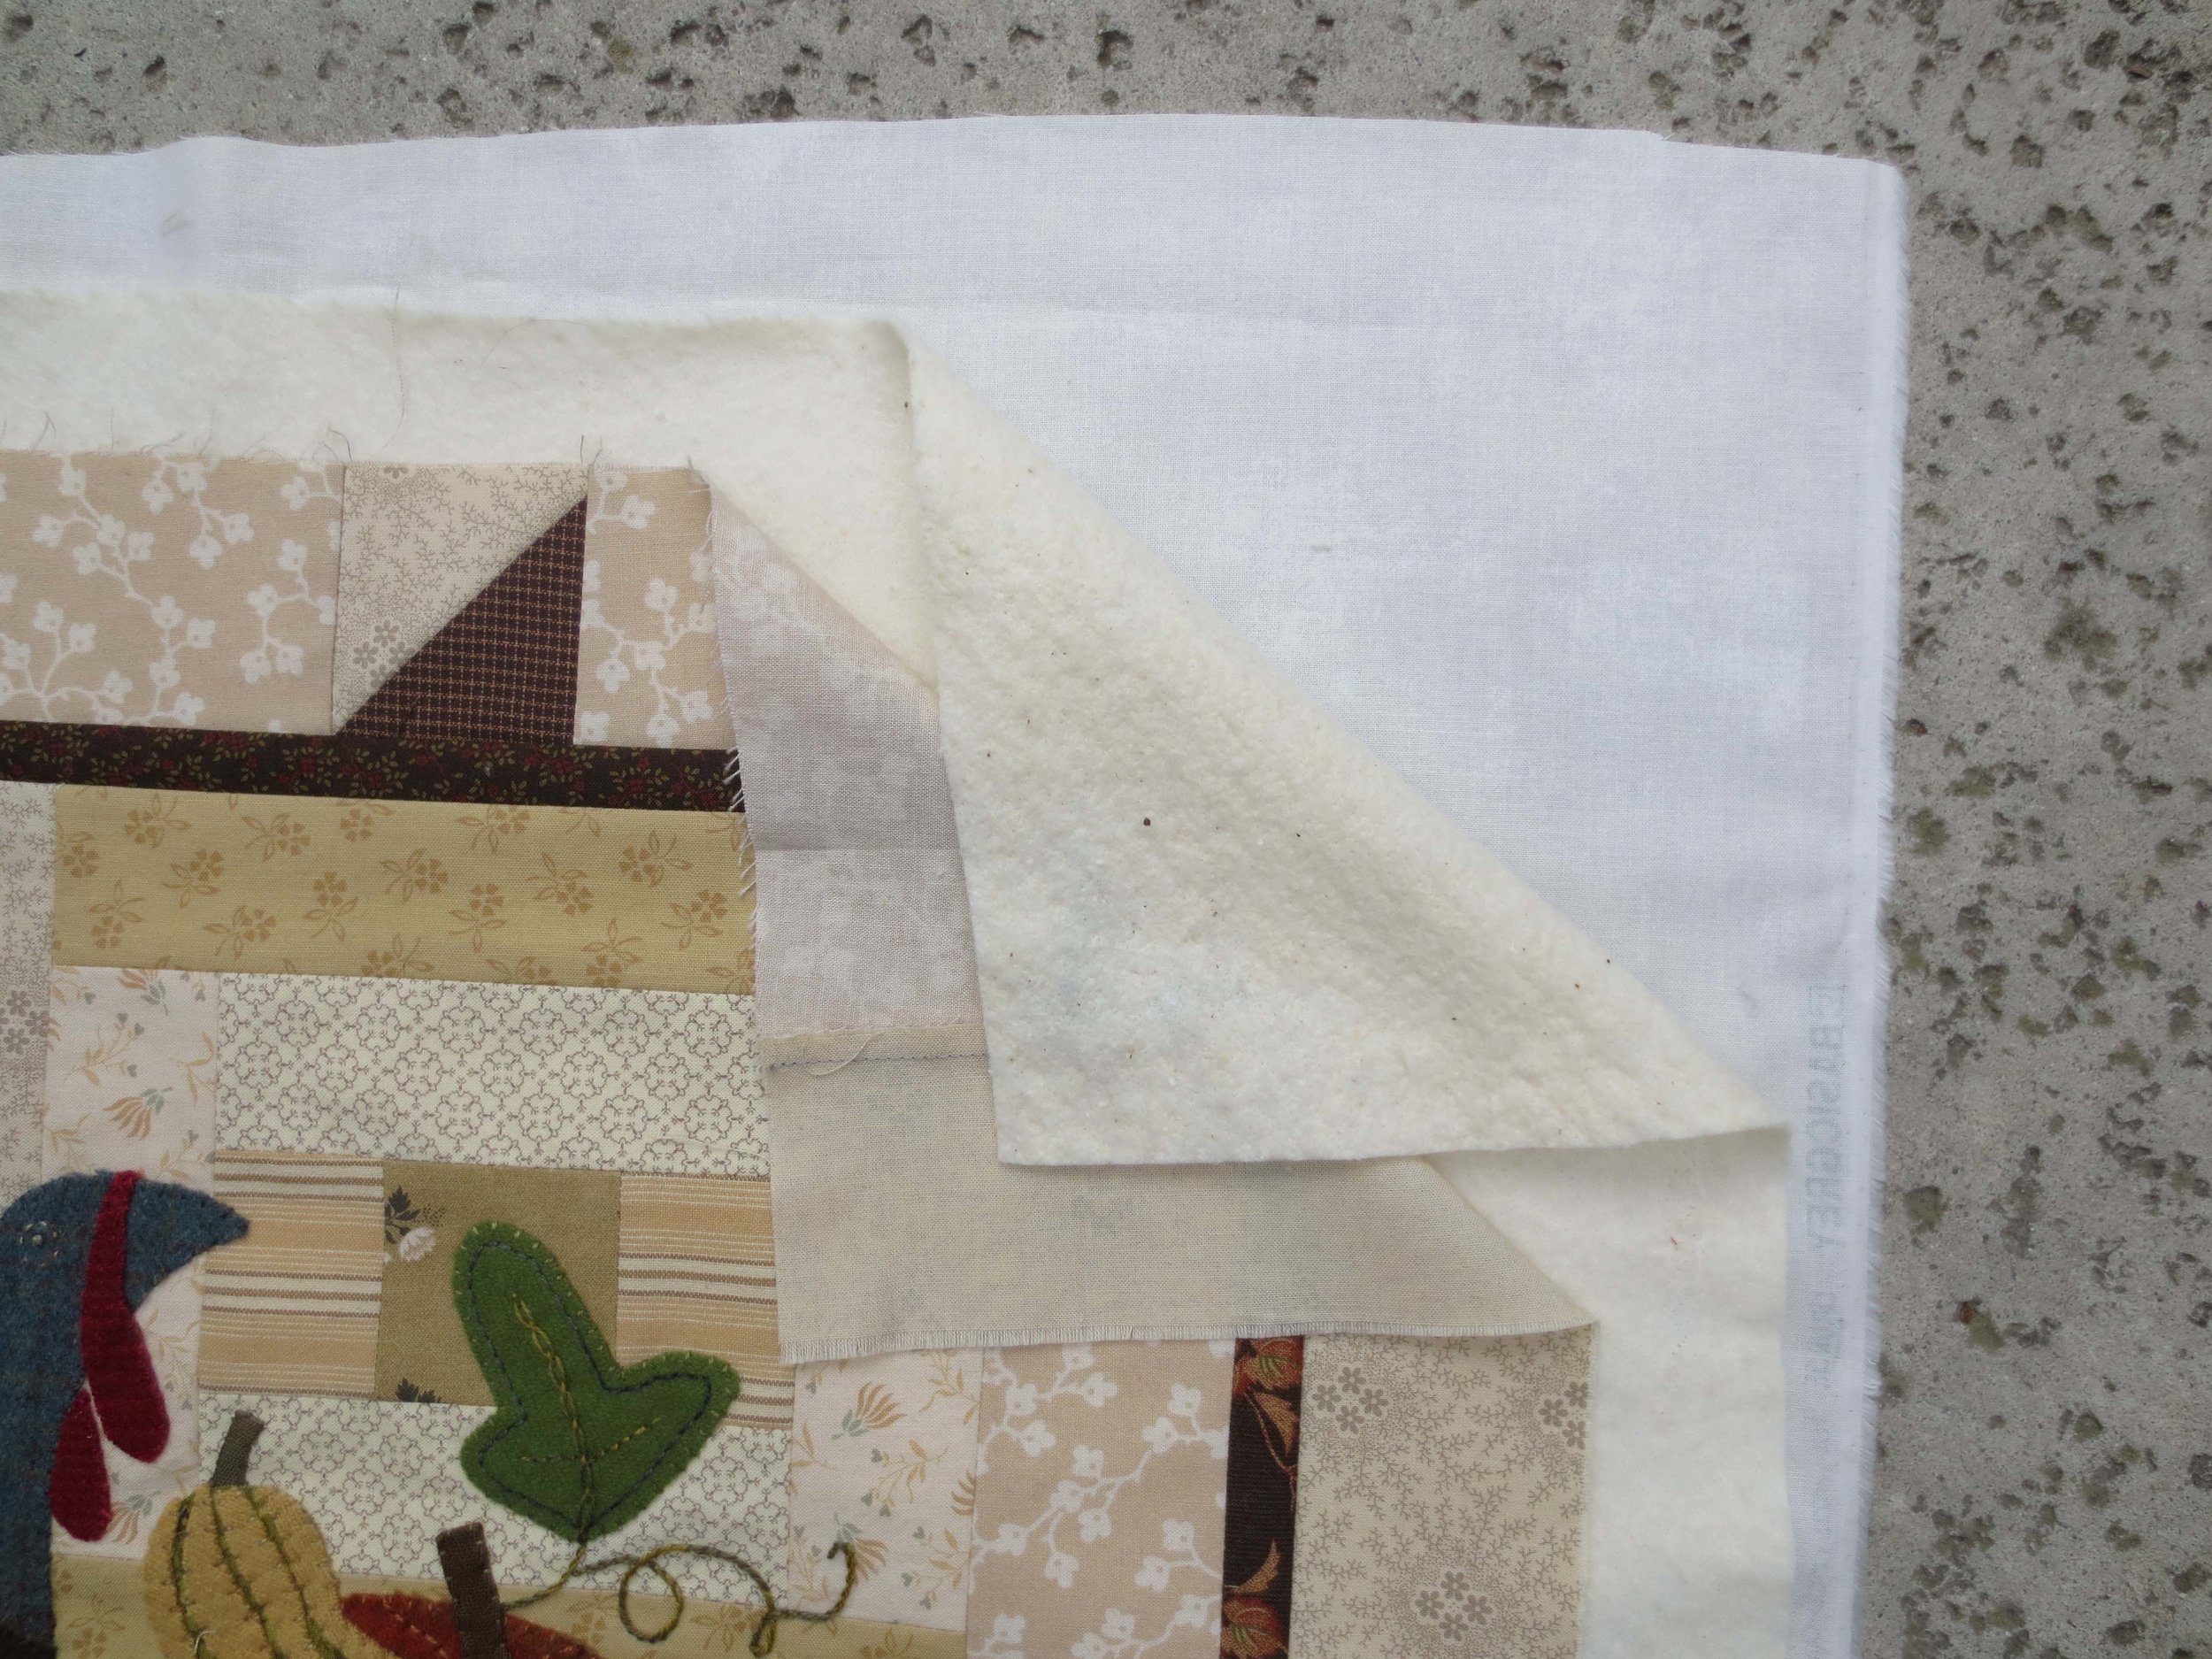
Layer the applique (right side up), batting, and backing fabric (wrong side up). Press the layers together. Pin baste the three layers.
Binding
I didn’t quilt my mat. I just sewed the binding on after basting because I wanted to get it completed. I used a single fold binding using 1 1/2” strips of Fabric J (These should have been cut when you were making your background).
If you are unfamiliar with quilt binding here are a couple of good tutorials:
https://quiltingtutorials.com/tutorial/the-ultimate-quilt-binding-tutorial
http://www.jaybirdquilts.com/2014/07/single-fold-binding-tutorial.html
Enjoy!


