House on Flowerpot Hill
It’s been a while, but I’m back with a new tutorial. You may have remembered this design from my IG feed @butternut_plaid. The original was a tiny 3 1/2” square painting made with homemade acorn cap ink.
Acorn cap ink painting
The second version was a 6 1/2” embroidery created with threads I dyed with indigo and madder. The background fabric was dyed with local oak galls.
Embroidered with indigo and madder dyed threads on a background dyed with oak galls
The final design I chose for this tutorial is the largest version at 7 1/2” x 8 1/2”. It’s a mixture of wool applique and embroidery. I used an early American Fraktur watercolor palette of blue, green, orange, gold, and brown. And I’ve added a couple of new stitches to my repertoire: the basque and fishbone stitches. I think I’m totally in love with them both. The basque stitch makes a lovely fringe on the rug, and the fishbone stitch, coupled with variegated thread, creates some whimsical leaves and flower stems.
If you’re new to my blog, you’ll want to download the Butternut Plaid Stitch Guide as well as the fishbone stitch guide. For those of you who are old pros, pull out your old stitch guides, download the fishbone guide, gather your supplies, and let’s get stitching!
Supplies
Background fabric - 3 different neutral colored medium weight fabrics. Cotton/linen blend, linen, or quilting cotton are all suitable. What is a neutral color? Well, I consider it anything that complements the colors of the wool, but doesn’t overpower the central design. My friend Peggy says orange is a neutral because that’s her favorite color. So, make yourself happy by using colors that sing to you.
Fabric A - 9” x 14 1/2”
Fabric B - 6” x 10”
Fabric C - 5” x 6”
Felted Wool - suggested colors are listed
House
Main body - 2 1/2” x 2 1/2” old gold
Side - 1 1/2” x 2 1/2” gold plaid
Roof - 1” x 2” dark brown
Windows - 1” x 1 1/2” dark brown
Door - 1” x 1” burnt orange
Hills
Large - 2” x 4” medium yellow green
Small - 1 1/2” x 2 1/2” dark yellow green
Flowerpot, flower centers - 4” x 4” denim blue
Rug
Outside - 2 1/2” x 6” burnt orange
Inside - 2 1/2” x 5” dark green/brown plaid
Tree top, leaves 1 & 2 - 5” x 5” medium leaf green
Tree trunk - 4” x 4 1/2” chestnut brown
Small tree - 1” x 2” light green/brown plaid
Large flower and small triangle flowers - 2 1/2” x 3” yellow
Flowers 1, 3 & 4 - 3” x 3” orange
Flower 2 - 2” x 2” burnt orange
Threads - Use colors that match your wool colors. Use a coordinating variegated thread for the flower stems, small leaves, tree and hill embellishments. I used 6-strand embroidery floss because I could increase or decrease the thickness of the thread needed without having to purchase additional types of thread. I suggest using a thread conditioner like Sew Fine Thread gloss to keep the threads from getting tangled.
I used House of Embroidery 6-strand Embroidery floss (available from https://globalartisans.shop/collections/house-of-embroidery ) colors 1BC, 31A, 32C, 33A, 46A, 51C, 58BC, 72B, and 54A ( a variegated green, yellow, orange combo)
I also used Cosmo color #821 for the house and yellow flowers.
Miscellaneous
Sewing machine - used to piece background
Steam Iron
Chenille needles, size 22 and 24
Feather weight fusible web
Lightbox or bright window
Pencil or marking pen (preferably a water or heat erasable marker) - used to draw flower and leaf stems as well as marking light colored wools.
Fine line chalk pencil - used to mark dark wools
Thread conditioner- I used Sew Fine Thread Gloss
Instructions
Assembling the background - all seams are 1/4”
Sew Fabric B to Fabric C together along 6” sides creating a 6” x 14 1/2” rectangle. Press seams open.
Sew Fabric A to the BC block along the 14 1/2” sides creating a 14 1/2” square. Press seams open and square up block.
2. Applique
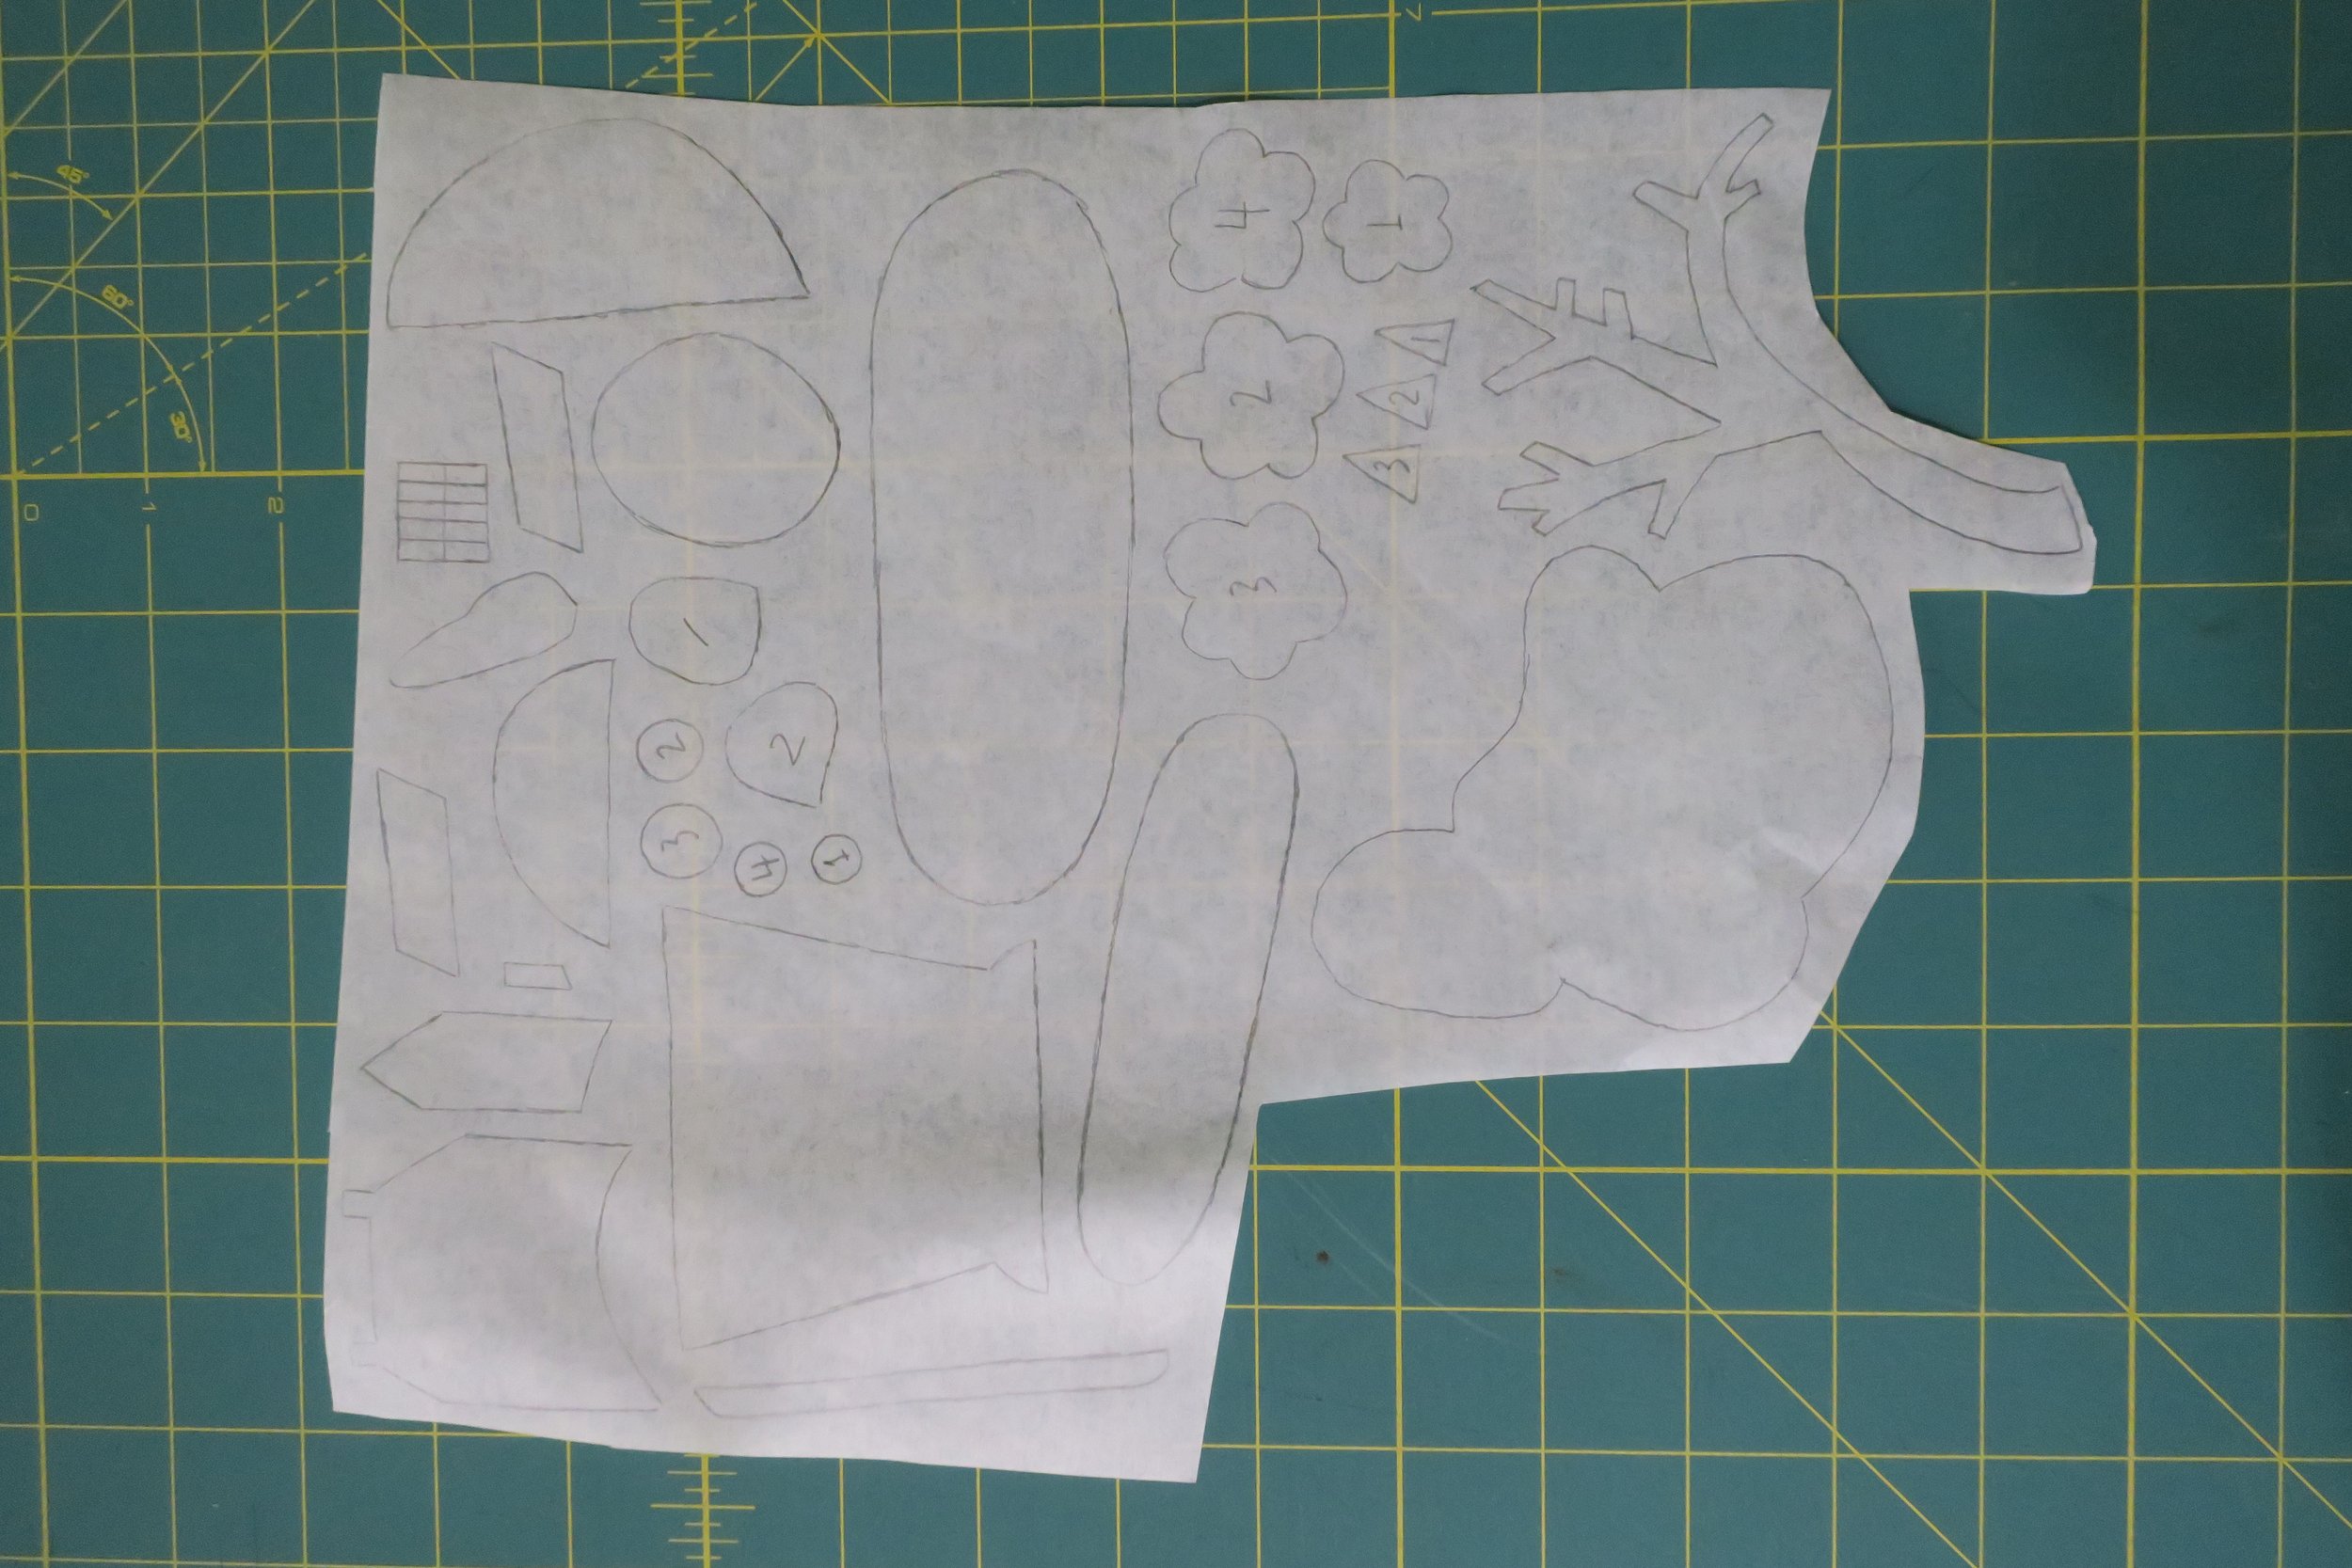
Trace pattern pieces onto fusible web and cut out leaving a small (1/8”) border around each pattern.
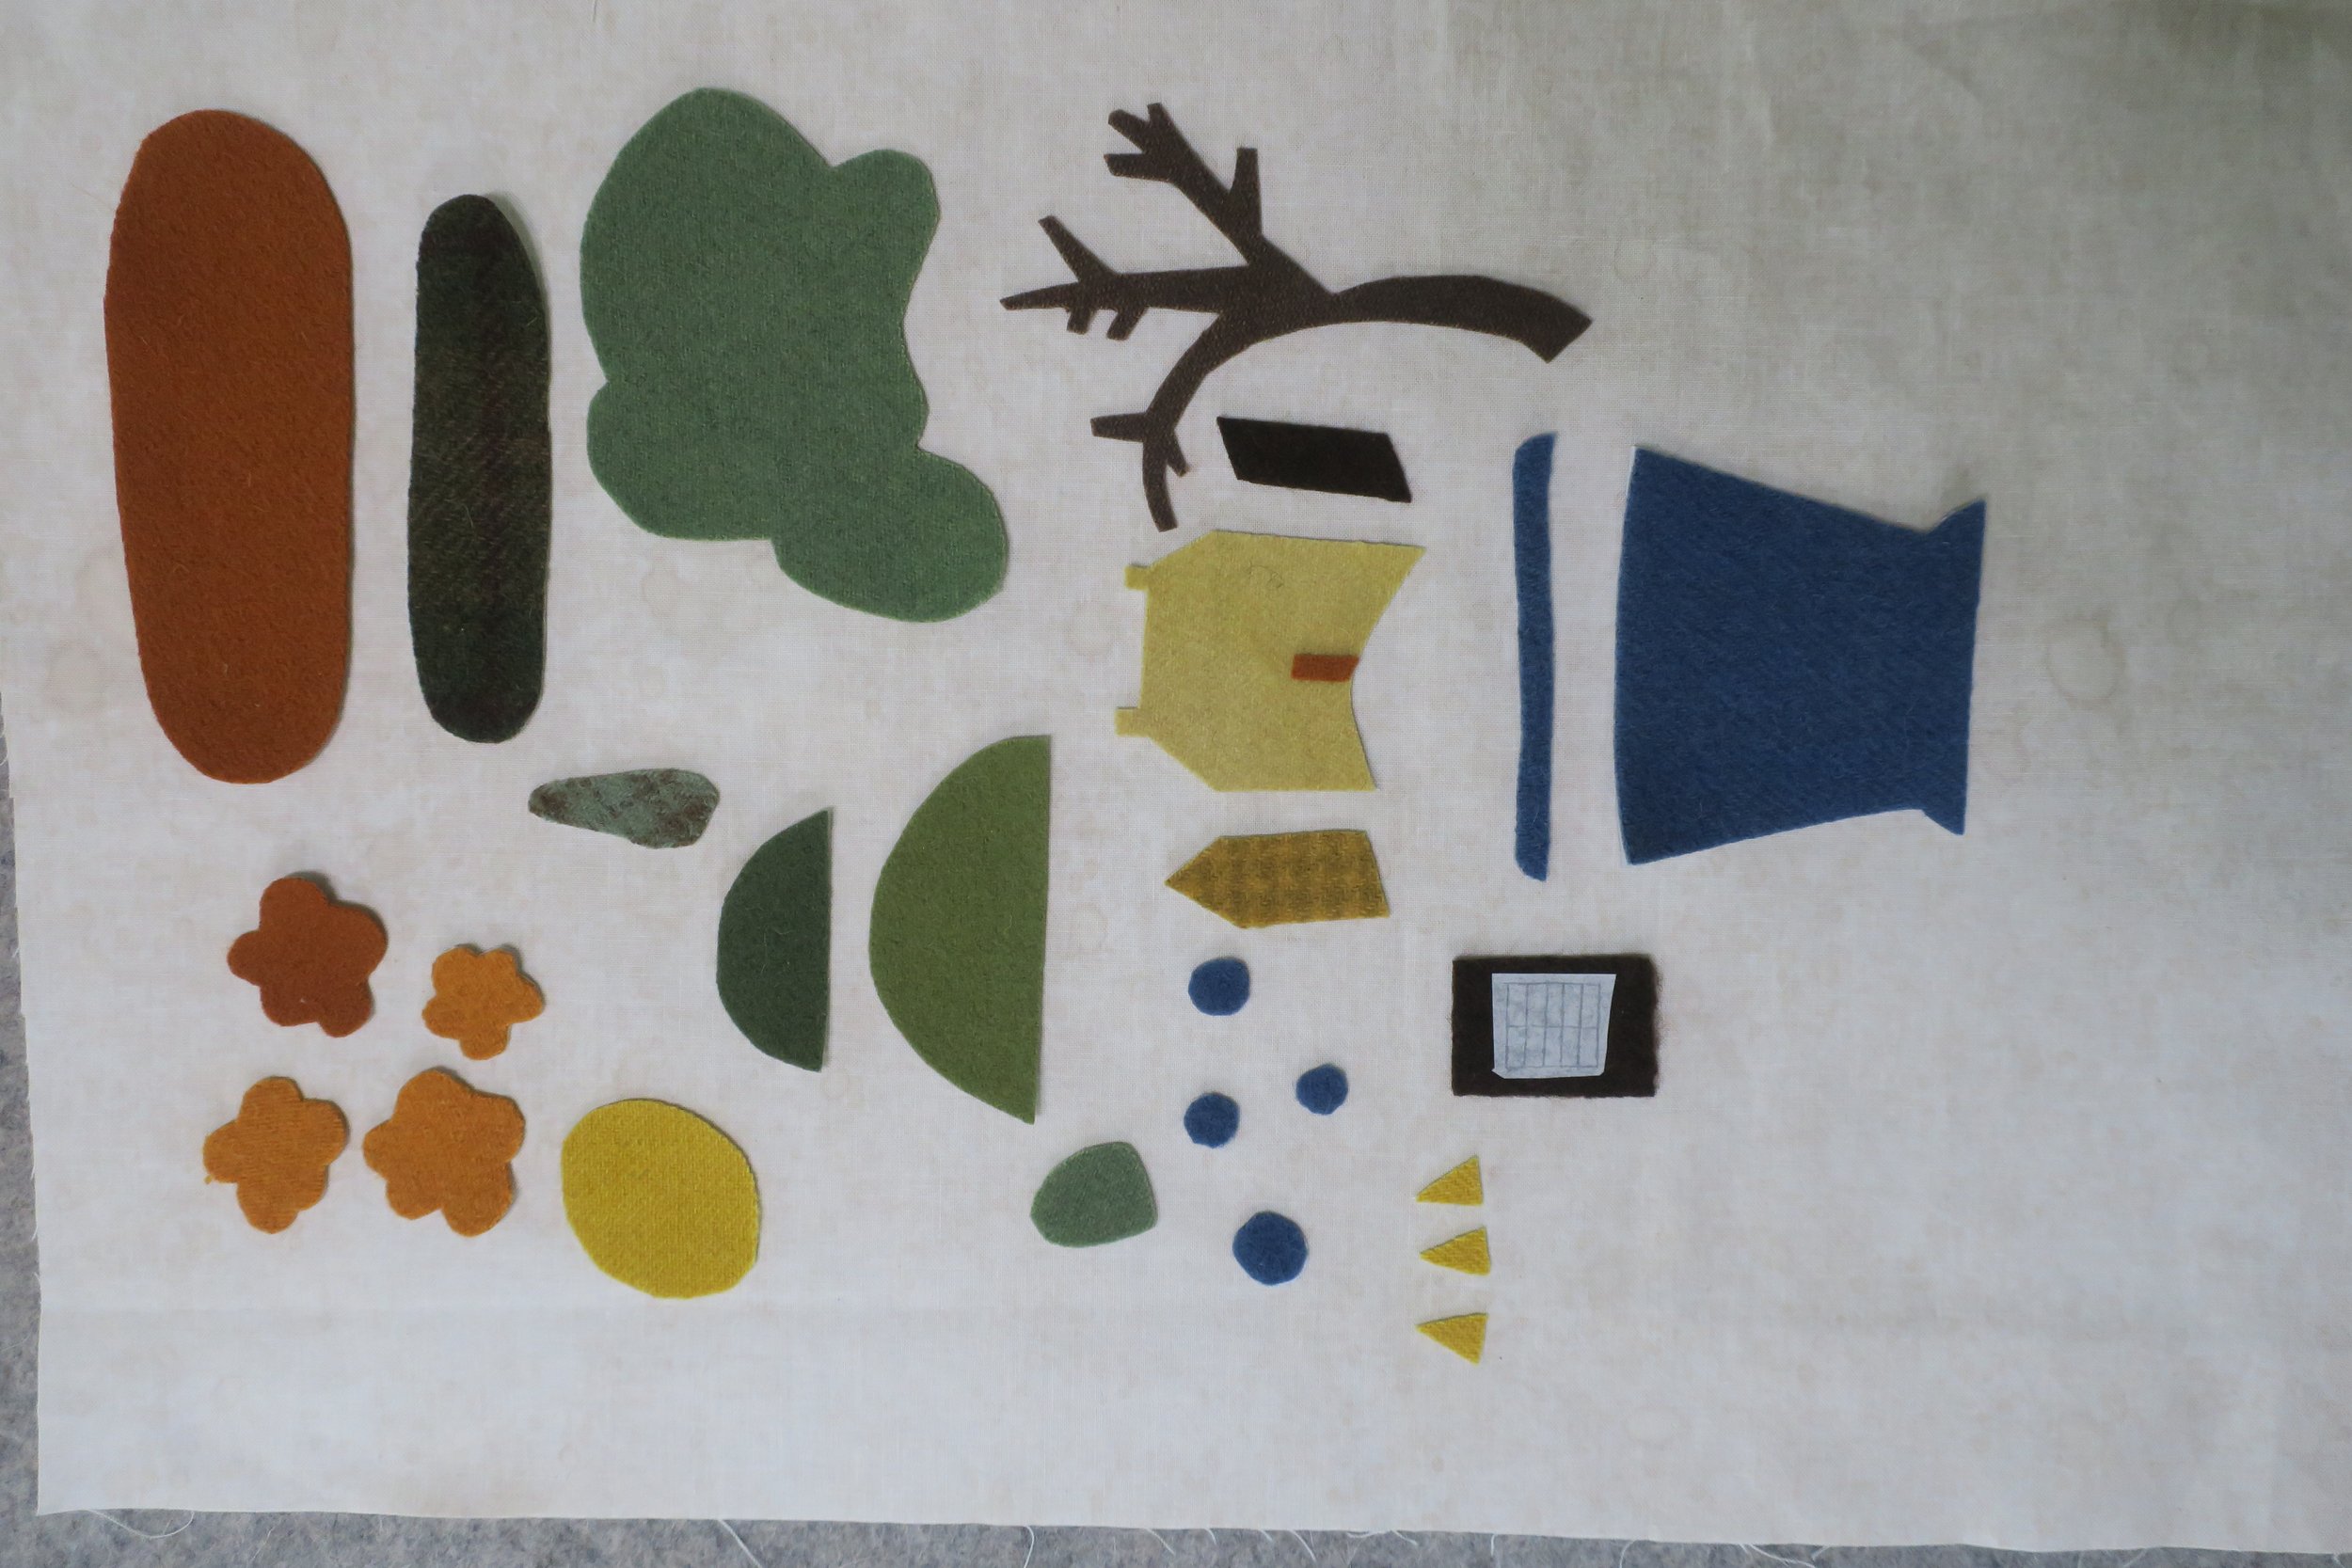
Fuse pattern pieces onto designated wool and cut out along traced lines. Wait to cut out windows until right before fusing to house. Set aside.
Using a light box or brightly lit window, trace the flower, leaf stems, and triangle flower leaves. with a water or heat erasable marker. The lines can also be traced with a mechanical pencil if a marker is unavailable, The lines will be covered up with stitching. I included the veins of leaves 1 & 2 to help with the orientation of the leaves. The tips of each of the leaves will be placed on the end of each line.
Use 3 strands of floss (54A) to stem stitched over the traced stem lines of the triangle flowers.
Use the same thread (3-strand) to fill the leave with a fishbone stitch. If the stitch guide is not helpful enough, Mary Corbet at NeedlenThread is a great resource for tutorials on embroidery stitches.
Repeat the stitch sequence until the leaf is filled in.
Use the same thread (3-strand) to chain stitch the stem on the left side.
Using the layout as a guide, position the house body, tree top, flowers 1, 2 & 4, leaf #1, triangle flowers, and the large rug. A light box comes in handy here. Place the layout on the light box and center the background fabric over it. This method provides the most accurate placement.
Slide a cookie sheet or sturdy piece of cardboard under the fabric and carefully transfer it to an ironing surface. Fuse the wool to the background using steam. Note: If you wish, each layer of wool can be whip stitched in place using 1 strand of matching colored floss at this time. I like to fuse everything in place and then whip stitch everything down at once.
Return the background to the lightbox and position the small tree, flower #3, house side, roof, and inside rug.
Transfer to ironing suface, and then fuse in place.
Return to the light box and postition the tree trunk, large hill, and flower centers. Make sure you tuck the bottom of the tree trunk under the hill.
Transfer to ironing surface, and then fuse in place.
Cut out your individual windows.
Return to to the light box and position the small hill and house windows.
Transfer to the ironing surface, and then fuse in place.
Return to the light box and position the flowerpot and flowerpot rim.
Transfer to the ironing surface, and then fuse in place.
Position leaf #2 , and then fuse in place.
Notice that the chain stitched stem on the left doesn’t meet the hill. If this happens to you, simply stitch another chain on the bottom.
Beginning with the smallest pieces first (windows), whip stitch all in place with 1 strand of matching colored floss.
Use 3 strands of floss (33A) to stem stitch the trunk of the small tree.
Use 1 strand of Cosmo #821 to stitch the window panes. Begin by stitching a single horizontal straight stitch across the center of the window, and then make a single vertical stitch creating a 4 paned window. Repeat for all 9 windows.
Use 3 strands of the same floss to backstitch on both sides of the house and around the chimneys.
Use 2 strands of the same thread to backstitch around each of the triangle flowers.
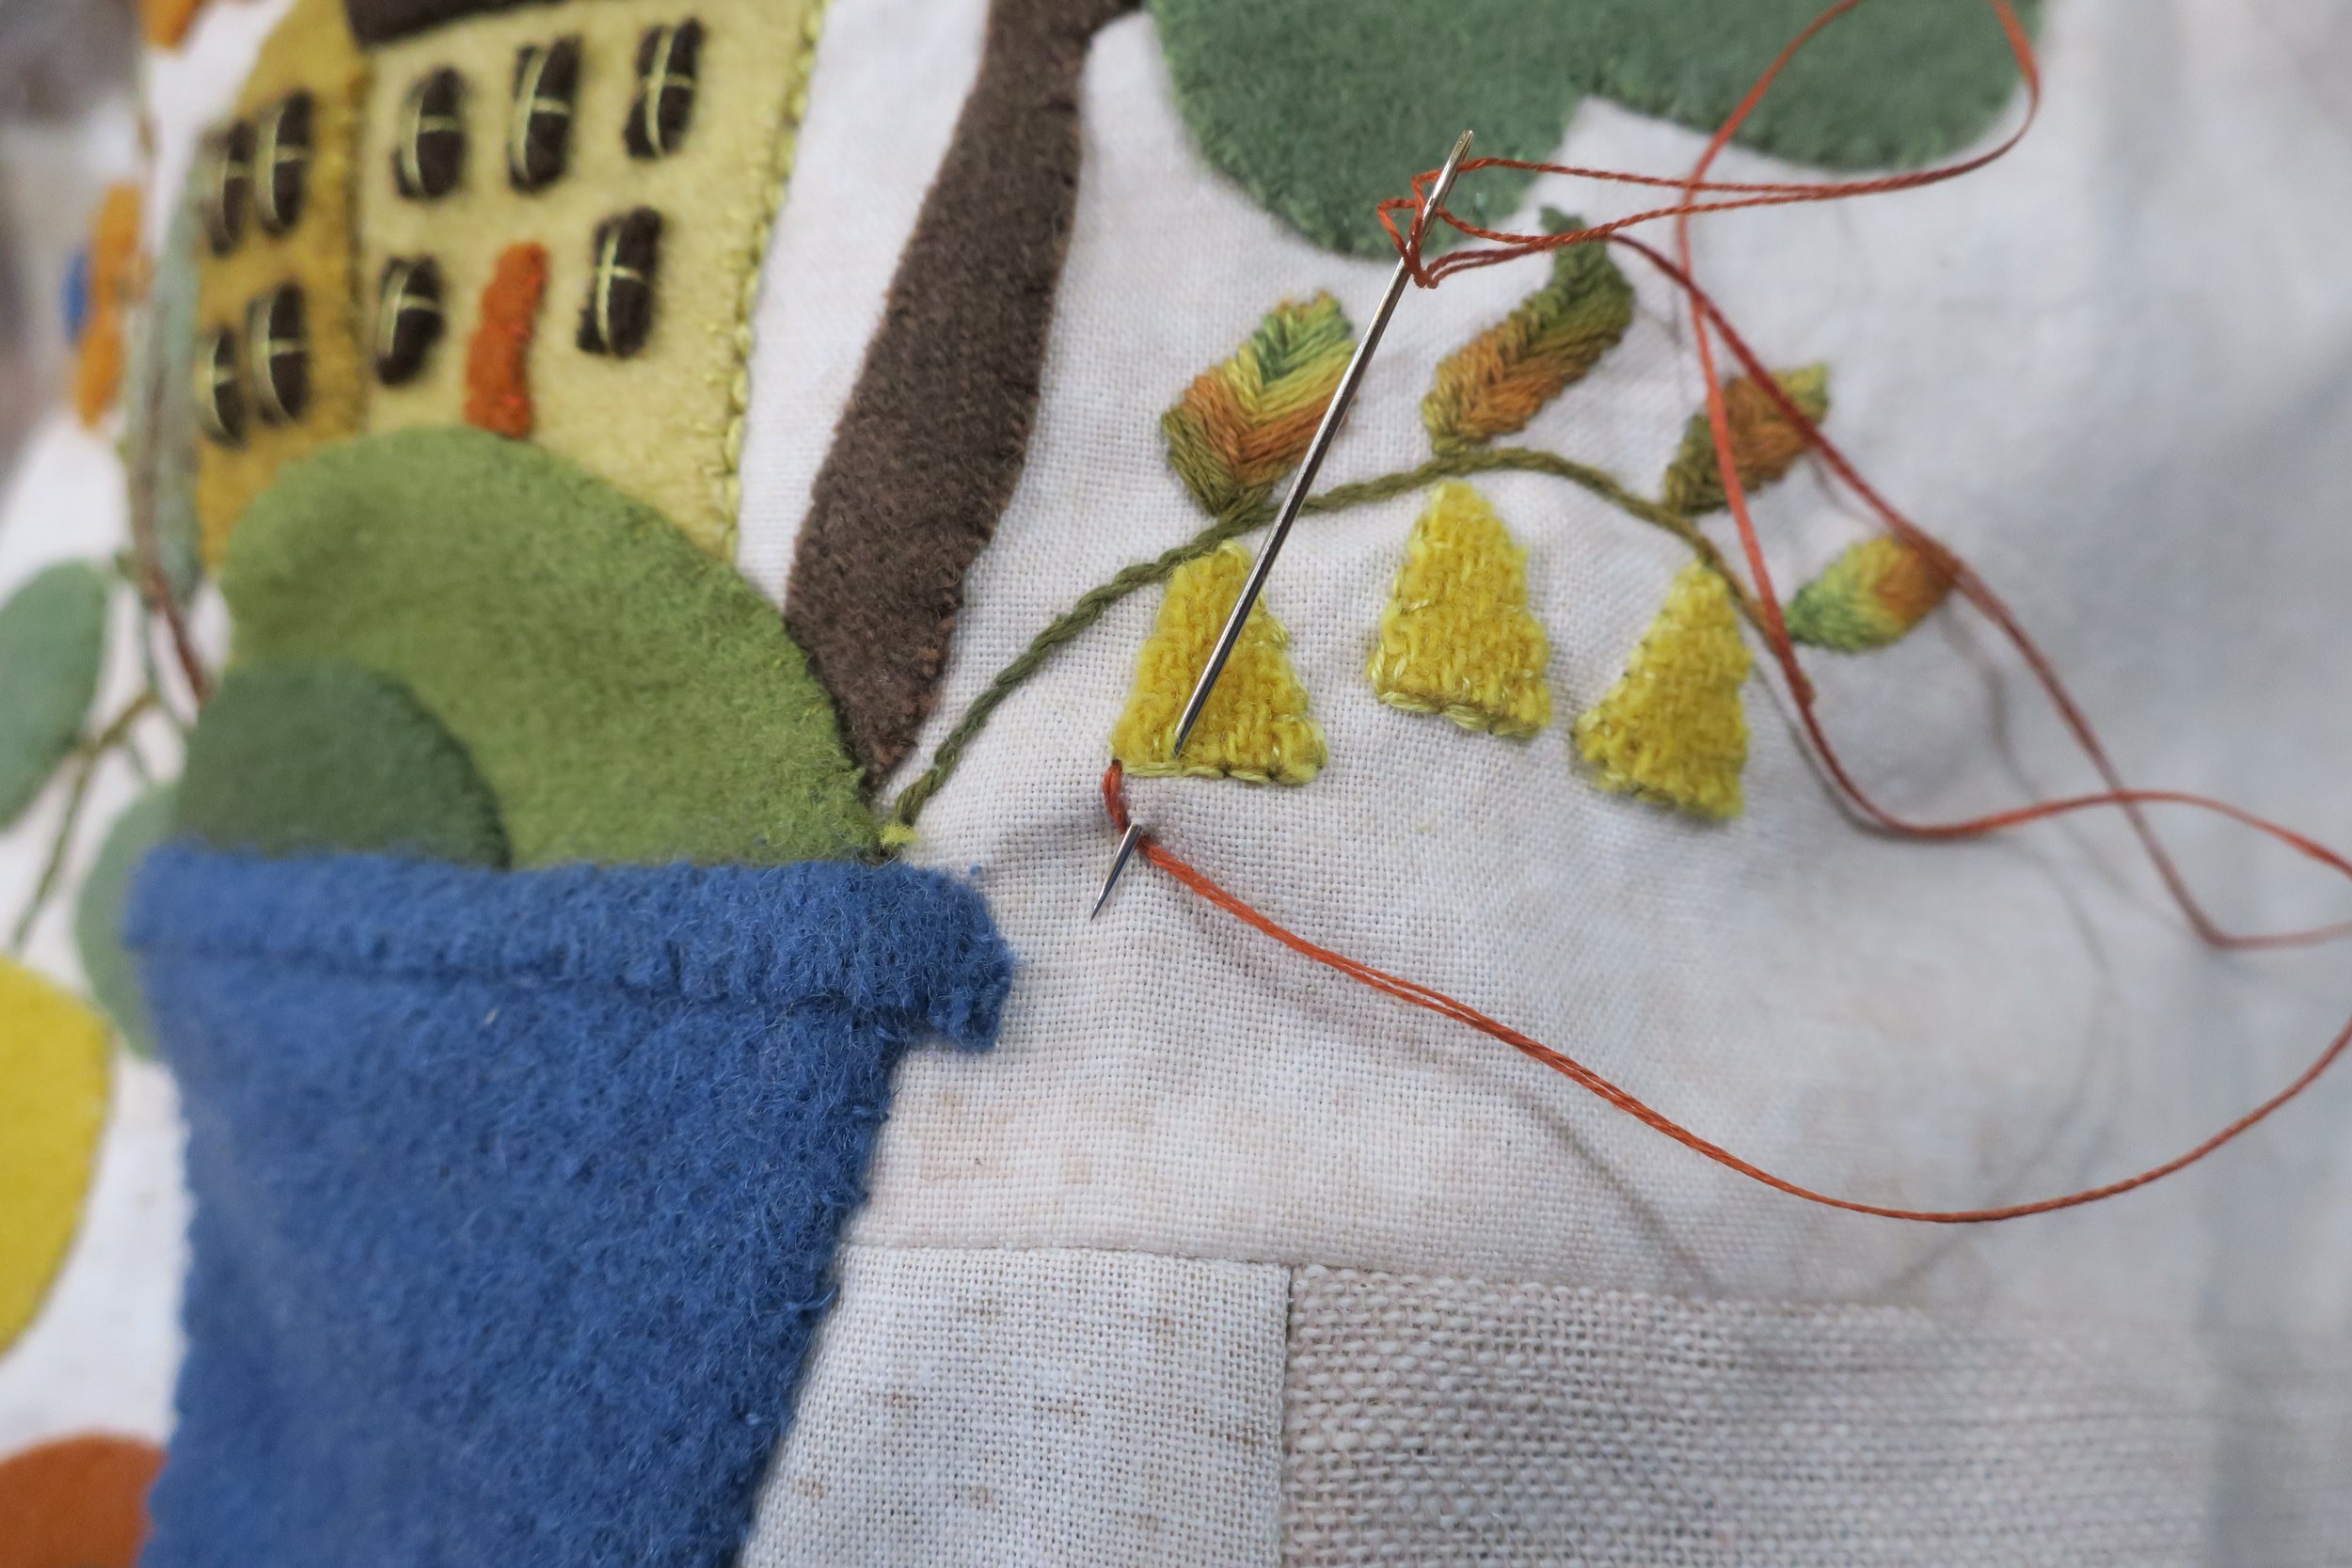
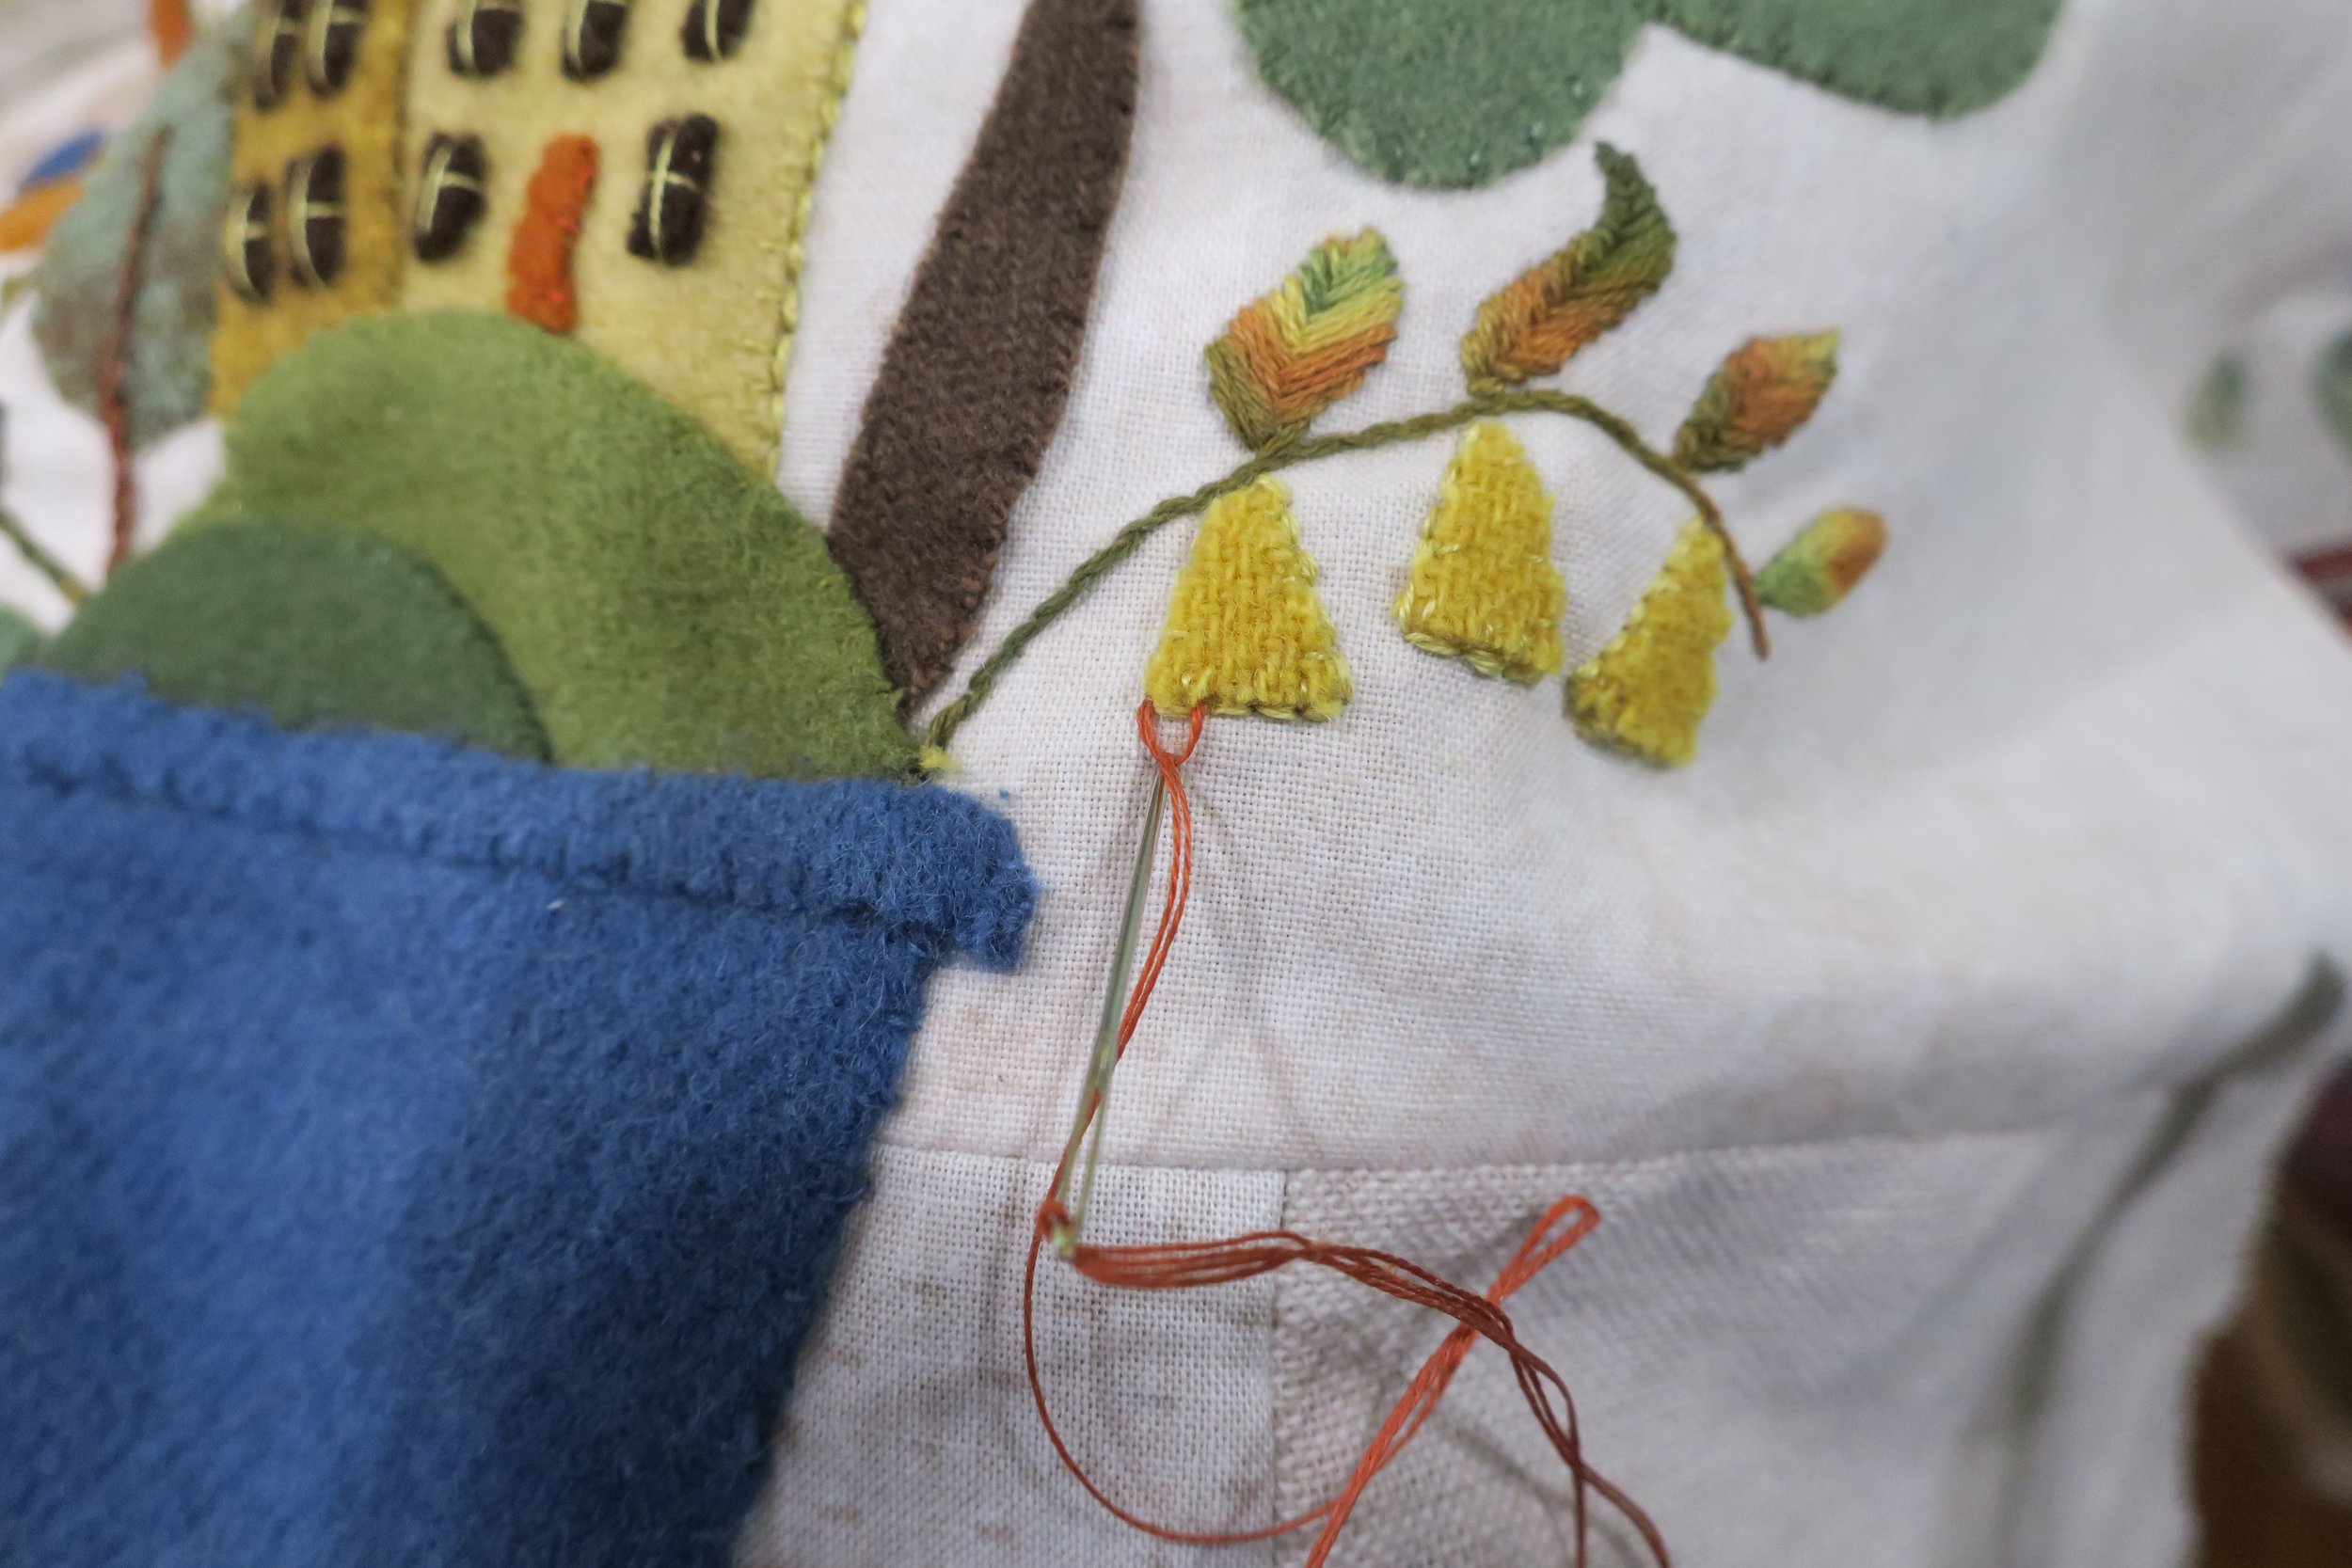
Use 2 strands of burnt orange (51C) floss to stitch double fly stitches on the bottom of each triangle flower. See Layout for placement.
Stitch the second fly stitch inside the first fly stitch.
Use 3 strands of variegated floss (54A) to embellish the tree top with a running stitch. I began with an echo stitch around the tree branches and then randomly filled the remaining unstitched spaces.
Use 3 strands of floss (32C moss) to backstitch around the large tree top and small tree.
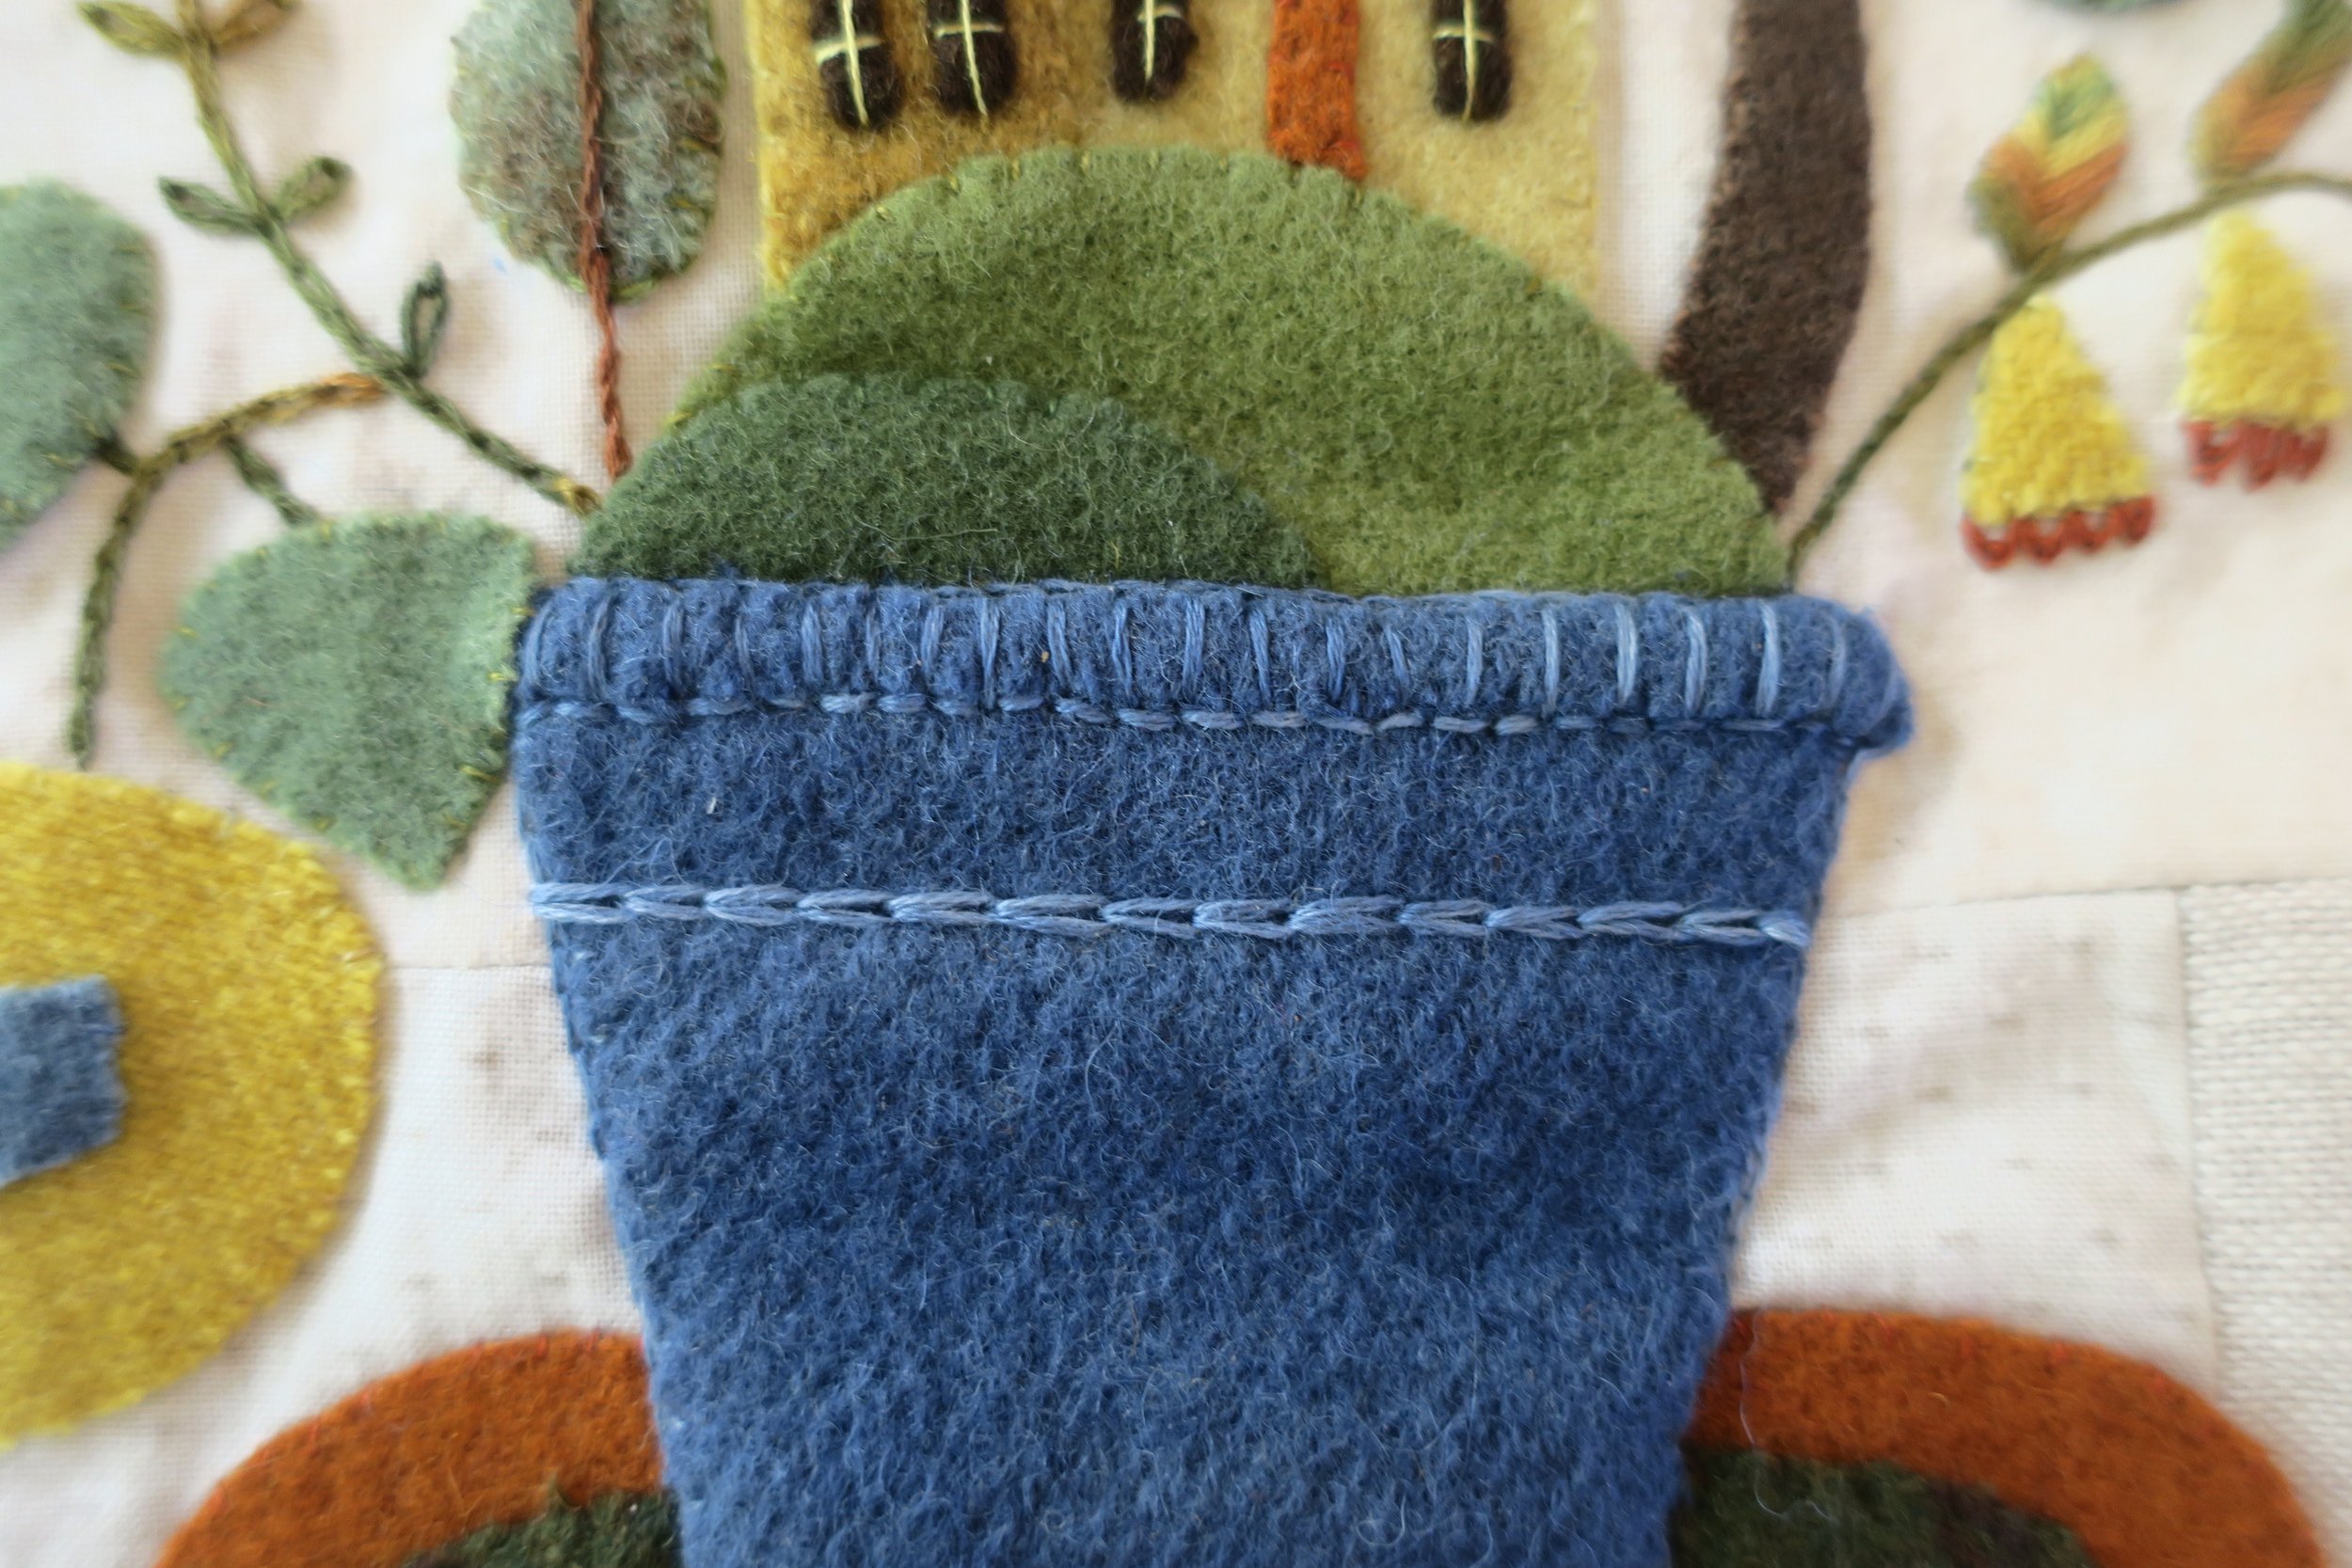
Use 2 strands of blue floss (1BC) to chain stitch around all sides of the flowerpot.
Use a chalk pencil to draw a line defining the base of the flowerpot.
Use 3 strands of the same floss to backstitch over the chalk line.
Use the same thread to back stitch under the lip of the flowerpot.
Use the same floss to stitch a series of vertical straight stitches across the flowerpot lip.
Draw a horizontal chalk line 1/2” below the flowerpot lip.
Use 3 strands of the blue floss to chain stitch over the chalk line.
We’re halfway done with our wool embellishment adventure. Have a cuppa, go for a walk, work in the garden. We’ll work on the rug next.
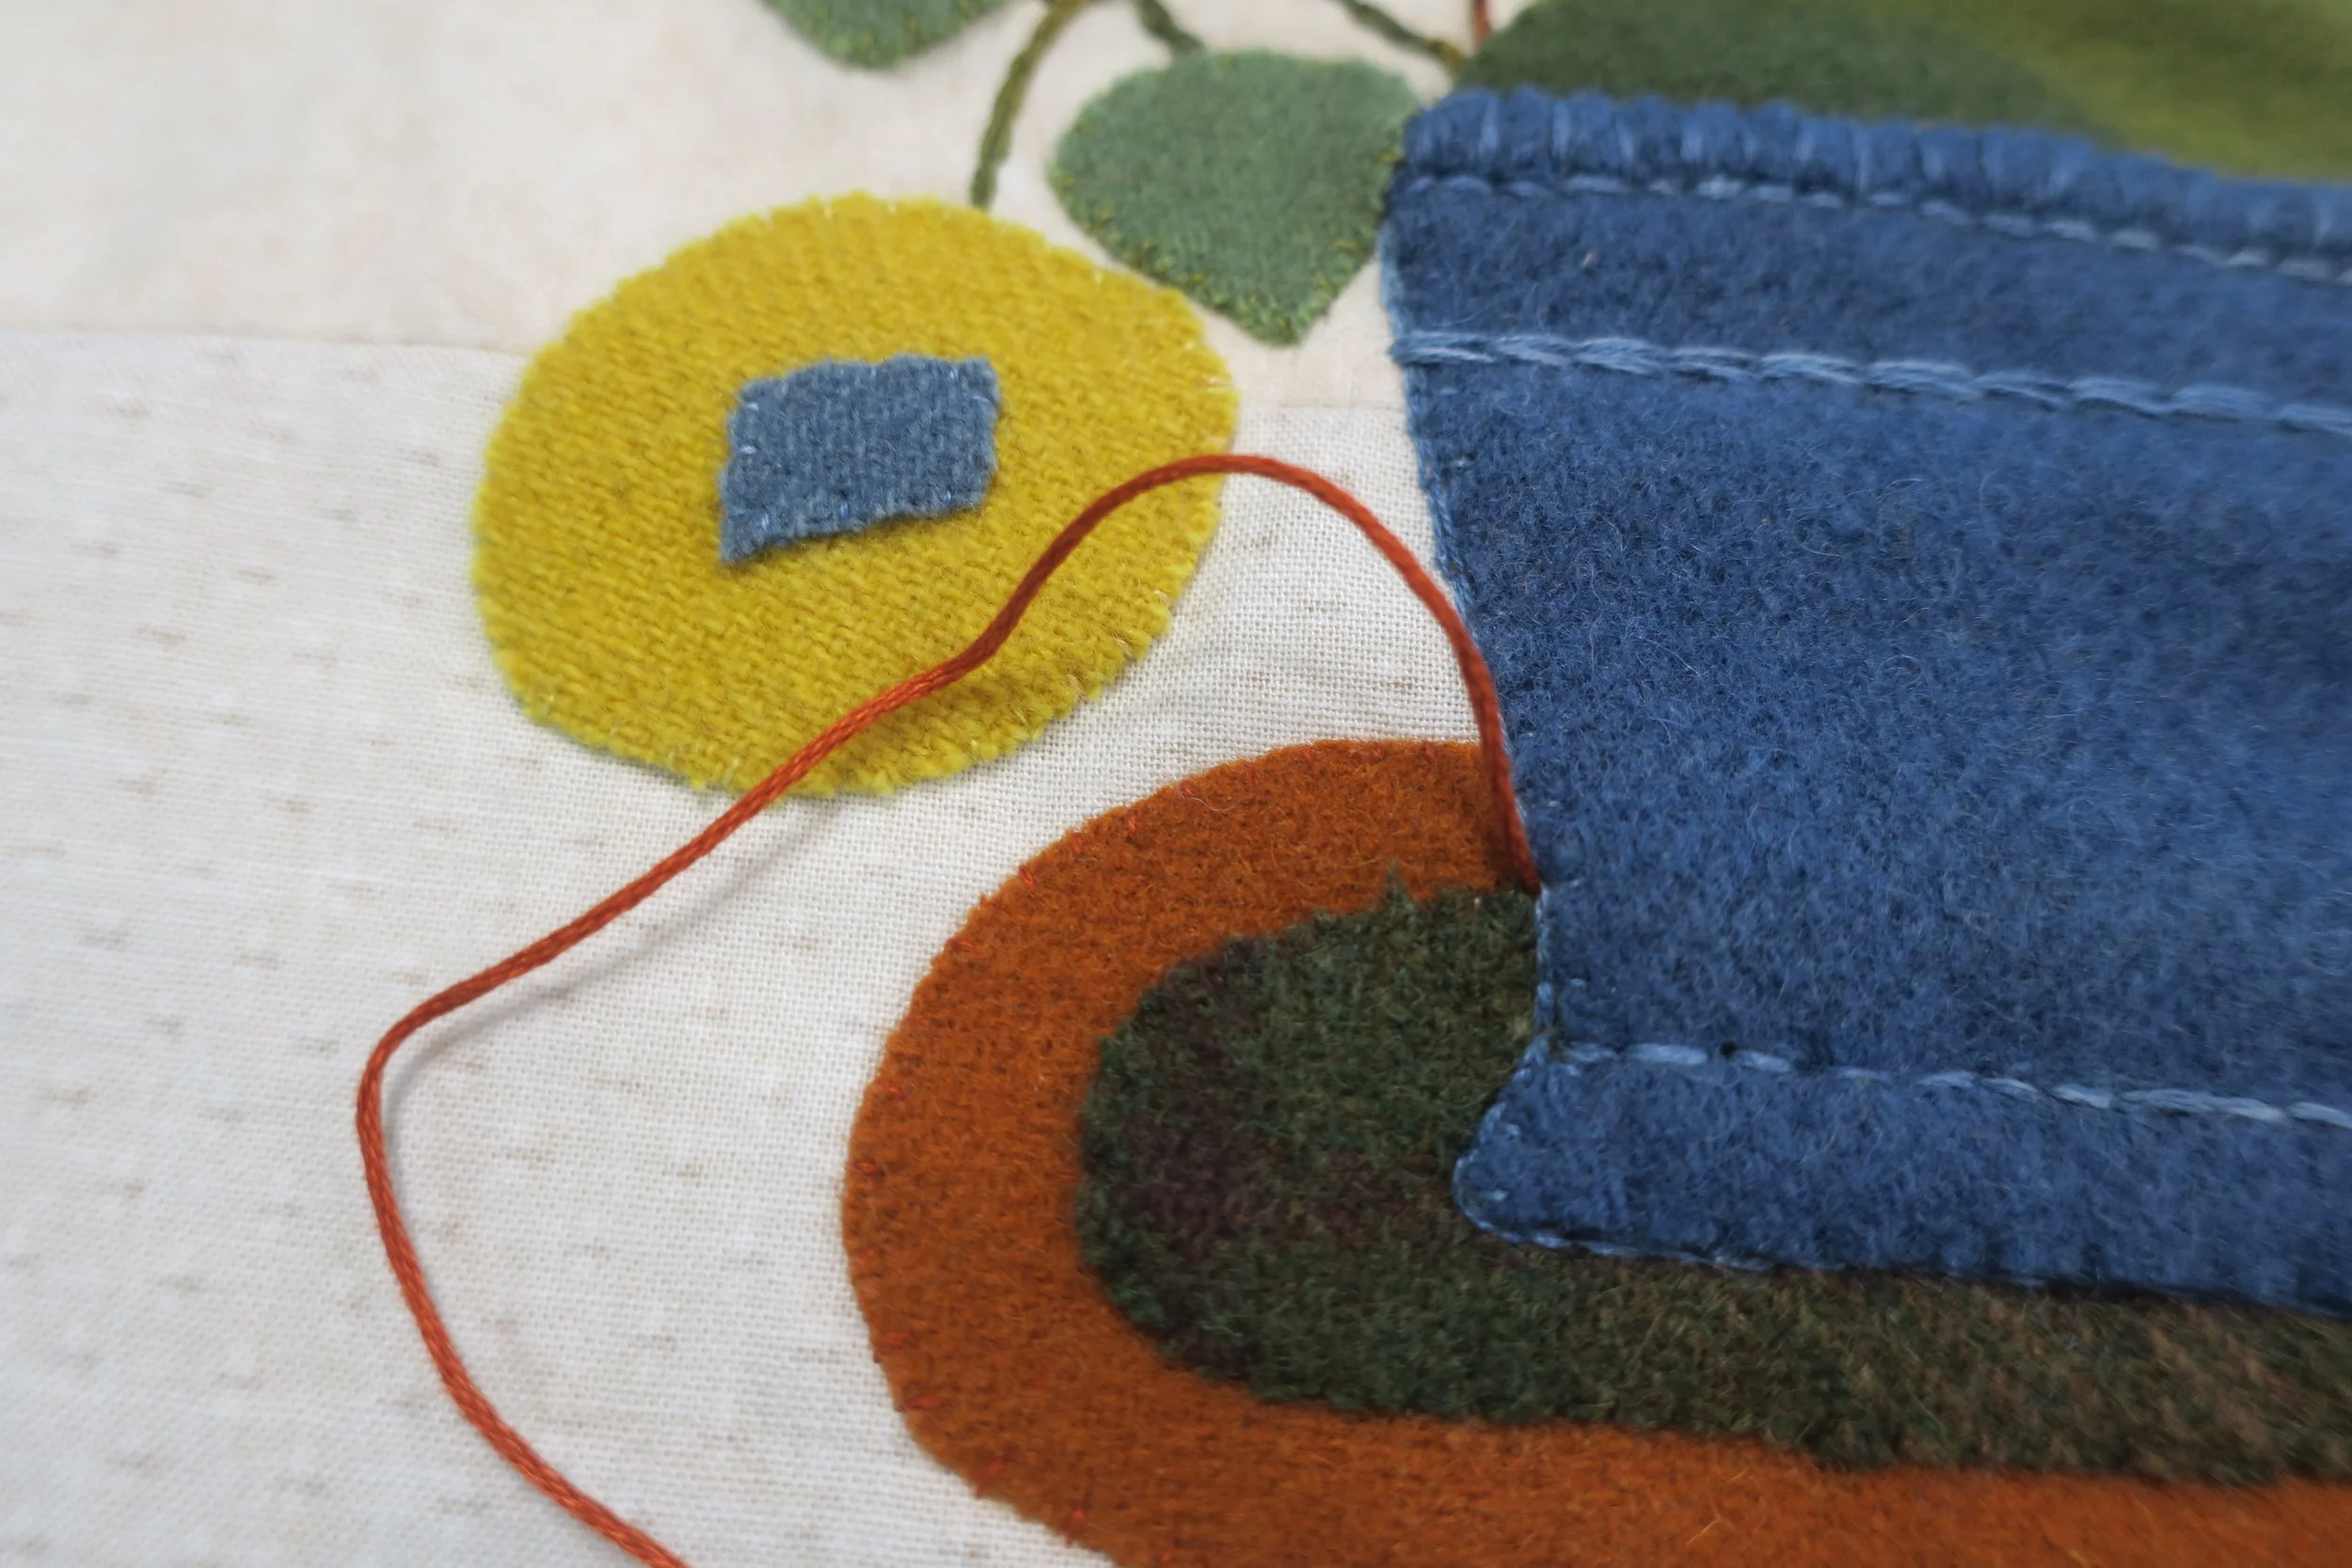
You will need 2 needles, one for the working thread (size 24), and the other (size 22) for the lay down thread.
Begin by bringing the lay down thread (6 strands of color 51C) needle up at the left hand side of the flowerpot where it intersects with the top of the inside rug. Bring the thread through and anchor the needle on the right side of the of the rug, leaving the thread loose.
Bring the thread the working thread (4 strands of 32C) up approximately 1/8” from the edge of the flowerpot and along the outer edge of the inside rug. Butt the lay down thread against the edge of the inside rug, and then insert the needle down again on the other side of the lay down thread tacking it down. This is called a couching stitch.
Continue with the working thread until you reach the last 2 1/2” of the edge of of the inside rug. At this point you will insert the lay down thread needle into the intersection of the flowerpot and the inside rug. Pull the thread through, while still making sure it butts up against the edge of the inside rug. Don’t knot of the end on the backside yet. Secure your needle so that the hanging thread on the back will not be caught while you continue couching on the front.
Return to the front of your project, and then finish couching the last of the lay down thread. Knot off the ends of both the working and lay down threads on the back and then weave the tails through adjacent stitches.
After I couched this, I thought WOW! This would be a great stitch to imitate a rag or coiled rug. I see a new design in the future!
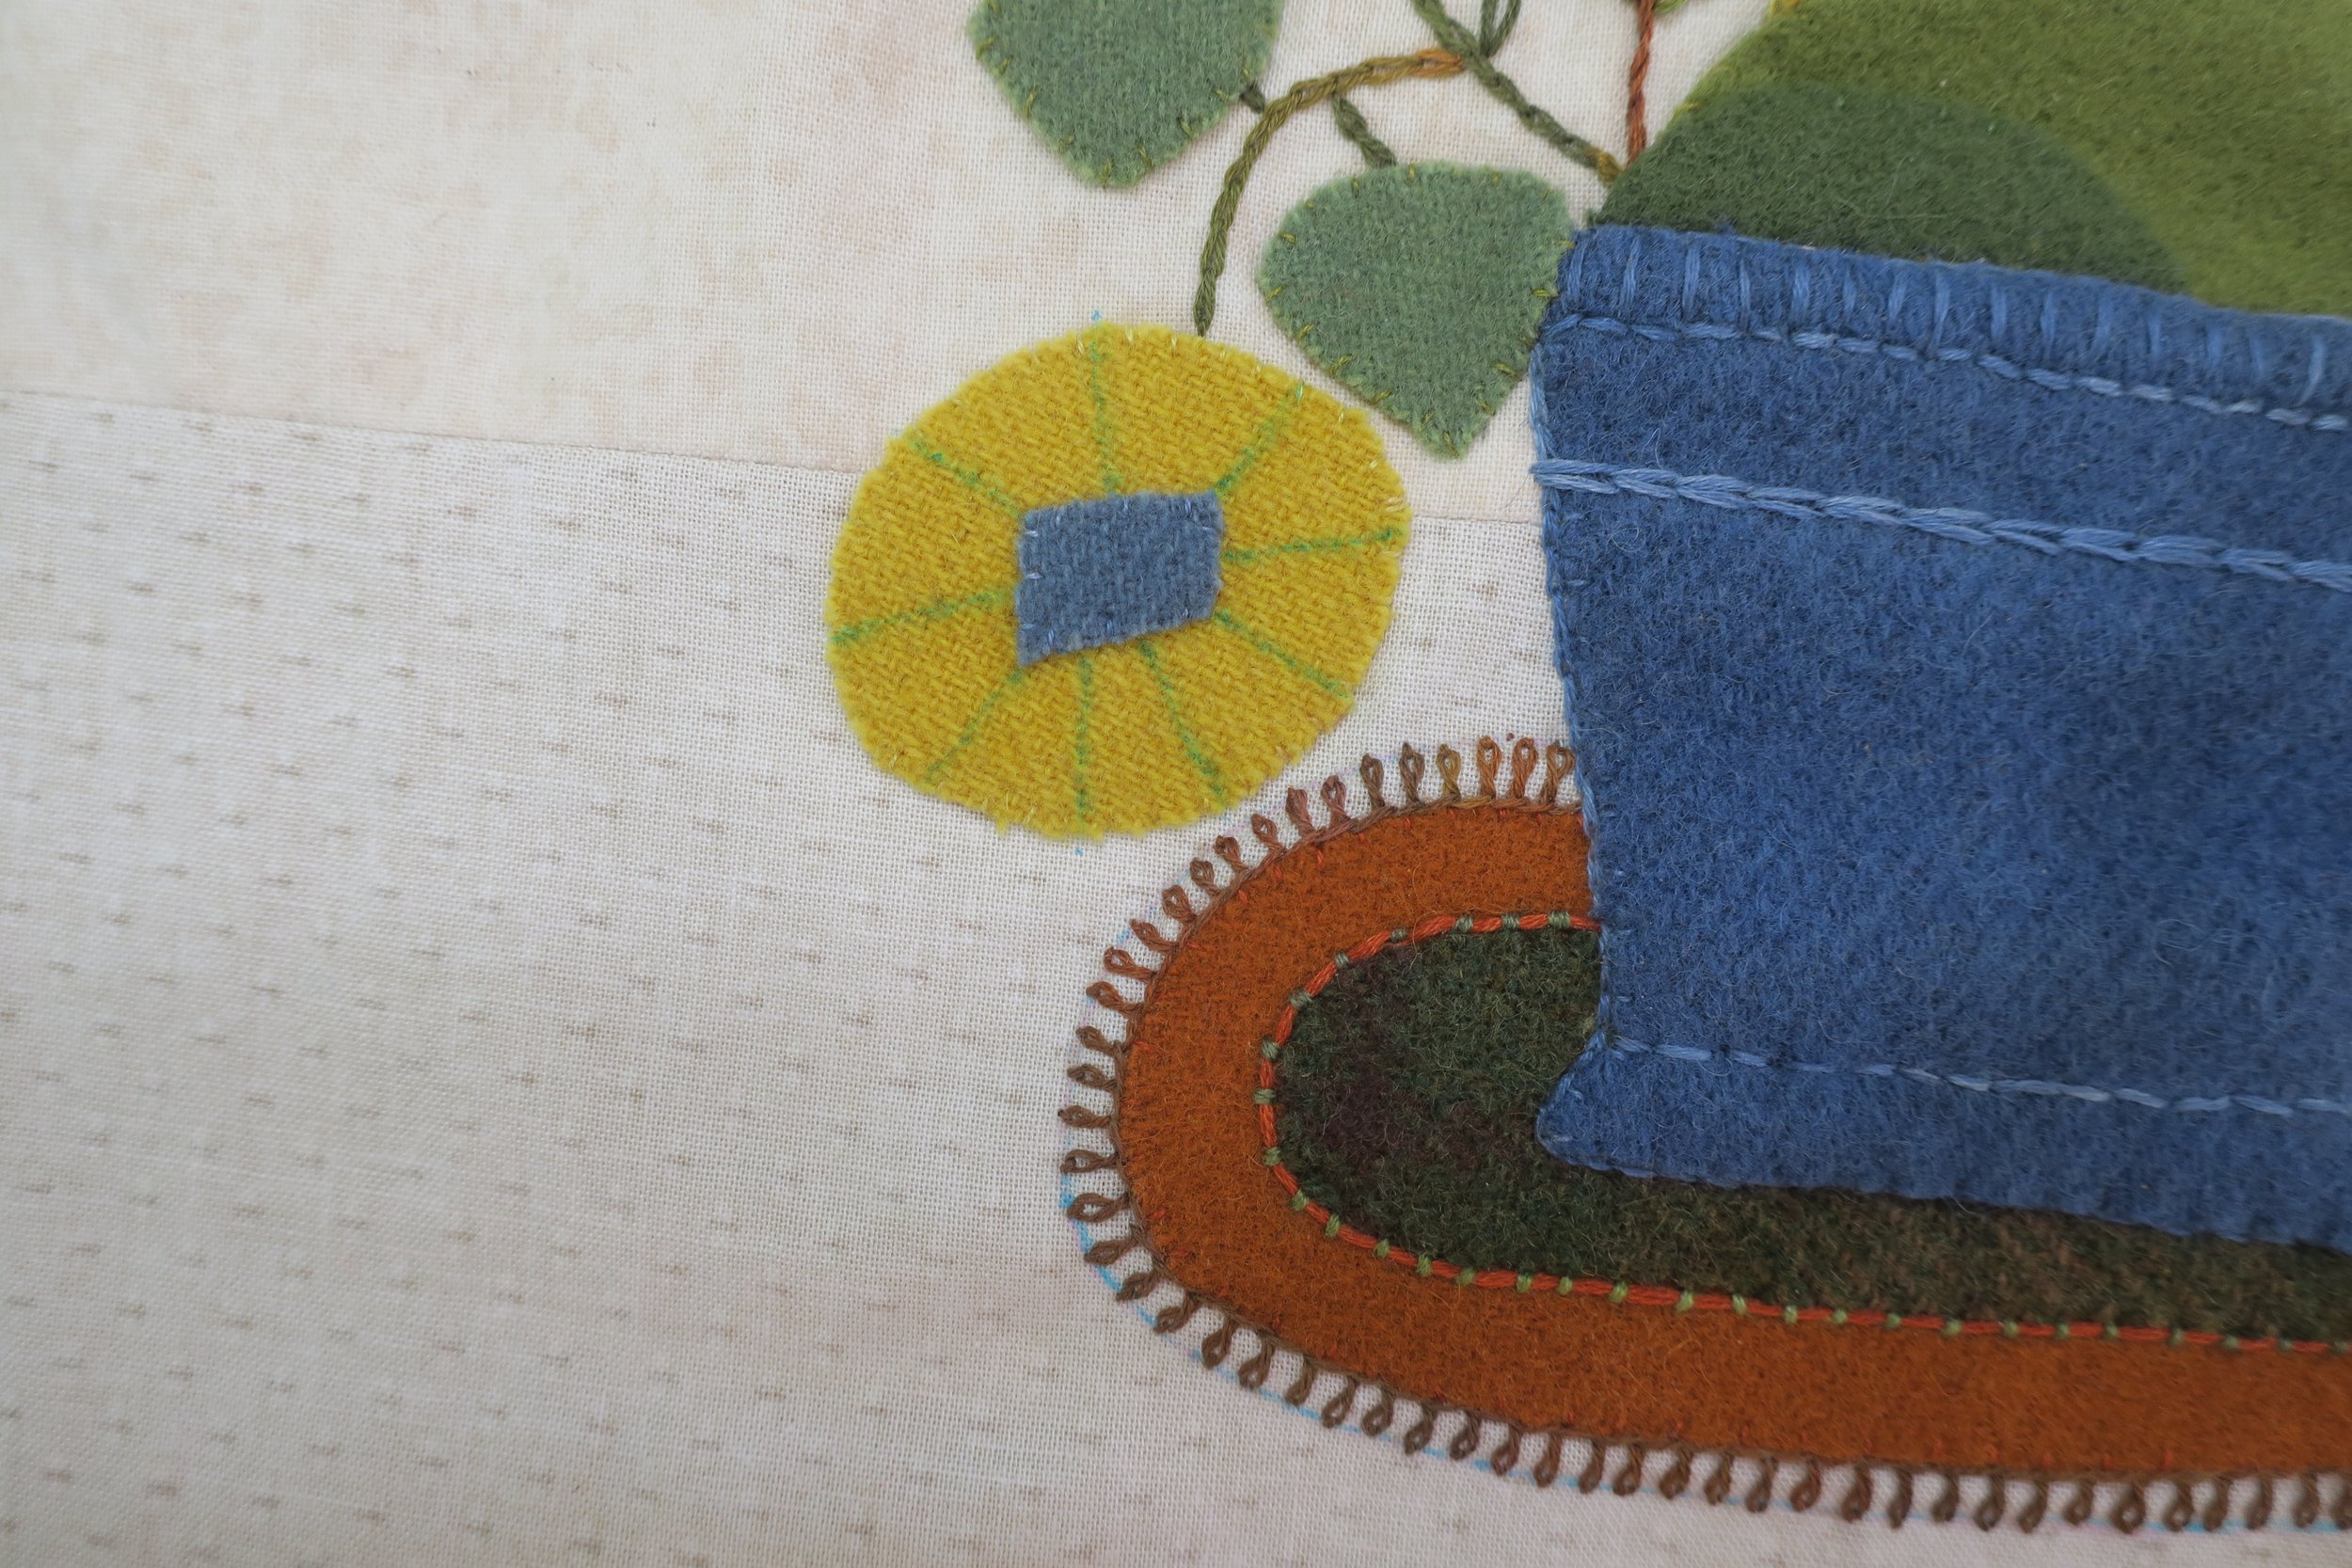
We’ll use a Basque Stitch to make the fringe on the rug. It’s a bit like a blanket and twisted chain stitch combined.
Begin by drawing a line around the outer rug approximately 3/16” or 5mm from the edge. This is where an erasable marking pen is necessary. This will be a guide line for the length of your fringe. It will not be covered by stitches, so you will need to remove it once you finish stitching.
Using 2 strands of 33A, bring the needle up on the left side of the outer rug near the flowerpot. It helps to turn the project upside down. Note: The photos I took are from my first pass at stitching the fringe. I began with 3 strands of thread, but after a few stitches I decided it was too heavy looking, so I replaced them with 2 strands.
Lay your thread horizontally to the right. Insert the needle over the thread and into the background fabric just at the edge of the rug and about 1/8” from the flowerpot. Bring the needle back up again at the guide line like you would for a chain stitch. Now bring your thread around the front of the needle, crossing over and around the top. Pull your thread through, but don’t pull too tight.
Tack the loop down like you would a simple detached chain stitch.
Begin the next stitch by bringing your needle up at the elbow of the first stitch. Bring the thread through and start the next Basque stitch.
Continue with the basque stitches all around the edge of the rug.
On to the large flower!
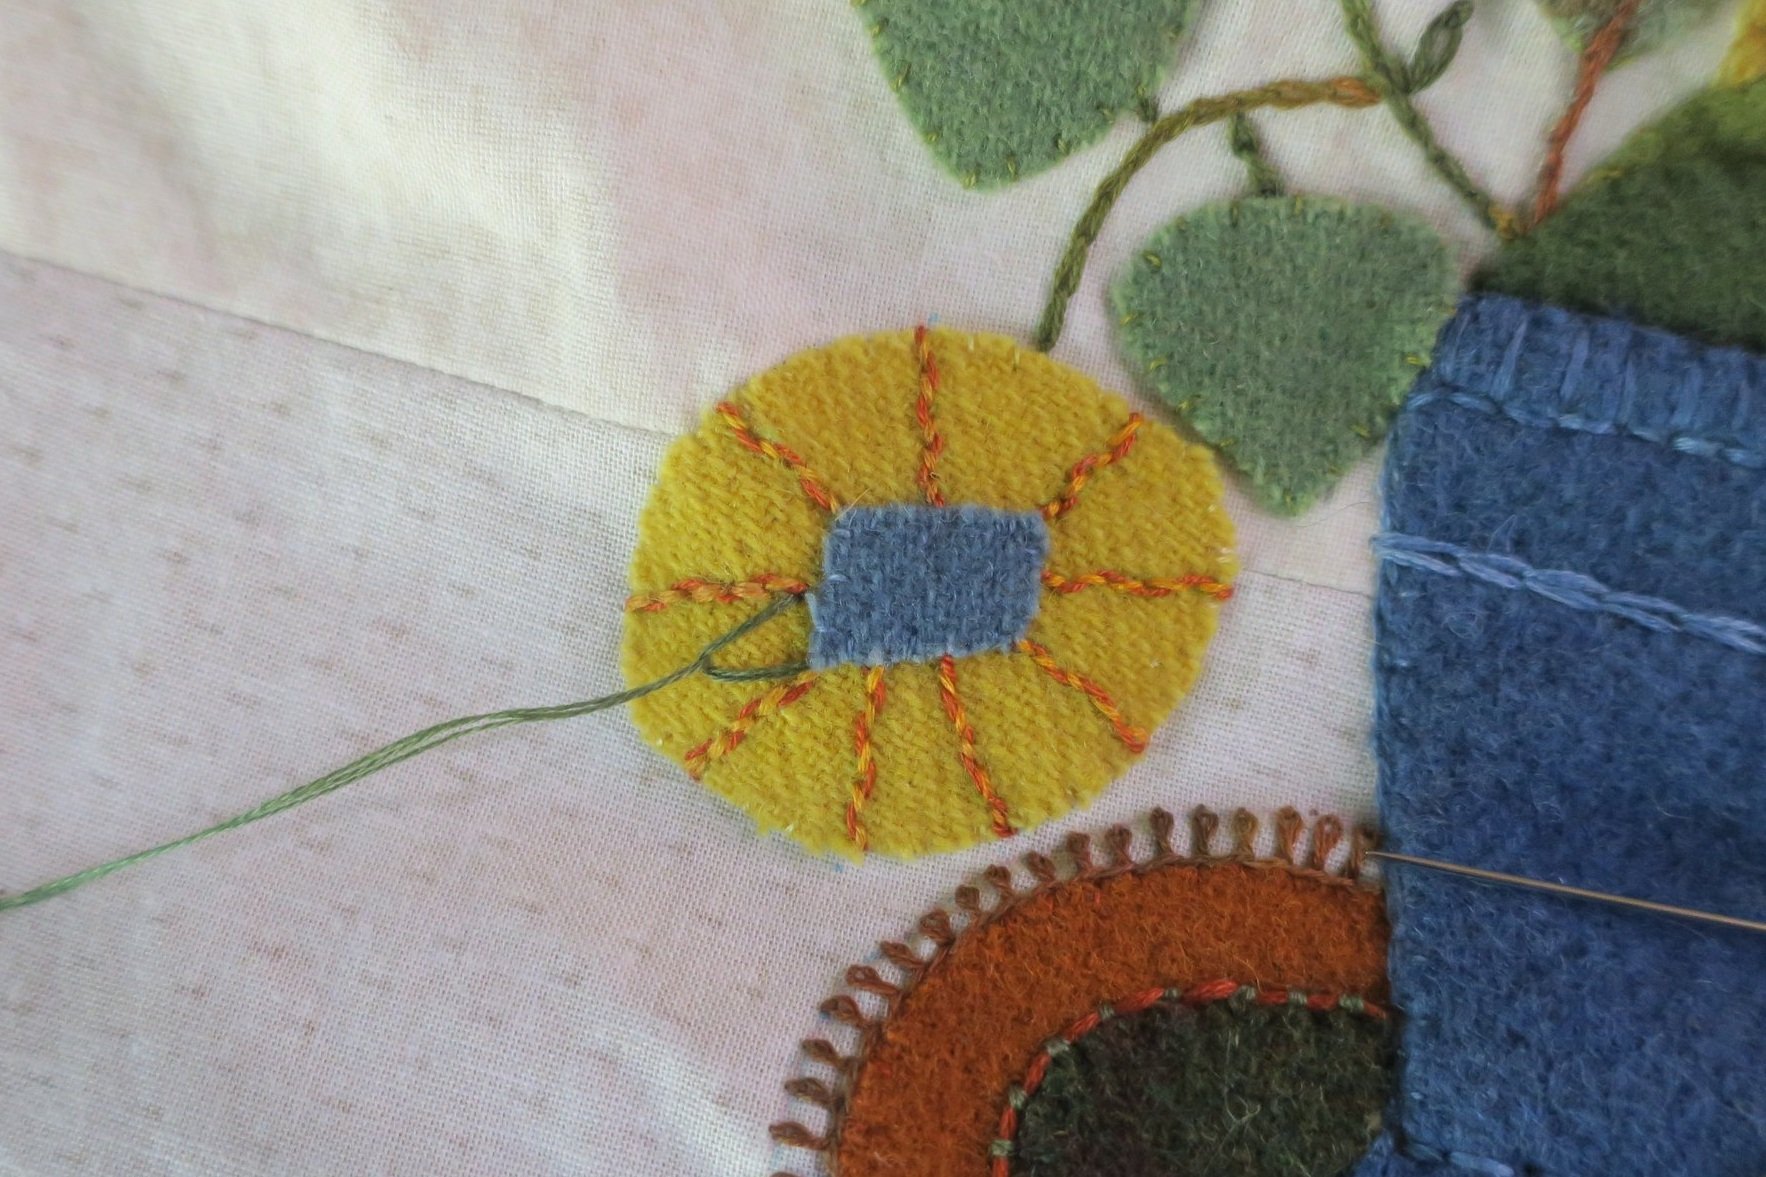
Using a erasable marking pen, draw 4 lines radiating out from the corners of the flower center, creating 4 large pie shapes.
Using the same marker, subdivide the bottom section into 3 slices, and the rest of the sections into 2 slices each, creating 9 slices.
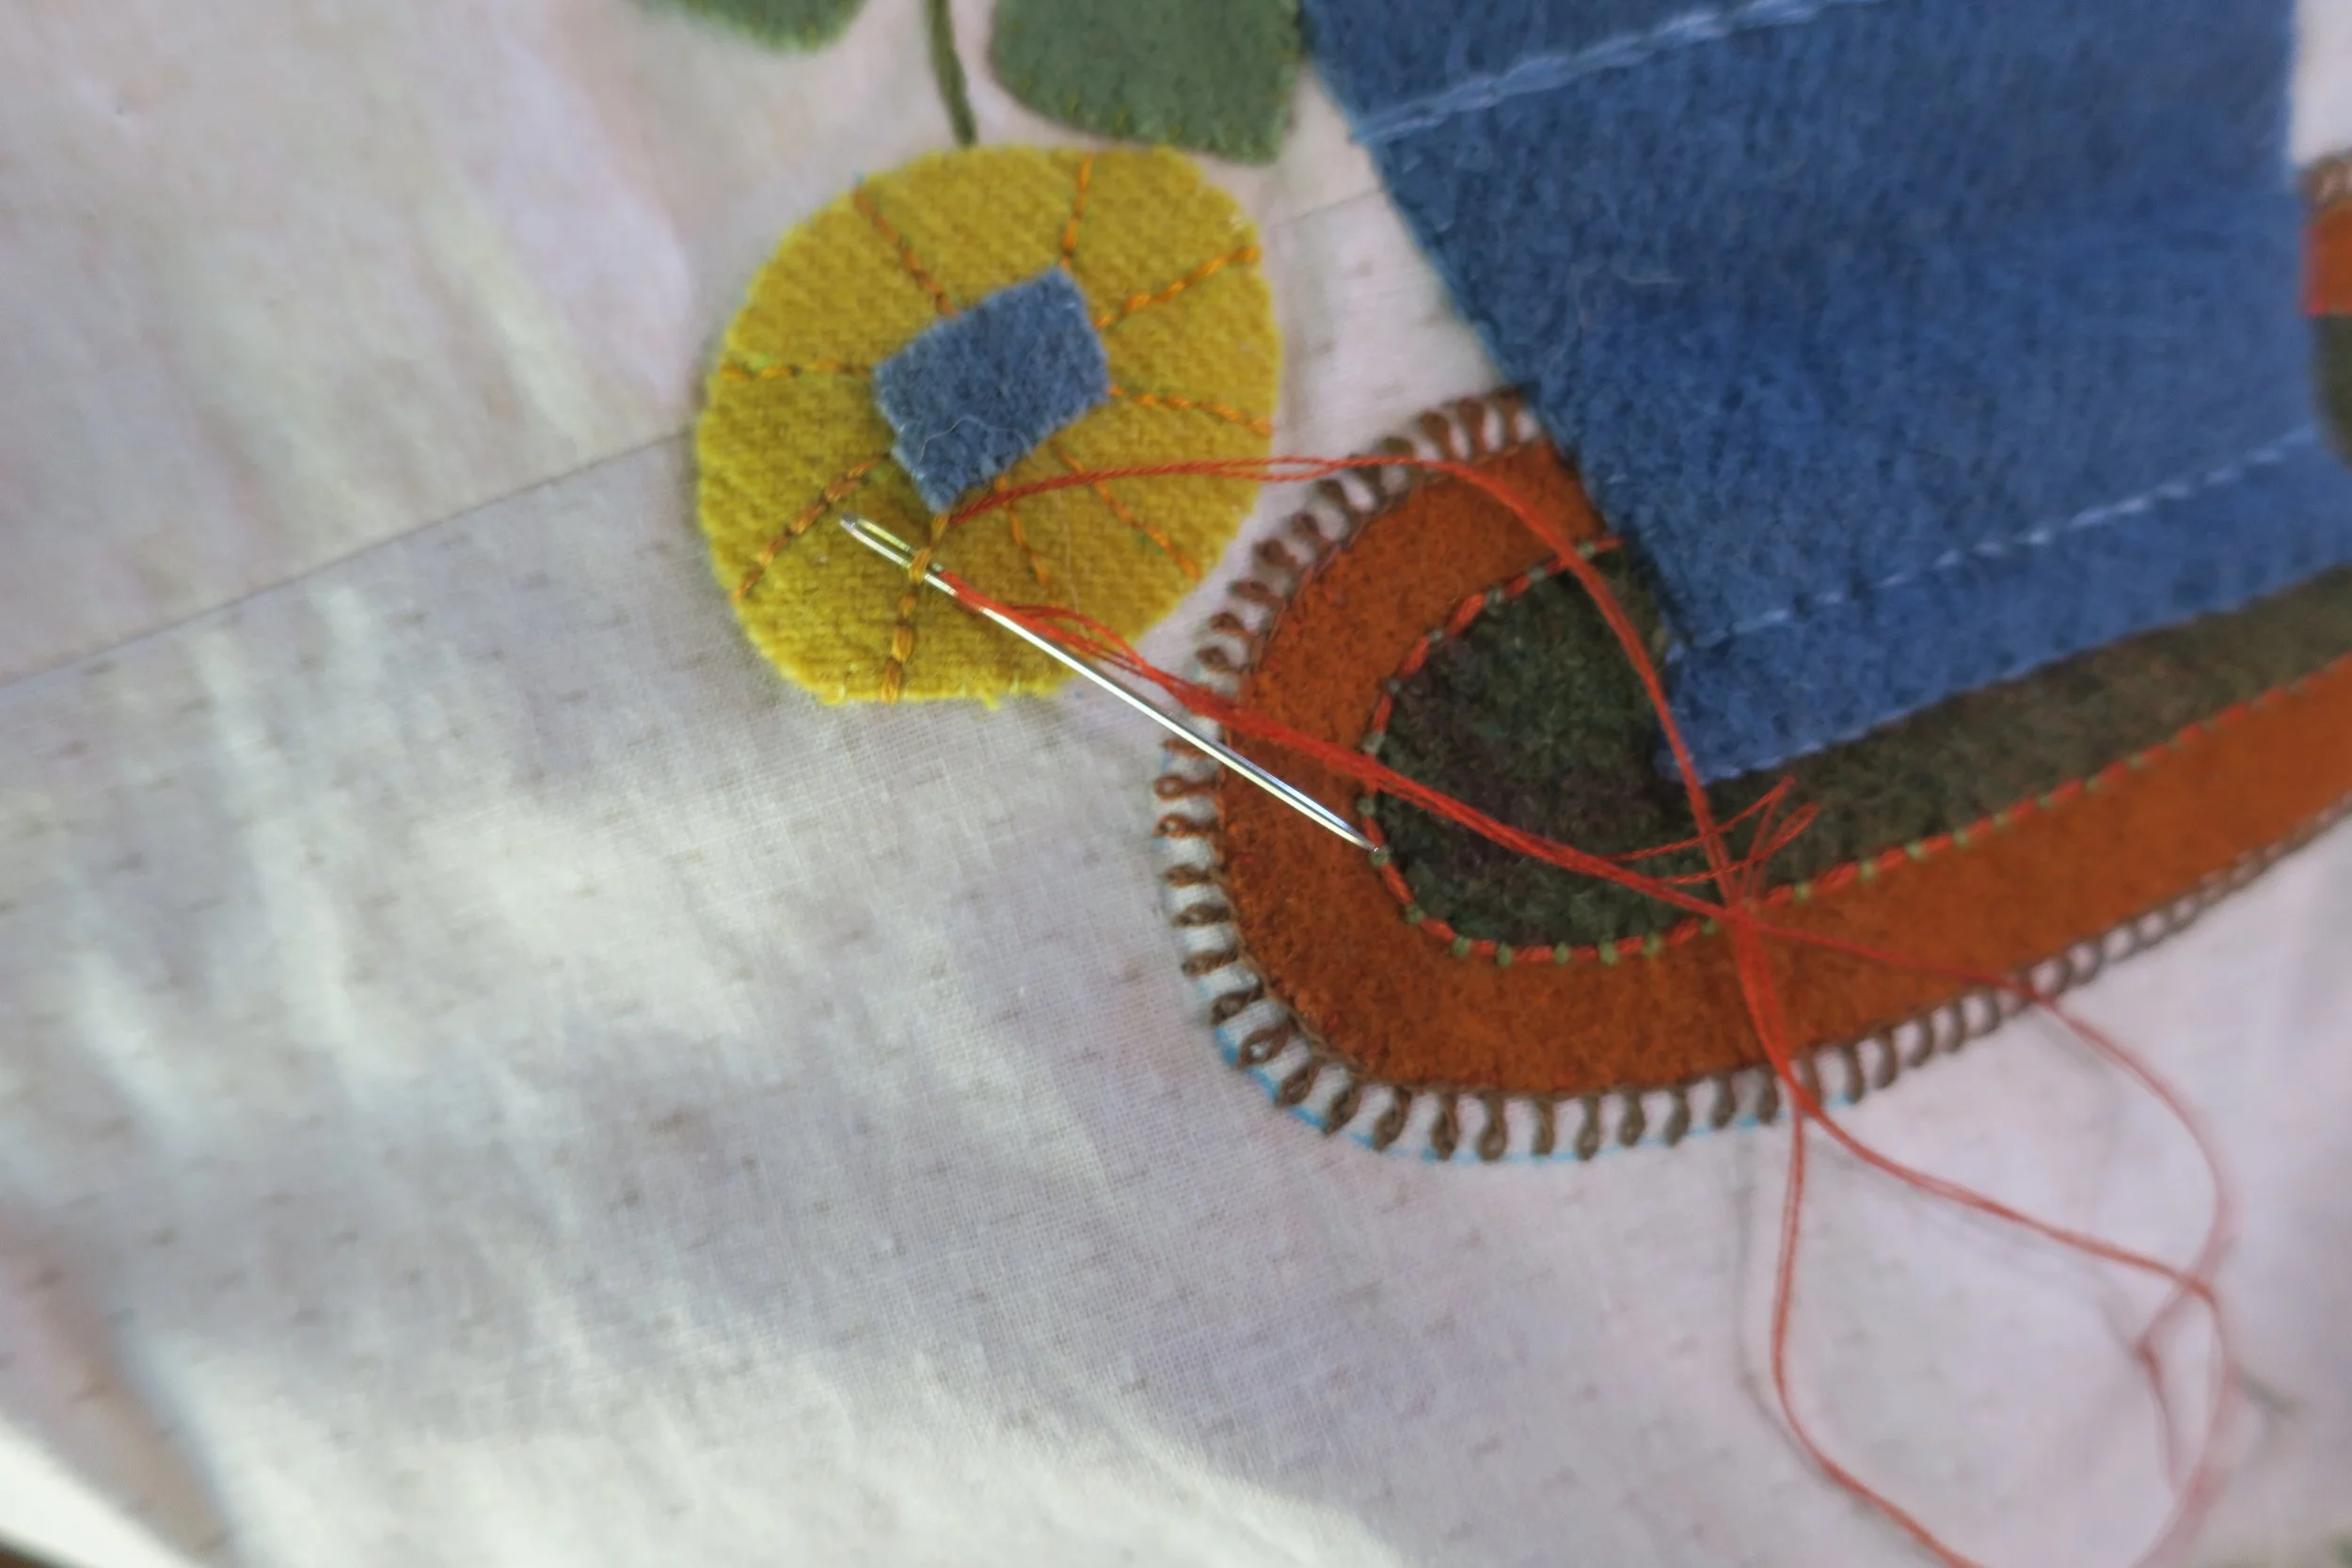
Use 3 strands of 46A to backstitch over the drawn lines. You will be making a woven backstitch.
Use 3 strands of 51C to weave through each backstitch. This works best if you use the head of the needle rather than the tip.
Repeat the woven backstitches for all the radiating lines.
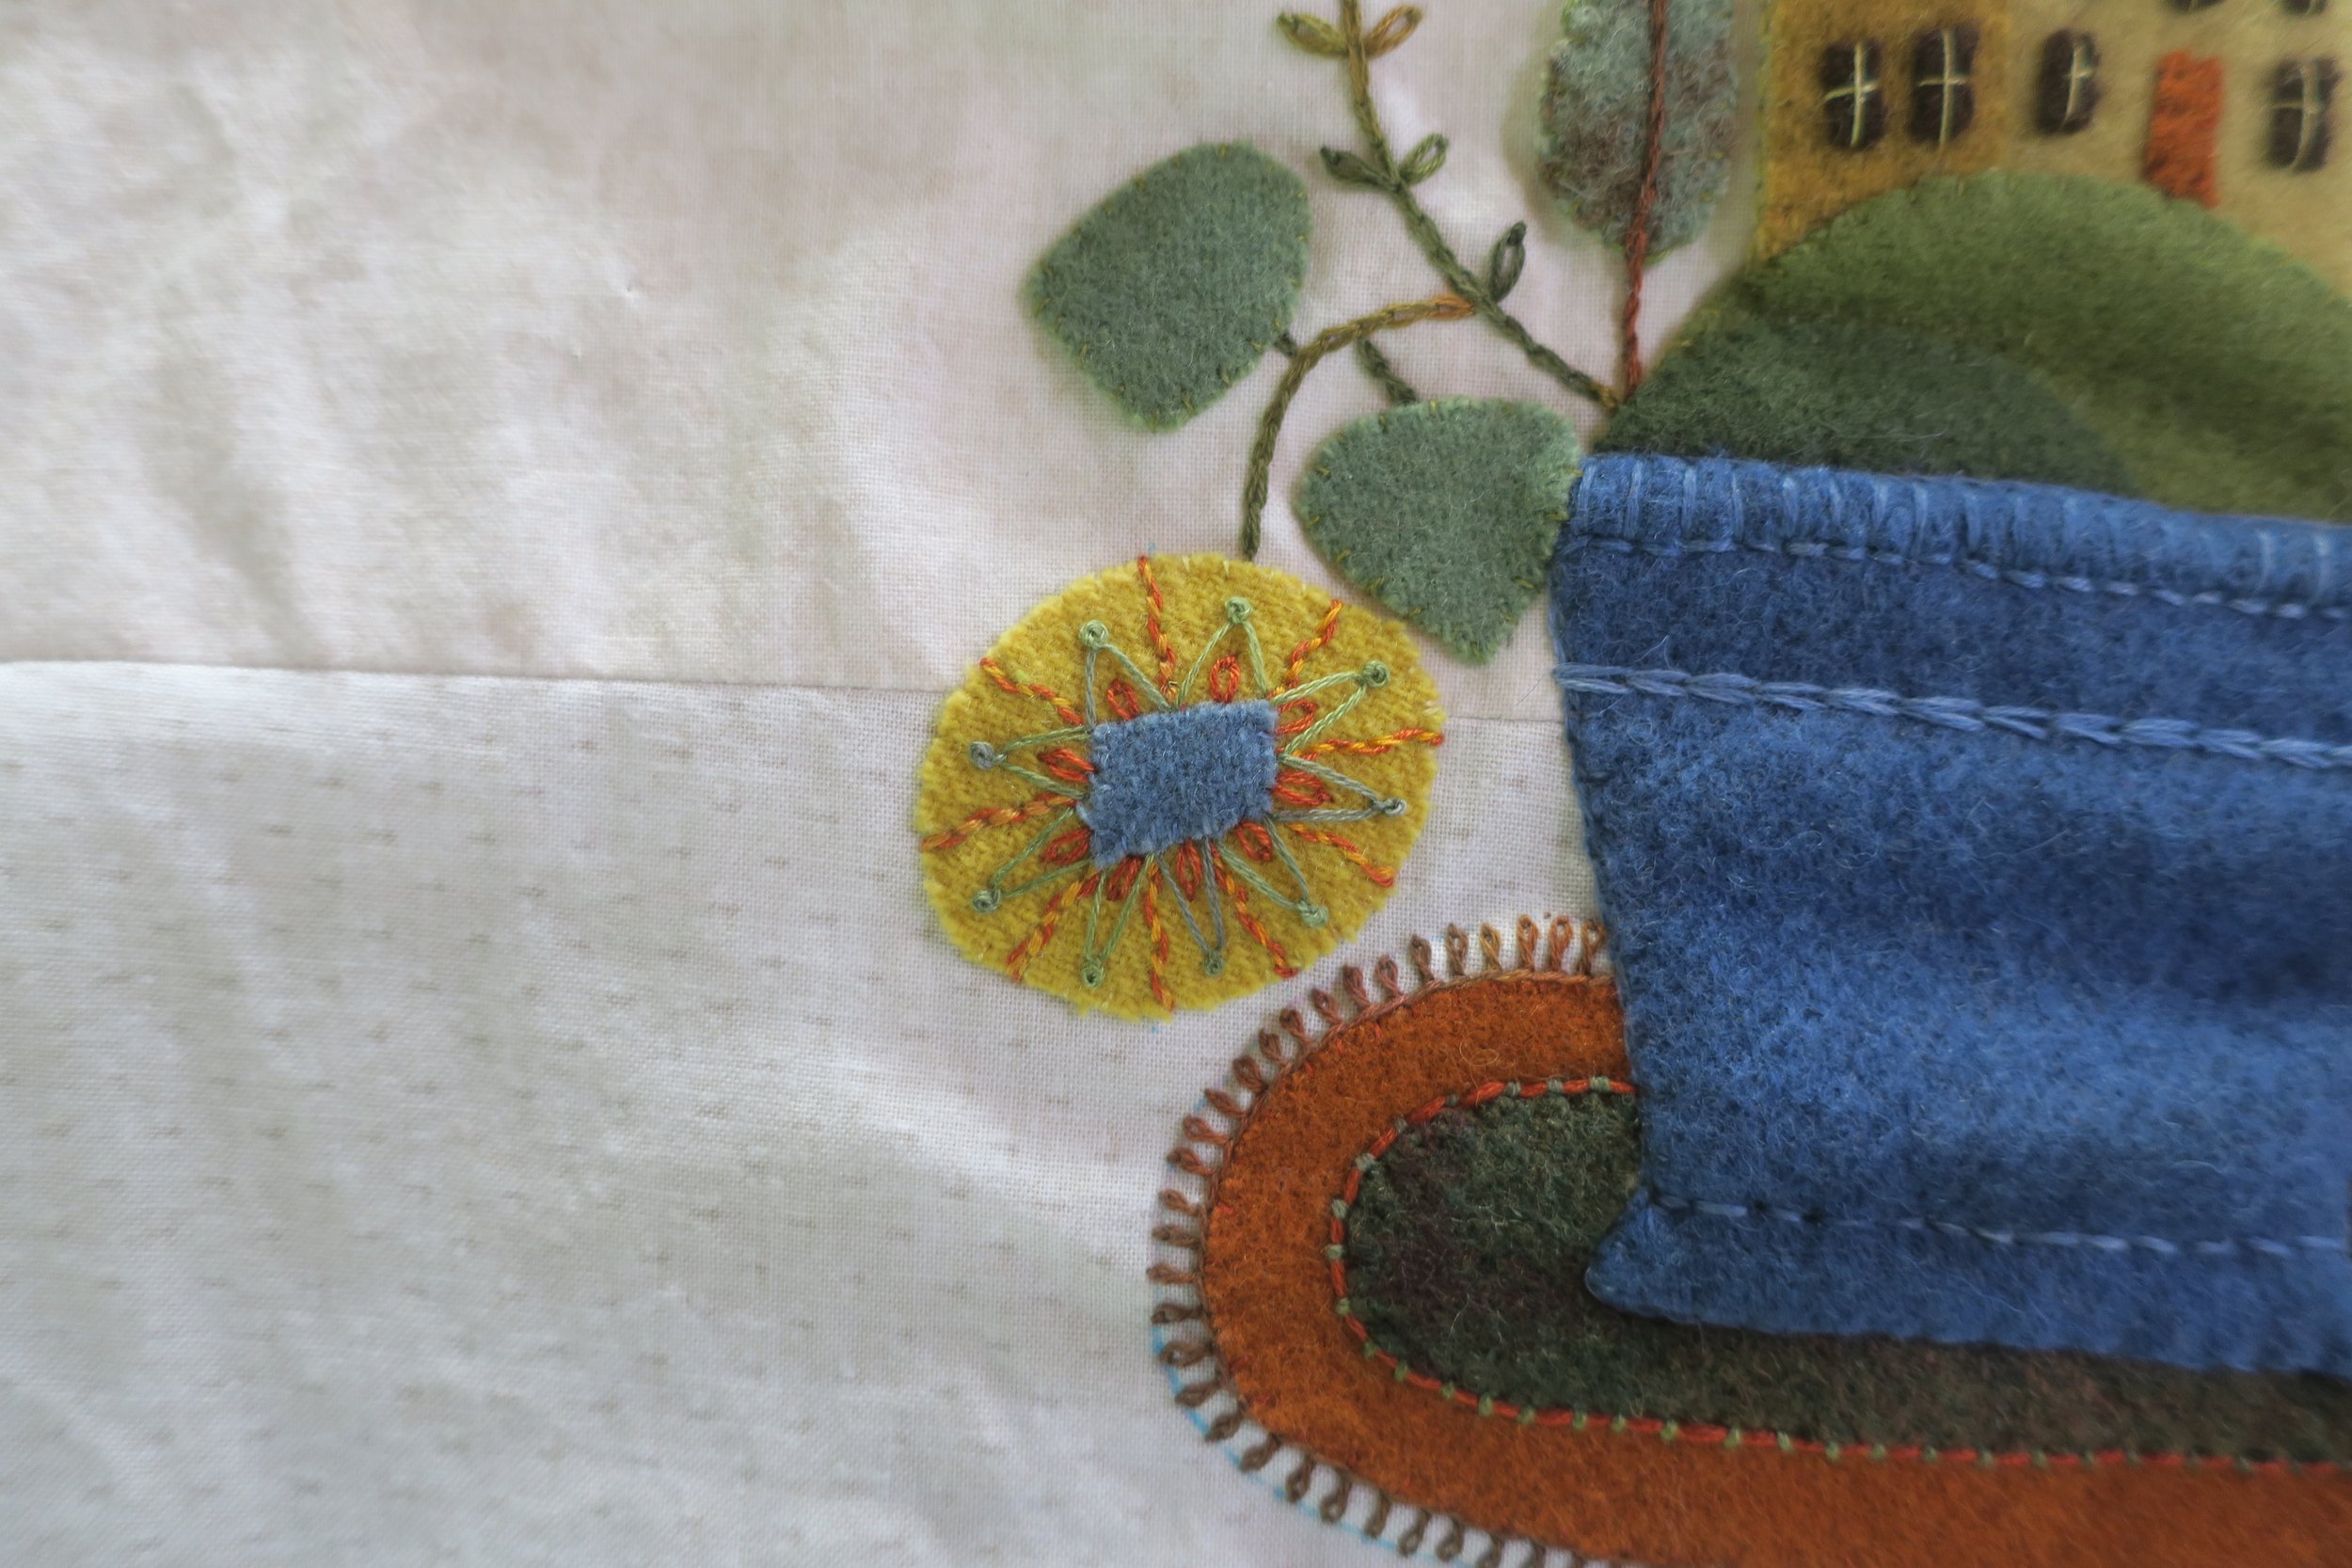
The next stitch is a fly stitch with a slight variation.
Using 2 strands of 32C, bring your needle up on the bottom left hand corner of the flower center. Bring the thread all the way through.
Insert the needle back down at the base of the adjoining radiating line, and back up again 1/4” from the outer edge of the flower. Wrap the thread under the needle tip.
Pull the thread through. Make a double wrapped French, or colonial knot at the end and insert the needle back down through to the back, pulling the thread through. Secure the thread with a knot at the back.
Repeat this modified fly stitch in each of the pie slices.
Use 2 strands of 51C to stitch a detatched chain in each of the fly stitches.
Use 3 strands of 1BC to stitch a grid pattern of French knots in the flower center.
Finish this flower off by adding a couched stitch around the perimeter, using 6 strands of 1BC as your lay down thread, and 4 strands of Cosmo 821 as your working thread.
Use a chalk marker to draw the center veins of leaves 1 and 2.
Use 3 strands of 54A to stitch a closed fly stitch over the lines. Use the layout guide for placement.
Do you notice a problem here? Leaf # 2 is too close to the flower! Somehow I put it in the wrong position! I got out my snips and tweezers, and removed and repostioned it in the correct spot. A stitching catastrophe averted!
Use 3 strands of 58BC to backstitch around each leaf.
We’re in the final stretch!
Use 2 strands of 32C to make 2 diagonal parallel lines on flower center #1. See layout for positioning.
Use the same thread to 2 more diagonal parallel lines that cross over the first pair of lines creating a diamond pattern.
Use 3 strands of Cosmo 821 to tack down the 4 intersections of the diamond grid. This stitch is sometimes called a laid or lattice stitch.
Repeat for flowers 2-4.
Use 3 strands of Cosmo 821 as your lay down thread and 4 strands of 1BC as your working thread to couch around each flower center.
Use 2 strands of 54A to chain stitch around flowers 1, 3 and 4.
Use 2 strands of 51C to chain stitch around flower 2.
Use 2 strands of 54A to make a series of fly stitches on the large hill.
Use a damp cloth to remove any water erasable marks on your project.


