It's Beginning to Look a Lot Like Christmas
Nutcracker wool applique ornament back
Wool Applique Nutcracker Ornament
5 1/4” diameter
This is a companion ornament to Jolly St. Nick and Tis The Season. It’s a project that works up quick because the stitching is fairly basic with 8 easy stitches: whip, back, stem, french knot, cross, buttonhole, running, and chain. The most time-consuming step is the embellishments made with small gold sequins, seed beads, and Swarovski crystals.
Happy Stitching!
Materials
Felted wool or wool felt
7” x 14” rectangle of blue for background
3 ½” square of white for the hair, beard, and moustache
5” x 7” rectangle of red for top of crown, chest and shoulders, and right side of tree
2 ½” x 3” rectangle of beige for the face
1” x 2” rectangle of dark beige for the nose
1 ½” square of pink for the cheeks
2 ½” x 5” rectangle of gold for the crown, chest/shoulder embellishment, and star
2 ½” x 4” rectangle of green for the tree
Thread - You can use embroidery floss of perle cotton, size 12. Use colors that match your wool colors.
You will also need:
Dark grey floss for the eyes
Blue floss that matches the background color
Brown floss for the tree trunk
Black perle cotton, size 8 for the embroidery stitches around the edges of the ornament.
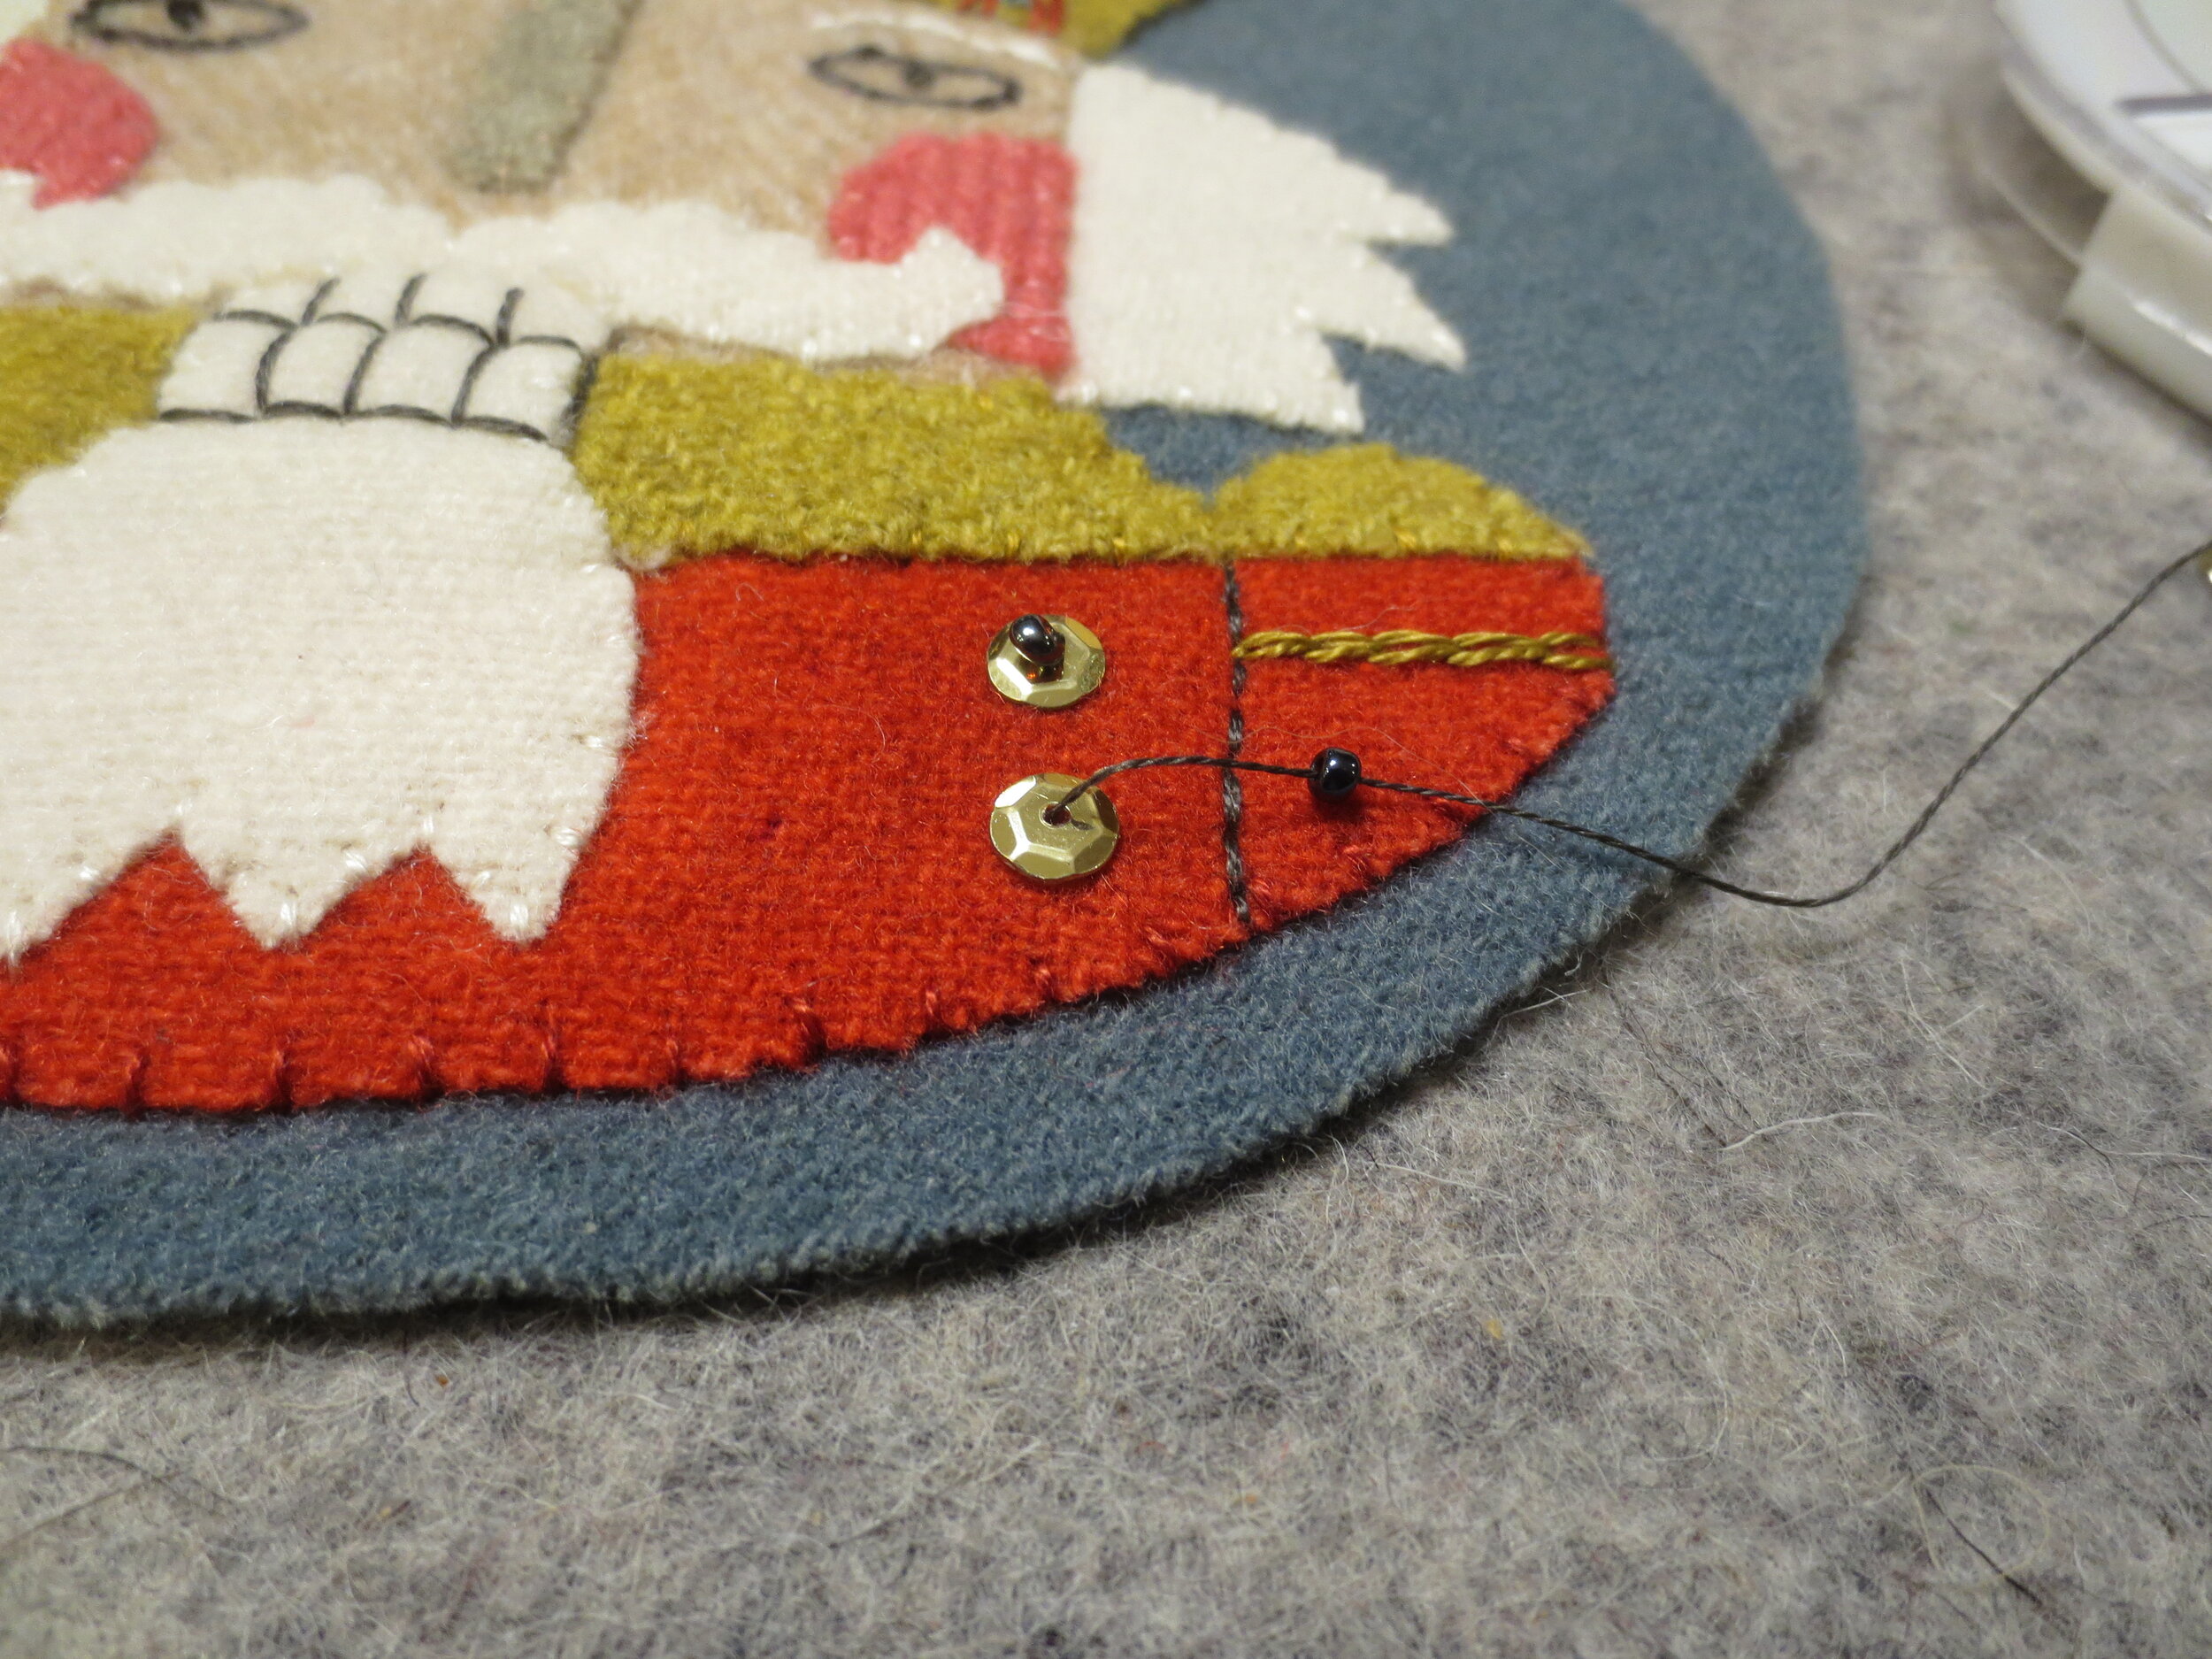
Miscellaneous
2” length of ½” wide brown twill ribbon
14 small, round, gold sequins
Six 4mm topaz colored, faceted, round Swarovski crystals
8 dark grey seed beads
6 clear seed beads
Beading needle
Chenille needle, size 24
Air erasable fabric marking pen
Freezer paper
Featherweight fusible web
Polyester fiberfill
Steam iron
Pattern and Layout - Download here
Stitch Guide - Download here
Instructions
Preparing the Appliques
1. Trace the background pattern onto the paper side of freezer paper. Cut out leaving a small (1/4”) border around the pattern outline.
2. Fuse the pattern to the background wool, and then cut out along the drawn line. Remove freezer paper and repeat for the second background.
3. Trace the remaining patterns onto fusible web, and then cut out leaving a small (1/4”) border around the pattern outline.
4. Fuse patterns to designated wool fabric , and then cut out along drawn lines.
Stitching the Applique – Use 2 strands of floss or 1 strand of perle cotton, size 12 for all embroidery stitches unless otherwise noted.
Front
1. Lay out the crown top, face, hair, and the shoulders/chest piece onto one of the background pieces using the Layout as a guide. The crown and top of the face butt up to each other, and the shoulders/chest piece overlaps the bottom of the face. The face overlaps the edges of the hair. Fuse in place using steam.
2. Position the nose, cheeks, and top of the chest/shoulders. Fuse in place using steam.
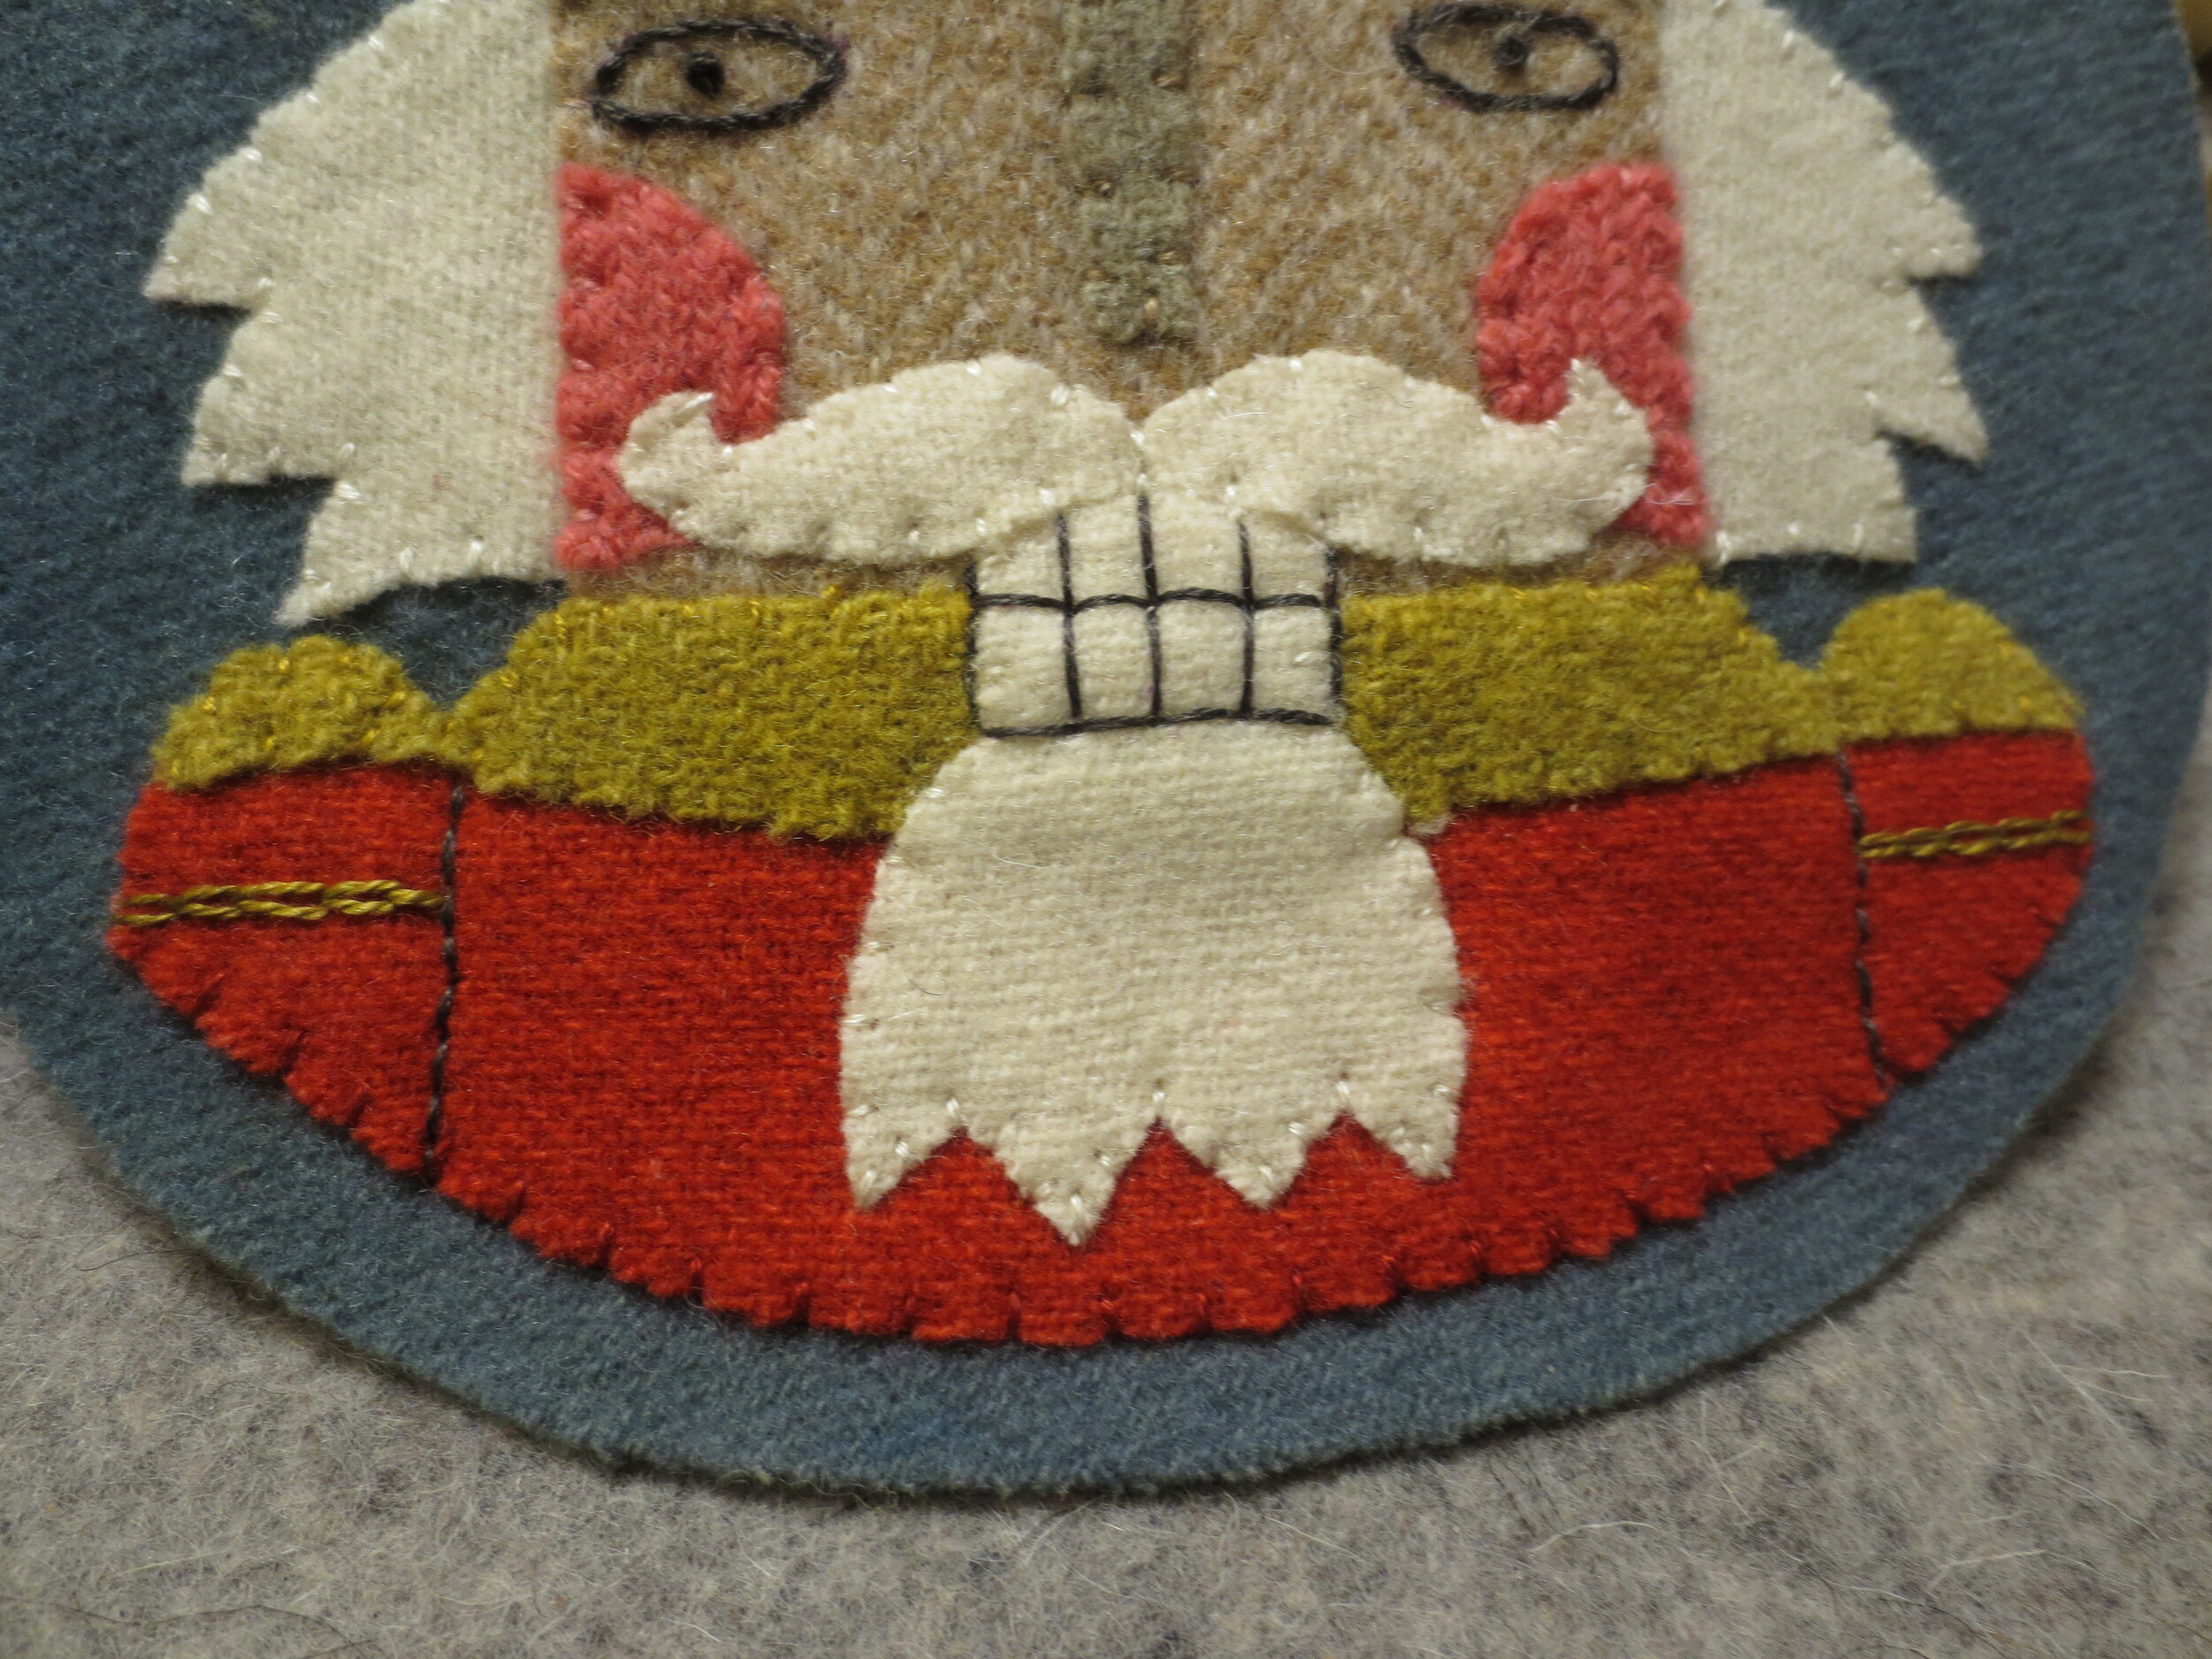
3. Whip stitch everything with thread that matches wool colors.
4. Layout teeth/beard, moustache and crown using the Layout as a guide, and then fuse in place using steam.
5. Whip stitch moustache, teeth/beard, and crown with thread that matches wool colors.
6. Use an air erasable fabric marking pen to draw the teeth.
7. Use dark grey floss to back stitch the teeth. Hint: If you make 4 equally spaced back stitches along the bottom and center horizontal lines of the teeth they will provide a guide for the vertical stitches that form the teeth.
8. Draw the outlines of the eyes.
9. Use grey floss to stitch very small (1/16”) stem stitches over the outlines.
10. Use the same floss to stitch a single french knot eyeball in each of the eyes.
11. Draw the eyebrows, and then stem stitch over the lines with the same thread used to whip stitch the hair.
12. Draw 4 guide lines on the crown top using the Layout for placement guidance.
13. Use 3 strands of gold floss to backstitch over the guide lines.
14. Draw 5 triangles along the bottom of the crown.
15. Use red floss to make a fly stitch over each of the triangles.
16. Use the same floss to make a smaller fly stitch under each of the first fly stitches.
17. Use blue floss to make a single french knot in the space below the smaller fly stitch.
18. Use a beading needle and a single strand of gold floss to sew a single crystal onto each of the points of the crown. Begin by knotting the end of your thread 3 times. Bring the needle up about 1/16” from the tip of the crown point. Thread the needle through the crystal, and then insert the needle very close to where the thread emerged. Pull the thread through to the back to make the crystal snug against the background, and then knot 3 times. Repeat for remaining points and the top of the crown.
19. Draw lines to create the arms and then back stitch over the lines with dark grey thread.
20. Draw a single horizontal line on each of the upper arms using the layout for positioning. Use gold thread to chain stitch over the lines.
Chest Embellishment
21. Mark the position of each sequin on the chest using the Layout as a guide.
22. Begin on the right side of the chest.
Use one strand of gold floss and a beading needle to attach the sequin. As before, knot the thread end 3 times.
Bring the needle up from the back of project through the marked position. Thread the needle through the sequin and then through the seed bead.
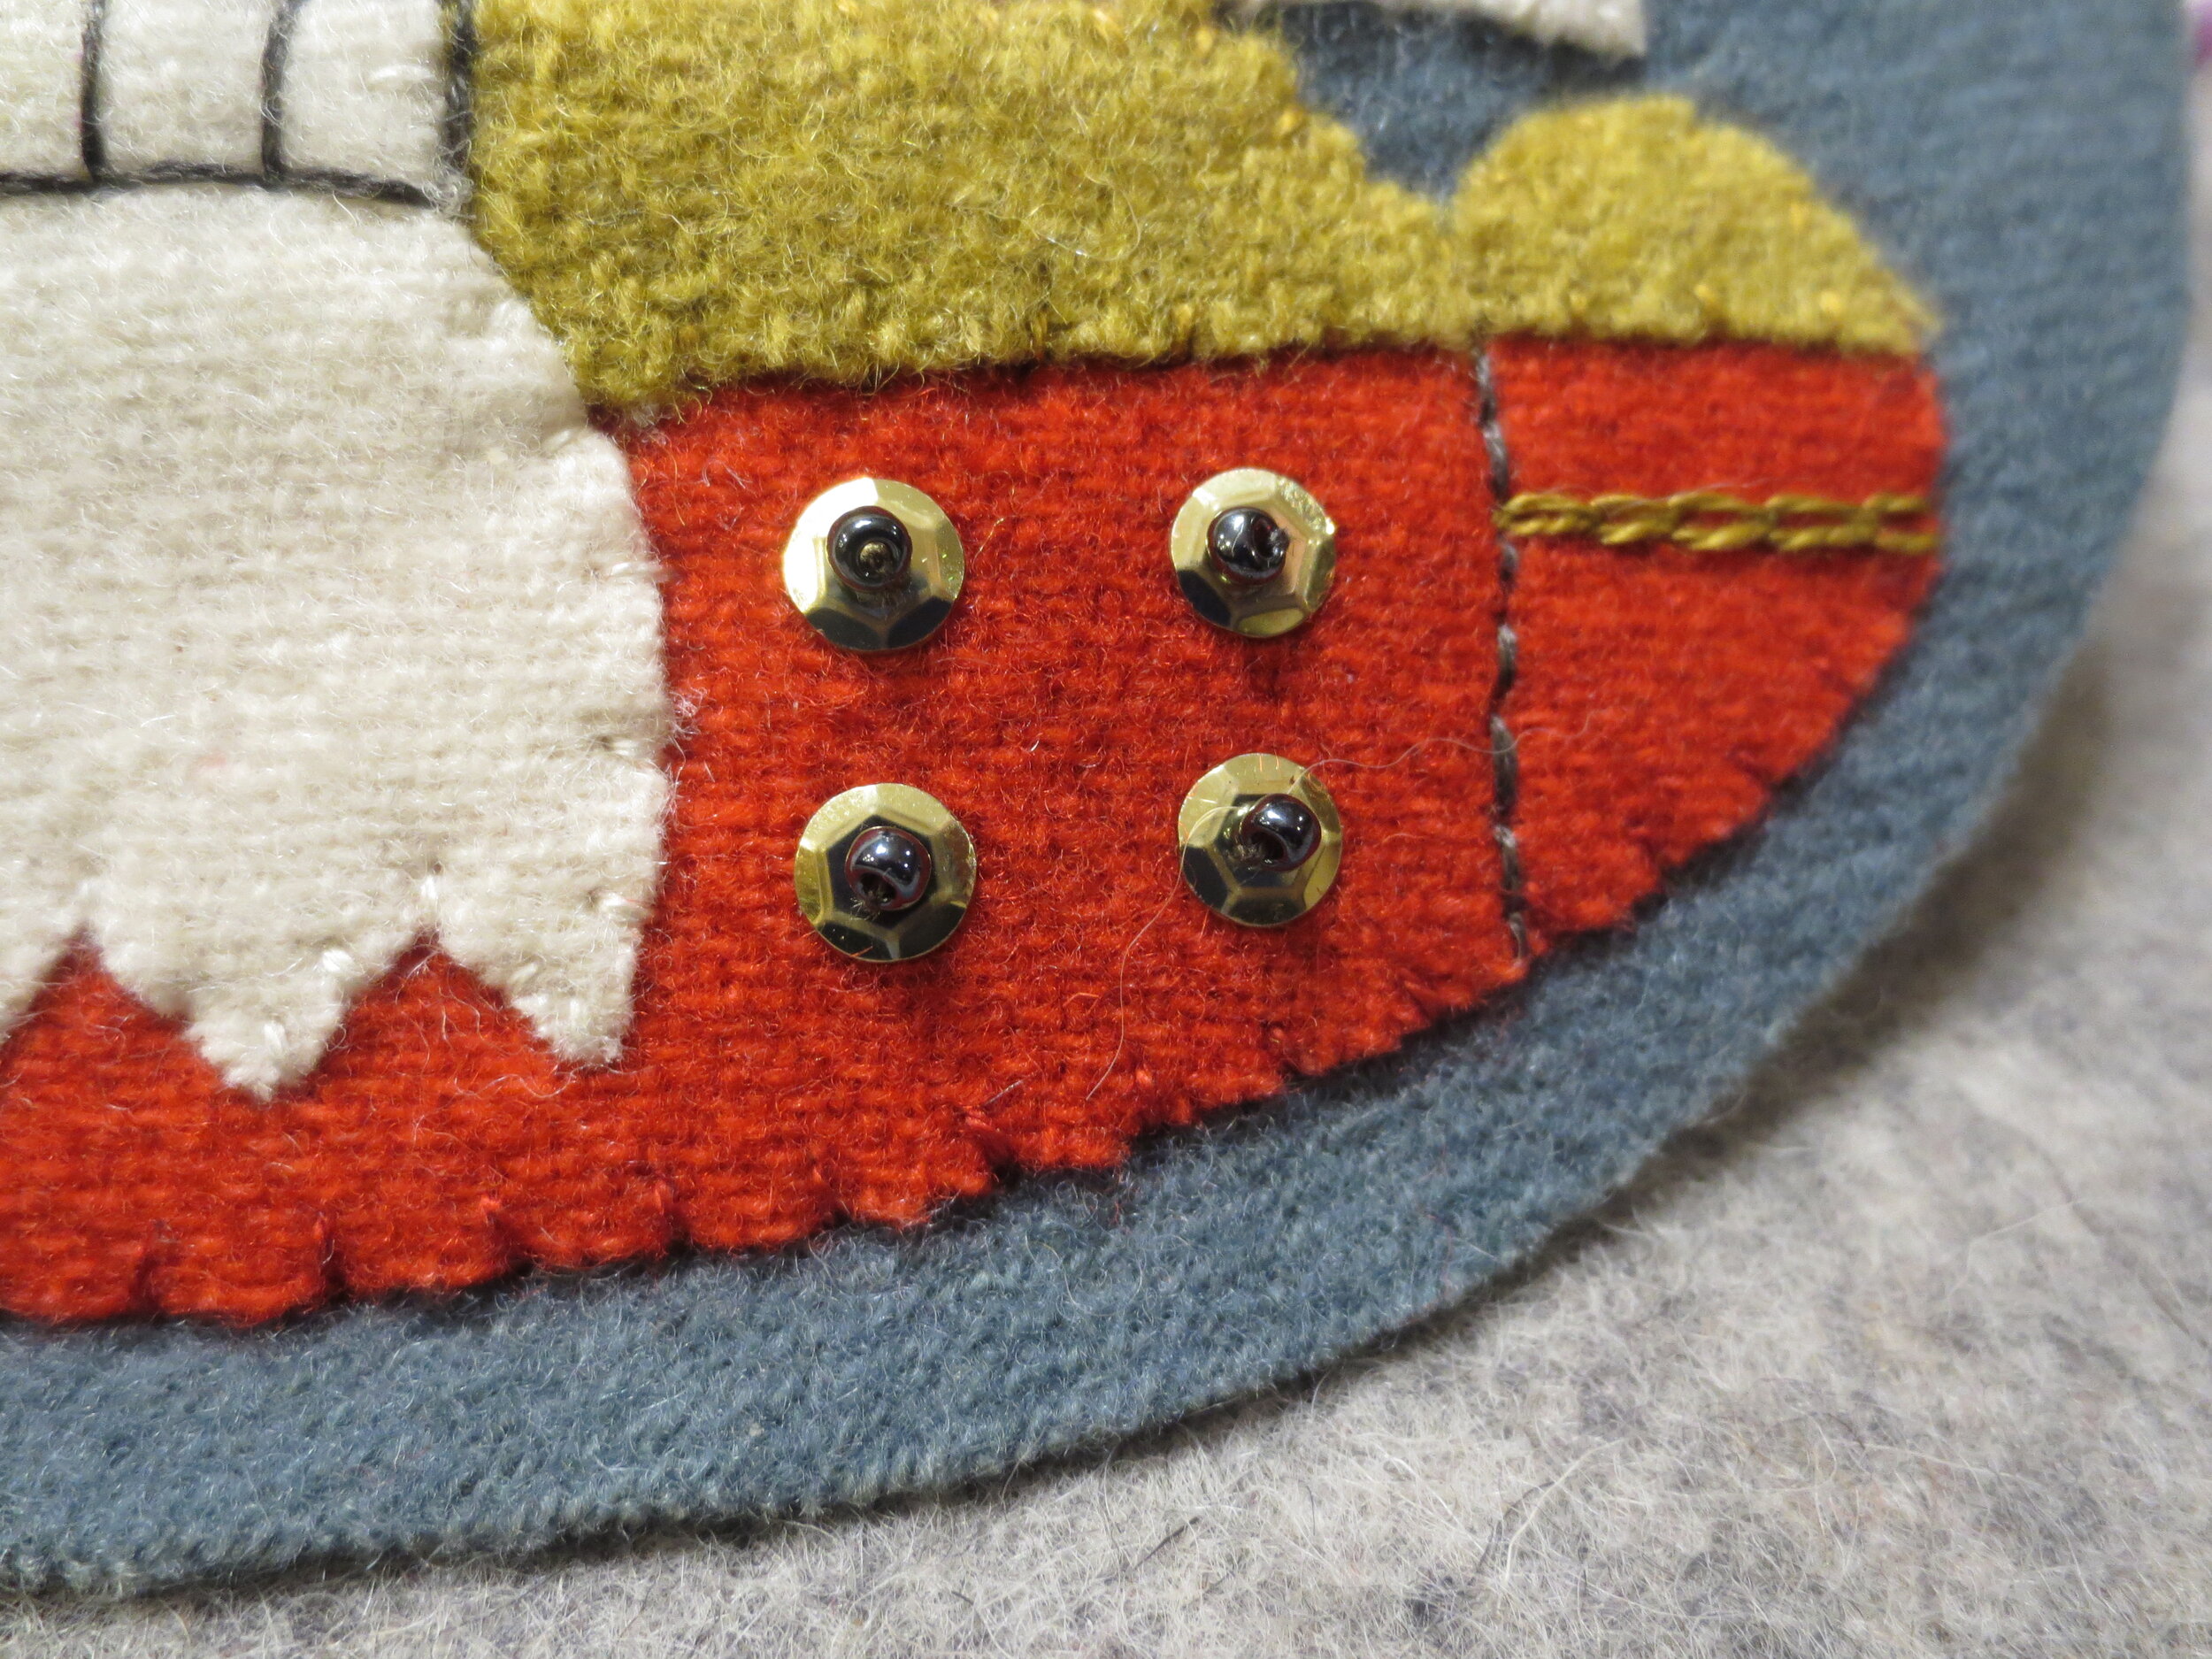
Insert the needle into the sequin hole and then pull through to the back of the project. Make sure the bead is snug against the sequin, and then knot the thread 2 times, but don’t cut the thread.
Repeat for the remaining 3 sequins and beads. Finish by knotting off the last stitch 3 times.
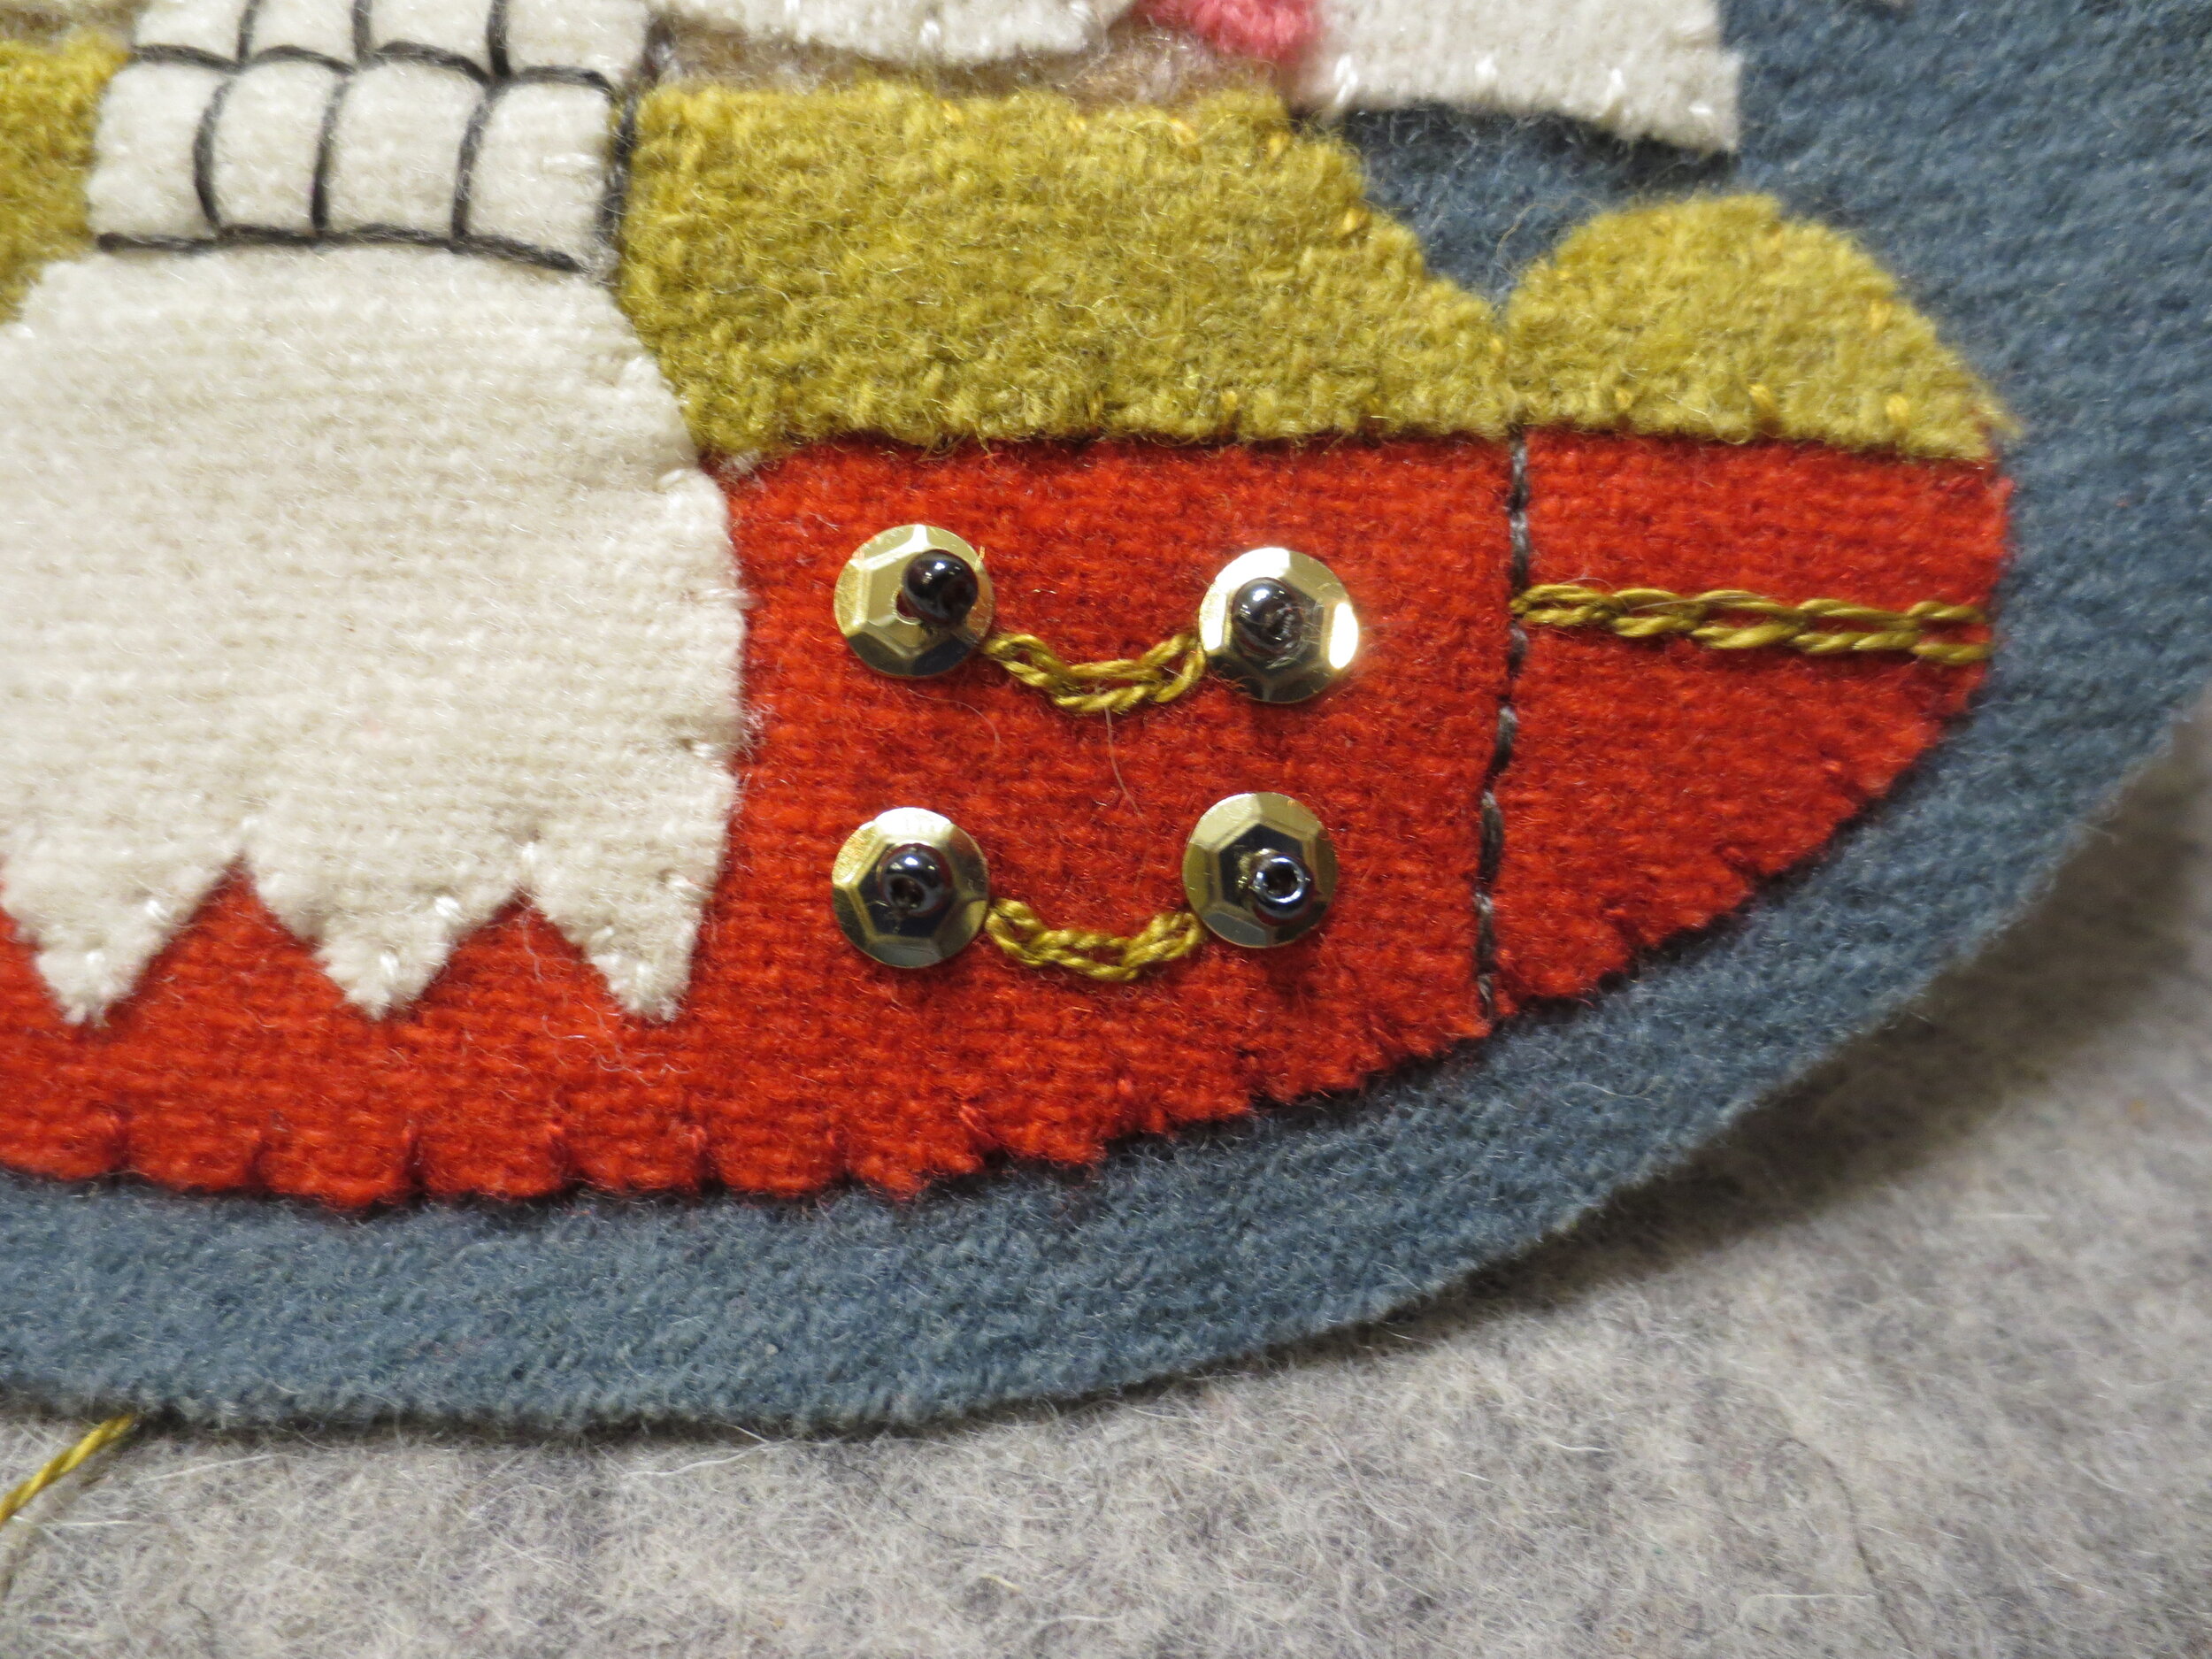
23. Use gold thread to make a chain stitch between each pair of sequins. You should be able to make 3 links of the chain.
24. Repeat for the left side.
Back
1. Turn under one end of the ribbon trunk ¼” and press.
2. Position the tree, star, and tree trunk on the background. Hint: The tree trunk should extend 1/2” from the base of the tree, and the folded end should be at least ½” from the edge of the background.
3. Fuse in place using steam.
4. Use brown floss to make cross stitches over the line between the left and right side of the tree.
5. Use the same thread to whip stitch the tree trunk.
6. Whip stitch the tree and star with thread that matches the wool colors.
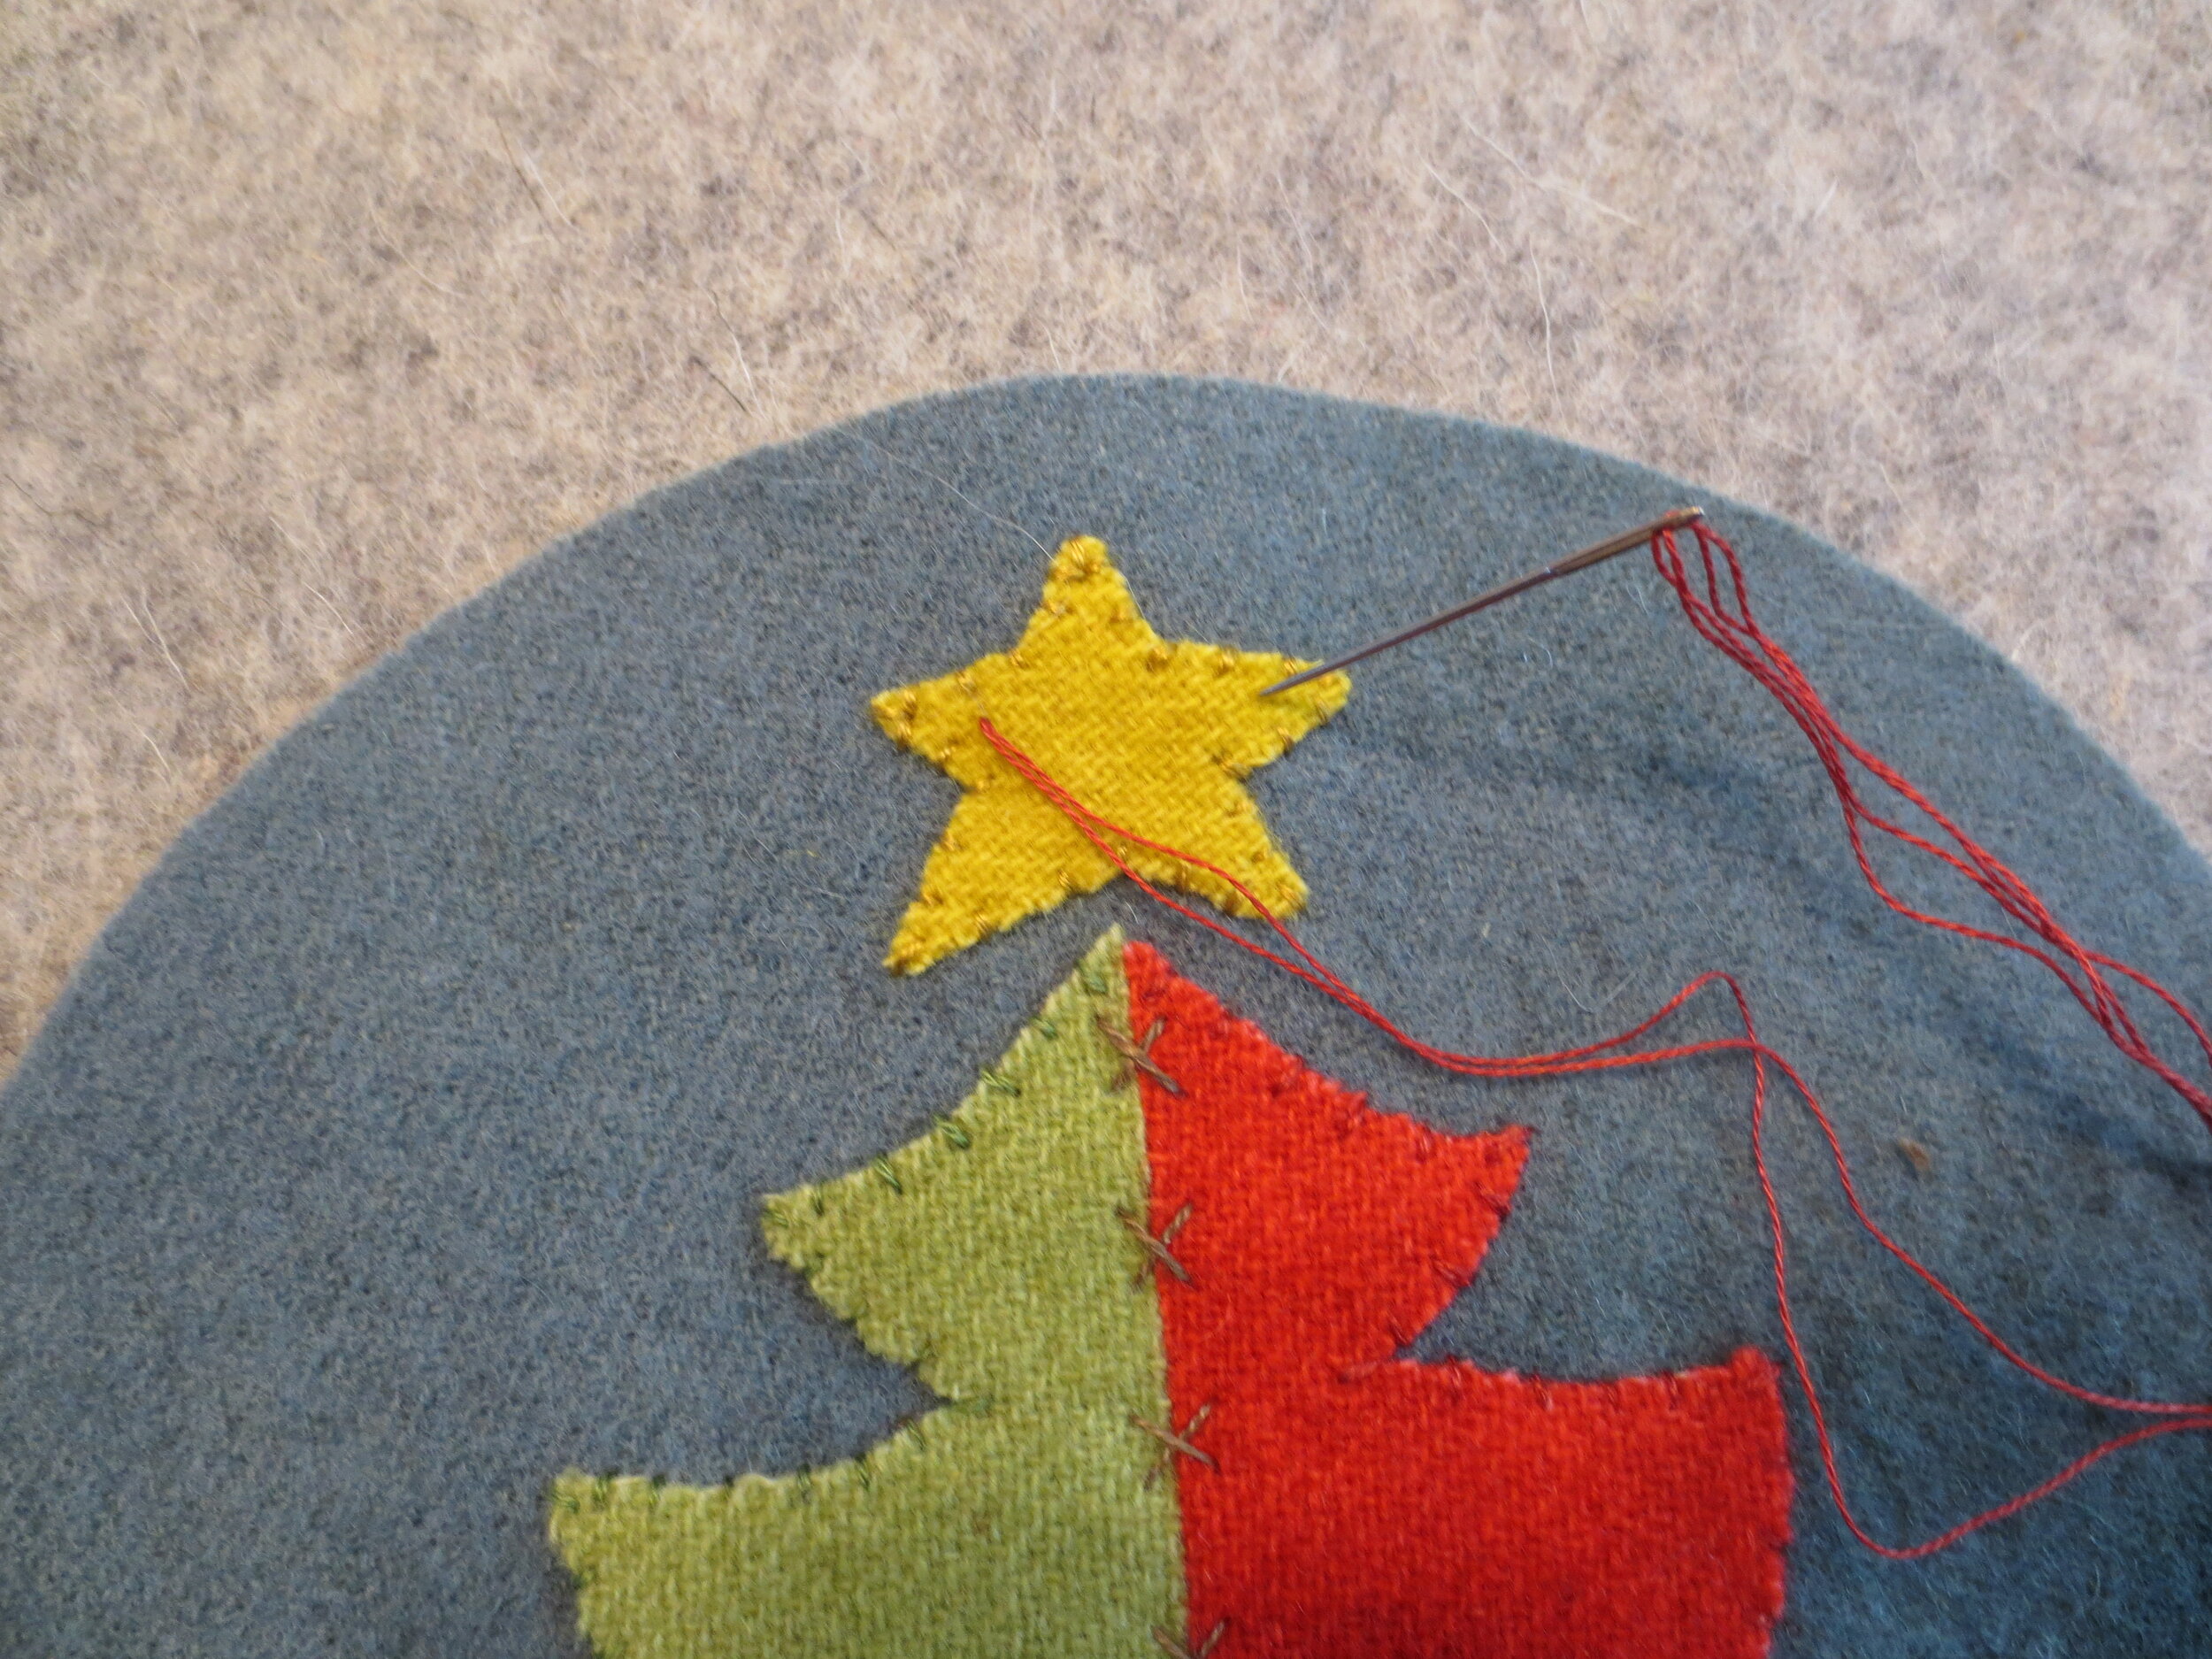
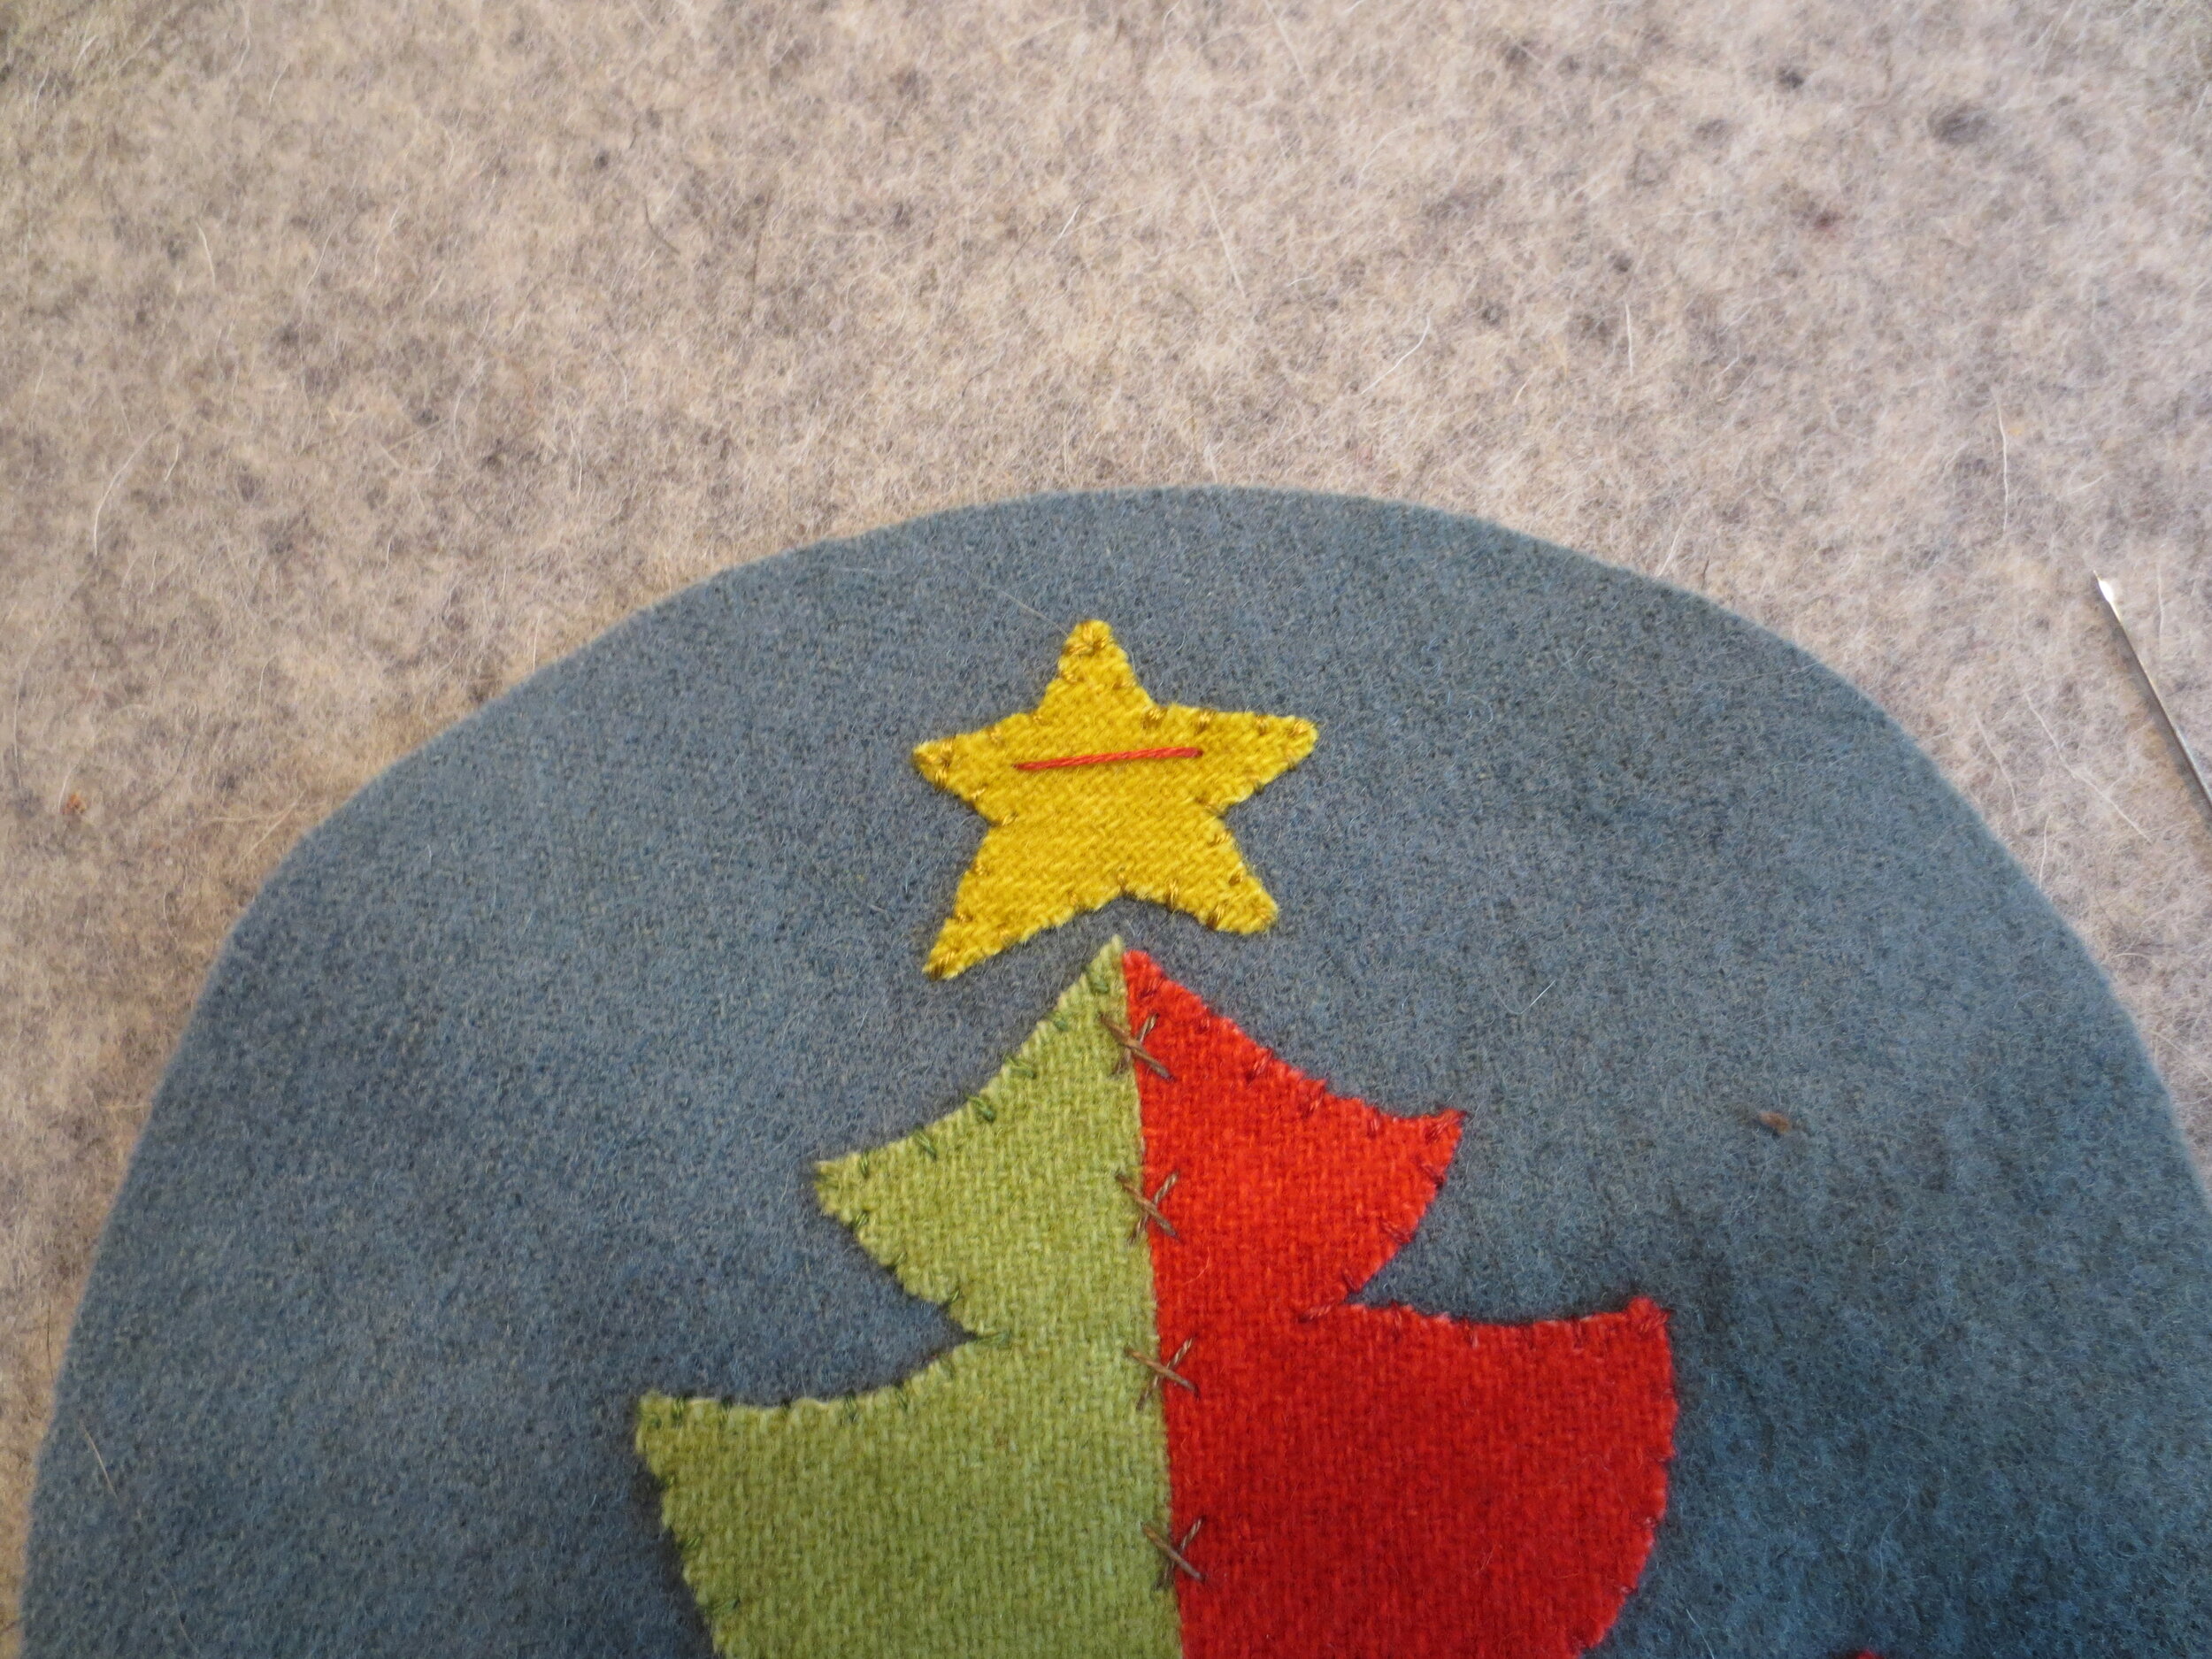
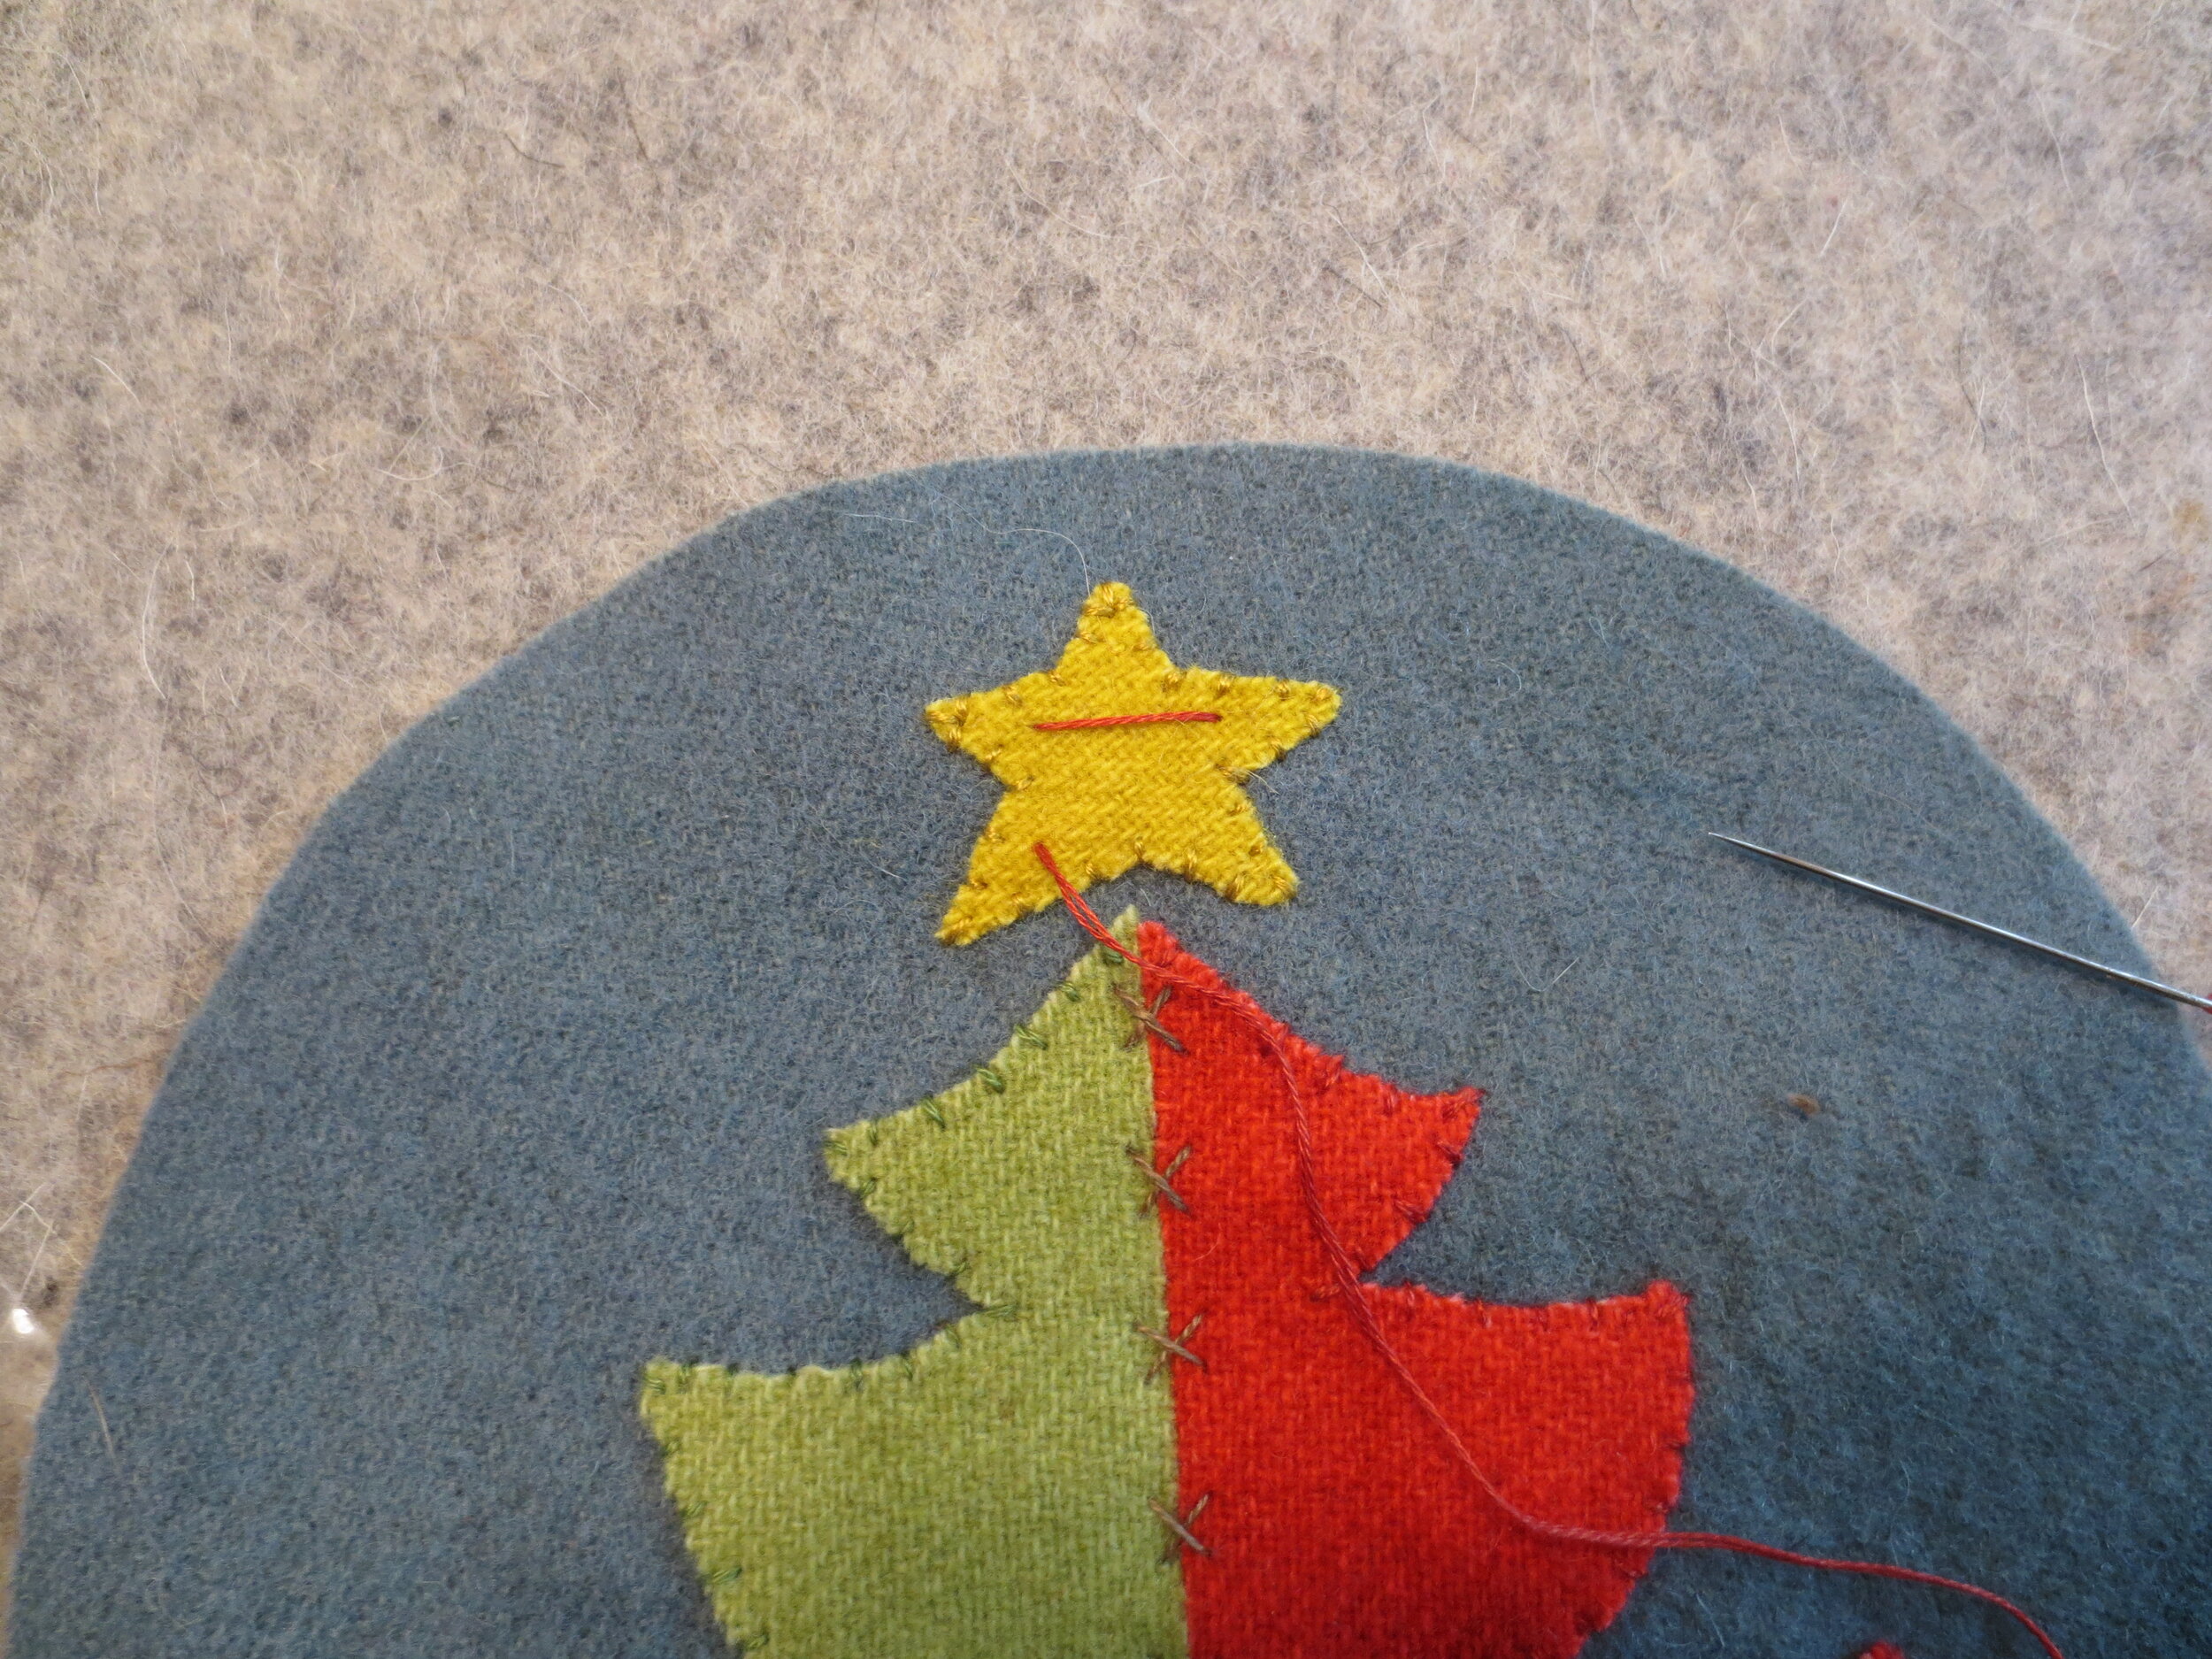
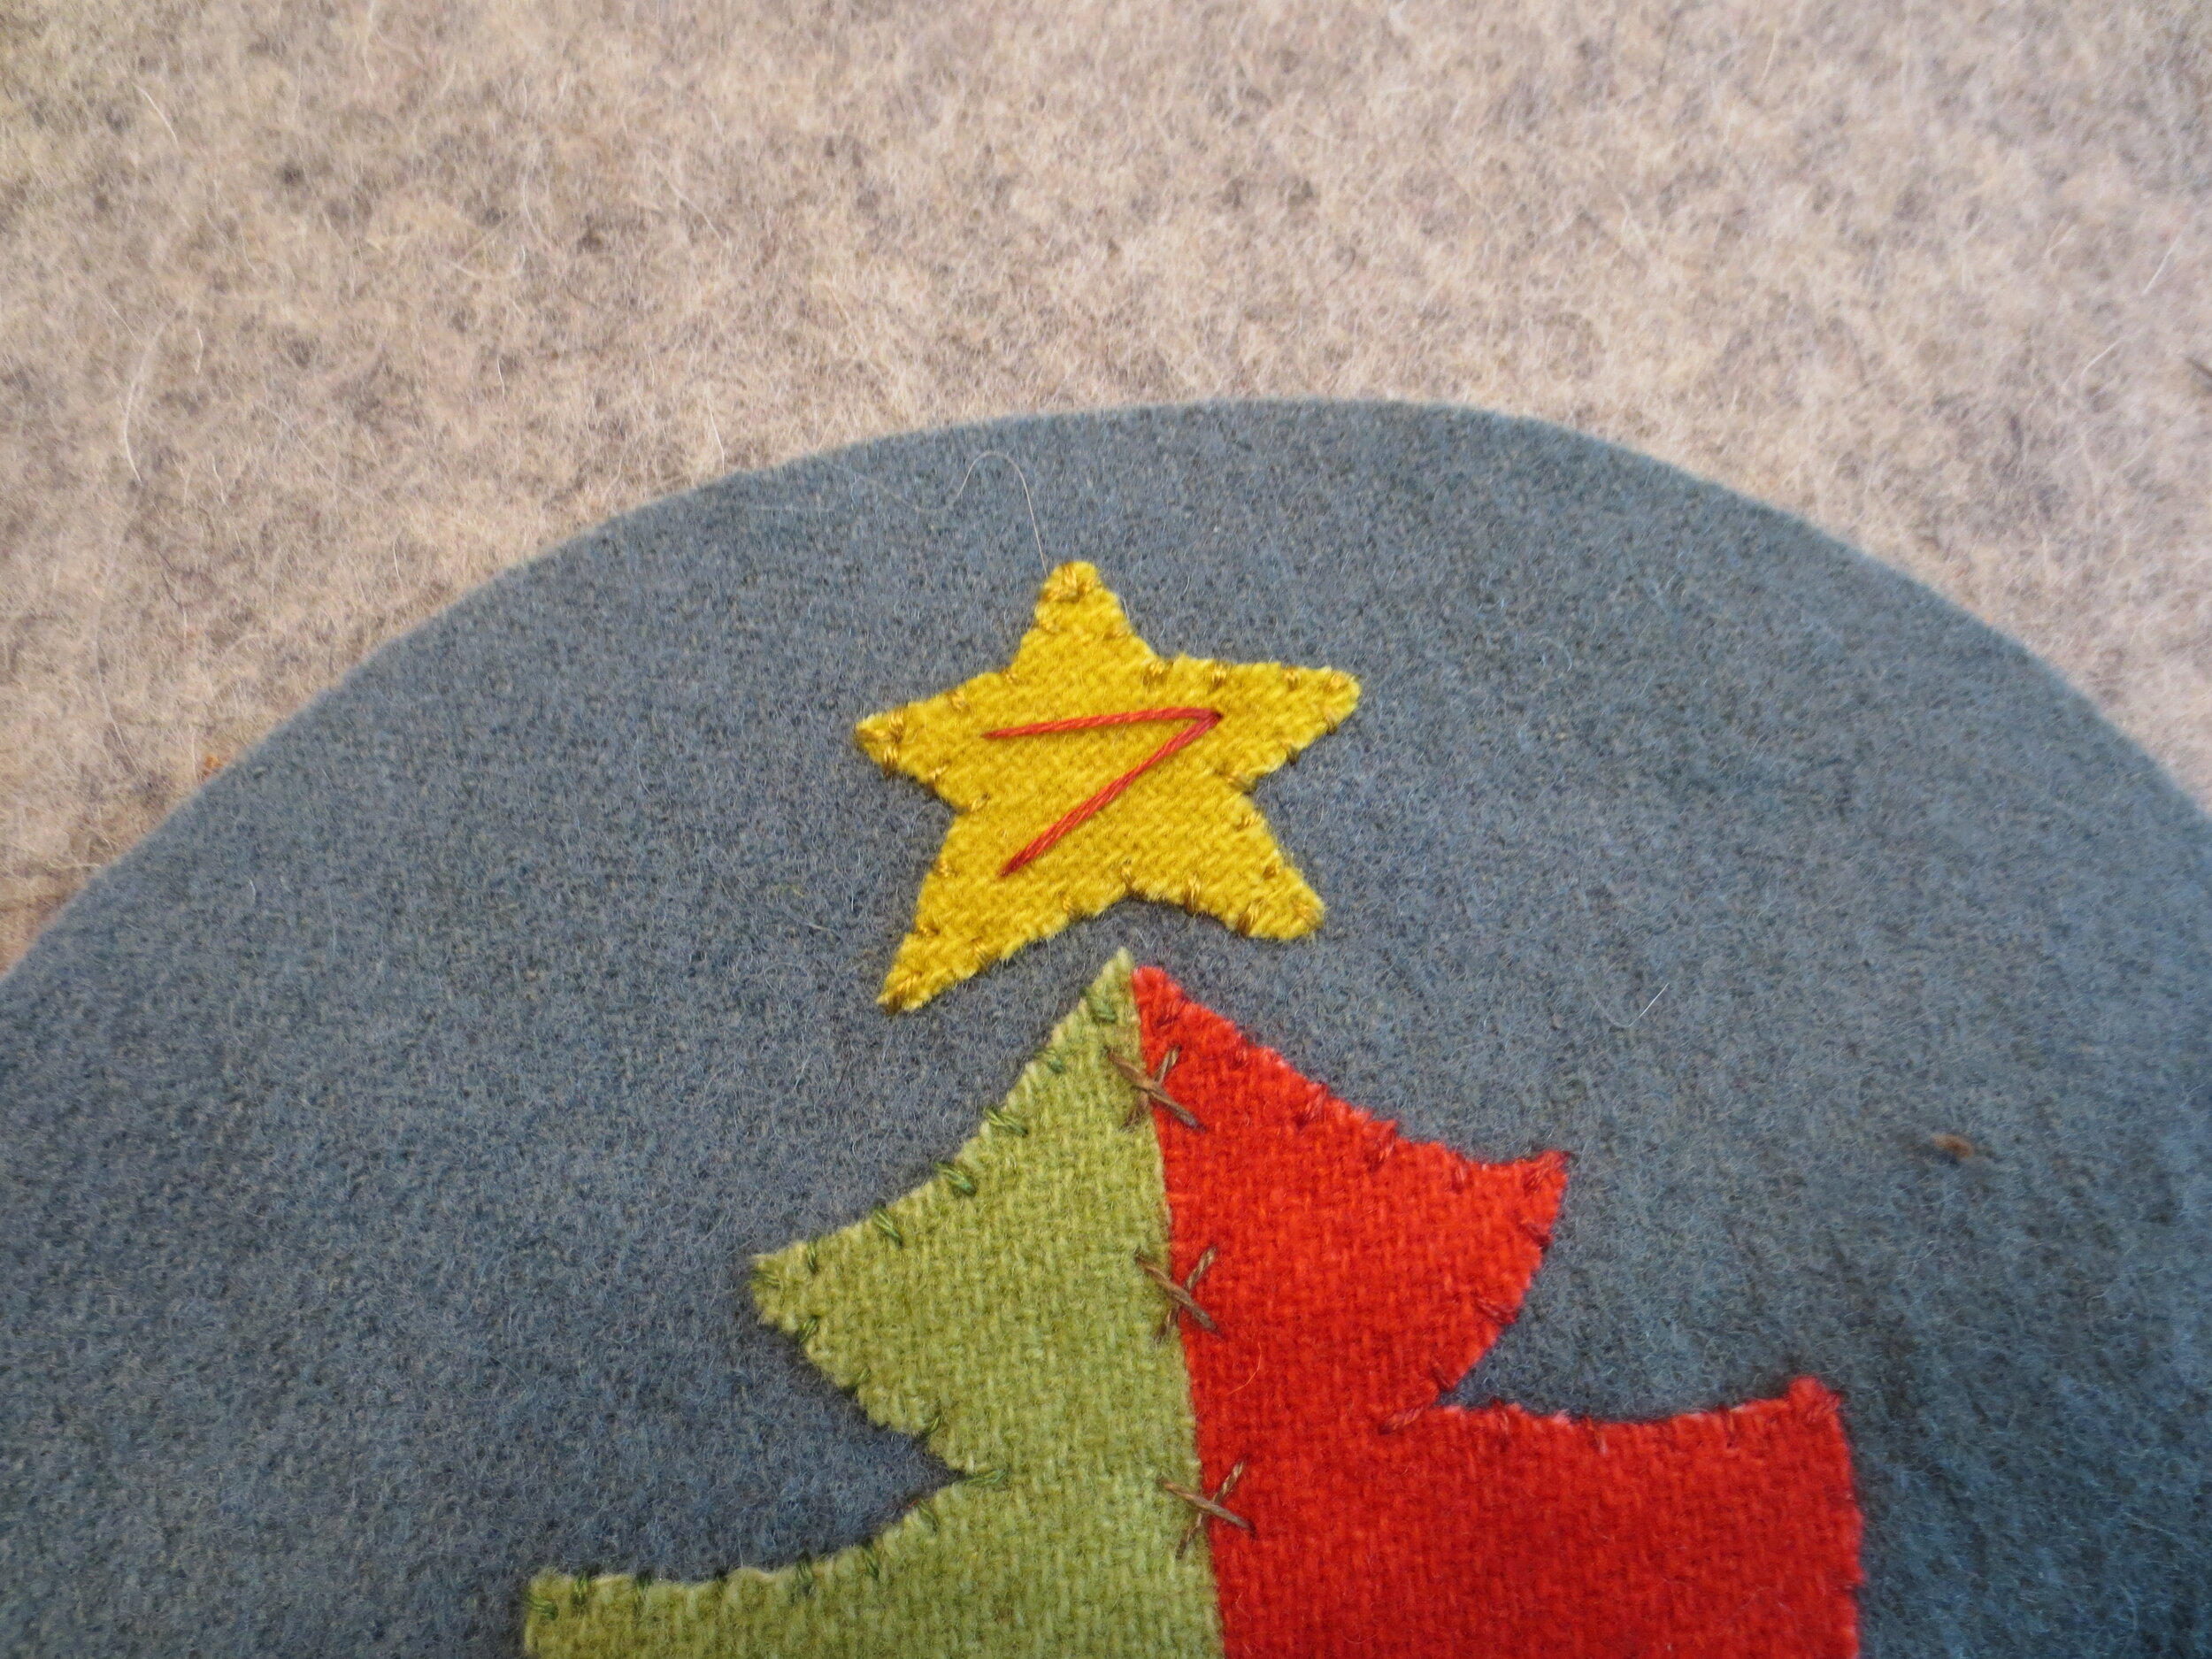
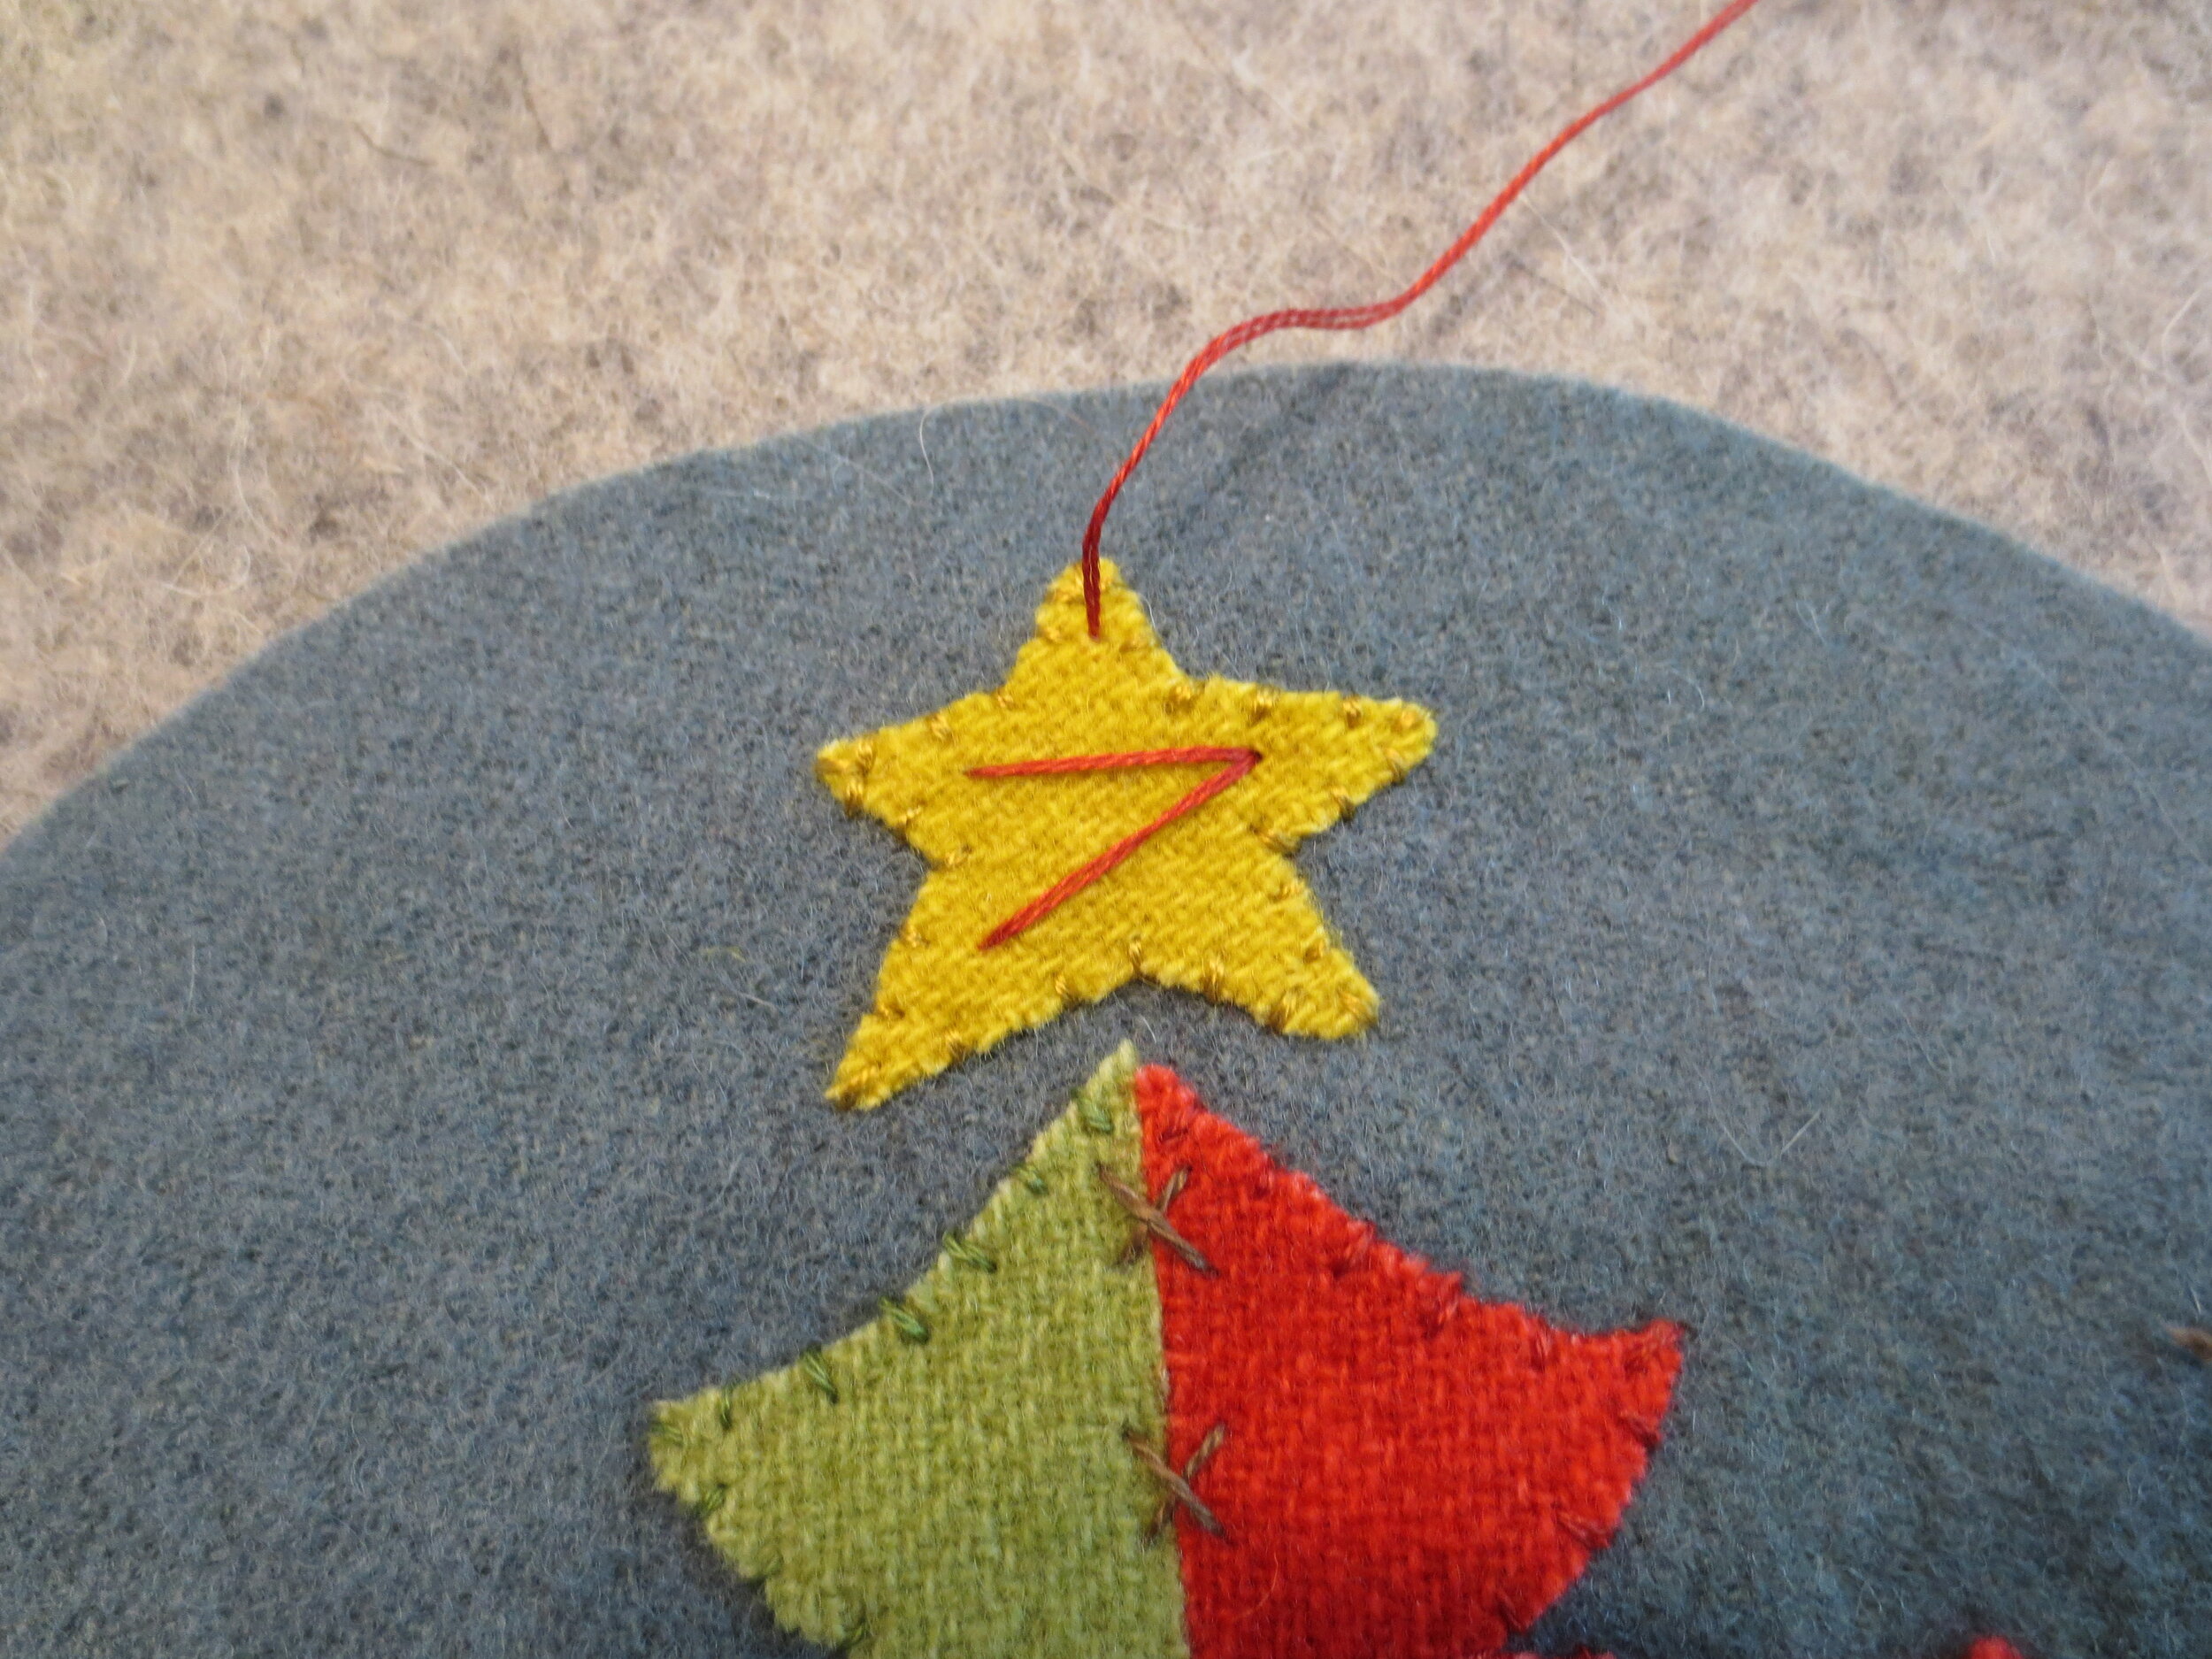
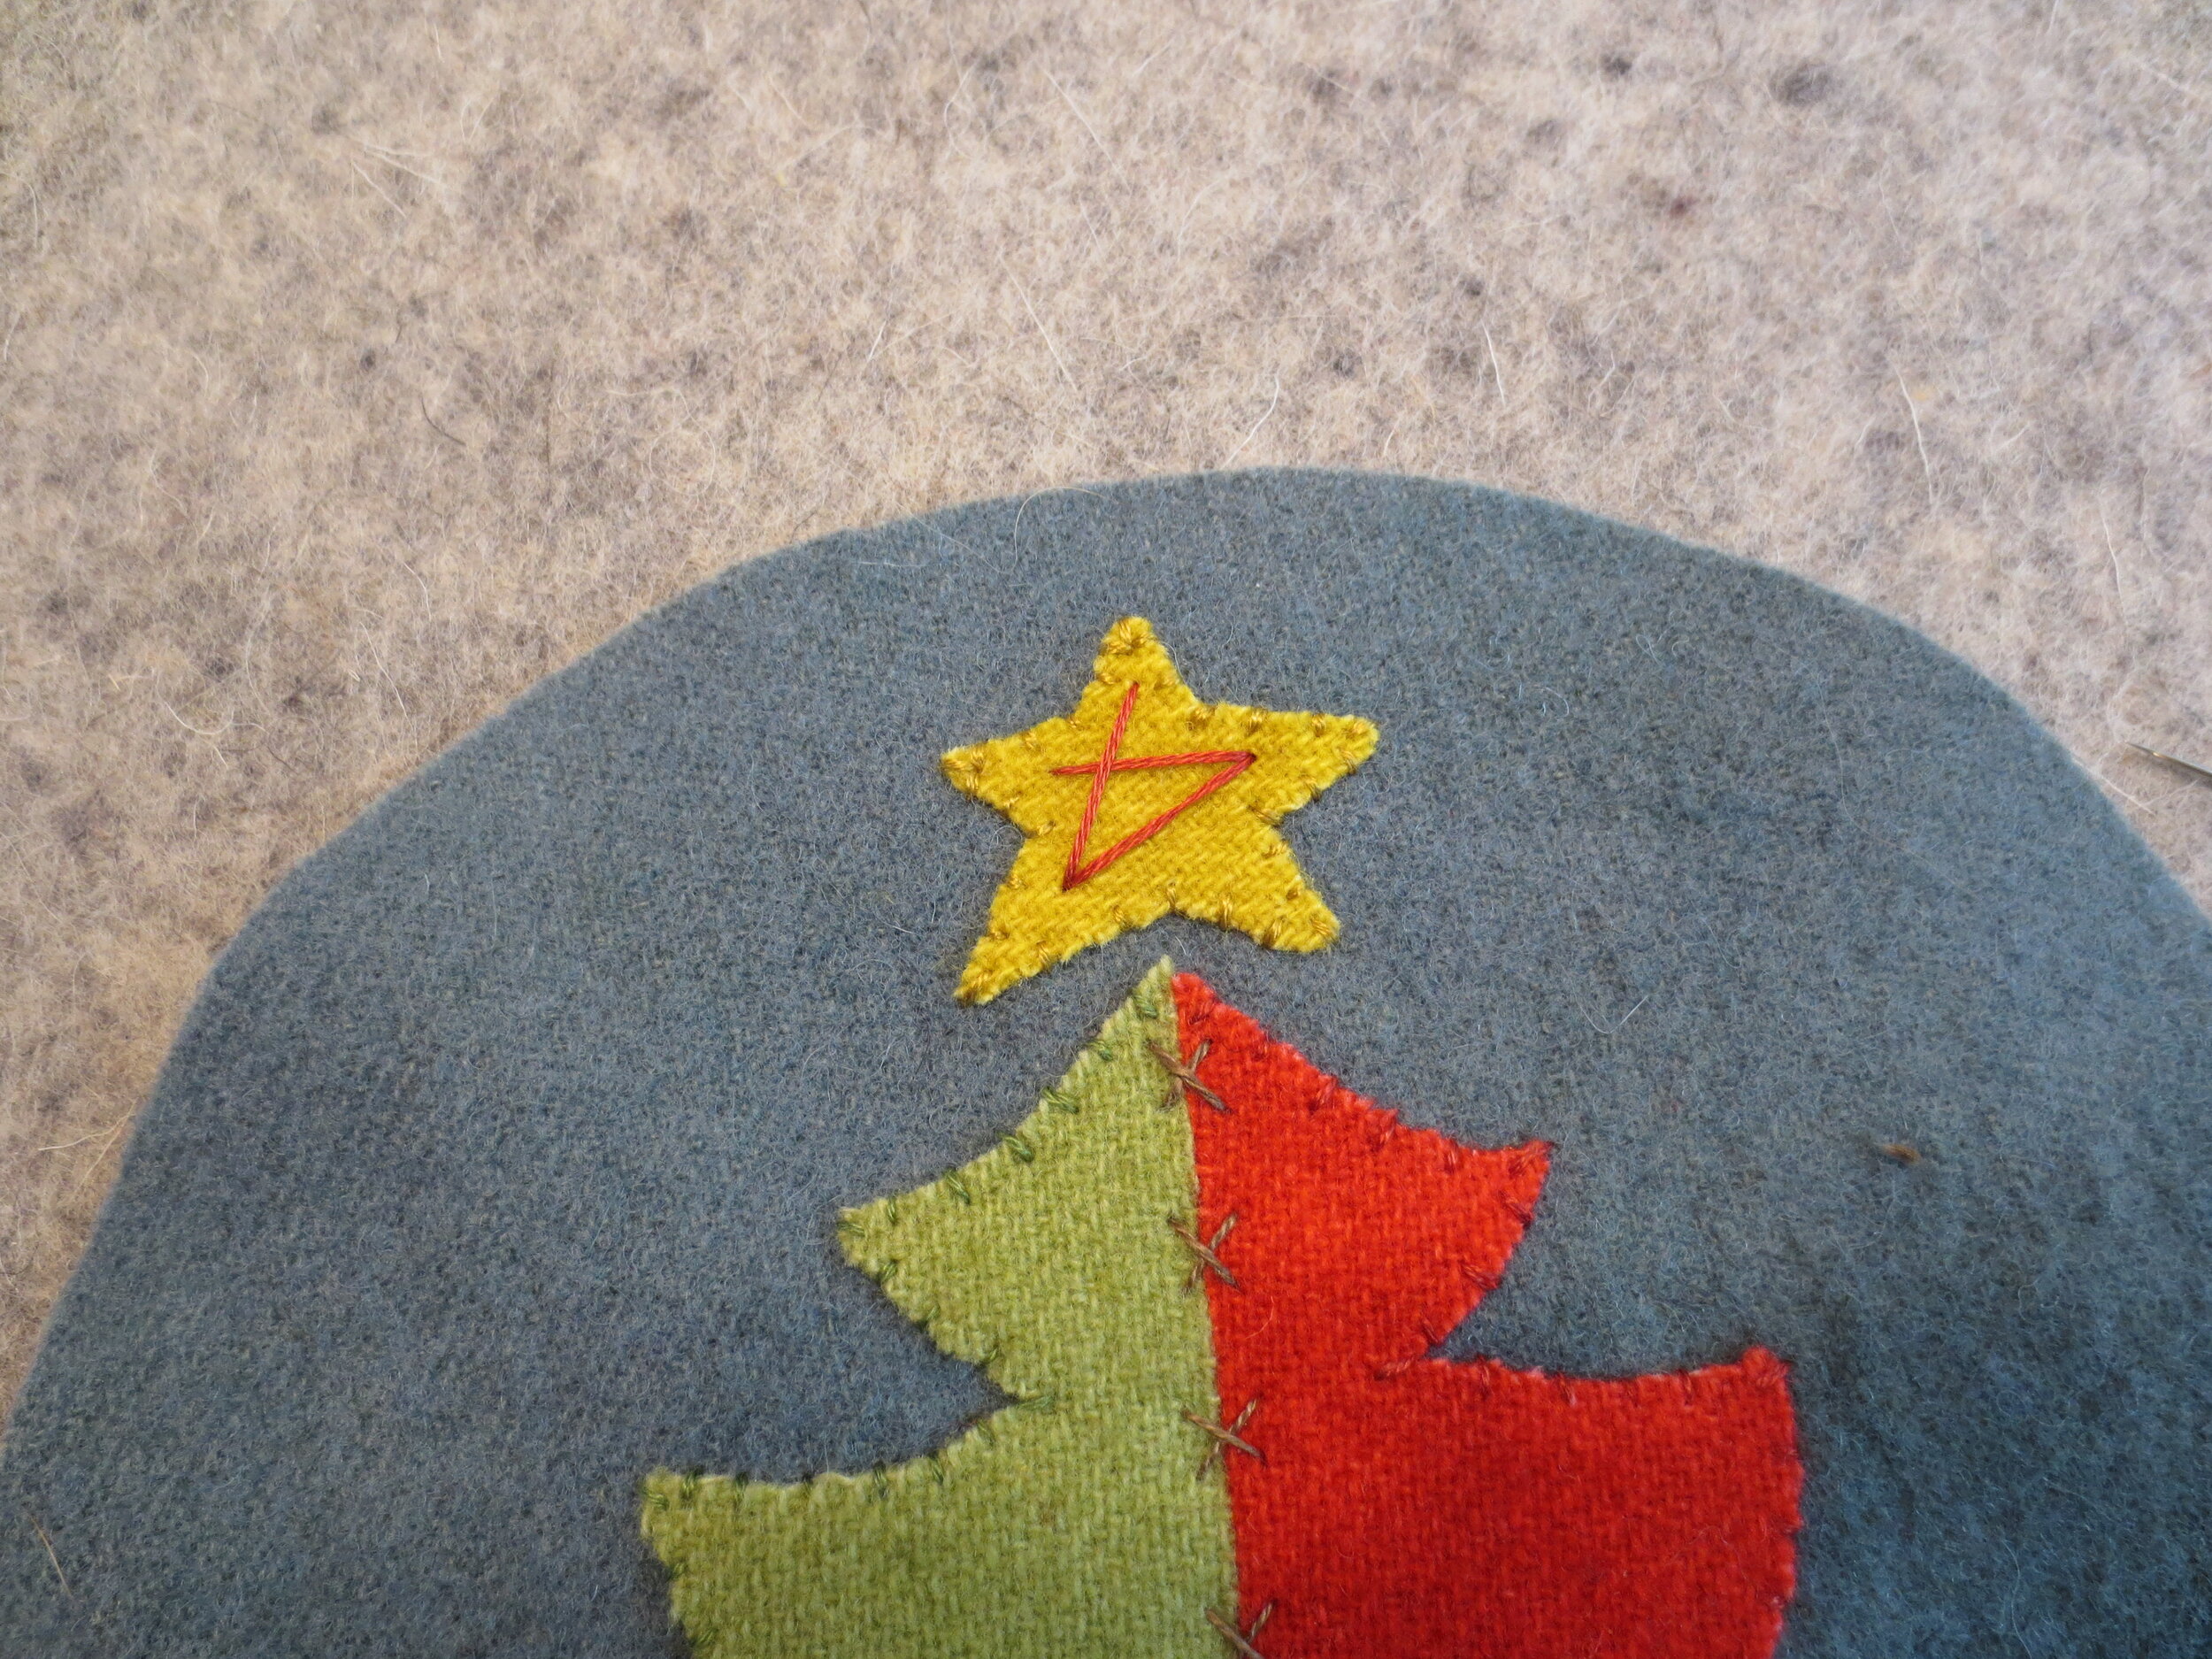
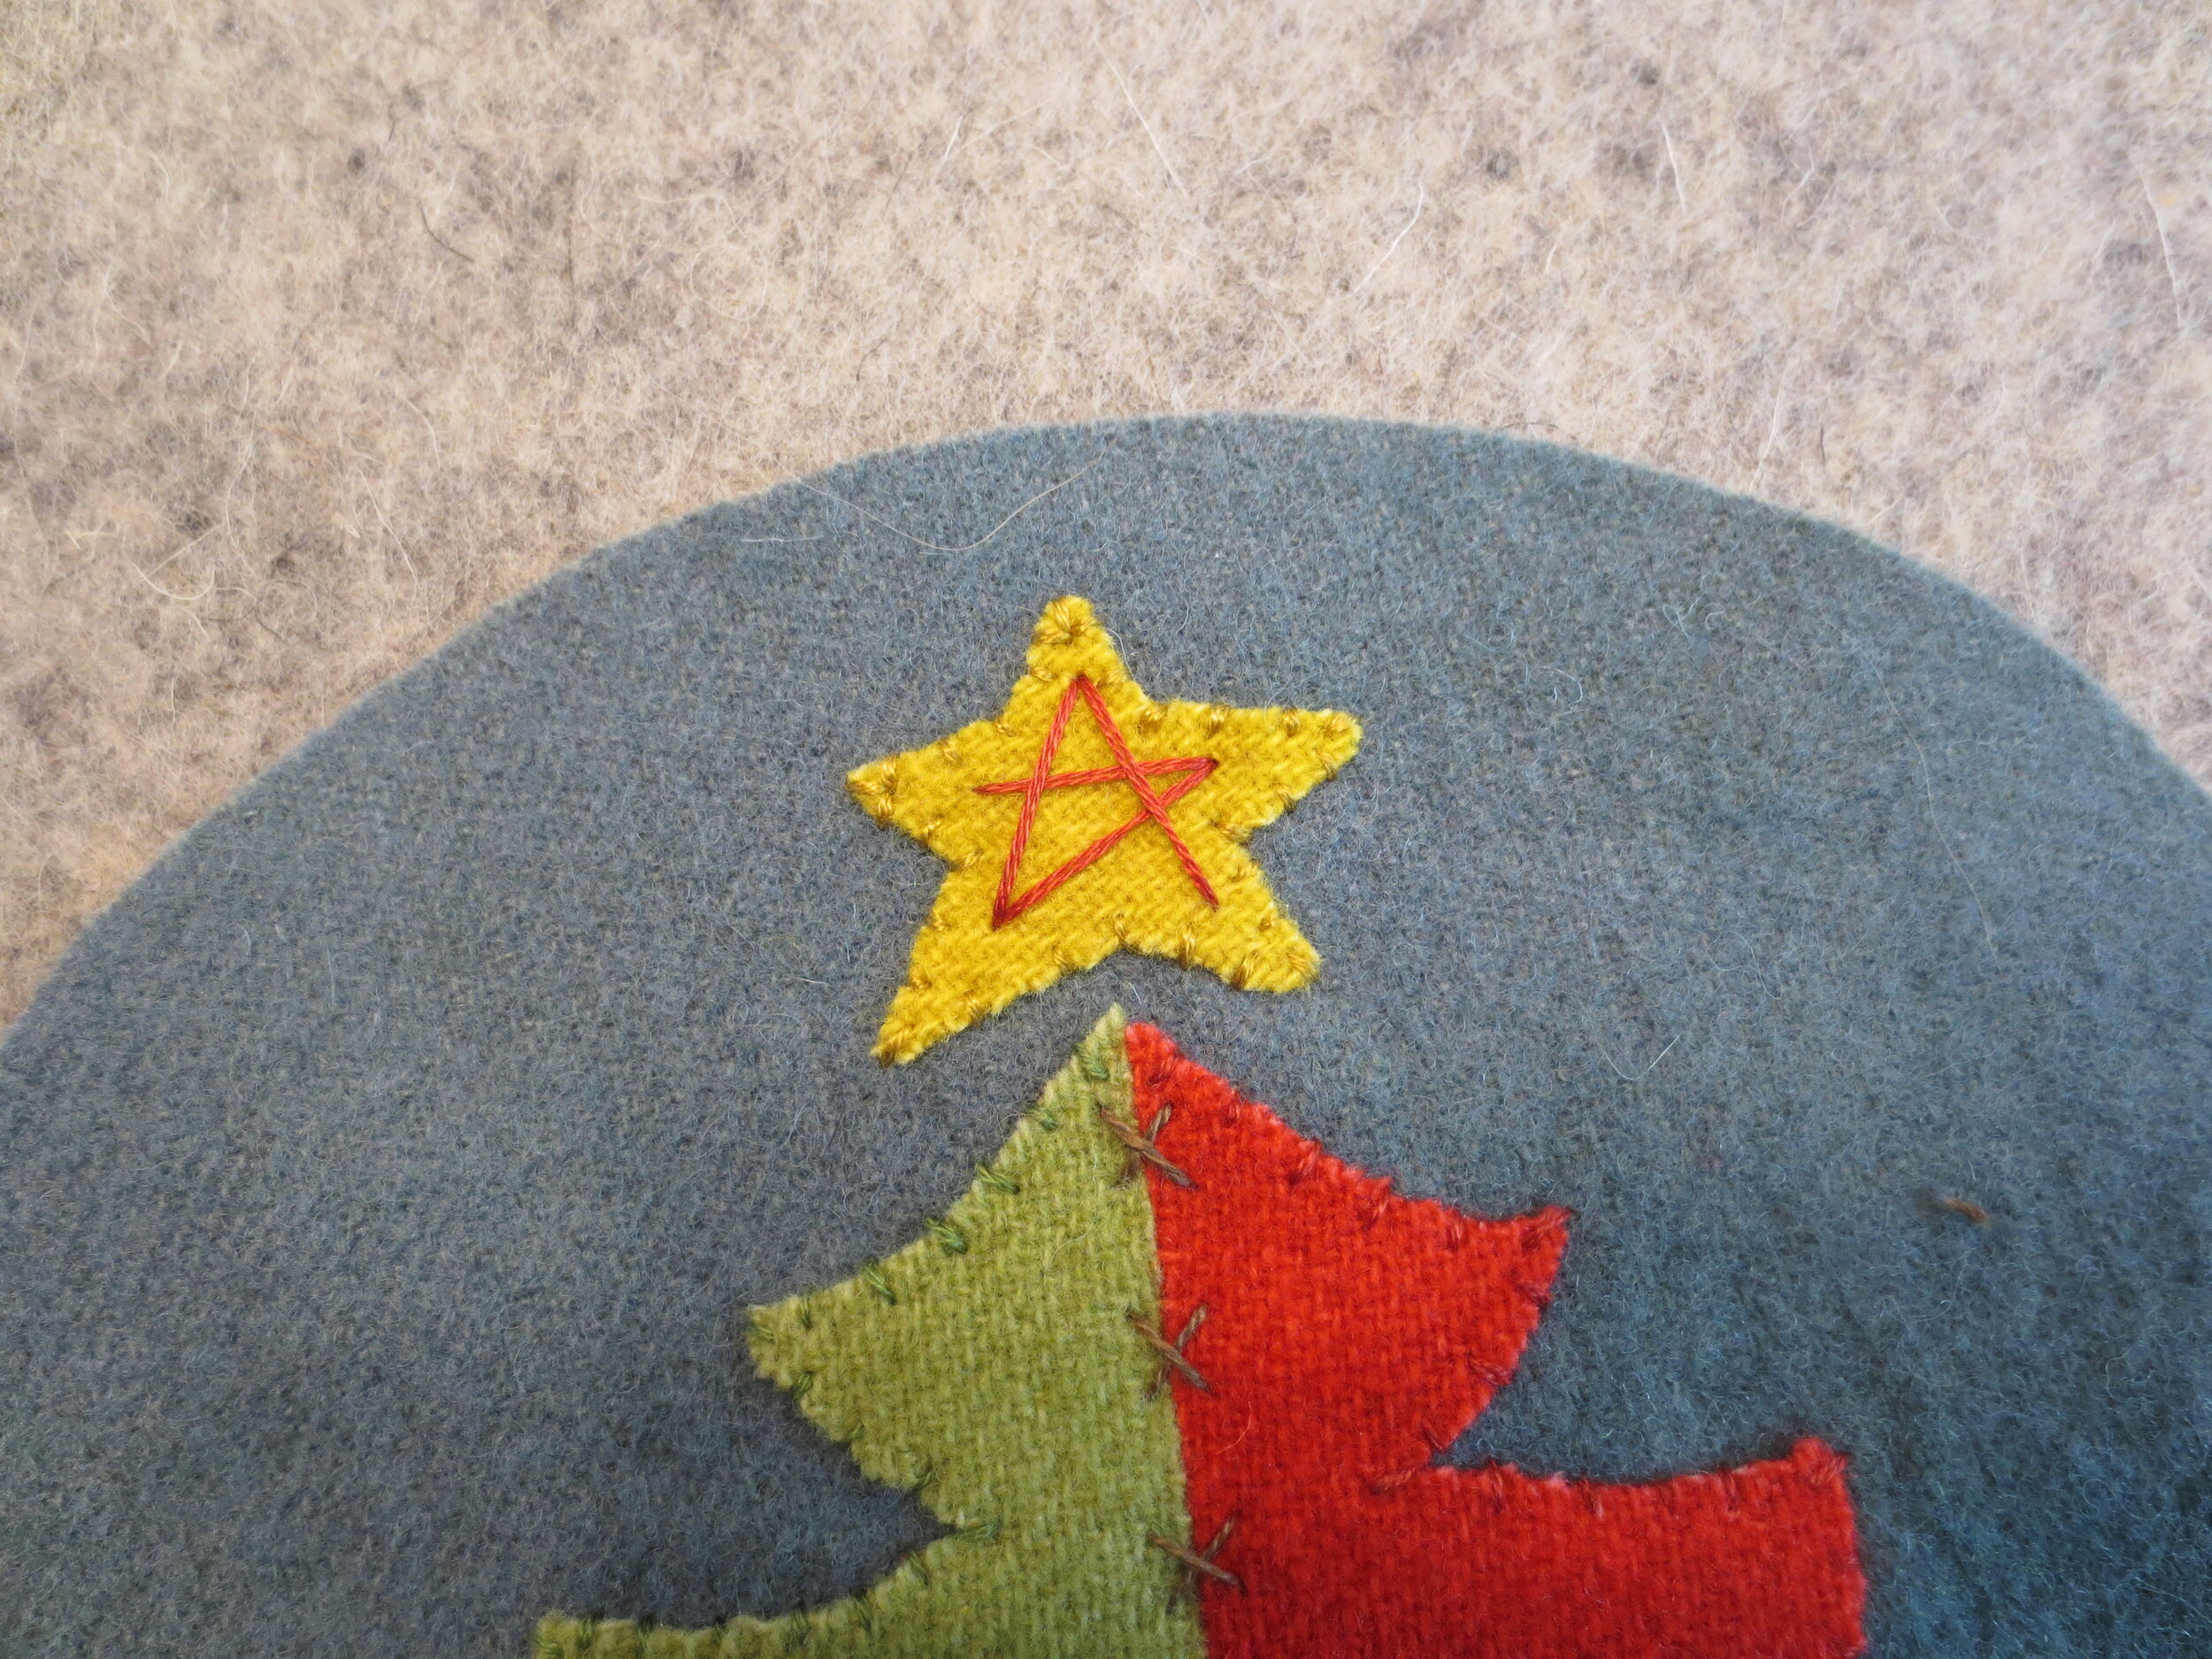
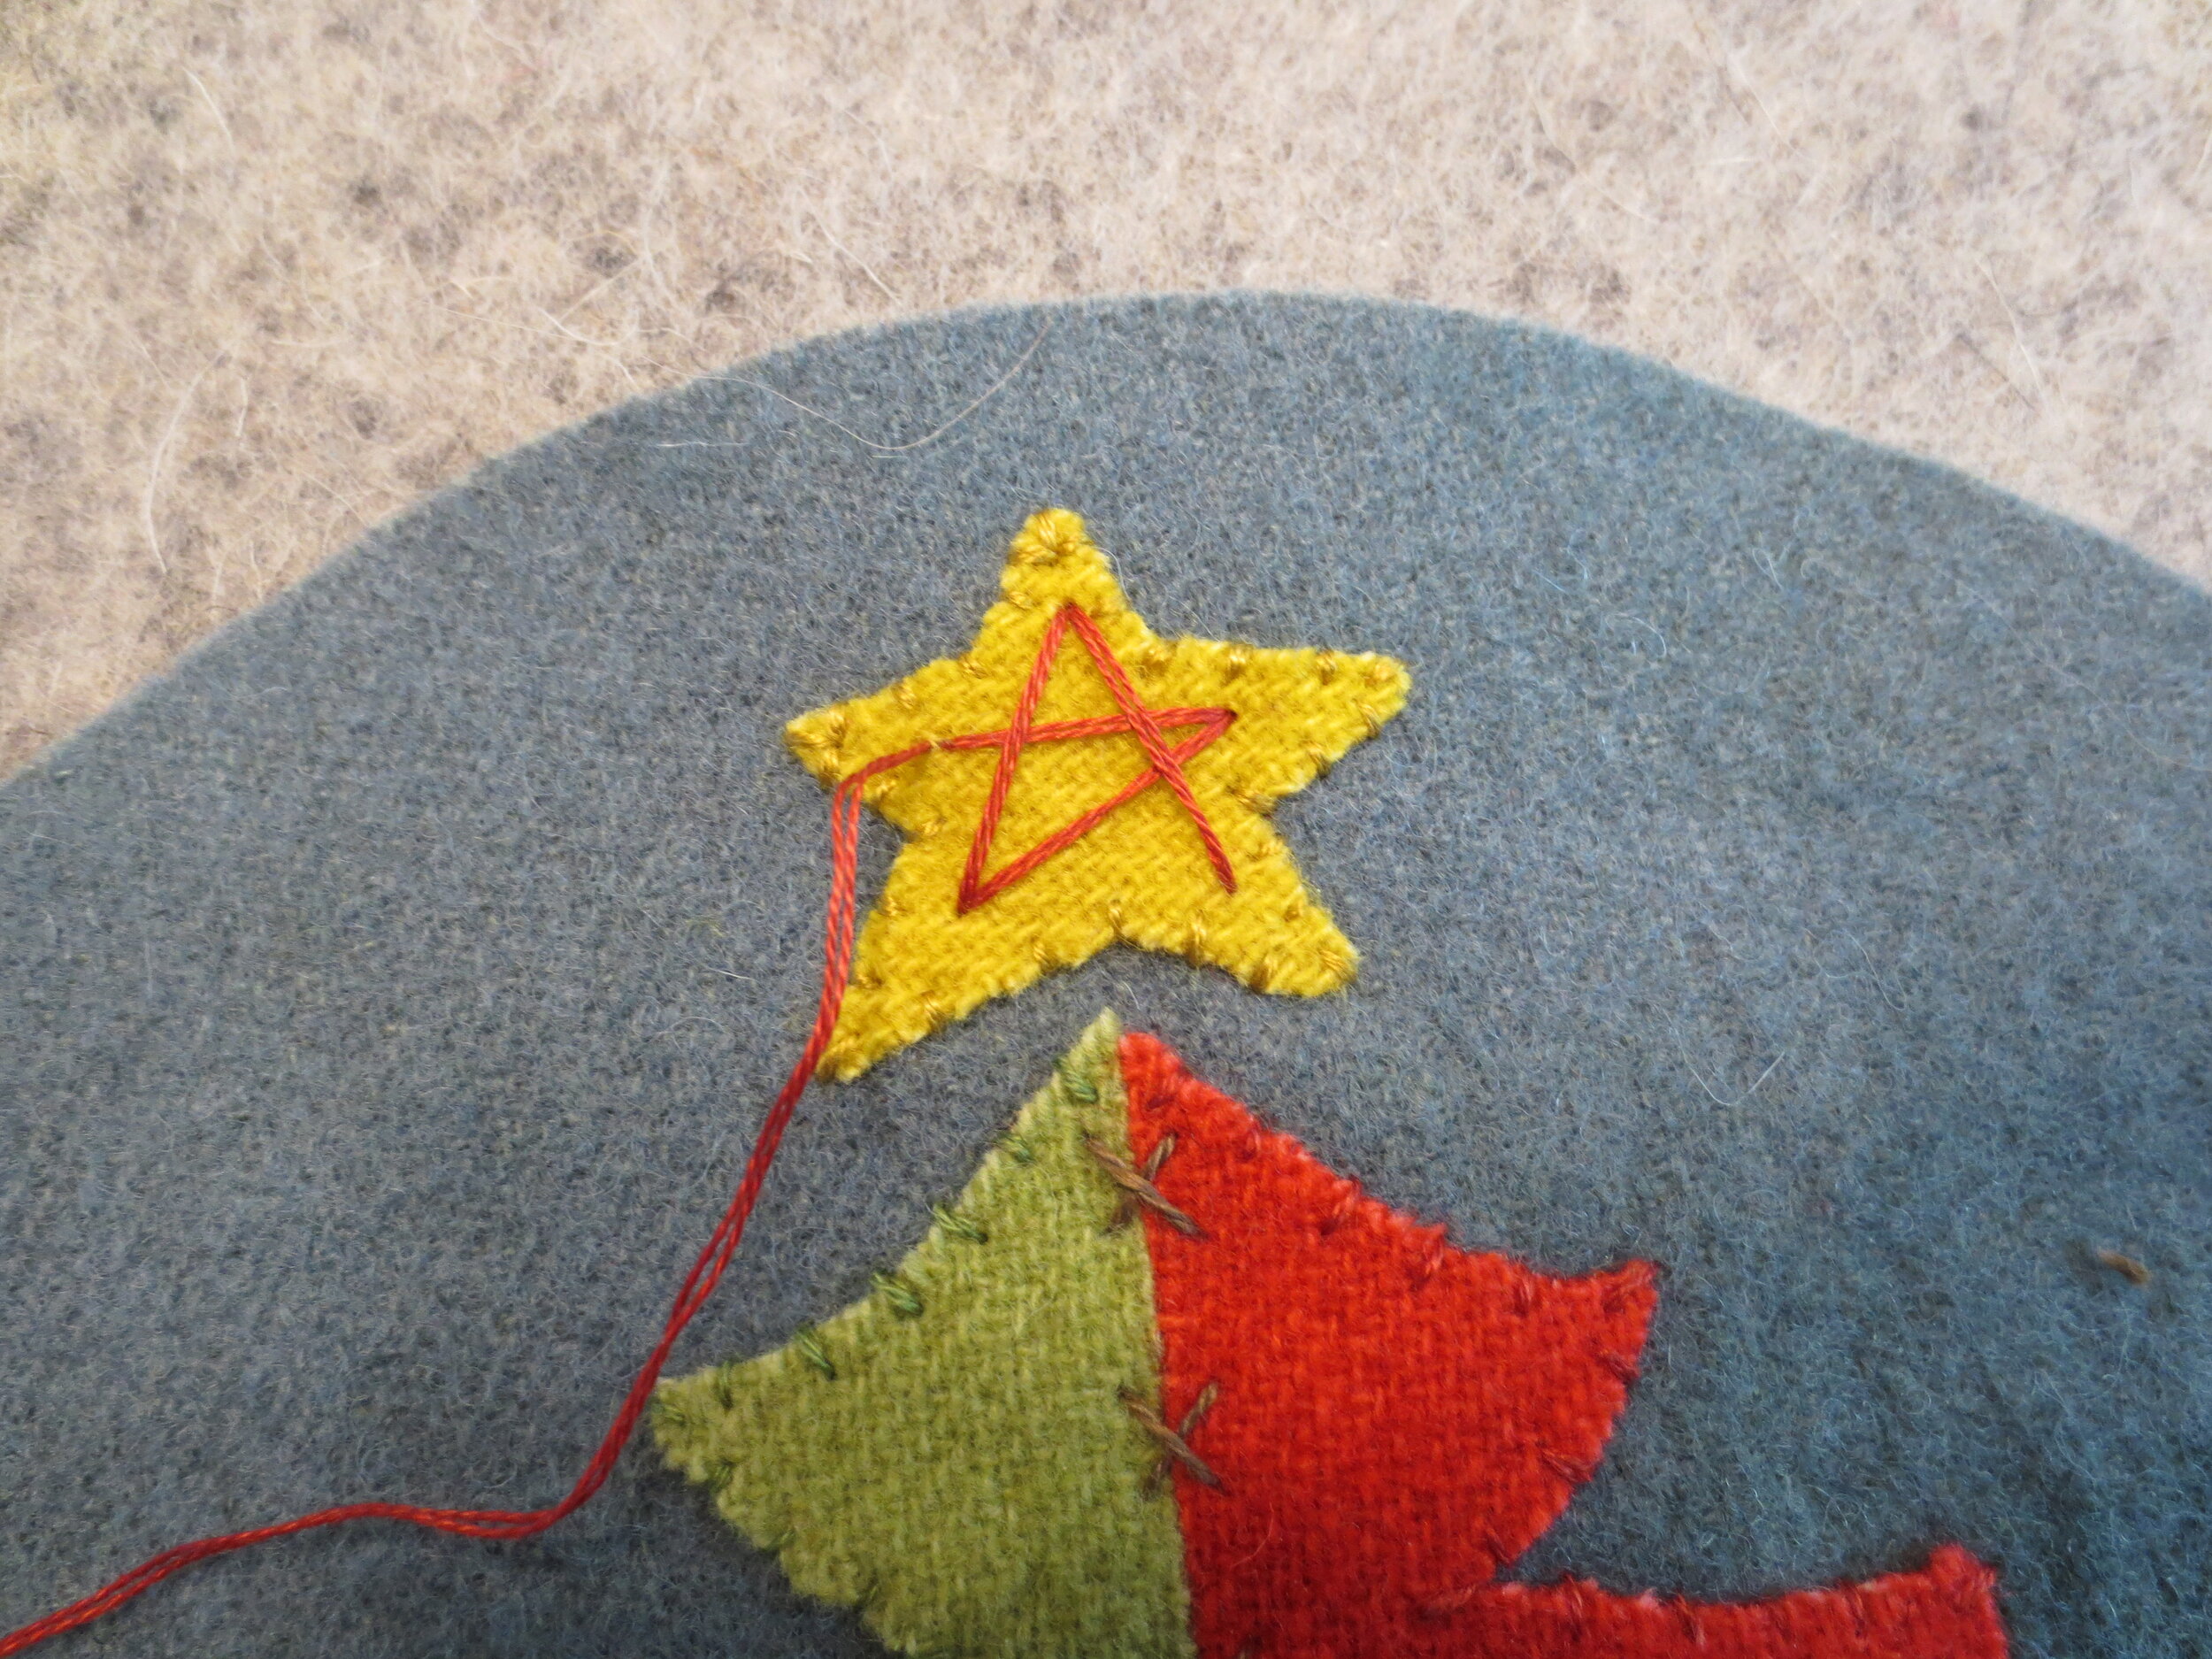
7. Use red thread to stitch a star in the center of the wool star. Follow the sequence below.
8. Use red thread to make a running stitch line 1/8” from the outer edge of the green part of the tree.
9. Use green thread to make a running stitch line 1/8” from the outer edge of the red part of the tree.
10. Use gold thread to stitch the gold sequins and seed beads on the tips of the tree.
Voila! The front and back are complete!
Ornament Assembly
Refer to Tis The Season ornament assembly (step 34) for the instructions for putting the ornament together.
Enjoy!


